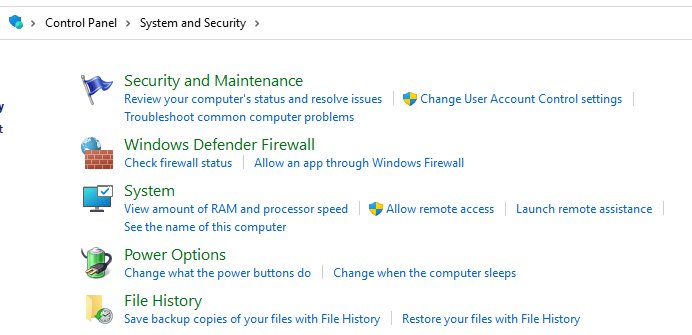
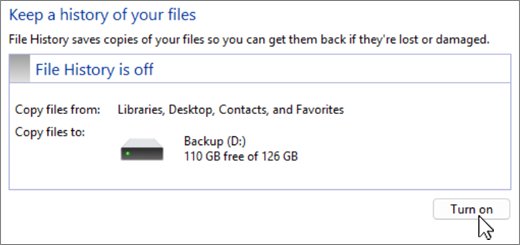
To reconnect a File History drive in Windows, plug the backup drive back into the same PC, open Control Panel > System and Security > File History, and select Run now.
This guide covers the steps to reconnect the File History drive in Windows 11 and Windows 10, the fixes for drive letter, offline and network problems, and how to confirm the backup works again.
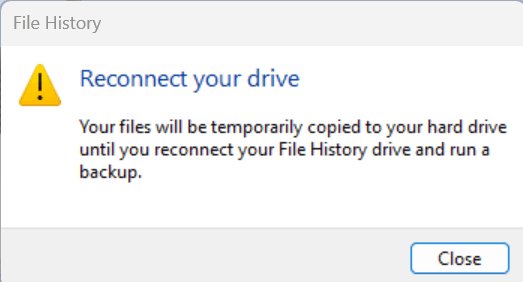
Reconnect the external drive and restart File History
The "Reconnect your File History drive" warning means Windows has not reached the backup drive for too long. Reconnecting the backup drive is the fix in most cases, and it is the first method to try now.
- Plug the external backup drive into the PC, ideally into the same USB port it used before.
- Wait until the drive appears under This PC in File Explorer.
- Open Control Panel and select System and Security.
- Select File History.
- Select Run now to start a backup straight away, or wait for the next scheduled backup.
If you back up to a network location instead, reselect that network share in the same File History page before you select Run now.
What is File History and what causes it to disconnect?
Understanding File History starts with what it copies. It is the Windows backup feature that saves versions of your libraries (Documents, Pictures, Videos, Music and any custom library) plus the Desktop to an external drive or a network location.
File History only lives in Control Panel, on both Windows 11 and Windows 10. A File History drive loses access in Windows 11/10 whenever the copy target stops answering for a long period.
| Cause | What happens | Where to fix it |
|---|---|---|
| USB backup drive unplugged or asleep | Scheduled backups fail until the drive returns | Reconnect the external drive |
| Drive letter changed | File History looks for the old path | Disk Management |
| Drive marked Offline | Windows sees the disk but cannot use its volume | Disk Management |
| File system errors on the backup drive | Writes fail or the drive mounts read-only | chkdsk |
| Network share or host PC unavailable | The network location cannot be reached | Network settings and the host PC |
| Failing drive | Errors return after every repair | Use a new external drive |
Why does the "Reconnect your File History drive" error appear?
The error message appears once the File History drive has been disconnected for too long. It is a reminder, not a sign that existing backups are lost.
| What the message causes | What it does not mean |
|---|---|
| New file versions stop being copied | The old versions on the drive are deleted |
| Windows keeps reminding you until the drive returns | File History has been switched off |
| Changes since the last backup are unprotected | You need to set File History up from scratch |
Laptops that leave the desk without their backup drive see this message most often.
Preparing for reconnection
| Check | Why it matters |
|---|---|
| The original backup drive, or a replacement | File History needs a target outside the Windows drive |
| An administrator account | Disk Management, chkdsk and system repair commands need admin rights |
| Network path and credentials for a network share | Reselecting a network location needs the share to be reachable |
| A spare USB port or cable to swap | A loose port or cable can drop the drive mid-backup |
Select the File History drive again
When the drive is connected but File History still shows the warning, pick the drive again so Windows stores its current path.
- Open Control Panel > System and Security > File History.
- Select Select drive.
- In the Select a File History drive window, choose the backup drive and select OK.
- If Windows asks about existing backups, choose to move the existing files to keep your older versions.
- Select Run now.
Verify the drive letter
File History tracks the drive it last used. If another USB device took the backup drive's letter, give the backup drive a letter again.
- Right-click the Start button and select Disk Management.
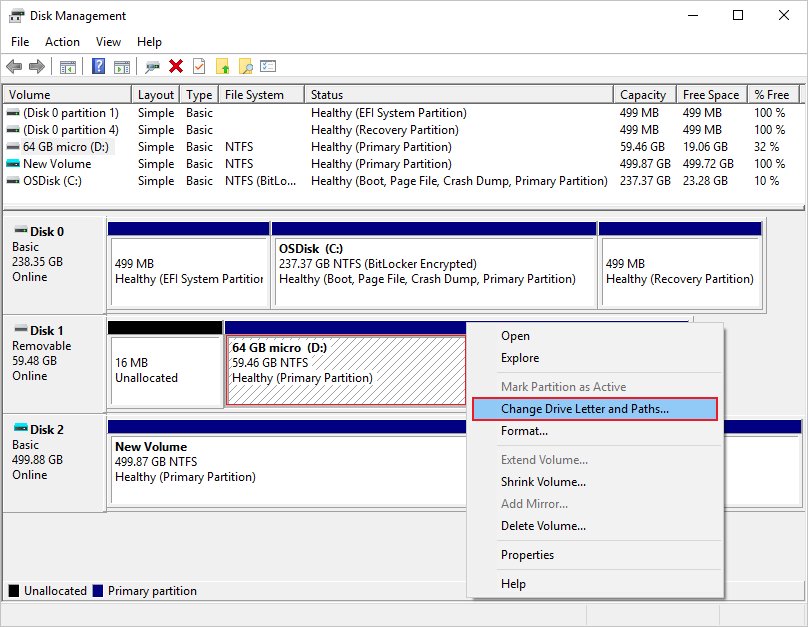
- Right-click the backup drive's volume and select Change Drive Letter and Paths.
- Select Change, or Add if the volume has no letter.
- Select Assign the following drive letter, pick the letter from the list and select OK.
- Select Yes in the confirmation dialog, then reselect the drive in File History.
Never change the letter of the drive that holds Windows or installed apps. If the drive has a letter but still does not show in File Explorer, unhide the hidden drive first.
Make sure the drive is online
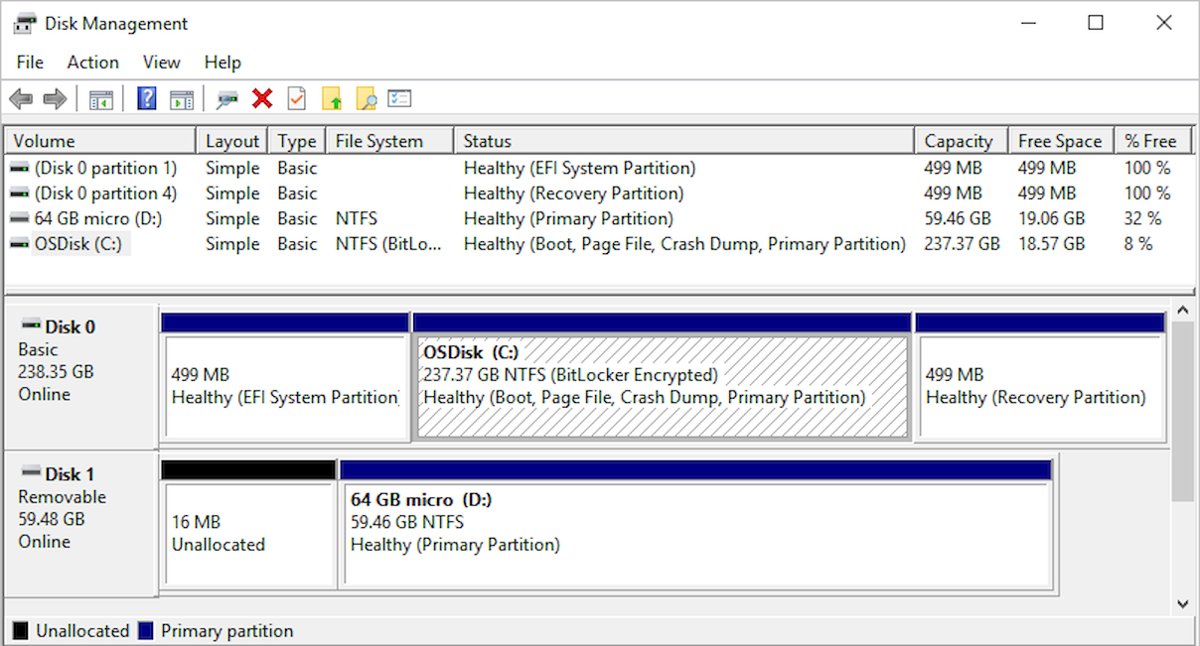
- Press Windows + R, type
diskmgmt.mscand select OK. - Find the backup disk in the lower pane.
- If the disk is listed as Offline, right-click the disk label and select Online.
- Confirm the volume now shows a drive letter.
- Return to File History and select Run now.
Do not select Format or Initialize Disk on a disk that already holds backups. Formatting destroys the data on the volume.
Repair the backup drive
Check the drive for errors when it connects but backups fail or the drive keeps dropping. chkdsk checks the file system and repairs it when you add /f. Replace E: with your backup drive's letter.
chkdsk E: /fRun it from Command Prompt opened with Run as administrator. /f fixes file system errors and needs to lock the drive; /r also locates bad sectors and recovers readable data, but takes much longer. Without a switch, chkdsk only reports the drive's status.
You should see: chkdsk reports that it found no problems, or that it made corrections to the file system. Do not interrupt it while it runs.
chkdsk works only on local disks, not on a drive letter mapped to a network share.
Use a new external drive
Try another backup drive when chkdsk keeps finding errors or the old drive is lost. File History can switch targets without starting over.
- Connect the new external drive and wait for it to appear in File Explorer.
- Open Control Panel > System and Security > File History.
- Select Select drive.
- Choose the new drive in Select a File History drive and select OK.
- When prompted, choose to move existing files to the new drive or start fresh.
- Select Run now to make the first backup on the new drive.
Use a network drive
File History can save to a network location, such as a shared folder on another PC or a NAS. Verify network connectivity first, because the share must be reachable every time a backup runs.
- Open File Explorer, select This PC, select More and choose Map network drive.
- Pick a letter in the Drive list and type the share path in the Folder box.
- Select Reconnect at sign-in, then select Finish.
- Open Control Panel > System and Security > File History and select Select drive.
- Choose the network location, select OK, then select Run now.
If the share does not open, the host PC may be off or your account may lack permission on it.
Delete File History configuration files
A stale File History configuration can keep pointing at a drive that no longer exists. Microsoft documents no manual file path for this configuration, so reset it through File History itself rather than deleting folders by hand.
- Connect the drive you want to use from now on.
- Open Control Panel > System and Security > File History.
- Select Select drive and choose the drive.
- Select OK and, when asked about earlier backups, choose to start fresh.
- Select Run now to write a new backup with the new configuration.
Starting fresh means File History stops listing the older versions. Copy anything you still need from them first.
Disable and re-enable File History
- Open Control Panel > System and Security > File History.
- Select Turn off.
- Disconnect the backup drive, wait a few seconds and connect it again.
- Select Turn on in File History.
- Select Run now and wait for the backup to finish.
Install Windows updates
- Select Start > Settings > Windows Update.
- Select Check for updates.
- Select Download & install if updates are listed.
- Restart the PC if Windows asks you to.
- Reconnect the backup drive and select Run now in File History.
Windows 10 support ended on October 14, 2025, so a Windows 10 PC no longer gets new fixes through Windows Update.
Repair corrupted Windows system files
If File History, Control Panel or the drive tools misbehave on every drive, repair the Windows image and its system files. Open Command Prompt with Run as administrator and run DISM first.
DISM.exe /Online /Cleanup-image /Restorehealth
sfc /scannow
DISM pulls clean copies of Windows components, using Windows Update as the source. sfc /scannow then scans all protected system files and replaces corrupted ones from the cache. Keep the window open until verification reaches 100%.
You should see: "Windows Resource Protection did not find any integrity violations" or "found corrupt files and successfully repaired them".
How to confirm File History is backing up again
- Edit or save a test file in Documents.
- Open Control Panel > System and Security > File History and select Run now.
- In File Explorer, right-click the Documents folder and select Restore previous versions.
- Check the Previous Versions tab for an entry with today's date and time.
- Select the entry, expand Open and select Open in File History to see the saved copy.
Troubleshoot if the drive still does not reconnect
These connection issues cover the cases where the steps above did not clear the warning.
The backup drive does not appear in File Explorer
The drive is offline, has no letter, or the USB port or cable has failed.
- Connect the drive to another USB port and try a different cable.
- Open Disk Management and bring the disk Online if it is listed as offline.
- Assign a letter with Change Drive Letter and Paths if the volume has none.
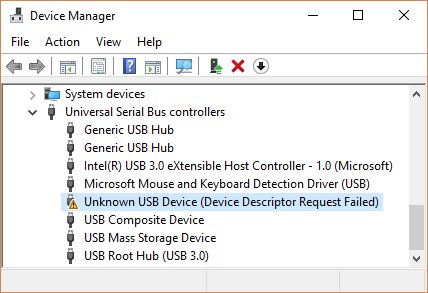
- Update the USB and chipset drivers if no USB device is detected.
Change Drive Letter and Paths is greyed out
The volume is unallocated, not accessible, or your account lacks permission.
- Sign in with an administrator account.
- Check that the volume shows as a formatted partition in Disk Management.
- If the disk is new and unallocated, it holds no backups; set it up as a new File History drive.
chkdsk says it cannot lock the drive
Another program has files open on the backup drive.
- Close File Explorer windows and apps using the drive.
- Run
chkdsk E: /fagain. - If the lock still fails, accept the offer to check the drive at the next restart.
The network drive keeps disconnecting
The host PC or NAS is off, asleep, or the share permissions changed.
- Confirm the host PC or NAS is on and the share opens in File Explorer.
- Turn on network discovery if the Network discovery is turned off banner shows.
- Map the share again with Reconnect at sign-in selected.
- Reselect the network location in File History.
The reconnect warning returns after every backup
The drive is unplugged between backups or is failing.
- Leave the drive connected long enough for scheduled backups to run.
- Run
chkdsk E: /fon the drive. - Move File History to a new external drive if errors keep returning.
Utilizing advanced File History features
| Feature | How to use it |
|---|---|
| Back up an extra folder | Right-click the folder, select Show more options > Include in library and add it to a library |
| Restore a deleted file | Right-click the parent folder, select Restore previous versions, pick an older version and select Restore |
| Restore without overwriting | Expand Restore and select Restore to… to save the copy in another folder |
| Back up on demand | Select Run now in File History |
| Switch the backup target | Select Select drive and choose a USB drive or network location |
A restore replaces the current version of the file, and that replacement can't be undone, so use Restore to… when unsure.
Tips to prevent File History drive problems
These best practices for using File History keep your files safe and stop the reconnect warning from coming back.
| Tip | Why it helps |
|---|---|
| Keep the backup drive plugged in when you are at the desk | Scheduled backups only run while the drive is connected |
| Give the backup drive a high, fixed letter | Other USB devices are less likely to take it |
| Run chkdsk on the backup drive now and then | File system errors get fixed before backups fail |
| Use a network location for laptops that stay on one network | The target is there whenever the laptop joins that network |
| Keep a second copy in cloud storage | One drive failure does not take every copy with it |
| Test a restore after any reconnect | Proof that versions are being saved |
Reconnect File History drive FAQs
Frequently asked questions about the reconnect warning, with short answers.
What does "Reconnect your File History drive" mean?
It means Windows has not reached your File History drive for too long, so new file versions are not being backed up. Your earlier backups stay on the drive. Connect the drive again, or reselect the network location, and run a backup.
Why does File History keep disconnecting?
File History disconnects when the backup drive is unplugged, changes drive letter, goes offline in Disk Management, develops file system errors, or when a network share becomes unreachable. Fix the cause in that order, starting with the cable and port.
Can File History back up to a network drive?
Yes. File History can save to a network location such as a shared folder or NAS. Map the share with Reconnect at sign-in, then choose it under Select drive in the File History page of Control Panel.
Will I lose my old backups if I switch to a new drive?
No, not if you choose to move existing files when Windows asks. File History copies the earlier versions to the new drive. Choosing to start fresh leaves the old versions behind on the previous drive.
How do I start a File History backup manually?
Open Control Panel, select System and Security, select File History, and then select Run now. The backup starts immediately instead of waiting for the next scheduled run, which is useful right after you reconnect the drive.
Is File History still available in Windows 11?
Yes. File History is in Control Panel under System and Security in Windows 11 and Windows 10. Windows Backup in Settings is a separate tool with its own options, so open Control Panel whenever you need to manage File History.
Can I run chkdsk on a network File History drive?
No. chkdsk works only on local disks and cannot check a drive letter redirected over the network. Repair a network share's disk on the PC or NAS that hosts it, using that device's own tools.
How do I restore files from File History?
Right-click the folder that held the file in File Explorer and select Restore previous versions. Pick a version from before the loss, then select Restore, or Restore to to save the copy somewhere else without overwriting.