To move a row in Excel, select its row number, hold Shift, and drag the row's border to the new position; Excel inserts it there without replacing any data.
This guide covers four methods for Excel on Windows: drag and drop, cut and insert, the move pointer with the right-click menu, and a VBA macro, plus fixes for when Excel refuses to move a row.
Method 1: Drag and drop (simple and visual)
Drag and drop is the quickest way to reorder rows when the source and destination are both on screen. Holding Shift is what makes Excel insert the row instead of overwriting the row you drop it on.
- Click the row number on the left edge to select the whole row. For several rows, drag down the row numbers, since the rows must be next to each other.
- Point to the top or bottom border of the selection until the pointer changes to the four-headed move pointer.
- Press and hold Shift.
- Drag the rows up or down. A thick horizontal line shows where the rows will land.
- Release the mouse button first, then release Shift.
- Check the row numbers: the moved rows now sit at the line, and the rows below them have shifted down.
If you drag without Shift, Excel replaces the destination row instead and asks before it overwrites cells that contain data. Select Cancel to keep the original content.
Method 2: Cut and insert (more precise and controlled)
Cut and insert suits long sheets, because you never have to drag across hundreds of rows. Insert Cut Cells pushes the existing rows down, so nothing is overwritten.
- Click any cell in the row you want to move and press Shift + Spacebar to select the entire row, or click the row number.
- On the Home tab, in the Clipboard group, select Cut, or press Ctrl + X. A moving dashed border appears around the row.
- Right-click the row number of the row that should end up directly below the moved row.
- Select Insert Cut Cells from the menu.
- Confirm the row now sits above the row you right-clicked and its old position has closed up.
- Press Esc if you change your mind before inserting; it cancels the moving border.
To move the row to another worksheet or workbook, cut it, switch to the other sheet tab or workbook, then right-click the destination row number and select Insert Cut Cells.
Method 3: Using pointer and context menu (for quick movements)
The move pointer does more than Shift-drag. The key you hold while dragging decides whether Excel moves or copies the row, and whether it inserts or replaces.
Select the row first, point to its border until the move pointer appears, then use the combination below.
| What you want | Hold while dragging | What Excel does |
|---|---|---|
| Move the row and replace the destination row | Nothing | Moves the row onto the target and warns before overwriting data; select Cancel to stop |
| Copy the row and replace the destination row | Ctrl | Copies the row onto the target with no warning; press Ctrl + Z to undo |
| Move the row and insert it between rows | Shift | Inserts the row at the line and shifts the others down |
| Copy the row and insert the copy between rows | Ctrl + Shift | Inserts a duplicate and leaves the original in place |
| Duplicate a row without dragging | Right-click menu | Press Ctrl + C, right-click the target row number, select Insert Copied Cells |
Keep Ctrl or Shift held until after you release the mouse button. Letting go of the key first turns a copy into a move.
Method 4: Using VBA (for automation and repeated tasks)
A macro helps when the same row moves happen on a schedule, such as pushing a completed task to the top of a list each week.
This example moves row 5 above row 2. It inserts a blank row, cuts the source row into it, then deletes the empty row left behind.
Sub MoveRowFiveAboveRowTwo()
    Rows(2).Insert Shift:=xlShiftDown
    Rows(6).Cut Destination:=Rows(2)
    Rows(6).Delete
End Sub
Press Alt + F11 to open the Visual Basic for Applications editor, select Insert > Module, and paste the code. Rows(2).Insert pushes rows 2 and below down, so the old row 5 becomes row 6. Rows(6).Cut with a Destination moves it straight into the new row 2 without using the clipboard, and Rows(6).Delete removes the empty row it left. Change the numbers to suit your sheet, and remember that a cut range must be one block of adjacent cells.
You should see: Press Alt + F8, select MoveRowFiveAboveRowTwo, and select Run. The content of the old row 5 now appears in row 2, and no blank row remains.
Save a copy of the workbook before running a macro on real data. To keep the macro, save the file as an Excel Macro-Enabled Workbook (*.xlsm).
Summary: choosing the right method to move rows in Excel
| Your situation | Use this method | Why |
|---|---|---|
| Source and destination rows are both visible | Method 1: Shift + drag | One drag, no clipboard, nothing overwritten |
| Destination is far down the sheet or on another worksheet | Method 2: Cut and Insert Cut Cells | No long drag, and it works across sheets and workbooks |
| You want to overwrite a row, swap content, or make a copy | Method 3: Pointer and right-click menu | Plain drag replaces, Ctrl + drag copies, Insert Copied Cells duplicates |
| You move the same rows every week or across many files | Method 4: VBA macro | One keystroke repeats the move exactly |
| You need to reorder dozens of rows at once | Sort on a helper column (see the tips table) | One sort replaces many separate moves |
How to check the Excel row moved correctly
- Read the row numbers around the new position and confirm the moved row sits where you intended.
- Click a formula cell in the moved row and check the formula bar for the references you expect.
- Scan formulas elsewhere that pointed at the row for #REF! errors.
- Check that the old position closed up with no blank row, unless you used a replace drag.
- Press Ctrl + Z straight away if anything looks wrong; Excel undoes the move.
Why moving rows in Excel matters: what travels with the row
Moving a row is safer than retyping it, because Excel carries everything in the row to its new position. Knowing what travels with it explains most surprises after a move.
| Item in the row | What happens when you move it |
|---|---|
| Values and text | Move with the row unchanged |
| Formulas | Move with the row together with their calculated results |
| Comments and notes | Move with their cells |
| Cell formats | Fill, font, borders and number formats move too |
| Hidden cells | Included in the move by default |
| Copied formulas | Relative references in a copy are not adjusted, so a copy can show #REF!; fix the references manually |
Additional tips and best practices for moving Excel rows
| Tip | What to do |
|---|---|
| Maintaining data integrity | Select the entire row by its number, not part of it, so no columns get left behind |
| Undo functionality | Ctrl + Z reverses a drag or Insert Cut Cells; save a copy before running a macro |
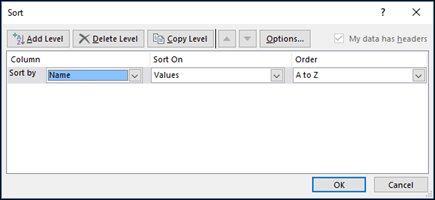
| Handling filters and sorting | To reorder many rows, type the new order as numbers in a helper column, then use Data > Sort & Filter > Sort on that column with My data has headers ticked |
| Moving non-adjacent rows | The mouse cannot move rows that are not next to each other; move each block separately or sort them into place |
| Copying visible rows only | Use Home > Find & Select > Go To Special > Visible cells only before Ctrl + C |
| Keep column widths | After pasting, open the Paste arrow and select Keep Source Column Widths |
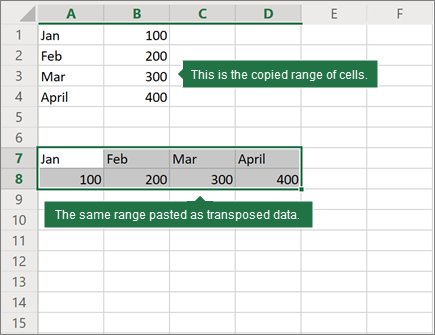
| Rows to columns | Copy with Ctrl + C, right-click the target cell, and select Transpose under Paste Options; Cut does not work here |
If you need a blank row before the move, add blank rows in Excel with Home > Insert > Insert Sheet Rows first.
Additional resources for moving rows in Excel
- Move or copy cells, rows, and columns — Microsoft's reference for every drag and Insert Cut Cells variant
- Transpose (rotate) data from rows to columns or vice versa — Turning rows into columns with Paste Options
- Sort data in a range or table — Multi-level and custom sorts for reordering many rows
- Range.Cut method (Excel) — VBA reference for the Cut method and its Destination argument
- Range.Insert method (Excel) — VBA reference for inserting rows and the Shift argument
Why can't I move rows in Excel? Fixes by symptom
Why can't I drag and move rows in Excel?
Cell drag-and-drop is turned off in Excel's options, so the move pointer never appears.
- Select File > Options > Advanced.
- Under Editing options, tick Enable fill handle and cell drag-and-drop.
- Tick Alert before overwriting cells so Excel warns before a drag replaces data.
- Select OK and try the drag again.
Why won't Excel let me move rows on a protected sheet?
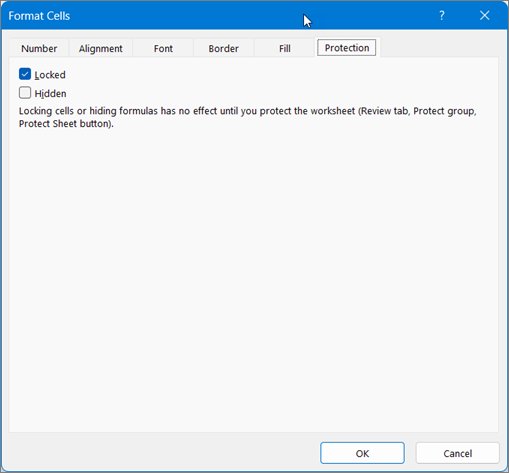
Worksheet protection blocks changes to locked cells, so rows cannot be cut or dragged.
- Open the Review tab.
- Select Unprotect Sheet, or go to File > Info > Protect > Unprotect Sheet.
- Enter the password if the sheet has one, and select OK.
- Move the rows, then select Review > Protect Sheet to lock it again.
Excel will not move several selected rows at once
The selected rows are not adjacent; neither the mouse nor Cut can move separate blocks together.
- Move each block of adjacent rows separately.
- Or add a helper column, number the rows in the order you want, and sort on it with Data > Sort.
Moving a row in Excel replaced existing data
The row was dropped without Shift, or pasted with Ctrl + V instead of Insert Cut Cells.
- Press Ctrl + Z to restore the overwritten row.
- Repeat the move holding Shift while you drag, or right-click and select Insert Cut Cells.
Formulas show #REF! after moving or copying rows
A copied formula kept relative references that now point at cells that do not exist.
- Press Ctrl + Z if the change just happened.
- Otherwise click each #REF! cell and correct the reference in the formula bar.
Sheet protection and workbook protection are separate locks; if a password also blocks sheet changes at file level, remove Excel workbook protection as well.
Moving rows in Excel FAQ
Can I move rows in Excel?
Yes. Select the row number, hold Shift and drag the row's border to a new position, or cut the row with Ctrl + X and use Insert Cut Cells. Both keep every value, formula, comment and format in the row.
How do I move rows in Excel without replacing data?
Hold Shift while you drag the row's border, or cut the row and right-click the destination row number to select Insert Cut Cells. Both insert the row and push the others down instead of overwriting the row you drop it on.
How do I move rows in Excel with the keyboard?
Press Shift + Spacebar to select the row and Ctrl + X to cut it. Then select the destination row and use Insert Cut Cells from the right-click menu. Ctrl + Z undoes the move if the row lands in the wrong place.
How do I move rows in Excel without dragging?
Use cut and insert. Select the row, press Ctrl + X, right-click the row number below where it should go, and select Insert Cut Cells. This route suits long sheets where dragging across hundreds of rows is slow.
How do I move rows in Excel to another sheet?
Cut the row with Ctrl + X, select the other worksheet tab, then right-click the destination row number and select Insert Cut Cells. The same steps work for a different open workbook.
How do I move rows to columns in Excel?
Select the rows, press Ctrl + C, right-click the top-left destination cell, and select Transpose under Paste Options. Cut does not work for transposing, and Transpose is not available inside an Excel table until you convert it to a range.
How do I quickly move rows in Excel?
Shift + drag is the quickest when both positions are on screen. To reorder many rows at once, number them in a helper column and sort on that column from the Data tab.
How do I move rows in an Excel table or spreadsheet?
Select the rows and use Shift + drag or Insert Cut Cells. In a table you can also reorder rows by sorting on a column, because Sort works on both tables and ranges.
Why can't I drag and move rows in Excel?
The most common cause is that drag-and-drop is turned off. Select File > Options > Advanced and tick Enable fill handle and cell drag-and-drop. A protected sheet or a non-adjacent selection also stops a drag.
How do I move rows in Excel on Windows desktop?
In Excel for Windows, select the row number, hold Shift, and drag the border to the new position. The Home tab Cut command with Insert Cut Cells gives the same result without dragging.
Final thoughts: the best way to move rows in Excel
Use Shift + drag for nearby rows and Insert Cut Cells for anything far away or on another sheet. Both insert the row without overwriting data and undo in one step. Keep VBA for moves you repeat, and a helper-column sort for reordering many rows at once.