To enable G-Sync on Windows 11, turn on G-Sync or FreeSync in your monitor's on-screen menu, then open NVIDIA Control Panel, select Set up G-SYNC under Display, tick Enable G-SYNC, G-SYNC Compatible and select Apply.
This guide covers the GPU, monitor and Windows 11 requirements, the Monitor Technology setting, FreeSync monitors, gaming laptops, V-Sync, and fixes when the G-Sync option is missing or does nothing.
Enable G-Sync on Windows 11
These steps work on any Windows 11 PC with a supported NVIDIA graphics card and a G-SYNC or G-SYNC Compatible display connected to it. Install the latest NVIDIA driver first, because the Set up G-SYNC page only appears when the driver detects a capable display.
- Open your monitor's on-screen menu with its menu button and turn on the G-SYNC, FreeSync or Adaptive-Sync option if the monitor has one.
- Right-click an empty area of the desktop and select NVIDIA Control Panel (on Windows 11, select Show more options first if it is not listed).
- In the navigation pane, under Display, select Set up G-SYNC.
- Tick the Enable G-SYNC, G-SYNC Compatible check box if it is not already ticked.
- Choose Enable for full screen mode or Enable for windowed and full screen mode.
- Select Apply. The screen may go black for a second while the display resets.
If the monitor is G-SYNC Compatible or an unvalidated FreeSync model, also select it under Select a display and tick Enable settings for the selected display model before you select Apply.
What’s Nvidia G-Sync?
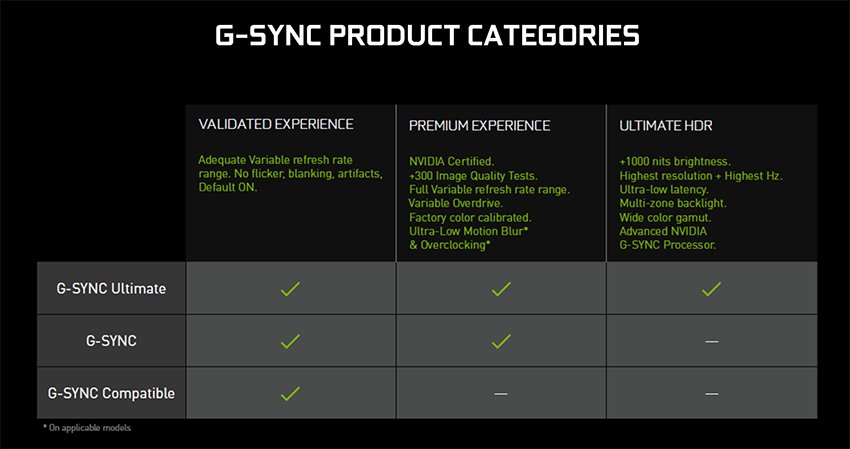
NVIDIA G-SYNC matches the monitor's refresh rate to the frame rate the GPU is producing. That removes screen tearing and reduces stutter and input lag without the latency that V-Sync adds. NVIDIA sells three tiers of display under the G-SYNC name.
| Tier | Hardware inside the monitor | Variable refresh range | What it adds |
|---|---|---|---|
| G-SYNC Ultimate | NVIDIA G-SYNC processor | 1 Hz to the panel's maximum | Top-end HDR, high contrast and low latency |
| G-SYNC | NVIDIA G-SYNC processor | 1 Hz to the panel's maximum | Variable overdrive; every unit tested and calibrated by NVIDIA |
| G-SYNC Compatible | No NVIDIA processor (VESA Adaptive-Sync) | A set range, at least 2.4:1 (for example 60-144 Hz) | Validated by NVIDIA for no flicker, blanking or ghosting; VRR on by default |
| Unvalidated Adaptive-Sync or FreeSync | No NVIDIA processor | Whatever the maker specifies | Can be switched on manually; may work, work partly or not at all |
NVIDIA keeps the full list of certified models on its G-SYNC monitor specs page, so check your model there before you buy. Some newer G-SYNC monitors also add G-SYNC Pulsar backlight strobing and G-SYNC Ambient Adaptive Technology.
G-Sync requirements for your GPU, monitor and Windows 11
| Requirement | G-SYNC and G-SYNC Ultimate monitor | G-SYNC Compatible monitor |
|---|---|---|
| Desktop GPU | GeForce GTX 650 Ti BOOST or newer | Pascal (GeForce GTX 10 series) or newer |
| Laptop GPU | GeForce GTX 965M, 970M, 980M or newer | Pascal or newer, wired to a port driven by the NVIDIA GPU |
| Windows | Windows 7 or later, including Windows 11 | Windows 10 or later, including Windows 11 |
| Connection | DisplayPort 1.2 or later, straight from the graphics card | DisplayPort cable recommended by monitor makers |
| Driver | R340.52 or later; install the current Game Ready or Studio driver | Any driver from January 2019 onward; install the current one |
| Monitor setting | G-SYNC on in the on-screen menu where offered | FreeSync or Adaptive-Sync on in the on-screen menu |
An AMD or Intel graphics card cannot use NVIDIA Control Panel G-SYNC settings, even on a G-SYNC monitor. If you are not sure what is installed, check which graphics card you have before you go further.
Set Monitor Technology to G-SYNC in Manage 3D settings
NVIDIA lists this as one of the three conditions for G-SYNC to run. If a game ignores G-SYNC after you tick the box, this setting is usually the reason.
- Open NVIDIA Control Panel.
- Under 3D Settings, select Manage 3D settings.
- Stay on the Global Settings tab.
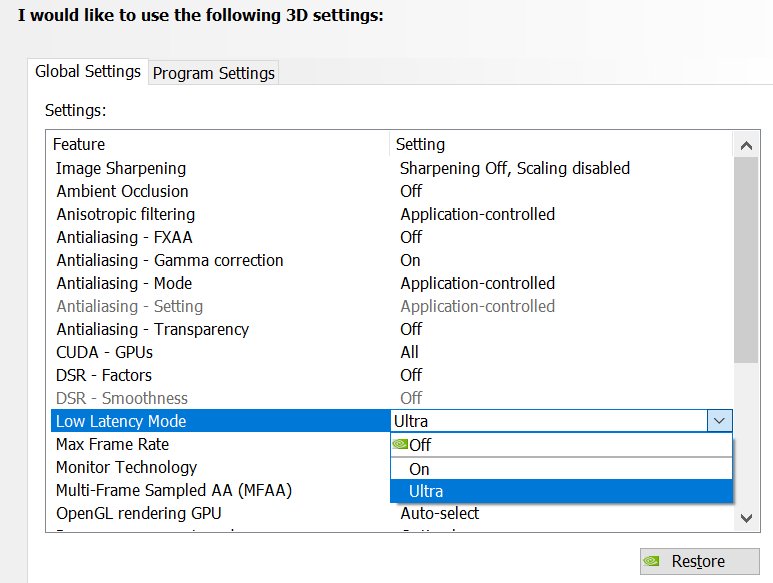
- Find Monitor Technology in the list and set it to G-SYNC Compatible or G-SYNC.
- Select Apply.
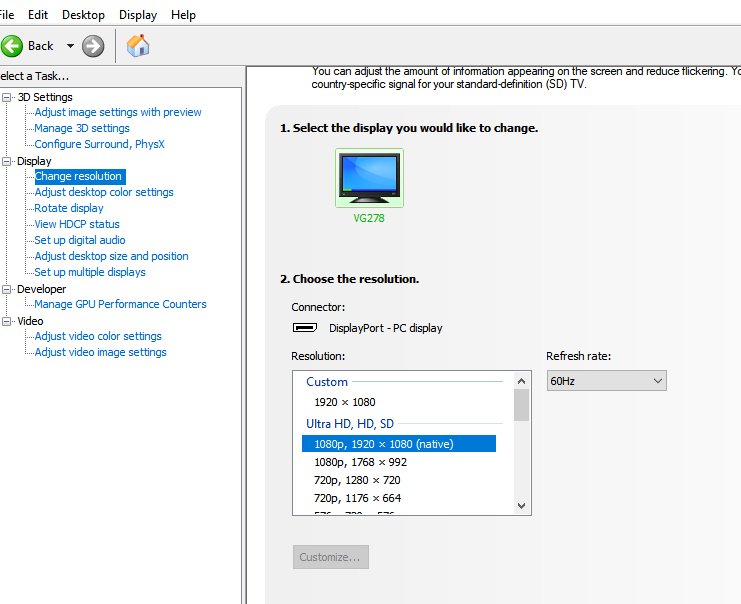
With G-SYNC on, the driver sets Refresh rate on the Change resolution page to the display's highest rate and disables Preferred refresh rate in Manage 3D settings. To change those, turn G-SYNC off first.
Enable G-Sync Compatible on a FreeSync monitor
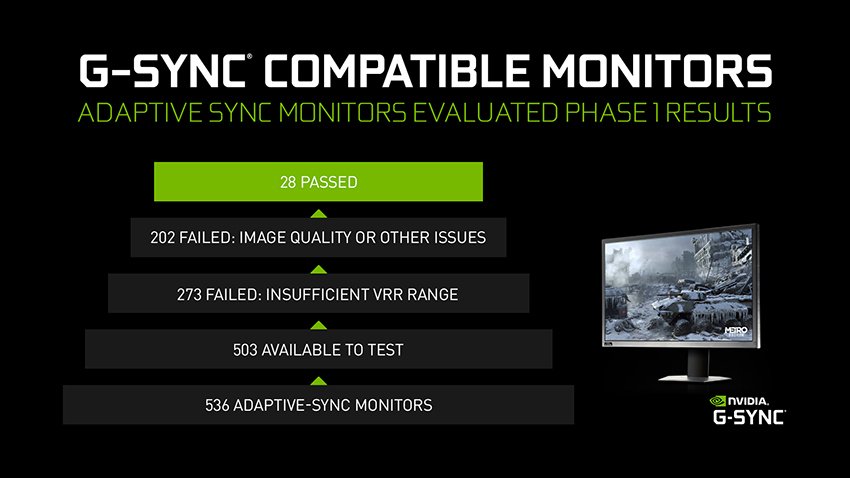
A FreeSync or Adaptive-Sync monitor that NVIDIA has not validated can still run G-SYNC Compatible mode on a GeForce GTX 10 series or newer card. NVIDIA warns that the result can range from fully working to flickering or not working at all.
- Connect the monitor to the graphics card with a DisplayPort cable.
- Turn on FreeSync or Adaptive-Sync in the monitor's on-screen menu.
- Open NVIDIA Control Panel and set Monitor Technology to G-SYNC Compatible under Manage 3D settings.
- Select Set up G-SYNC under Display and tick Enable G-SYNC, G-SYNC Compatible.
- Under Select a display, select the FreeSync monitor.
- Tick Enable settings for the selected display model. A note says the display is not validated; continue anyway.
- Select Apply. The monitor briefly restarts and G-SYNC shows as enabled.
If the picture flickers or blanks during games after this, the monitor's variable refresh range is not working well with G-SYNC. Untick the display-model box to switch it back off.
Enable G-Sync on a gaming laptop with an external monitor
Many gaming laptops wire some video ports to the integrated graphics and others to the NVIDIA GPU. G-SYNC only works on an external display plugged into a port driven by the NVIDIA GPU.
- Press Ctrl + Shift + Esc, open the Performance tab and confirm an NVIDIA GPU is listed.
- Check the laptop's manual for the ports linked to the discrete GPU (often a USB-C or HDMI port).
- Connect the monitor to that port with a cable rated for the monitor's top refresh rate.
- Set the monitor's input source to the port type you used.
- Open NVIDIA Control Panel > Display > Set up G-SYNC, tick Enable G-SYNC, G-SYNC Compatible and choose a mode.
- Select Apply, then restart the laptop and the monitor once if the option does not take.
NVIDIA notes that V-Sync forced on in NVIDIA Control Panel does not work on Microsoft hybrid-graphics laptops. On those, turn V-Sync on inside the game instead.
G-Sync full screen mode vs windowed and full screen mode
| Your situation | Choose this | Why |
|---|---|---|
| You play games in exclusive full screen | Enable for full screen mode | G-SYNC runs only where it is needed; desktop apps are untouched |
| You play in borderless or windowed mode | Enable for windowed and full screen mode | G-SYNC also applies to games running in a window |
| Desktop apps flicker or stutter with the windowed option on | Enable for full screen mode | NVIDIA recommends it when windowed G-SYNC causes problems |
| You want the lowest latency in competitive games | Full screen mode, with the game set to fullscreen | NVIDIA's latency guide still recommends fullscreen over borderless |
Windows 11 display settings for G-Sync and variable refresh rate
Windows 11 has no G-Sync switch of its own, but these settings decide whether the monitor runs at its full refresh rate and whether Windows reports variable refresh rate support.
| Setting | Where it is in Windows 11 | What to set |
|---|---|---|
| Refresh rate | Settings > System > Display > Advanced display > Choose a refresh rate | The highest rate the monitor supports at its native resolution |
| VRR support check | Settings > System > Display > Advanced display > Display information | Confirms the monitor reports variable refresh rate support |
| Dynamic refresh rate | Settings > System > Display > Advanced display > Dynamic refresh rate | Turn off if a game seems capped below the monitor's maximum |
| Optimizations for windowed games | Settings > System > Display > Graphics > Default settings | On, so windowed DirectX games can use variable refresh rate |
| Game Mode | Settings > Gaming > Game Mode | On, as NVIDIA's latency guide suggests |
The same Graphics page is where you can turn on hardware-accelerated GPU scheduling if your card supports it.
Should V-Sync be on or off with G-Sync?
G-SYNC removes tearing only while the frame rate stays below the monitor's refresh rate. Above that, frames tear again unless something caps them.
| Your priority | V-Sync setting | Result |
|---|---|---|
| No tearing at any frame rate | V-Sync On in NVIDIA Control Panel, plus NVIDIA Reflex or Low Latency Mode | The frame rate is capped just below the refresh rate, so G-SYNC stays active |
| Lowest possible latency | V-Sync Off, Reflex on | Slightly lower latency, with tearing when FPS exceeds the refresh rate |
| Windowed game or hybrid-graphics laptop | V-Sync On inside the game | Control Panel V-Sync only applies to full screen apps |
To change it, open Manage 3D settings, find Vertical sync in the list and pick the value. Turn V-Sync off in the game's own settings when you set V-Sync in the NVIDIA Control Panel, so the two do not stack.
How to tell if G-Sync is working
- Open NVIDIA Control Panel > Set up G-SYNC and check for a green check mark next to your monitor.
- Open Settings > System > Display > Advanced display and confirm the refresh rate is the monitor's maximum.
- Start a game in full screen and turn on the monitor's own refresh-rate readout if its on-screen menu has one.
- Watch the readout change as the game's frame rate moves; a fixed number means variable refresh is not active.
- Pan the camera quickly and look for horizontal tear lines; with G-SYNC on and FPS below the refresh rate there should be none.
How to turn off G-Sync
- Open NVIDIA Control Panel.
- Select Set up G-SYNC under Display.
- Clear the Enable G-SYNC, G-SYNC Compatible check box.
- Select Apply.
To stop G-SYNC on one FreeSync monitor only, select that display and clear Enable settings for the selected display model instead.
G-Sync not working on Windows 11
Set up G-SYNC is missing from NVIDIA Control Panel
The driver does not see a variable refresh display on an NVIDIA-driven port.
- Turn on G-SYNC, FreeSync or Adaptive-Sync in the monitor's on-screen menu.
- Connect with a DisplayPort cable straight to the graphics card, not to the motherboard's video port.
- On a laptop, move the cable to a port linked to the NVIDIA GPU.
- Install the latest NVIDIA driver and restart the PC.
G-Sync is enabled but games still tear
Monitor Technology is not set, or the frame rate is above the refresh rate.
- Set Monitor Technology to G-SYNC Compatible in Manage 3D settings.
- Choose Enable for windowed and full screen mode if the game runs in a window.
- Turn Vertical sync on in Manage 3D settings to keep FPS below the refresh rate.
Screen flickers or goes black with G-Sync on
The monitor is not validated as G-SYNC Compatible and its VRR range misbehaves.
- Check the monitor against NVIDIA's G-SYNC specs list.
- Update the monitor firmware if the maker offers one on its support site.
- If flicker continues, clear Enable settings for the selected display model to turn it off for that monitor.
Games run below the monitor's refresh rate on Windows 11
Dynamic refresh rate can cap games that are not built for VRR.
- Open Settings > System > Display > Advanced display.
- Turn off Dynamic refresh rate.
- Set Choose a refresh rate to the highest value.
Preferred refresh rate or stereo settings are greyed out
G-SYNC locks those settings while it is on.
- Clear Enable G-SYNC, G-SYNC Compatible on the Set up G-SYNC page.
- Change the locked setting.
- Turn G-SYNC back on if you still want it.
Nvidia G-Sync on Windows 11 FAQ
Does G-Sync work on Windows 11?
Yes. NVIDIA supports G-SYNC displays on Windows 7 and later and G-SYNC Compatible displays on Windows 10 and later, which includes Windows 11. You enable it in NVIDIA Control Panel, not in Windows Settings.
Is G-Sync on by default?
On monitors NVIDIA has validated as G-SYNC Compatible, the driver turns variable refresh on automatically once it is installed and the monitor is plugged in. On unvalidated FreeSync monitors you must enable it yourself on the Set up G-SYNC page.
Which graphics cards support G-Sync?
Monitors with a G-SYNC processor need a GeForce GTX 650 Ti BOOST or newer. G-SYNC Compatible monitors need a Pascal-class card, which means GeForce GTX 10 series or newer, including every RTX card.
Can I use G-Sync on a FreeSync monitor?
Yes, with a GeForce GTX 10 series or newer card over DisplayPort. Turn on FreeSync in the monitor menu, then enable G-SYNC Compatible and tick Enable settings for the selected display model. Unvalidated models may flicker or only work partly.
Does G-Sync work over HDMI?
Monitors with an NVIDIA G-SYNC processor need DisplayPort 1.2 or later straight from the graphics card. Monitor makers also tell owners of FreeSync monitors to use DisplayPort for G-SYNC Compatible mode, so use a DisplayPort cable wherever the monitor has one.
Should I turn V-Sync on with G-Sync?
Turn V-Sync on in NVIDIA Control Panel if you never want tearing. With Reflex or Low Latency Mode, it caps the frame rate below the refresh rate so G-SYNC stays active. Leave it off if lowest latency matters more than tearing.
Does G-Sync work in windowed or borderless mode?
Yes, if you choose Enable for windowed and full screen mode on the Set up G-SYNC page. Pick full screen mode instead if desktop apps flicker or stutter with the windowed option on.
Why is G-Sync not showing in NVIDIA Control Panel?
The Set up G-SYNC page only appears when the driver finds a G-SYNC capable display on a port driven by the NVIDIA GPU. Turn on adaptive sync in the monitor menu, use DisplayPort, and on laptops use a port linked to the discrete GPU.