To change a user's permissions in Windows 11, open Settings > Accounts > Other users, select the account, choose Change account type, and pick Administrator or Standard User.
This guide covers that Settings route, Control Panel, file and folder permissions, Local Users and Groups, Command Prompt, PowerShell, Computer Management, shared folders, and fixes for access errors.
Method 1: Change user permissions via Settings
You must be signed in with an administrator account. The change applies to the whole PC, and the user gets the new rights the next time they sign in.
- Press Win + I to open Settings.
- Select Accounts, then Other users. You can also type
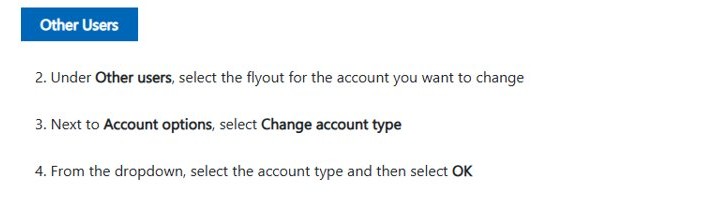
ms-settings:otherusersin the Run box. - Under Other users, select the account to expand it.
- Next to Account options, select Change account type.
- Choose Administrator or Standard User in the drop-down list.
- Select OK.
If the person has no account on the PC yet, add a user account first, then change its type.
What are user permissions in Windows 11?
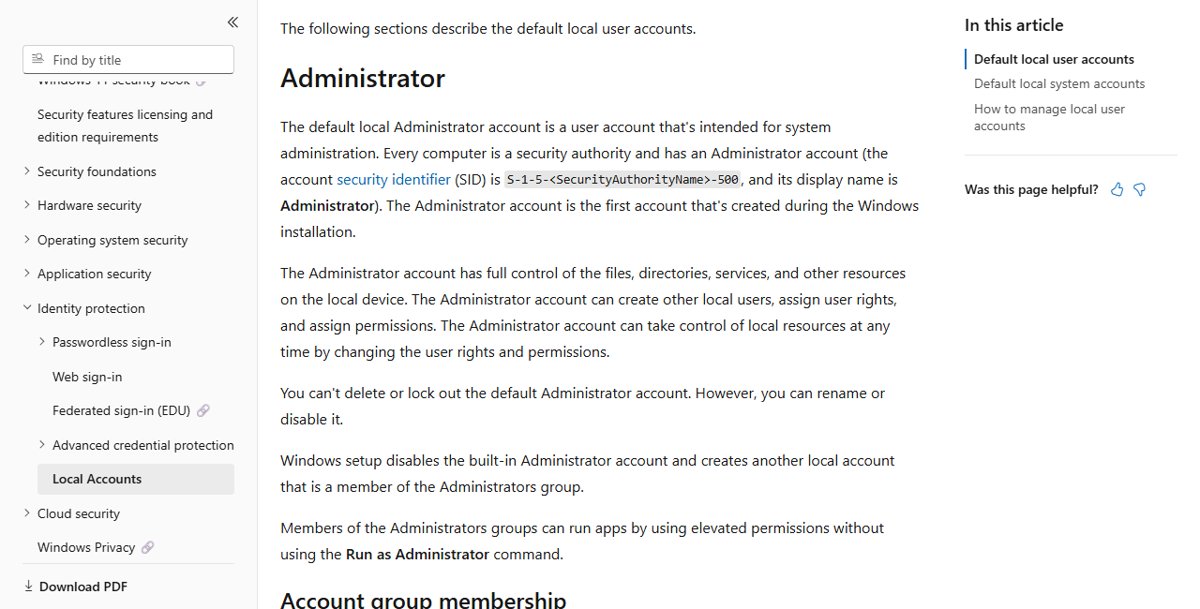
Windows 11 has two layers. The account type decides what a person can do to the PC, and NTFS permissions decide what each user or group can do to a file or folder.
| Permission | Applies to | What it allows |
|---|---|---|
| Administrator account | The whole PC | Change settings, install software and access all files; members of the Administrators group have Full Control of the device |
| Standard User account | The whole PC | Everyday use; admin tasks need an administrator to approve the User Account Control prompt |
| Full control | File or folder | Everything below, plus change permissions, take ownership and delete any file inside a folder |
| Modify | File or folder | Read, write, run and delete |
| Read & execute | File or folder | Open files and run programs |
| List folder contents | Folder only | See the files and subfolders inside |
| Read | File or folder | Open and view content and attributes |
| Write | File or folder | Create files and folders and change data |
Why change user permissions?
| Reason | Change to make |
|---|---|
| A family member or employee should not install software | Set the account to Standard User |
| A trusted user needs to install apps and change system settings | Set the account to Administrator |
| One folder holds private or work files | Remove other users from the folder's Security tab, or deny them access |
| A user gets Access denied on a folder they need | Grant Read or Modify on that folder |
| Other PCs on the network need a folder | Share it and set share permissions |
Method 2: Change user permissions using Control Panel
Control Panel still offers the account type switch in Windows 11. Sign in as an administrator first.
- Select Start, type
Control Paneland open it. - Select User Accounts, then User Accounts again.
- Select Manage another account.
- Select the account you want to change.
- Select Change the account type.
- Choose Standard or Administrator, then select Change Account Type.
Method 3: Change file or folder permissions
These are NTFS permissions, so the drive must be formatted as NTFS. You need to own the item or have permission from the owner to change it.
- Right-click the file or folder in File Explorer and select Properties.
- Open the Security tab and select Edit.
- To add someone, select Add, type the user or group name, and select OK.
- To change an existing entry, select the user or group in Group or user names.
- Tick Allow or Deny next to each permission, such as Modify or Full control.
- To take someone off the list, select them and select Remove.
- Select Apply, then OK, and approve the User Account Control prompt if it appears.
A newly added user starts with Read & execute, List folder contents and Read. Grant permissions to groups rather than single users where you can, because it is easier to manage.
Method 4: Change user permissions using Local Users and Groups
Local Users and Groups changes rights by group membership. Adding a user to Administrators makes them an administrator; leaving them only in Users makes them a standard user.
- Press Win + R, type
lusrmgr.mscand press Enter. - Select the Users folder and double-click the account.
- Open the Member Of tab.
- Select Add, type
Administratorsand select OK to give admin rights. - To take admin rights away, select Administrators in the list and select Remove.
- Select Apply, then OK. The user signs out and back in for the change to apply.
Method 5: Change permissions using Command Prompt
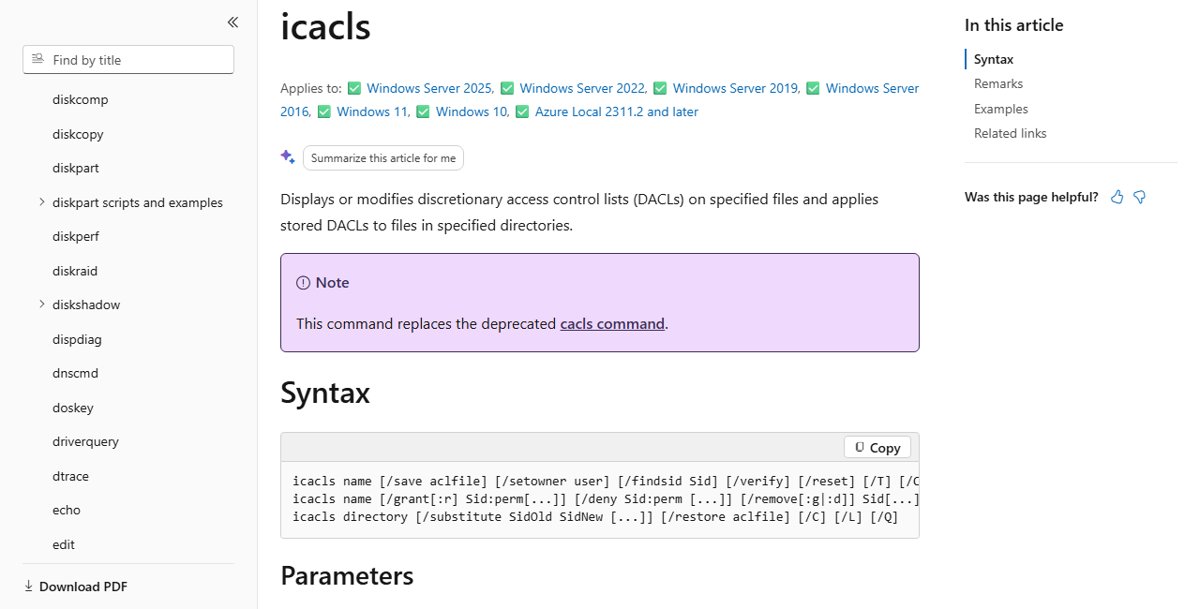
Open Terminal or Command Prompt with Run as administrator. net localgroup changes the account type, and icacls changes file and folder permissions.
net localgroup Administrators "UserName" /addAdds the account to the local Administrators group. Swap /add for /delete to make it a standard user again. For a folder, icacls "D:\Projects" /grant UserName:M /t grants Modify on the folder, its files and subfolders; use F for Full access, RX for Read and execute or R for Read only.
You should see: Command Prompt prints The command completed successfully. Running net localgroup Administrators lists the user as a member.
Add :r after /grant to replace the user's existing explicit permissions instead of adding to them, and use /remove UserName to take the user off the folder entirely.
Method 6: Change permissions via PowerShell
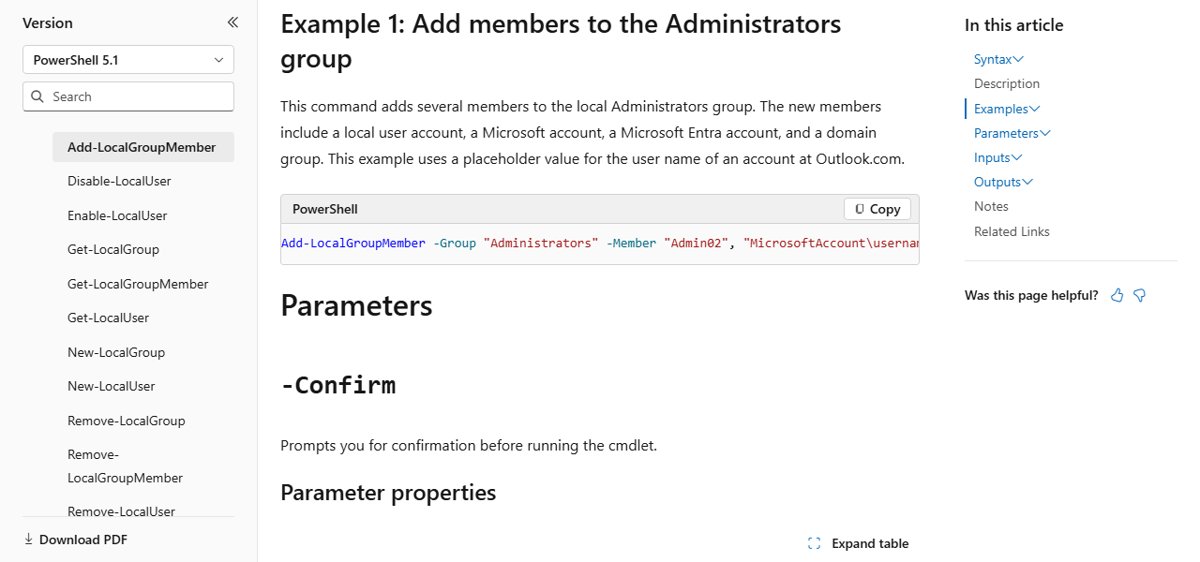
Open Windows PowerShell or Terminal as administrator. The LocalAccounts cmdlets manage group membership on the local PC.
Add-LocalGroupMember -Group "Administrators" -Member "UserName"Adds the user to the Administrators group, giving them every right assigned to that group. Remove-LocalGroupMember -Group "Administrators" -Member "UserName" takes the rights away.
You should see: No output means it worked. Get-LocalGroupMember -Group "Administrators" then lists the user.
Method 7: Manage permissions using Computer Management Console
Computer Management holds the same Local Users and Groups snap-in alongside Shared Folders, so you can manage accounts and shares from one window.
- Right-click Start and select Computer Management.
- Expand System Tools, then Local Users and Groups.
- Select Groups and double-click Administrators.
- Select Add, type the user name and select OK to grant admin rights.
- To remove admin rights, select the user in Members and select Remove.
- Select Apply, then OK.
How to change user permissions for shared folders
Share permissions apply only to people who open the folder over the network. Set them from the Sharing tab.
- Right-click the folder and select Properties.
- Open the Sharing tab and select Advanced Sharing.
- Tick Share this folder if it is not shared yet.
- Select Permissions.
- Select a user or group, or select Add to add one.
- Tick Allow or Deny for Full Control, Change or Read, then select OK twice.
For a quick share, right-click the folder, select Show more options > Give access to > Specific people, and pick the user. Give access to > Remove access stops sharing.
Managing permissions across networks
A shared folder is checked twice: once against share permissions and once against NTFS permissions. Neither changes the other, and the more restrictive of the two wins.
| Share permissions | NTFS permissions | |
|---|---|---|
| Where to set them | Sharing tab > Advanced Sharing > Permissions | Security tab |
| Who they affect | Only users connecting over the network | Local and network users |
| Levels | Full Control, Change, Read | Full control, Modify, Read & execute, List folder contents, Read, Write |
| Shown in Effective Access | No | Yes |
| Common approach | Full Control for Everyone | Do the real restricting here |
On a home network, set the Wi-Fi network to Private and turn on Network discovery and File and printer sharing in Manage advanced sharing settings, or other PCs will not see the share.
How to check current user permissions
- Run
net localgroup Administratorsin Command Prompt to list every administrator on the PC. - Run
whoami /groupsto see the groups your own account belongs to. - For a file or folder, open Properties > Security > Advanced, open the Effective Access tab, select Select a user, type the name and select View effective access.
Effective Access is read-only and ignores share permissions, so a network user can still be blocked by the share even when it shows access.
Factors to consider when changing permissions
| Factor | Why it matters |
|---|---|
| Number of administrators | Administrators have Full Control of the PC; Microsoft advises keeping the Administrators group small |
| Deny overrides | Explicit deny entries are checked before allow entries, so a Deny can block a user who is also allowed through a group |
| Full control on folders | It lets the user delete any file in the folder and take ownership of it |
| Inheritance | Files and subfolders inherit the parent folder's permissions, so change the folder rather than each file |
| Groups over individuals | Users added to a group get its permissions automatically, which keeps changes in one place |
| SYSTEM account | Microsoft does not recommend removing the SYSTEM account's permissions from a file, even though it is possible |
Troubleshooting user permission issues
Access denied or You need permission on a file or folder
Your account is not the owner and has no permission entry; the owner can always change permissions.
- Open Command Prompt as administrator.
- Run
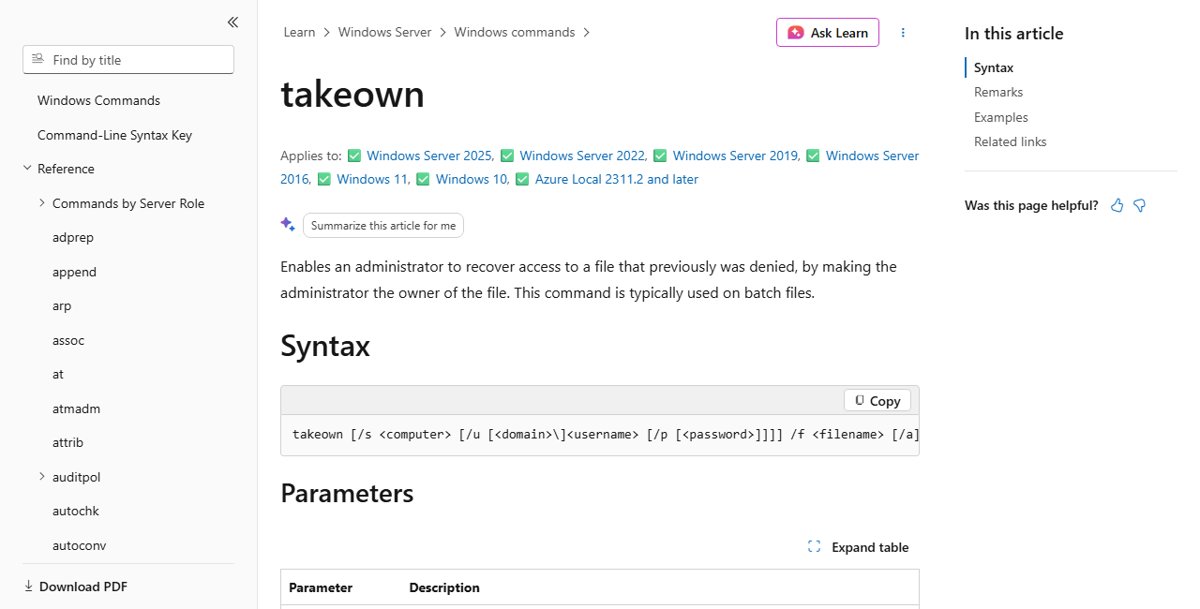
takeown /f "D:\Folder" /r /d Yto take ownership of the folder and everything in it. - Run
icacls "D:\Folder" /grant UserName:F /tto give your account full access. - Open the folder again.
Permission check boxes are greyed out or Remove is unavailable
The permissions are inherited from the parent folder.
- Change the permission on the parent folder instead, if every subfolder should follow it.
- Or open Properties > Security > Advanced and select Disable inheritance, then choose to convert inherited permissions into explicit ones.
- From Command Prompt,
icacls "D:\Folder" /inheritancelevel:ddoes the same and copies the inherited entries.
Change account type is missing or asks for an administrator password
You are signed in with a standard account, which cannot change permissions.
- Sign out and sign in with an administrator account.
- Repeat the Settings or Control Panel steps from that account.
- If there is no other administrator, ask whoever manages the PC; work and school PCs are often locked by policy.
FAQs about user permissions in Windows 11
What's the difference between Administrator and Standard User in Windows 11?
An administrator can change any setting, install software and open every file on the PC. A standard user can run apps and change their own settings, but needs an administrator to approve system changes.
Can I change another user's permissions without being an administrator?
No. Changing account types and group membership needs an administrator. For a file or folder you own, you can change its permissions, because the owner can always edit them.
How can I check who has administrator rights on my PC?
Run net localgroup Administrators in Command Prompt, or Get-LocalGroupMember -Group "Administrators" in PowerShell. Both list every account with admin rights.
Is it safe to make every user an administrator?
No. Administrators have Full Control of the PC, so malware running under any of their accounts can change the system. Microsoft recommends limiting the number of administrators and using standard accounts for everyday work.
How do I give a user full control of a folder in Windows 11?
Open the folder's Properties, go to Security > Edit, select or add the user and tick Allow next to Full control. From an elevated Command Prompt, icacls "path" /grant UserName:F /t does the same.
How do I remove administrator rights from a user in Windows 11?
Open Settings > Accounts > Other users, select the account, choose Change account type and pick Standard User. The command net localgroup Administrators "UserName" /delete does the same.
Do share permissions override NTFS permissions?
Neither overrides the other. Windows checks both for network users and applies the more restrictive result. Local users are affected only by NTFS permissions.