BIOS settings, called UEFI firmware settings on modern PCs, control how the computer starts, which security features run before Windows, how memory and the processor behave, and which firmware version is installed.
This guide shows how to enter setup, what each common setting does, which ones to change and which to leave alone, how to update the firmware, and how to recover when a change stops Windows from starting.
How to enter BIOS or UEFI setup
On a PC that runs Windows in UEFI mode, the fastest route is from Windows itself, because timing a key press does not matter. There are also other ways to enter BIOS, including the startup key.
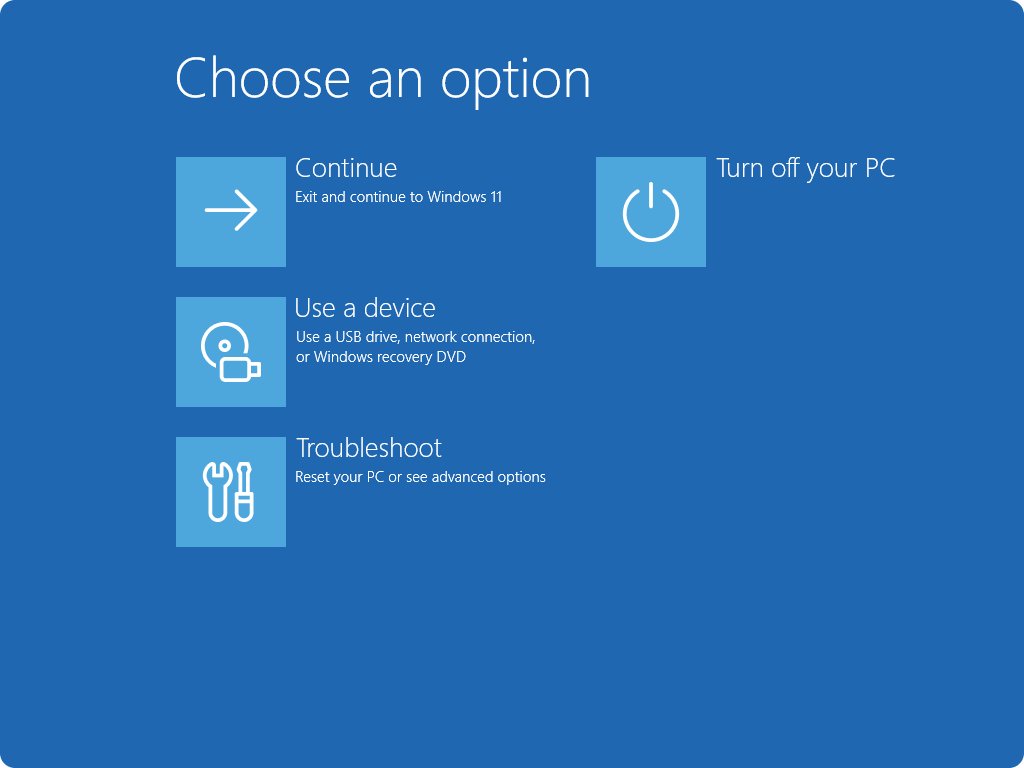
- Open Settings > System > Recovery. On Windows 10, open Settings > Update & Security > Recovery.
- Next to Advanced startup, select Restart now.
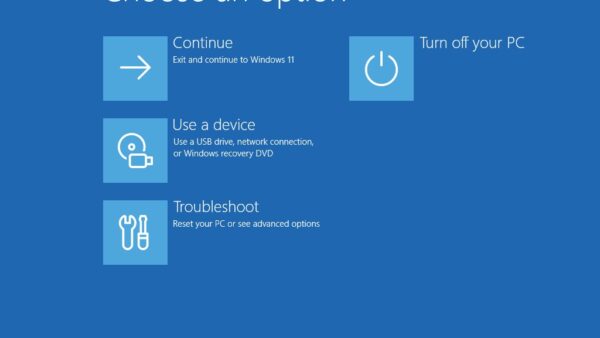
- On the Choose an option screen, select Troubleshoot.
- Select Advanced options > UEFI Firmware Settings.
- Select Restart. The PC restarts straight into the firmware setup screen.
To use the startup key instead, shut down fully, press Power and tap the setup key repeatedly. Microsoft lists Esc, Delete, F1, F2, F10, F11 and F12 as the common keys; Dell uses F2, and HP uses Esc or F10.
On Microsoft Surface, shut down, hold Volume-Up, press and release Power, and keep holding Volume-Up until the UEFI screen appears.
BIOS, UEFI, firmware, and the boot manager: what is the difference?
Microsoft defines firmware as the software that runs before Windows when you turn on the PC. It is commonly called UEFI and sometimes still called BIOS, so on a current PC both names lead to the same setup screen.
| Term | What it is | Why it matters when you change settings |
|---|---|---|
| Firmware | Code stored on the motherboard that starts the hardware before Windows loads | Every setting in this guide lives here, not in Windows |
| BIOS | The original firmware standard, still the everyday name for the setup screen | Legacy BIOS boots from MBR disks and has no Secure Boot |
| UEFI | The modern firmware standard on current PCs | Microsoft recommends UEFI mode because it adds security features such as Secure Boot; it boots from GPT disks |
| CSM (Legacy mode) | A compatibility mode on UEFI hardware that boots the old BIOS way | TPM 2.0 and Secure Boot do not work in Legacy/CSM mode |
| Windows Boot Manager | The Windows loader that UEFI starts from the boot drive | It appears as a boot entry; keep it first in the boot order on a Windows PC |
Before changing a BIOS setting
Microsoft's own advice is to change only what you need in the UEFI, because adjusting other settings can stop you reaching Windows. Five minutes of preparation makes every change reversible.
- Write down the current BIOS Version/Date and BIOS Mode from System Information: press Win + R, type
msinfo32and press Enter. - Find your BitLocker recovery key. A Microsoft account stores it if device encryption was set up with that account.
- Open setup and photograph each page you plan to touch, so you know the original values.
- Note the one setting you came to change and its current value.
- Keep a laptop on AC power, and back up important files before a firmware update.
Microsoft also recommends opening its UEFI instructions on a second device, because the PC itself is unusable while it sits in setup.
A practical decision guide
Match what you want to do to a row. Most readers need only one setting, and many need none, because Windows PCs ship with sensible defaults.
| What you want | Setting to change | Risk if done wrong |
|---|---|---|
| Boot once from a USB drive | Temporary boot menu, not the saved boot order | None; the next restart returns to normal |
| Meet the Windows 11 requirements | UEFI boot mode, Secure Boot, TPM (Intel PTT or AMD fTPM) | Windows will not boot if you switch an MBR install to UEFI |
| Run Android apps, WSL or virtual machines | Intel VT-x or AMD-V virtualization | Low |
| Run RAM at its rated speed | Intel XMP or AMD EXPO profile | Restarts or crashes if the kit and board disagree |
| Fix a known firmware bug or security issue | BIOS update from the PC or board maker | A power cut during the update can leave the PC unbootable |
| Make the PC quieter or cooler | Fan curve or fan profile | Overheating if fans are set too slow |
| Squeeze out extra CPU speed | Clock, voltage or boost limits | Instability, shorter component life, possible loss of warranty |
Boot mode: UEFI, Legacy BIOS, and CSM
Windows boots only in the mode it was installed with. UEFI needs a GPT disk, and Legacy BIOS uses MBR, so check the disk before you switch anything.
| What System Information or Disk Management shows | Correct boot mode | What to do |
|---|---|---|
| BIOS Mode: UEFI, disk partition style GPT | UEFI, with CSM off | Leave it; this is the mode Windows 11 expects |
| BIOS Mode: Legacy, disk partition style MBR | Legacy/CSM, for now | Convert the disk with MBR2GPT first, then switch the firmware to UEFI |
| Installing Windows fresh from USB | UEFI | Pick the USB entry that starts with UEFI: in the boot menu |
| Very old operating system or tool that needs Legacy | Legacy/CSM | Expect Secure Boot and TPM 2.0 to be unavailable while it is on |
To read the partition style, right-click Start, select Run, type diskmgmt.msc, right-click the Windows disk, select Properties and open the Volumes tab. Microsoft notes that the MBR-to-GPT conversion cannot be undone.
Boot order and the temporary boot menu
The boot order is saved and applies on every start. The temporary boot menu applies once, which makes it the safer choice for installing Windows or running a recovery USB.
- Plug in the USB drive and restart the PC.
- Tap the boot menu key as the PC starts. Dell uses F12 for the One Time Boot Menu; Microsoft lists F12, Esc, F9, F10 and F8 as common boot menu keys.
- On Surface, shut down, hold Volume Down and press Power to boot from USB.
- Select the entry for the drive, such as UEFI: USB Drive, and press Enter.
- To change the saved order instead, open setup, go to the Boot or Boot Configuration page and move the entry up the list.
- Keep Windows Boot Manager first for everyday use, then save and exit.
Secure Boot: check it and turn it on
Secure Boot checks the signature of each piece of boot software, which stops rootkits loading before Windows. Windows 11 lists a Secure Boot capable UEFI PC as a requirement, so keep it on.
Microsoft's original 2011 Secure Boot certificates expire in 2026. Windows Update installs the newer 2023 certificates, and Windows Security > Device security shows the Secure Boot status.
- Press Win + R, type
msinfo32and press Enter. Check that BIOS Mode reads UEFI and Secure Boot State reads On. - If BIOS Mode reads Legacy, convert the disk to GPT before you go further.
- Enter UEFI setup and open the Security or Boot page.
- Set Secure Boot to Enabled. On Dell, select Apply, then Save and Exit.
- Restart and confirm Secure Boot State now reads On in System Information.
Brand menus differ, so the place to turn on Secure Boot for Windows 11 may sit under a different tab on your board. If an older graphics card, Linux distribution or earlier Windows version will not start with Secure Boot on, check the vendor for a signed update or firmware fix rather than leaving the PC unprotected.
TPM and platform-security settings
The TPM is a tamper-resistant security chip, or firmware equivalent, that stores keys for BitLocker, device encryption and Windows Hello. Windows 11 requires TPM 2.0, and Microsoft has required new PC models to ship with TPM 2.0 enabled since July 2016.
- Press Win + R, type
tpm.mscand press Enter. If it shows Compatible TPM cannot be found, the TPM is off in firmware. - Enter UEFI setup and look under Advanced, Security or Trusted Computing.
- Turn on the entry your board uses: Intel PTT or Intel Platform Trust Technology on Intel, AMD fTPM switch or AMD PSP fTPM on AMD, or Security Device or TPM State on other boards.
- Save and exit.
- Open
tpm.mscagain and check Specification Version under TPM Manufacturer Information reads 2.0.
The menu name changes by board when you enable TPM 2.0 in BIOS, such as PTT on Intel or fTPM on AMD. Do not clear the TPM unless you have backed up data protected by it; turning off or clearing the TPM triggers BitLocker recovery.
Virtualization technology in BIOS: Intel VT-x and AMD-V
Hardware virtualization lets Windows run another operating system, such as Android or Linux, and it powers several Windows Security features. Many PCs ship with it on, and Microsoft states it is already enabled on Surface devices.
- Enter UEFI setup from Settings > System > Recovery > Advanced startup.
- Find the processor or advanced page. Intel PCs call the option Intel Virtualization Technology (VT-x or VMX); AMD PCs call it AMD Virtualization (AMD-V).
- Set it to Enabled, then save and exit.
- Back in Windows, select Start, type Windows features and open Turn Windows features on or off.
- Select Virtual Machine Platform, then OK, and restart if asked.
Memory profiles: Intel XMP and AMD EXPO
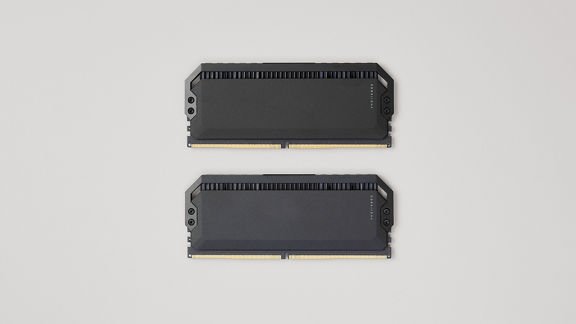
Memory runs at a conservative default speed until you load its profile. Intel describes XMP as preset combinations of speed, timing and voltage tested by the memory maker; AMD EXPO, short for Extended Profiles for Overclocking, does the same job on AMD platforms such as Ryzen 7000.
Both are a form of overclocking. Intel notes that altering clock frequency or voltage may void warranties and reduce stability, so enable a profile only on memory and a board that both support it.
- Check that the memory kit lists XMP or EXPO and that the motherboard supports it. Intel says its Z and B series boards support XMP.
- Enter UEFI setup and open the memory or overclocking page, or the main page on simplified layouts.
- Select the XMP or EXPO profile the board lists, rather than typing speeds and timings by hand.
- Save and exit, then let the PC restart into Windows.
- If the PC restarts in a loop or crashes in Windows, return the setting to Auto or Disabled.
CPU overclocking, undervolting, and boost controls
These settings change the processor's clock speed, voltage or power limits. Boost behaviour is already automatic on current Intel and AMD processors, so the defaults deliver the rated performance.
Leave clock multipliers, core voltage and power limits on Auto unless you are deliberately overclocking or undervolting and can stress-test the result. Intel states that altering clock frequency or voltage may void product warranties and reduce stability, security, performance and the life of the processor and other components. A change that boots today can still crash under load later, which is why each step needs testing.
Storage, SATA, NVMe, and RAID settings
The storage page sets how the motherboard presents drives to Windows. Microsoft lists a change to the storage controller mode in the BIOS as a cause of the INACCESSIBLE_BOOT_DEVICE stop error.
| Setting | What it controls | Safe approach |
|---|---|---|
| SATA mode (AHCI, RAID, legacy IDE) | The driver Windows needs to read SATA drives | Keep the mode Windows was installed in |
| RAID | Grouping several drives into one array | Set it before installing Windows, not after |
| NVMe and M.2 slot options | Which slots are active and what they share lanes with | Check the board manual before moving a drive between slots |
| Hot plug and port enable | Whether individual ports are switched on | Turn on the port the drive is connected to if it is missing |
If Windows stopped booting right after a storage change, Microsoft's fix is to revert the change, for example a controller mode switch from legacy to AHCI.
Fan curves and thermal controls
A fan curve sets how fast each fan spins at a given temperature. The default profile balances noise and cooling for the cooler the maker fitted.
| Goal | Adjustment | Caution |
|---|---|---|
| Quieter idle | Lower the fan speed only at low temperatures | Keep the high-temperature points unchanged |
| Cooler under load | Raise the speed at the upper temperature points | More noise during games or renders |
| Fan not detected | Check the fan is enabled on the header it is plugged into | Check the board manual for the header names |
| Laptop thermals | Use the maker's performance or thermal mode where offered | Laptops rarely expose full fan curves |
Integrated graphics and onboard devices
The onboard devices page switches built-in hardware on or off: audio, network ports, Wi-Fi, Bluetooth, cameras and the processor's integrated graphics. On business Surface models, the Devices page gives each component an On or Off switch.
| Device | When to turn it off | When to leave it on |
|---|---|---|
| Integrated graphics | Rarely; turning it off frees nothing useful on most desktops | Your monitor plugs into the motherboard's video ports |
| Onboard audio | You use a separate sound card and see a duplicate device | You use the motherboard's audio jacks |
| Onboard network or Wi-Fi | A policy or a separate adapter replaces it | It is your only network connection |
| Camera and microphone | You want them physically unavailable to every app | You use video calls |
A device switched off in firmware disappears from Device Manager, so check this page before reinstalling drivers for a missing camera or port.
BIOS and UEFI updates
A firmware update fixes bugs, adds hardware support and closes security holes. Dell advises updating when an update fixes an issue you have, is marked critical, or as part of planned maintenance, and notes that updating does not delete your data.
Get the file only from the PC or motherboard maker, or through Windows Update. Some makers, Dell included, deliver BIOS updates as Windows Update optional updates.
- Read the installed BIOS Version/Date in
msinfo32and compare it with the maker's support page for your exact model. - Suspend BitLocker: Control Panel > System and Security > BitLocker Drive Encryption > Suspend protection > Yes.
- Connect the AC adapter; Dell asks for a laptop battery of at least 10 percent on top of mains power.
- Close open programs and disconnect docks, printers and USB drives.
- Run the maker's update file, or use the USB route: copy the file to a FAT32 drive and pick the flash option in the boot menu or setup.
- Do not turn the PC off while the update runs, even if the screen goes blank or it restarts several times.
- Resume BitLocker protection once Windows starts, and check the new version in
msinfo32.
On Dell PCs, you can update a Dell BIOS through SupportAssist, Dell Command | Update or the F12 flash route. Some makers block a downgrade once a version contains security fixes, so treat an update as one-way.
Saving, exiting, and restoring settings
- To keep changes, select Save & Exit or press F10 on ASUS firmware, then confirm with Ok.
- On Surface, open the Exit page and select Restart Now.
- To leave without changes, select the exit option that discards changes, then confirm.
- To return every setting to the factory values on Dell, select Load Defaults or Restore Settings, choose BIOS Defaults, then OK and Exit.
- On ASUS laptops press F9; on ASUS desktops press F5. Confirm with Ok, then save and exit.
Loading defaults does not touch your files, but it does undo custom choices such as boot order and virtualization. ASUS notes it also leaves any BIOS password in place.
How to view BIOS settings from Windows
Windows cannot show or change every firmware setting, but it reports the ones that matter most for compatibility and security.
- Press Win + R, type
msinfo32and press Enter. - On System Summary, read BIOS Version/Date, BIOS Mode (UEFI or Legacy) and Secure Boot State.
- Run
tpm.mscand confirm Specification Version reads 2.0. - Open Windows Security > Device security to see the Secure Boot and security processor status.
- For anything else, such as the boot order or memory profile, enter UEFI setup and read the page directly.
How to recover from a failed boot or unstable setting
The system powers on but will not reach Windows
A boot mode, boot order or storage controller change no longer matches how Windows was installed.
- Enter setup with the startup key.
- Put back the value you changed, using your notes or photos.
- Make sure Windows Boot Manager is first in the boot order.
- If you switched between Legacy/CSM and UEFI, or changed the SATA mode, switch it back.
- If you cannot remember the change, load the defaults, then save and exit.
The computer repeatedly restarts after enabling XMP or EXPO
The memory cannot run stably at the profile's speed on this board and processor.
- Enter setup with the startup key as soon as the PC powers on.
- Set the memory profile back to Auto or Disabled, then save and exit.
- Check the board maker's support page for a newer BIOS and its release notes.
- Try the profile again, or load defaults if the restarts continue.
A BitLocker or device-encryption recovery screen appears
A firmware update or a TPM change made Windows distrust the start-up chain.
- Get the recovery key from your Microsoft account on another device, or from the printout, file or USB where you saved it.
- Type the key and let Windows start.
- Undo the TPM change if you made one by mistake.
- Next time, suspend BitLocker before a firmware update or TPM change.
You cannot enter setup after saving a change
The key press misses the short window before Windows loads, or a USB keyboard is not ready in time.
- Use Settings > System > Recovery > Advanced startup > Restart now, then UEFI Firmware Settings.
- If Windows will not start, let it fail twice; it then opens the recovery screen with the same option.
- Try another USB port or keyboard and tap the key from the moment you press Power.
- On a Dell whose firmware is corrupt, Dell documents a Ctrl + Esc BIOS recovery at power-on.
The computer starts after defaults are loaded, but custom features are missing
Defaults reset optional settings such as virtualization, boot order and memory profiles.
- Open setup and turn virtualization back on if you use virtual machines or Android apps.
- Reapply the XMP or EXPO profile.
- Check that Secure Boot and the TPM are still on with
msinfo32andtpm.msc. - Reset the boot order with Windows Boot Manager first.
Settings you should not change casually
| Setting | What goes wrong | Safe rule |
|---|---|---|
| Boot mode (UEFI vs Legacy/CSM) | Windows stops booting | Switch only after converting the disk to GPT |
| SATA or RAID controller mode | INACCESSIBLE_BOOT_DEVICE at startup | Change it before installing Windows, never after |
| Secure Boot keys | Signed boot software stops loading | Leave key management on its default |
| TPM clear or reset | BitLocker recovery and lost keys | Back up first and have the recovery key ready |
| CPU and memory voltage | Crashes, shorter component life, possible loss of warranty | Use tested profiles, not manual values |
| Supervisor or admin password | Locked out of setup, and some update tools fail | Store it somewhere safe if you set one |
Why a universal “best BIOS settings” list is misleading
Ignore any list that tells every PC to change the same settings; change a setting only to solve a specific problem or meet a specific requirement. Menu names, defaults and safe values differ by maker, board and processor, and Microsoft warns that changing settings you do not need can stop Windows starting. A setting that helps one gaming desktop, such as an XMP profile, does nothing on a laptop with soldered memory and can destabilise a board that does not support the kit.
Safe BIOS-settings workflow
- Decide the one result you want, and find the matching setting in the decision guide.
- Record the BIOS version, boot mode and the setting's current value.
- Suspend BitLocker if the change touches the TPM or the firmware version.
- Change that single setting, then save and exit.
- Start Windows and confirm the result in
msinfo32,tpm.mscor the app you needed it for. - Use the PC normally for a day before making the next change.
- If anything breaks, put the old value back or load defaults.
BIOS and UEFI settings FAQ
How do I configure BIOS settings?
Enter setup, open the page for the setting, change its value with the mouse or arrow keys and Enter, then save and exit, usually with F10. Change one setting at a time and note its old value so you can reverse it if the PC misbehaves.
How do I get to BIOS settings from Windows Settings?
Open Settings > System > Recovery and select Restart now next to Advanced startup. Then choose Troubleshoot > Advanced options > UEFI Firmware Settings > Restart. The option appears only when Windows runs in UEFI mode.
How do I go into BIOS settings when the PC starts?
Shut down fully, press Power and tap the setup key repeatedly. Common keys are F2, Delete, Esc, F1, F10, F11 and F12; Dell uses F2 and HP uses Esc or F10. Surface uses Volume-Up with Power.
How can I view BIOS settings without restarting?
Run msinfo32 to see the BIOS version, BIOS mode and Secure Boot state, and tpm.msc to see the TPM version. Windows cannot show the full list of firmware settings; for the boot order or memory profile you have to enter setup.
What BIOS settings should I change?
Usually none. Change a setting only for a specific goal: UEFI, Secure Boot and TPM for Windows 11, virtualization for virtual machines, XMP or EXPO for rated memory speed, or the boot menu to start from USB once. Leave everything else on its default.
Is BIOS the same as UEFI?
Not technically, but on current PCs both names lead to the same setup screen. UEFI is the modern firmware standard that replaced BIOS and adds Secure Boot. Microsoft says firmware is commonly called UEFI and sometimes still called BIOS.
What is the safest way to boot from a USB drive once?
Use the one-time boot menu instead of changing the saved boot order. Tap the boot menu key at startup, such as F12 on Dell, and pick the UEFI: entry for the USB drive. The next restart boots Windows as normal.
Should I enable XMP or EXPO?
Yes, if your memory kit and motherboard both support it and you want the speed printed on the kit. Without a profile, memory runs at a slower default. If the PC restarts repeatedly or crashes afterwards, set the profile back to Auto.
Can changing BIOS settings delete my files?
No. Firmware settings and BIOS updates do not erase the drive. Some changes, such as switching boot mode or storage controller mode, can stop Windows starting, but the files remain. Clearing the TPM without your BitLocker key is the change that risks access to encrypted data.
What should I do if a BIOS change prevents Windows from starting?
Enter setup with the startup key and put the changed setting back. If you do not know what changed, load the firmware defaults, then save and exit. Make sure Windows Boot Manager is first in the boot order and the boot mode matches the original install.
Do BIOS updates improve gaming performance?
Not as a rule. A BIOS update fixes bugs, adds hardware support and patches security issues. Dell recommends updating when an update fixes a problem you have, is marked critical, or as part of planned maintenance, not as a speed tweak.
The bottom line on BIOS settings
Run Windows in UEFI mode with Secure Boot and TPM 2.0 on, enable virtualization or an XMP or EXPO profile only when you need them, and change everything else only to fix a specific problem. Those settings cover the Windows 11 requirements and the common performance gain, while the rest carry real risk of an unbootable PC. Recording each old value and changing one thing at a time means any mistake is reversible in a minute.