To insert a signature in a Microsoft Word document, scan your handwritten signature, save it as a picture, and add it with Insert > Pictures wherever the signature belongs.
This guide also covers reusable AutoText signature blocks, signature lines, certificate-based digital signatures, drawing with the Draw tab, and the options in Word for Mac, the web and mobile.
How to insert a signature in Word
A picture of your real signature works in every edition of Word, including Word for the web. You need a scanner, or any device that can save your signature as an image file.
- Sign your name on a sheet of white paper.
- Scan the page and save the file as .bmp, .jpg or .png.
- In Word, click where the signature should appear and select Insert > Pictures.
- Choose the scanned file and insert it.
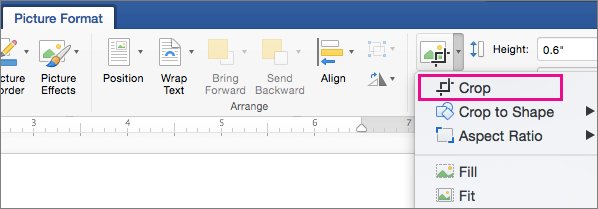
- Select the picture, open the Picture Format tab, select Crop, and drag the handles until only the signature remains.
- Right-click the cropped picture and select Save as Picture so you can upload the clean version into later documents.
The same picture also works as an uploaded digital signature: the signing dialog for a signature line accepts it through Select Image.
Which Word signature method should you use?
| Your situation | Use this method | Why |
|---|---|---|
| One letter or form, signed once | Signature image (Insert > Pictures) | Fast, looks handwritten, works in every Word edition |
| You sign letters every week | AutoText signature block | Inserts picture plus name, title and contact details in one step |
| Someone else must sign the file | Signature line (Signature Setup) | Shows the signer where to sign and records who signed |
| The recipient must prove the file is unchanged | Digital signature with a certificate | Encrypted stamp; the file becomes read-only after signing |
| You want proof of integrity but no visible mark | Invisible digital signature | Signs the whole file from File > Info |
| The document will be printed and signed in ink | Underlined tab line (Ctrl + U) | No setup, prints as a plain line |
| Several people sign remotely | E-signature add-in such as Docusign for Word | Routes the file to signers in order |
| You have a touchscreen and pen | Draw tab | Write the signature straight onto the page |
Digital certificate requirements for signing Word documents
A picture, AutoText block or drawn signature needs nothing extra. A real digital signature needs a signing certificate, which proves your identity and is usually valid for a year.
| Requirement | Details |
|---|---|
| Word version | Word for Microsoft 365, Word 2024, 2021, 2019 or 2016 on Windows |
| Signing certificate | Must be current, not expired, to sign an Office document |
| Certificate for shared files | Get one from a certificate authority so recipients can verify your signature |
| Certificate for personal use | Create a self-signed one with SelfCert.exe; other people cannot verify it unless they choose to trust it |
| Signature lines | Available in Word and Excel only |
| Invisible signatures | Available in Word, Excel and PowerPoint |
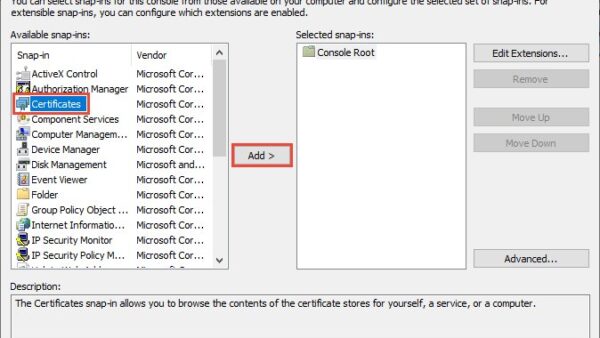
To make a self-signed certificate, open C:\Program Files\Microsoft Office\root\Office16, run SelfCert.exe, type a name in Your certificate's name, select OK, then select OK again on the SelfCert Success message.
Insert a handwritten signature image in Word for Mac
Word for Mac accepts the same scanned picture, and it also takes .gif files.
- Scan your signature and save it as .bmp, .gif, .jpg or .png.
- Click where the signature belongs in the document.
- On the Insert tab, select Pictures > Picture from File.
- Choose the file and select Insert.
- Select the picture, open Picture Format, select Crop, and trim the edges.
- Right-click the picture and select Save as Picture to keep the cropped copy for other documents.
Use Quick Parts and AutoText to insert a signature in Word
An AutoText entry saves a reusable signature block: the signature picture plus your typed name, job title, phone number or email address. This is the fastest way to sign Word documents you produce often.
- Insert your signature picture, then type the extra lines directly under it.
- Select the picture and the text together.
- On the Insert tab, in the Text group, select Quick Parts > Save Selection to Quick Part Gallery.
- Type a Name for the block and set Gallery to AutoText.
- Select OK.
- To sign a later document, click where the block belongs and select Insert > Quick Parts > AutoText, then pick your block.
On a Mac, select the picture and text, then choose Insert > AutoText > New, name the entry and select OK. Insert it later from Insert > AutoText > AutoText.
Add a digital signature line in Word for Windows
A signature line marks where a person should sign and holds their digital signature once they do. Add one line per signer.
- Click where the signature line should go.
- On the Insert tab, in the Text group, select Signature Line > Microsoft Office Signature Line.
- In Signature Setup, fill in Suggested signer, Suggested signer's title and Suggested signer's e-mail address.
- Add any Instructions to the signer.
- Tick Allow the signer to add comments in the Sign dialog box or Show sign date in signature line if you want them.
- Select OK. Repeat for each additional signer.
Insert a digital signature in Word
Signing a signature line adds an encrypted digital signature tied to your certificate. Make all edits first, because the signed document becomes read-only.
- Right-click the signature line and select Sign.
- If the file opened in Protected View and you trust its source, select Edit Anyway.
- Type your name in the box next to the X, write it with ink, or choose Select Image to use your signature picture and then select Select.
- Select Sign.
- Confirm that the Signatures button now appears at the bottom of the document.
If you want to keep others from editing the file before it reaches the signer, you can also password-protect the Word document before you send it.
Insert an invisible digital signature in Word
An invisible digital signature protects the authenticity of the whole file without showing a line on the page.
- Finish editing the document and save it.
- Select File > Info.
- Select Protect Document > Add a Digital Signature.
- If Word shows a message, select OK.
- Choose an option in the Commitment Type list.
- Type a reason in Purpose for signing this document.
- Select Sign.
Write your signature directly in Word
With a touchscreen, pen or mouse, the Draw tab lets you sign straight onto the page. The tab appears automatically on touch-enabled devices.
- If the Draw tab is missing, select File > Options > Customize Ribbon, tick Draw and select OK.
- Switch to View > Print Layout, since inking does not work in other views.
- On the Draw tab, select a pen and use its down arrow to set thickness and colour.
- Write your signature where it belongs.
- Press Esc to stop inking.
- If a stroke goes wrong, select Eraser and remove it, then sign again.
Create a simple signature line for printing
For a document that will be printed and signed in ink, an underlined tab is all you need. The same approach works when you make fill-in-the-blank lines elsewhere in the document.
- Click where the line should start.
- Press Ctrl + U to turn on underlining.
- Press Tab until the line is long enough.
- Press Ctrl + U again to turn underlining off.
- Type a label such as Signature or Date under the line if the form needs one.
Create a stable signature line for an online form
Underlined tabs shift when someone types into a form. A one-cell table with only a bottom border keeps the line in place, which matters when you make a Word document fillable for others to complete.
- Select Insert > Table and insert a 1×1 table, or 1×2 if you want a label beside the line.
- Drag the right edge of the table to the length you need.
- Select the table, open Table Design, and set the borders to None.
- Apply Bottom Border to the signature cell only.
- Type a label such as Signature or Date in the second cell if you used a 1×2 table.
- To see the hidden cell edges while you work, turn on gridlines in the Table group of the Layout tab.
Word on iPhone, iPad, and Android
Word for mobile has no signature line command, and a digital signature line needs an add-in. You can still draw a line for signing or insert your signature picture.
- Tap where the line should go and hold the underscore key until the line is long enough, or build a table line with the next steps.
- On a tablet, tap Insert and then the Table icon. On a phone, tap the Edit icon, tap Home to open the ribbon, then tap Insert and the Table icon.
- On the Table tab, tap Delete and remove rows and columns until one cell remains.
- Tap Table Styles and choose a style with a line under the header row and no other gridlines.
- To add your handwritten signature instead, tap Insert > Pictures and choose your signature image.
Add a signature in Word for the web
Word for the web has no signature command. A scanned picture is the only built-in way to sign there.
- Scan your signature and save it as .bmp, .gif, .jpg or .png.
- Crop the image in a photo editor and note where you saved it.
- Open the document in Word for the web and click where the signature belongs.
- Select Insert > Pictures.
- Browse to the cropped image, select it and open it.
Use a third-party app to insert a signature in Word
E-signature add-ins handle documents that several people must sign remotely. Docusign for Word, for example, sends a document for signature from inside Word and routes it to signers in order.
- In Word for Windows, select Home > Add-ins, or File > Get Add-ins.
- Select More Add-ins, then open the Store tab.
- Find the e-signature add-in your organisation uses.
- Select Add and sign in with that service's account.
- Open the add-in from the ribbon and follow its prompts to sign or send the document.
How to check a digital signature in Word is valid
- Look for the Signatures button at the bottom of the document window.
- Select File > Info > View Signatures to open the Signatures pane.
- Check that each signer is listed as a valid signature.
- A signature is valid only if the certificate is current, the publisher is trusted, and a reputable certificate authority issued it.
- A signature with a valid time stamp stays valid even after the signing certificate ages out.
Remove a digital signature from Word
- For a signature line, right-click it, select Remove Signature, then select Yes.
- Or open the Signature Pane, select the arrow next to the signature and choose Remove Signature.
- For an invisible signature, select File > Info > View Signatures.
- Select the arrow next to the signature name, choose Remove Signature, then select Yes.
- For a picture or drawn signature, select it and press Delete.
Removing the signatures lifts the read-only state, so you can make the Word document editable again and re-sign it after your changes.
Why “Add a Signature Line” is missing in Word
Signature Line does not appear on the Insert tab
Signature lines exist only in desktop Word for Windows; Word for Mac, the web and mobile do not offer the command.
- Open the file in Word for Microsoft 365, 2024, 2021, 2019 or 2016 on Windows.
- Select Insert and look in the Text group for Signature Line.
- On other platforms, use a signature picture or a drawn table line instead.
The whole ribbon, including the Insert tab, is hidden
The ribbon is collapsed to tab names or set to auto-hide.
- Select any tab name to show its commands.
- Show the Word ribbon permanently so the Insert tab stays open.
The Draw tab is missing or greyed out
The tab is off on non-touch devices, and inking needs Print Layout.
- Select File > Options > Customize Ribbon and tick Draw.
- Select View > Print Layout.
Recipients cannot verify the digital signature
The file was signed with a self-signed certificate, which others cannot verify unless they choose to trust it.
- Get a signing certificate from a certificate authority.
- Remove the old signature and sign the document again.
The document cannot be edited after signing
A digitally signed document becomes read-only to prevent changes.
- Remove the signature from File > Info > View Signatures.
- Make your edits, then ask each signer to sign again.
Word signature FAQ
Can I insert a signature in Word without a scanner?
Yes. Sign with the Draw tab on a touchscreen, or type your name next to the X when you sign a signature line. Any .jpg or .png image of your signature also works with Insert > Pictures.
Is a picture of my signature a digital signature?
No. A picture only looks like a signature. A digital signature is an encrypted stamp tied to a signing certificate, and it confirms the signer and that the content has not changed since signing.
Where is the Signature Line option in Word?
In desktop Word for Windows, select the Insert tab and look in the Text group for Signature Line > Microsoft Office Signature Line. Word for Mac, Word for the web and the mobile apps do not include this command.
Do I need a digital certificate to sign a Word document?
Only for a true digital signature. A scanned picture, AutoText block or drawn signature needs no certificate. A digital signature needs a current certificate from a certificate authority, or a self-signed one for personal use.
Why can't I edit a Word document after signing it?
Word makes a digitally signed document read-only so the signed content cannot change. Remove the signature from File > Info > View Signatures, edit the file, and sign it again.
Can I add a signature in Word for the web?
Word for the web has no signature command. Insert a scanned and cropped picture of your signature with Insert > Pictures. Open the file in desktop Word if you need a signature line or digital signature.
How do I save my signature to reuse in Word?
Insert your signature picture with your typed details, select both, and choose Insert > Quick Parts > Save Selection to Quick Part Gallery with Gallery set to AutoText. Insert it later from Insert > Quick Parts > AutoText.
How long is a Word digital signature valid?
A signing certificate is usually valid for a year. Signatures that carry a valid time stamp stay valid regardless of the certificate's age, so a document signed before expiry remains verifiable.
The bottom line on signing Word documents
Save a cropped signature picture as an AutoText block for everyday letters, and switch to a signature line with a certificate-backed digital signature when a recipient must prove the file has not changed. The picture works in every edition of Word in seconds, while only a digital signature locks the document and records who signed it.