To repair Windows Update components, open Command Prompt as administrator, run DISM.exe /Online /Cleanup-image /Restorehealth, then sfc /scannow, restart and check for updates again.
This guide covers each step on Windows 11 and Windows 10, how to reset the update cache folders, and what to do when DISM or SFC fails.
Repair Windows Update components with DISM + SFC (Win10/11) to fix update errors
This is Microsoft's own repair order for update errors caused by damaged system files. DISM repairs the component store first, and SFC then repairs protected files from it.
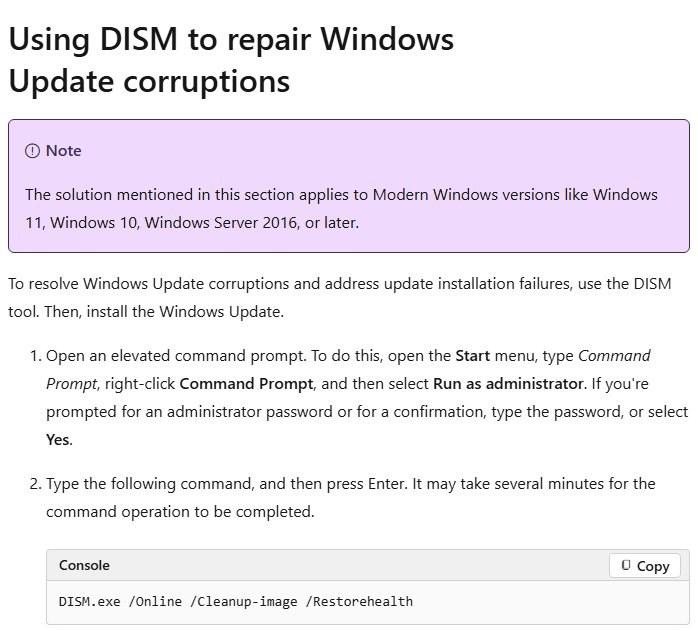
- Type command prompt in the taskbar search box, select Run as administrator and select Yes.
- Type
DISM.exe /Online /Cleanup-image /Restorehealthand press Enter. - Wait for The restore operation completed successfully or The operation completed successfully. If no confirmation appears, run the command again.
- Type
sfc /scannowand press Enter. - Wait until verification reaches 100%, then close Command Prompt.
- Restart the PC, then select Start > Settings > Windows Update > Check for updates.
Windows Update repair tools compared by error
| Your situation | Use this | Why |
|---|---|---|
| Any update error, first attempt | Windows Update troubleshooter | Runs automatic diagnostics and fixes most common problems |
| Error 0x8007000d or a corrupt download | Clear C:\Windows\SoftwareDistribution |
Microsoft links this code to corruption in the update cache |
| Updates still fail after clearing the cache | Reset the components with net stop and ren |
Also renames the catroot2 signature folder |
| Errors 0x80070057 or 0x80080005 | DISM RestoreHealth, then sfc /scannow |
Microsoft links these codes to corrupted files |
| DISM says the source files could not be found | DISM with /Source and /LimitAccess |
Gives DISM a local copy of the files |
| Errors keep returning on a drive with bad sectors | chkdsk /f C: |
Repairs file system errors under the update files |
| Nothing else works | Reinstall Windows, keeping files | Replaces the whole component store |
Prerequisites
| Requirement | Why it matters | How to meet it |
|---|---|---|
| Administrator rights | DISM servicing and SFC refuse to run in a standard window | Use an administrator account, or ask the PC's administrator to run the commands |
| Internet connection | DISM downloads replacement files from Windows Update by default | Settings > Network & Internet; reconnect if disconnected |
| Mains power | A repair interrupted by a flat battery can leave updates half applied | Plug the laptop in before you start the repair |
| Free disk space | Microsoft asks for at least 20 GB free to upgrade a 64-bit Windows, 16 GB for 32-bit | Settings > System > Storage |
| A backup of personal files | Microsoft asks you to back up before advanced update fixes | Copy files to a USB drive or OneDrive |
| Windows installation media (optional) | Needed only when DISM cannot get files from Windows Update | An ISO of the same Windows version as the PC |
Step-by-step: Repair Windows Update components with DISM + SFC
The six steps below run in this order. Each one depends on the step before it, so do not skip ahead.
| Step | Command or action | What it does |
|---|---|---|
| 1. Open an elevated terminal | Run as administrator | Gives DISM and SFC the rights they need |
| 2. Health checks (optional) | Dism /Online /Cleanup-Image /CheckHealth |
Reports whether the image is healthy, repairable or non-repairable |
| 3. Repair the component store | DISM.exe /Online /Cleanup-image /Restorehealth |
Replaces damaged component files using Windows Update |
| 4. Repair system files | sfc /scannow |
Replaces damaged protected files from the repaired store |
| 5. Restart | Start > Power > Restart | Loads the replaced files and finishes pending operations |
| 6. Retry Windows Update | Check for updates | Confirms the error is gone |
1) Open an elevated terminal (Admin)
Command Prompt, PowerShell and Windows Terminal all run DISM and SFC the same way. What matters is that the window runs as administrator, so if you prefer PowerShell, open PowerShell as administrator the same way.
- Type command prompt in the search box on the taskbar.
- Select Run as administrator from the result's options.
- Select Yes in the User Account Control prompt, or enter an administrator password if asked.
- Type the commands in that window only, not in a normal one.
If User Account Control asks for a password instead of showing Yes, your account is a standard account. Enter an administrator's credentials or sign in with an administrator account.
2) (Optional) Confirm Windows sees corruption (quick health checks)
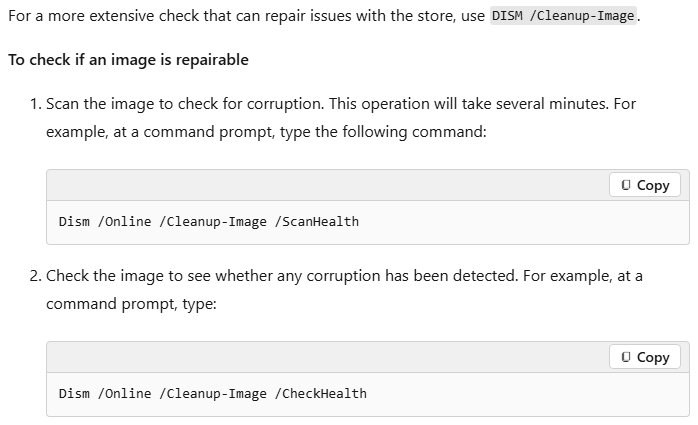
These checks change nothing. They tell you whether the component store needs repair before you run the longer RestoreHealth step.
Dism /Online /Cleanup-Image /CheckHealthReads the corruption flag Windows has already recorded and reports whether the image is healthy, repairable or non-repairable. For a deeper scan, run Dism /Online /Cleanup-Image /ScanHealth, which takes several minutes.
You should see: DISM reports the image as healthy, repairable or non-repairable. Healthy needs no repair; repairable means you should run RestoreHealth next.
If DISM reports the image as non-repairable, Microsoft's advice is to stop repairing it and reinstall Windows instead.
3) Repair the Windows component store (DISM RestoreHealth)
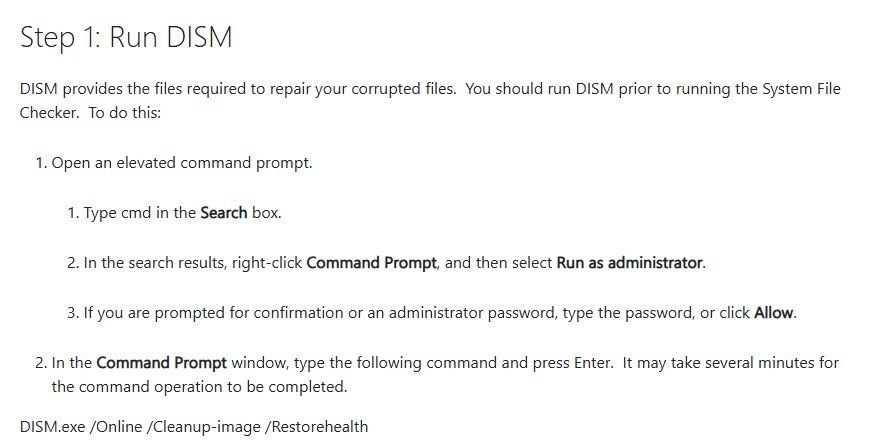
Windows Update installs files from the component store. When that store is damaged, updates fail with corruption errors until DISM repairs it.
DISM.exe /Online /Cleanup-image /RestorehealthScans the running Windows image and replaces damaged components with good copies, downloaded from Windows Update unless you give a /Source. It can take several minutes; leave the window open.
You should see: The restore operation completed successfully, or The operation completed successfully. If neither message appears, run the command again.
DISM writes its log to %WINDIR%\Logs\DISM\dism.log. You can also repair the Windows image offline with /Image: when Windows will not start.
4) Repair system files (SFC)
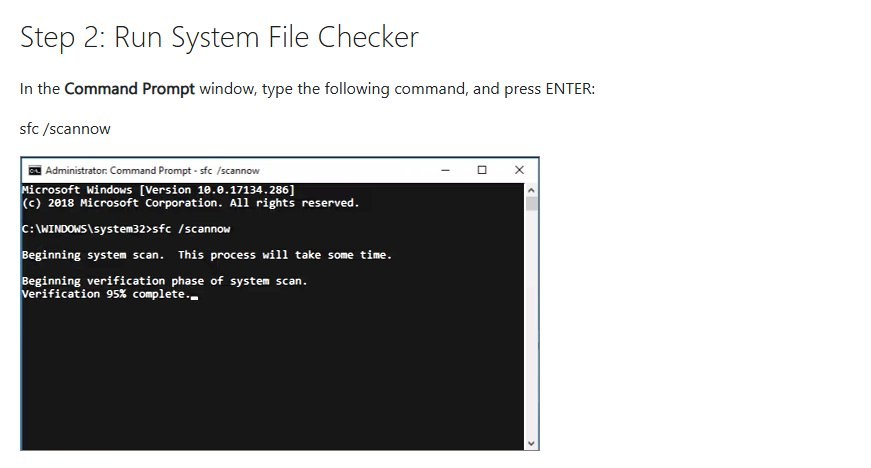
Run SFC in the same elevated window right after DISM succeeds. SFC copies replacement files from the store that DISM just repaired.
sfc /scannowChecks every protected Windows system file and replaces damaged or incorrect versions. Keep the window open until verification reaches 100%.
You should see: Windows Resource Protection did not find any integrity violations, or Windows Resource Protection found corrupt files and successfully repaired them.
Two other result messages need more work, covered under Troubleshooting 2 below. You can also run sfc /scannow in Safe Mode when it cannot finish in normal Windows.
5) Restart Windows (important)
Repaired files that were in use are only replaced at restart. Checking for updates before restarting can repeat the same error.
- Save your work and close all open apps.
- Select Start > Power.
- Select Update and restart if it appears. Otherwise select Restart.
- Sign in again and wait a minute for startup apps to settle.
6) Try Windows Update again
- On Windows 11, select Start > Settings > Windows Update > Check for updates.
- On Windows 10, select Start > Settings > Update & Security > Windows Update > Check for updates.
- Install everything offered, including updates that failed before.
- Restart when Windows asks, then select Check for updates again, because more updates can appear after the first batch.
- Open Update history and confirm the update that failed now shows as successfully installed.
Windows 10 reached end of support on October 14, 2025. The repair commands still work on it, but updates for it are limited.
Reset Windows Update components with net stop commands
DISM and SFC repair system files, but not the update download cache. If errors persist, rename the cache and the catroot2 signature folder so Windows rebuilds both.
- Open Command Prompt as administrator.
- Run
net stop bitsand wait for it to finish. - Run
net stop wuauserv. - Run
ren %systemroot%\softwaredistribution softwaredistribution.bak. - Run
ren %systemroot%\system32\catroot2 catroot2.bak. - Run
net start bits, thennet start wuauserv. - Close Command Prompt, restart the PC and check for updates.
Type each command on its own line and let it complete before the next. Windows downloads pending updates again afterwards, so the first check takes longer.
Tips, warnings, and troubleshooting
| Tip or warning | Why |
|---|---|
| Back up personal files before advanced repairs | Microsoft recommends a backup before command-line update fixes |
| Never close the window while DISM or SFC runs | An interrupted repair has to be run again from the start |
| Run DISM before SFC, not the other way round | SFC needs a healthy component store to copy from |
| Never delete the WinSxS folder by hand | Microsoft warns this can stop the PC booting and block future updates |
Avoid /ResetBase while troubleshooting |
It removes superseded components, so installed updates can no longer be uninstalled |
| Use a repair source of the same Windows version | Files from an older or different version may not match |
| Check date and time before retrying updates | Microsoft lists incorrect date and time as a cause of update failures |
Tip: Run from a local admin account if possible
Microsoft notes that some updates require administrator access. Run the repair from an account that is an administrator on this PC, so every command and every update has the rights it needs.
- Sign in with an account that has administrator rights on the PC.
- If no such account exists, ask the person who manages the PC to sign in and run the commands.
- To add a separate local account, select Start > Settings > Accounts > Other users > Add account and follow the prompts.
- Open the elevated terminal from that account and repeat steps 1 to 6.
On a work or school PC, Group Policy can control repair sources and updates. Ask IT before changing anything on a managed device.
Confirm Windows Update works after DISM and SFC
- Run
Dism /Online /Cleanup-Image /CheckHealthand confirm it reports the image as healthy. - Run
sfc /verifyonlyand confirm Windows Resource Protection did not find any integrity violations. - Open Settings > Windows Update select Check for updates and confirm no error appears.
- Open Update history and confirm the latest cumulative update shows as successfully installed.
Troubleshooting 1: DISM fails with “source files could not be found” (common)
DISM error 0x800f081f: the source files could not be found
Windows Update, often itself broken, could not supply the files DISM needed.
- Download an ISO of the same Windows version from Microsoft's software download page.
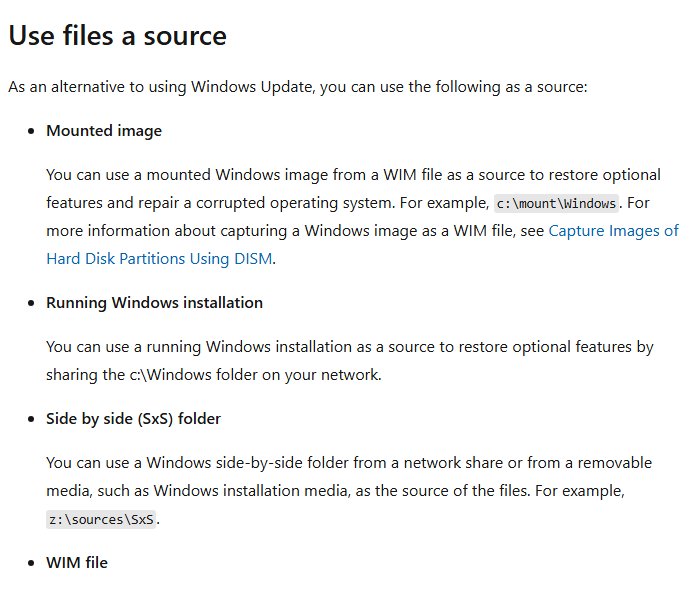
- Mount it from an elevated PowerShell window with
Mount-DiskImage -ImagePath "<path to the ISO>"and note its drive letter, for example E:. - Run
DISM /Get-ImageInfo /ImageFile:E:\sources\install.wimand note the Index whose Name matches your edition. - Run
DISM /Online /Cleanup-Image /RestoreHealth /Source:Wim:E:\sources\install.wim:<index> /LimitAccess. - Run
sfc /scannowafter DISM reports success.
DISM error 0x800f0906: files could not be downloaded
DISM cannot reach Windows Update.
- Confirm the PC is online and the date and time are set automatically.
- Run the Windows Update troubleshooter from Settings > System > Troubleshoot > Other troubleshooters.
- Retry RestoreHealth, or switch to the ISO source with
/LimitAccess.
Troubleshooting 2: SFC says it couldn’t fix some files
Windows Resource Protection found corrupt files but was unable to fix some of them
The store copy of some files is also damaged.
- Run
DISM.exe /Online /Cleanup-image /Restorehealthagain, with a/Sourceif it failed before. - Run
sfc /scannowagain. - If the message returns, run
findstr /c:"[SR]" %windir%\Logs\CBS\CBS.log >"%userprofile%\Desktop\sfcdetails.txt". - Open sfcdetails.txt on the desktop and note the files marked Cannot repair member file.
- Replace those files with good copies from a PC running the same Windows version, or reinstall Windows.
Windows Resource Protection could not perform the requested operation
SFC cannot finish while normal Windows is running.
- Open Settings > System > Recovery and select Restart now next to Advanced startup.
- Select Troubleshoot > Advanced options > Startup Settings > Restart.
- Choose Enable Safe Mode and sign in.
- Run
sfc /scannowfrom an administrator Command Prompt.
Troubleshooting 3: Windows Update still won’t work after DISM + SFC
The same update error code returns
The update cache or the update services are still broken.
- Run the Windows Update troubleshooter from Settings > System > Troubleshoot > Other troubleshooters.
- Reset the components with the
net stopandrencommands above. - Press Win + R, type
services.mscand confirm the Windows Update service starts.
Update fails with 0x800f0922 or not enough space
The drive is short of space for the update.
- Open Settings > System > Storage and remove temporary system files.
- Free at least 20 GB on a 64-bit Windows before a version upgrade.
- Disconnect any VPN and check for updates again.
Update fails with 0xC1900101
An incompatible driver blocks the update.
- Open Device Manager and expand Display adapters or Network adapters.
- Right-click the adapter, select Update driver and choose Search automatically for drivers.
- Unplug external hardware you do not need, then retry the update.
Errors continue after every fix
Disk errors or a component store too damaged to repair.
- Run
chkdsk /f C:from an administrator Command Prompt and restart when asked. - Run DISM and SFC once more.
- Back up your files and reinstall Windows, keeping your files and apps.
Repair Windows Update components with DISM and SFC FAQ
Should I run DISM or SFC first to fix Windows Update?
Run DISM first. Microsoft's update troubleshooting article runs DISM.exe /Online /Cleanup-image /Restorehealth before sfc /scannow, because SFC replaces damaged files with copies from the component store. If the store is damaged, SFC has nothing good to copy.
Does DISM RestoreHealth need an internet connection?
Only with the default source. DISM downloads replacement files from Windows Update. Without internet, mount a Windows ISO of the same version and add /Source:Wim:E:\sources\install.wim:<index> /LimitAccess so DISM uses the local files instead.
How long does DISM RestoreHealth take?
Microsoft describes RestoreHealth and ScanHealth as taking several minutes. The time depends on the PC and the amount of damage. Leave the elevated window open until DISM prints its final result, and run SFC only after that.
Do DISM and SFC delete my files or apps?
No. DISM repairs the Windows component store and SFC replaces protected system files. Neither touches personal files or installed apps. Microsoft still recommends a backup before advanced update troubleshooting.
Can I run DISM and SFC in PowerShell or Windows Terminal?
Yes. Both commands run the same way in Command Prompt, PowerShell and Windows Terminal. Open the window with Run as administrator first, because DISM servicing commands and SFC need an elevated session.
Is resetting Windows Update components the same as running DISM and SFC?
No. Resetting the components renames the SoftwareDistribution cache and the catroot2 folder so Windows downloads fresh update files. DISM and SFC repair system files. When updates keep failing, do both.
Does this work on Windows 10?
Yes. The DISM, SFC and reset commands are the same on Windows 10 and Windows 11. Windows 10 reached end of support on October 14, 2025, but the repair commands still work on it.