To turn on VSync in Windows 11, open the game's Graphics or Video settings and switch V-Sync (sometimes labelled Vertical Sync) to On, or force it for every game in NVIDIA Control Panel > Manage 3D settings > Vertical sync > On.
This guide covers the in-game switch, the NVIDIA driver setting, what the Windows 11 Graphics page can and cannot do, G-SYNC and variable refresh rate, how to check VSync is active, and fixes for stutter, lag and tearing.
Method 1: Enabling VSync Through Game Settings
The game's own switch is the fastest route and works the same on NVIDIA, AMD and Intel graphics. NVIDIA's driver default, Use the application setting, hands this decision to the game, so the in-game option is the one that counts on most PCs.
- Launch the game and open its main menu.
- Select Settings or Options, then open the Graphics, Video or Display tab.
- Find V-Sync, VSync or Vertical Sync. Some games place it under an Advanced sub-menu.
- Set it to On (or Enabled). If the game offers Adaptive or Triple buffered, see the table further down before choosing.
- Select Apply or Save, and restart the game if it asks you to.
Labels differ between games, but the setting almost always sits next to the frame-rate limit and the display mode (Fullscreen, Borderless or Windowed).
Which VSync route should you use?
Pick the row that matches your hardware and goal. A driver-level setting overrides the game, so change one place at a time to avoid confusion.
| Your situation | Use this | Why |
|---|---|---|
| Any GPU, one game tears | The game's V-Sync option (Method 1) | Fastest, and only affects that game |
| NVIDIA GPU, want VSync in every game | NVIDIA Control Panel > Manage 3D settings > Global Settings > Vertical sync > On | Applies to all Direct3D and OpenGL apps |
| NVIDIA GPU, one stubborn game ignores its own switch | NVIDIA Control Panel > Program Settings tab > add the game > Vertical sync > On | Per-program setting overrides the game |
| Frame rate often drops below the refresh rate | NVIDIA Adaptive vertical sync | VSync turns off below the refresh rate, which reduces stutter |
| G-SYNC or variable refresh rate (VRR) monitor | G-SYNC or Windows 11 VRR (see the G-Sync and FreeSync section) | Removes tearing with less lag and stutter than fixed VSync |
| AMD or Intel graphics | The game's V-Sync option first | Works on every GPU without extra software |
System Requirements
VSync itself needs nothing special: any game that offers the option can use it. The extras in this guide have real requirements, listed below. If you are unsure which graphics card is in your PC, check your GPU first.
| Feature | What you need | Where it is documented |
|---|---|---|
| In-game VSync | A game with a V-Sync option | Game's own settings |
| NVIDIA Vertical sync override | An NVIDIA GPU with NVIDIA Control Panel, and the display connected to the NVIDIA GPU | NVIDIA Control Panel help |
| NVIDIA Fast vertical sync | Pascal or later NVIDIA GPU, single-GPU setup | NVIDIA Control Panel help |
| NVIDIA Adaptive vertical sync | Monitor Technology set to ULMB or Fixed Refresh Rate | NVIDIA Control Panel help |
| G-SYNC | A G-SYNC capable display | NVIDIA Control Panel help |
| Optimizations for windowed games | Windows 11, a DirectX 10 or DirectX 11 game in windowed or borderless mode | Microsoft Support |
| Dynamic refresh rate (DRR) | A display that supports VRR and at least 120 Hz | Microsoft Support |
Method 2: Using NVIDIA Control Panel
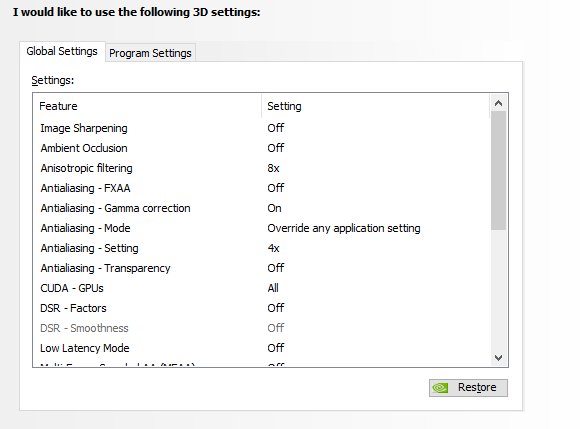
NVIDIA's Vertical sync setting synchronises the application's frame rate with the display refresh rate to eliminate tearing. Set it once under Global Settings for every game, or under Program Settings for one game only.
- Right-click an empty area of the desktop and select NVIDIA Control Panel, or type
NVIDIA Control Panelin the Start search box and open it. - In the left pane, select Manage 3D settings.
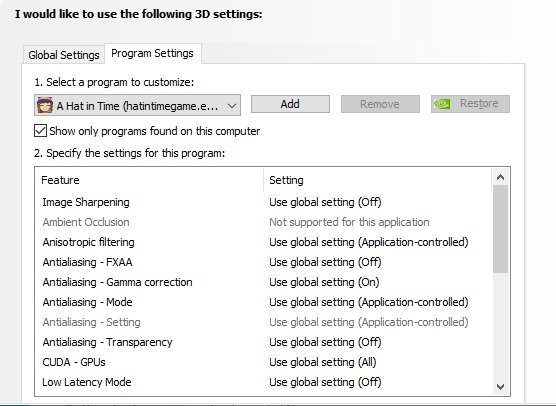
- Stay on the Global Settings tab to change every game, or open Program Settings, select the game in Select a program to customize (use Add if it is missing).
- Scroll the settings list to Vertical sync and open its drop-down.
- Choose On to eliminate tearing, or Adaptive or Fast as described in the table below.
- Select Apply at the bottom of the window, then restart the game.
If you use OpenGL games, also turn on Triple buffering on the same page. NVIDIA states it improves performance when Vertical sync is on, and it applies to OpenGL applications only.
NVIDIA Vertical sync options explained
The drop-down has more than On and Off. Each value below is quoted from NVIDIA's own Control Panel help.
| Value | What it does | When to pick it |
|---|---|---|
| Use the application setting | The game's own V-Sync option decides | Default; leave it when you control VSync in-game |
| Off | No synchronisation; best raw performance | Competitive play where lag matters more than tearing |
| On | Frame rate locked to the refresh rate; eliminates tearing | Tearing is the main problem |
| Adaptive | VSync on only when the frame rate is faster than the refresh rate | Frame rate often dips below the refresh rate |
| Adaptive 1/2 refresh rate | VSync on only when the frame rate beats half the refresh rate | Very demanding games on a weaker GPU |
| Fast | Improves latency without introducing tearing | Frame rate far above the refresh rate; Pascal or later GPU |
The two Adaptive values appear only when Monitor Technology is set to ULMB or Fixed Refresh Rate, so they are hidden while G-SYNC is selected.
Method 3: Using Windows Graphics Settings
The Windows 11 Graphics page documented by Microsoft has no V-Sync switch. What it offers is Optimizations for windowed games, which moves DirectX 10 and DirectX 11 games in windowed or borderless mode to the flip-model presentation. Microsoft says this reduces frame latency and enables variable refresh rate on supported displays.
- Select Start, then Settings.
- Go to System > Display > Graphics.
- Under Default settings, turn on the switch for Optimizations for windowed games.
- To change one game only, select it under Custom options for apps, then select Options.
- Set Graphics preference to High performance on a PC with two GPUs, then select Save.
- Restart the game.
Turning on Auto HDR switches this optimisation on automatically. To turn the optimisation off later, turn Auto HDR off first.
Intel graphics users set VSync in the game itself. To reach Intel's own control app for display settings, open Intel Graphics Command Center.
Check and set your refresh rate first
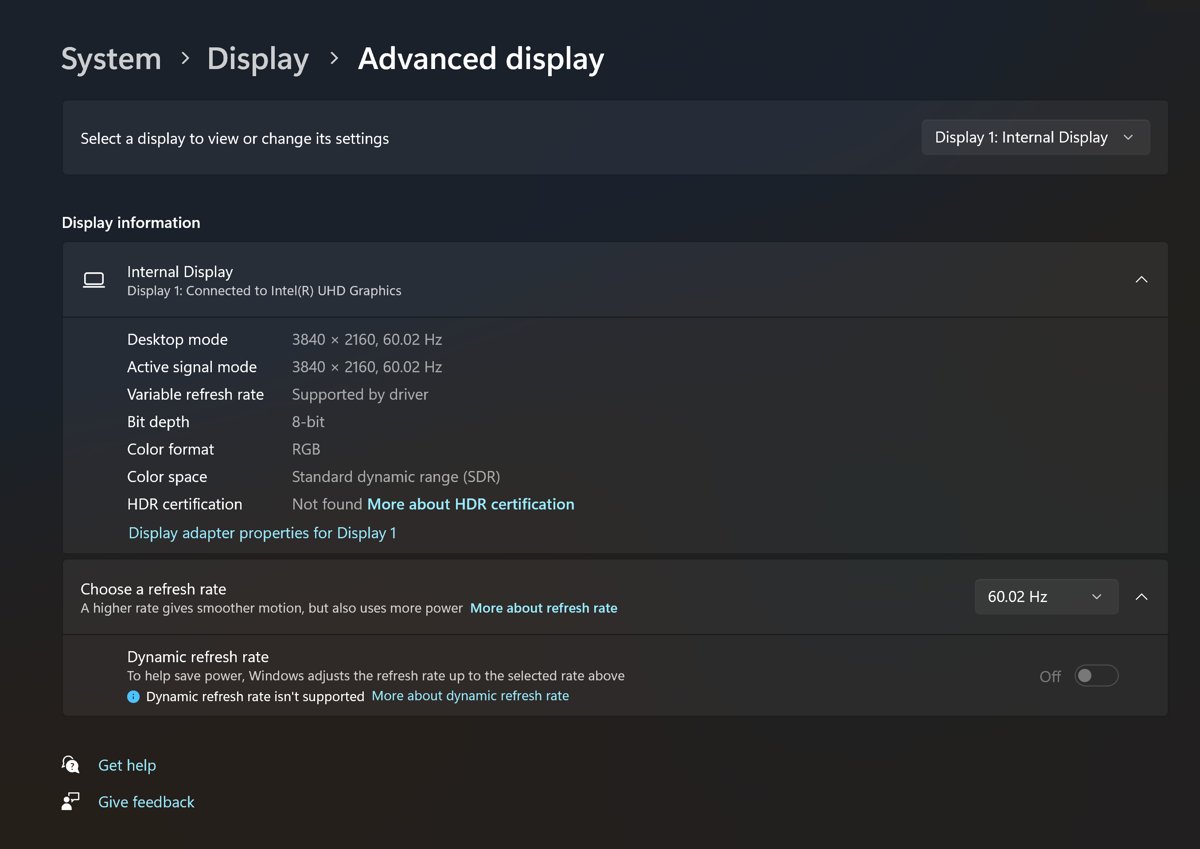
VSync locks the frame rate to the refresh rate, so a monitor left at 60 Hz caps a 144 Hz panel at 60 fps. Check the rate before turning VSync on.
- Select Start > Settings > System > Display > Advanced display.
- Read the Display information panel. It shows the current resolution, the refresh rate and whether the display supports variable refresh rate (VRR).
- Pick the highest rate next to Choose a refresh rate.
- Avoid rates marked with an asterisk (*) unless you accept a resolution change, because those rates do not support the current resolution.
On a laptop with Dynamic refresh rate turned on, Microsoft notes it can limit the maximum refresh rate of games not designed for VRR. Turn it off on the same page if a game seems stuck at a lower rate.
Method 4: Verifying VSync Status
With VSync on, the frame rate cannot exceed the refresh rate. NVIDIA's own example: VSync typically caps a 60 Hz screen at 60 frames per second.
- Turn on the game's frame-rate counter, usually found near V-Sync in the same Graphics or Display menu.
- Stand still in a light scene. The counter should sit at or just under your refresh rate, for example 60, 144 or 165.
- Pan the camera quickly left and right. Horizontal tear lines across the screen should be gone.
- If the counter reads far above the refresh rate, VSync is off. Check the game setting and, on NVIDIA, that Vertical sync is not set to Off under Program Settings for that game.
With G-SYNC or VRR active, the frame rate floats below the refresh rate without tearing. That is expected and is not a VSync failure.
Understanding VSync
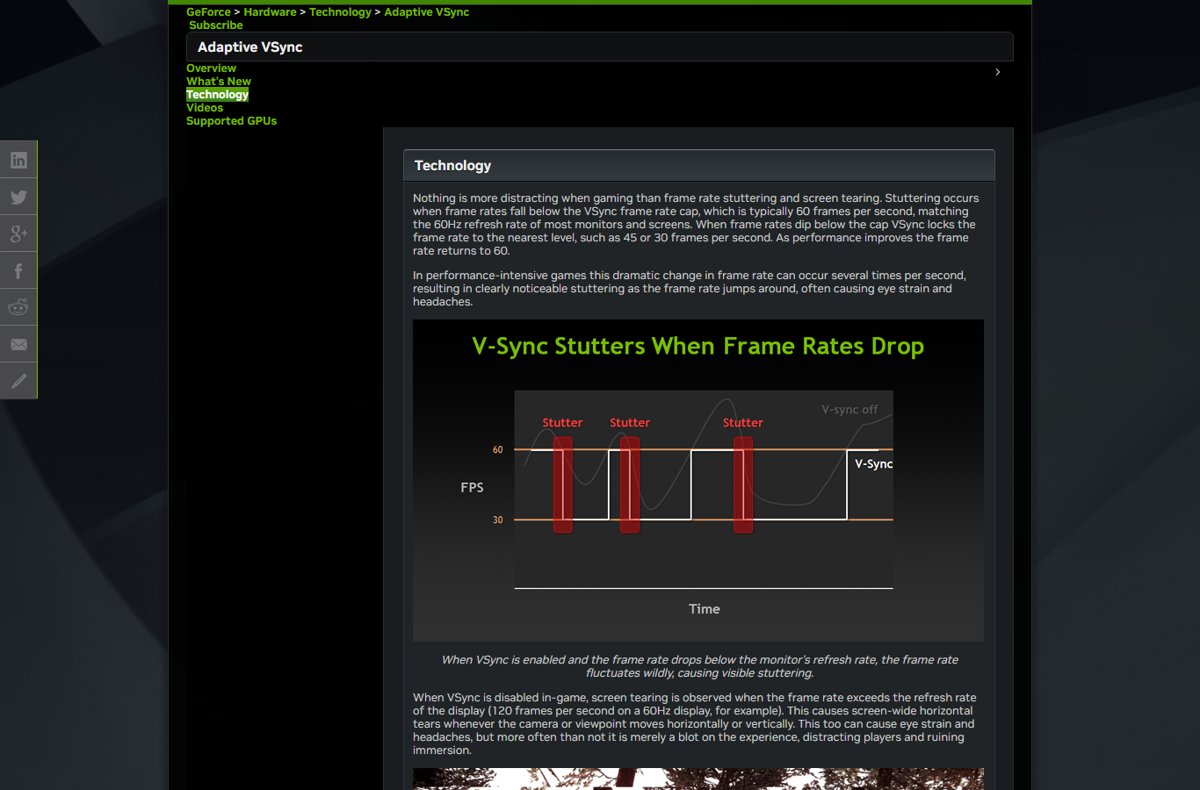
Tearing happens when the GPU sends frames faster than the screen refreshes, such as 120 fps on a 60 Hz display. VSync holds each frame until the display's next vertical blank, so a full image is always drawn.
| Behaviour | VSync off | VSync on |
|---|---|---|
| Frame rate above refresh rate | Uncapped, with horizontal tearing | Capped at the refresh rate, no tearing |
| Frame rate below refresh rate | Varies freely | Can drop in steps, for example 60 to 45 or 30, causing stutter |
| Input latency | Lowest | Higher, because frames wait for the refresh |
| In code (DirectX) | Sync interval 0 | Sync interval 1 to 4: present after the nth vertical blank |
Alternative Technologies: G-Sync and FreeSync
Variable refresh rate flips the approach: the monitor adjusts its refresh to the GPU instead of the GPU waiting for the monitor. Microsoft notes that many popular games use VRR automatically when the display supports it.
| Technology | What it does | How to turn it on |
|---|---|---|
| NVIDIA G-SYNC | Eliminates tearing while minimising input lag and stutter; needs a G-SYNC capable display | NVIDIA Control Panel > Manage 3D settings > Monitor Technology > G-SYNC |
| NVIDIA Adaptive VSync | Switches VSync on and off to keep the frame rate stable | Vertical sync > Adaptive (needs Fixed Refresh Rate or ULMB) |
| AMD FreeSync | AMD's variable refresh rate technology for FreeSync monitors | Set in AMD's graphics software; confirm the monitor supports it |
| Windows 11 VRR | Lets DirectX 10/11 windowed and borderless games use VRR | Optimizations for windowed games (Method 3) |
| Dynamic refresh rate (DRR) | Raises refresh for games and scrolling, lowers it to save battery | Settings > System > Display > Advanced display > Dynamic refresh rate |
Microsoft's developer documentation states that VRR displays require tearing to be enabled, also known as vsync-off support. With a working VRR or G-SYNC setup, in-game VSync is not what removes the tearing.
How to turn off VSync in Windows 11
- In the game, open Settings > Graphics (or Video) and set V-Sync to Off.
- On NVIDIA, open NVIDIA Control Panel > Manage 3D settings.
- Set Vertical sync to Off, or to Use the application setting so the game's own switch decides.
- Check the Program Settings tab too, because a per-game value overrides the global one.
- Select Apply and restart the game.
To reset every NVIDIA 3D setting at once, select Restore on the Global Settings tab.
Understanding Potential Issues
Stutter or frame rate jumping between 60, 45 and 30
Classic VSync drops to the next lower step when the GPU cannot hold the refresh rate.
- On NVIDIA, set Vertical sync to Adaptive so VSync switches off below the refresh rate.
- Lower the heaviest in-game graphics settings until the frame rate holds at the refresh rate.
- If the display supports G-SYNC or VRR, use that instead of fixed VSync.
Input lag after turning VSync on
Frames wait for the next refresh, and extra queued frames add delay.
- On a Pascal or later NVIDIA GPU, try Vertical sync > Fast.
- Use Low Latency Mode in Manage 3D settings; it limits how many frames the CPU prepares ahead of the GPU.
- Set Max Frame Rate slightly below the refresh rate, which NVIDIA notes can reduce system latency.
Tearing still visible with VSync on
A driver or game setting is overriding the switch you changed.
- Check that NVIDIA Vertical sync is not Off under Program Settings for that game.
- Confirm the display is connected to the NVIDIA GPU; the setting only applies to displays attached to it.
- Switch the game between Fullscreen and Borderless, then test again.
Frame rate stuck at 60 on a high refresh rate monitor
Windows is running the display at 60 Hz, so VSync caps the game at 60 fps.
- Open Settings > System > Display > Advanced display.
- Select the highest value next to Choose a refresh rate.
- If Dynamic refresh rate is on and a game stays low, turn it off.
NVIDIA Vertical sync options missing or VSync not taking effect
An outdated or generic graphics driver lacks the full control panel.
- Open Settings > Windows Update > Advanced options > Optional updates and install any display driver offered.
- Or press Windows key + X, select Device Manager, expand Display adapters, right-click the GPU and select Update driver.
- Get drivers from the GPU maker or PC maker only, never from a third-party driver site.
- If a new driver makes things worse, use Roll Back Driver on the Driver tab of the GPU's Properties.
Conclusion
Turn VSync on in the game first, and move to NVIDIA's Vertical sync override only when a game ignores its own switch or you want one rule for every title. On a G-SYNC or VRR monitor, variable refresh rate removes tearing with less lag and stutter than fixed VSync, so use it where the display supports it and keep classic VSync for fixed 60 Hz screens.
Frequently Asked Questions
Should I turn VSync on?
Turn VSync on if you see horizontal tearing and your frame rate usually stays at or above your refresh rate. Leave it off for competitive games where input lag matters more, and prefer G-SYNC or variable refresh rate when your monitor supports it.
How do I turn on VSync in Windows 10?
The steps are the same as on Windows 11. Switch V-Sync on in the game's graphics settings, or set Vertical sync to On in NVIDIA Control Panel > Manage 3D settings. Only the Windows Optimizations for windowed games switch is a Windows 11 feature.
How do I turn off VSync in Windows 11?
Set V-Sync to Off in the game's graphics menu. On NVIDIA hardware, also open NVIDIA Control Panel > Manage 3D settings and set Vertical sync to Off or Use the application setting, checking both the Global Settings and Program Settings tabs.
How do I turn off VSync in Windows 11 with Intel graphics?
Turn off V-Sync in the game's own graphics settings, which works on Intel graphics like any other GPU. Intel's display options live in Intel Graphics Command Center or Intel Graphics Software, depending on your processor generation.
Should you use VSync in windowed mode?
In windowed or borderless mode, first turn on Optimizations for windowed games in Settings > System > Display > Graphics. It moves DirectX 10 and 11 games to the flip model, lowering latency and allowing variable refresh rate. Turn in-game VSync on only if tearing remains.
How do I enable VSync on a PC?
Open the game's Settings or Options, go to Graphics or Video, and set V-Sync to On. For every game at once on an NVIDIA GPU, set Vertical sync to On under Global Settings in Manage 3D settings.
How do I change VSync settings?
Change VSync where it was set: in the game's graphics menu, or in NVIDIA Control Panel under Manage 3D settings > Vertical sync. The NVIDIA drop-down offers Use the application setting, Off, On, Adaptive, Adaptive 1/2 refresh rate and Fast.
Where do I open VSync settings in Windows 11?
Windows 11 Settings has no VSync switch. Open it inside the game's graphics menu, or right-click the desktop, select NVIDIA Control Panel and go to Manage 3D settings > Vertical sync.