Windows has two built-in screen recorders: press Windows logo key + Shift + R to record any region with Snipping Tool, or Windows logo key + Alt + R to record a game or app with Xbox Game Bar.
This guide covers both tools step by step, their shortcuts, where the MP4 files land, how to add sound, and what to do when a recording will not start.
How to record with Snipping Tool
Snipping Tool is the only built-in recorder that captures any part of the screen, including the desktop and File Explorer. It ships with Windows 11 and records an MP4 video snip of the area you draw.
- Select Start, type snipping tool, and select Snipping Tool in the results.
- Select the Record button in the Snipping Tool window.
- Select New. The screen dims so you can pick an area.
- Drag a rectangle around the part of the screen you want to record.
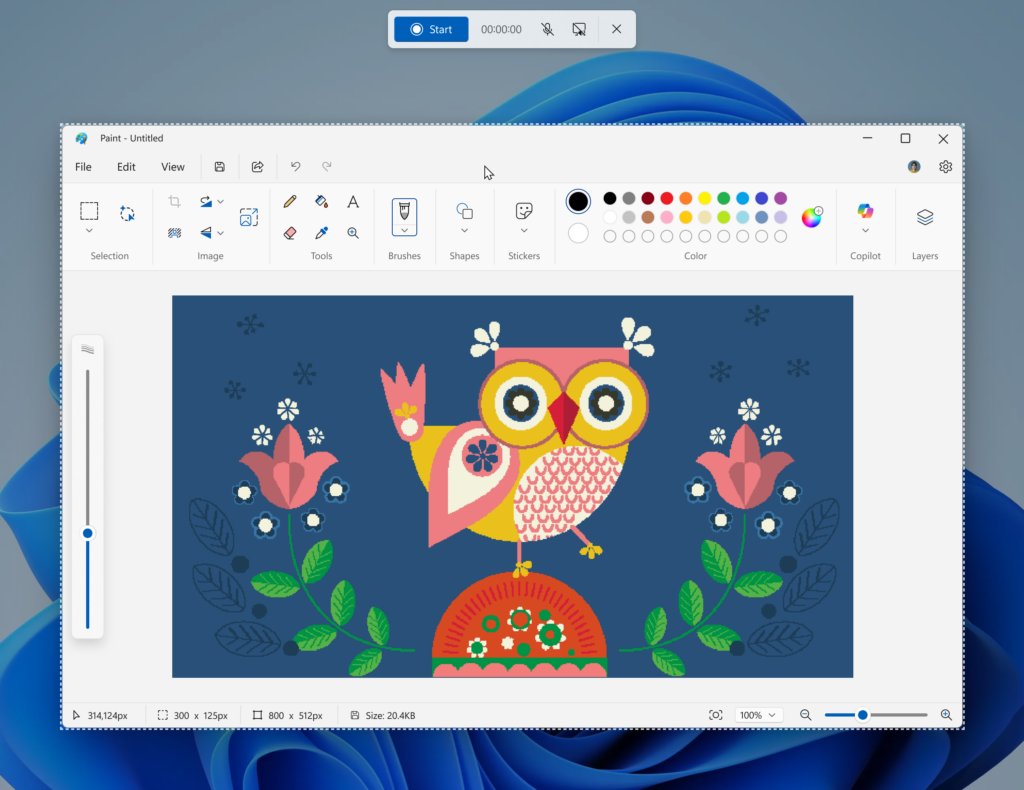
- Select Start and wait for the short countdown to finish.
- Do what you want to show on screen.
- Select Stop on the capture bar when you are done.
- Save the recording as it is, or select Edit in Clipchamp to trim it and add captions or audio.
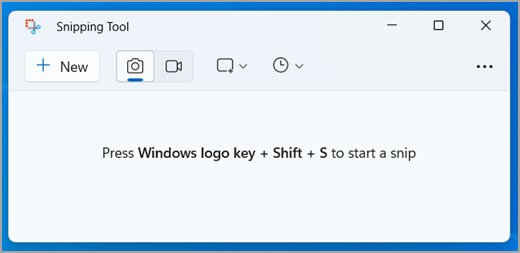
To skip the first three steps, press Windows logo key + Shift + R. Microsoft says this shortcut opens the Snipping Tool overlay straight in video mode.
Good use cases for Snipping Tool vs Game Bar
Both tools save MP4 video and cost nothing. They differ in what they can see and how fast they start.
| What you want to record | Use this | Why |
|---|---|---|
| A how-to clip of the desktop, File Explorer or Settings | Snipping Tool | It records any rectangle you draw, not one app |
| Part of a web page or one area of a window | Snipping Tool | You set the exact region before recording starts |
| A PC game or a single app with its sound | Xbox Game Bar | It records the focused game or app and can include game, app and mic audio |
| A moment that already happened in a game | Xbox Game Bar | Background recording keeps the last few moments ready to save |
| A recording on Windows 10 | Xbox Game Bar | Snipping Tool screen recording is a Windows 11 feature, so screen recording on Windows 10 runs through Game Bar |
| A recording you want to trim, caption or narrate | Snipping Tool | Edit in Clipchamp opens the clip in a video editor |
What the Snipping Tool now does
Snipping Tool started as a screenshot app. Microsoft has added recording features in a string of app updates, so the version you have decides which options appear. This table is an overview of each one.
| Feature | What it does | Where Microsoft documents it |
|---|---|---|
| Video snip | Records a rectangular selection of any part of the screen | Snipping Tool support page |
| Windows logo key + Shift + R | Opens the capture overlay ready to record | Windows keyboard shortcuts page |
| PC audio and microphone | Optionally records system sound and a voice-over, with a choice of recording device | Windows Insider blog, Snipping Tool 11.2307.44.0 |
| Auto-save to Screen Recordings | Saves recordings as MP4 in the Screen Recordings subfolder of Videos by default | Windows keyboard shortcuts page |
| Custom save folder | Lets you pick a new default folder for screenshots and recordings in app settings | Windows Insider blog, Snipping Tool 11.2408.13.0 |
| Trim | Cuts the start and end of a recording with grabbers | Windows Insider blog, Snipping Tool 11.2501.7.0 |
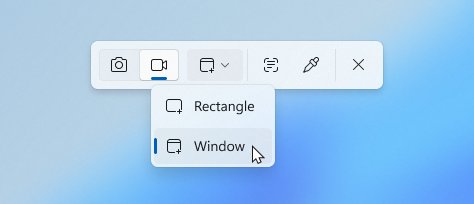
| Window mode | Sizes the recording area to one app window you pick | Windows Insider blog, Snipping Tool 11.2507.14.0 |
| Edit in Clipchamp | Sends the clip to Clipchamp for captions, audio and edits | Snipping Tool support page |
Features announced on the Windows Insider blog reach Insiders first. Update Snipping Tool from Microsoft Store > Library if an option in this table is missing.
Snipping Tool (Windows 11) — record a region fast
The keyboard route starts a recording from any screen without opening the app first.
- Press Windows logo key + Shift + R.
- Drag a rectangle over the area you want to record, or drag across the whole screen for a full-screen clip.
- Turn the microphone or system audio buttons on the capture bar on or off if your version shows them.
- Select Start.
- Select Stop when you are done.
- Find the MP4 in Videos > Screen Recordings, or save a copy with Save as in the Snipping Tool window.
If the shortcut does nothing, work through the fixes for a Snipping Tool shortcut that is not working; the same causes stop the recording shortcut.

Snipping Tool (Windows 11): precise region recordings and quick edits
Precision comes from setting the region before you press Start. Once recording begins, the region stays fixed, so a window that moves will slide out of the shot.
Recent versions let you trim inside Snipping Tool itself. Clipchamp handles everything heavier.
- For one app window, toggle to Record in the capture toolbar, open the Recording area drop-down and choose window mode, then pick the window.
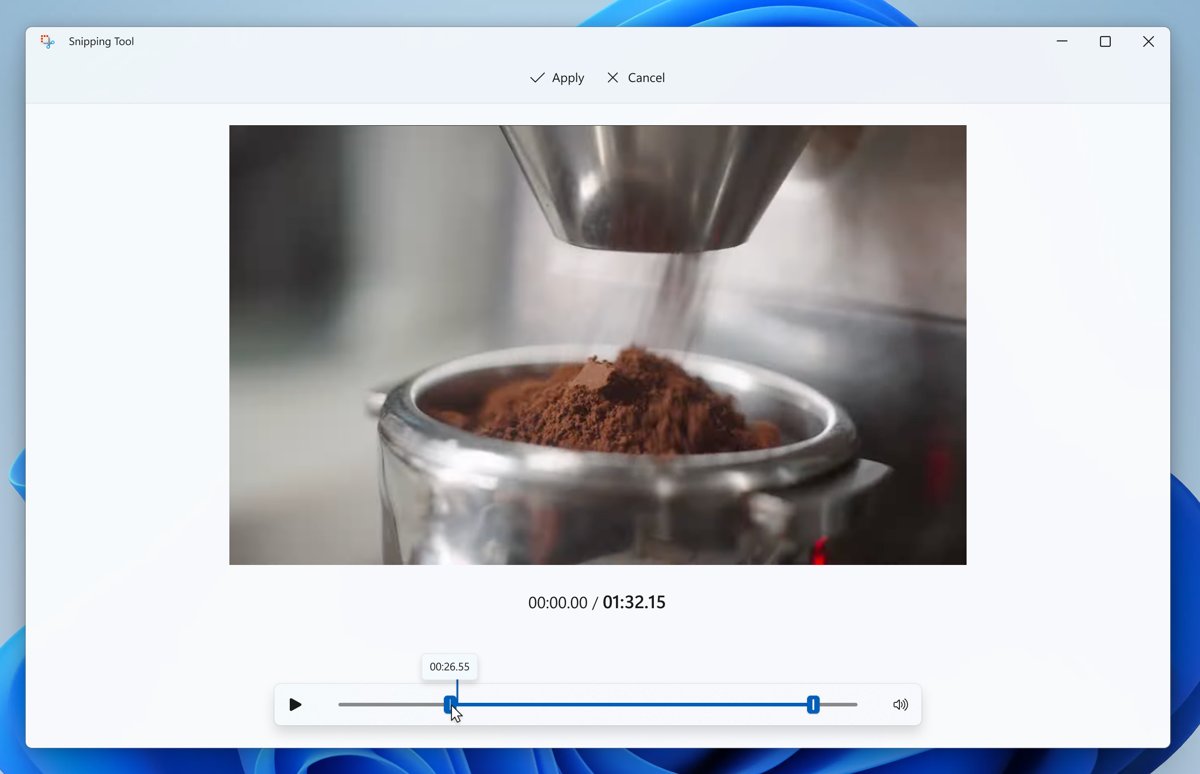
- After you stop, open the recording in Snipping Tool and select Trim at the top of the window.
- Drag the grabbers to the new start and end points.
- Select Apply to keep the cut, or Cancel to discard it.
- For captions, select Edit in Clipchamp, open the Captions tab and select Transcribe media.
- For sound changes, open the Audio tab in Clipchamp, set the volume between 0 and 200%, or select Detach audio.
Microsoft notes that you can re-enter Trim later to undo or adjust a cut.
Xbox Game Bar: the quick, reliable recorder
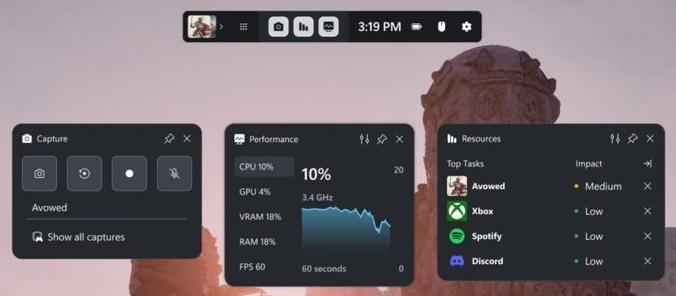
Xbox Game Bar is built into Windows 10 and Windows 11 and opens over any game with Windows logo key + G. Microsoft describes it as a way to record a video clip of a game or app, for example to show a usability problem to a developer.
| Fact | Xbox Game Bar on Windows 10 and 11 |
|---|---|
| What it records | The game or app you are using, as an MP4 clip |
| Screenshots | PNG files with Windows logo key + Alt + Print Screen |
| Save location | Videos > Captures, file named after the game or app with the date and time |
| Video card | Must support Intel Quick Sync H.264 or later, NVIDIA NVENC or AMD VCE to capture clips |
| Windows version | Windows 10 22H2 or newer is needed for some features since October 2024 |
| Windows N editions | May need the Media Feature Pack first |
| Xbox app | Needed, with sign-in, for many Xbox features inside Game Bar, not for basic recording |
If Windows logo key + G opens nothing, switch Xbox Game Bar on in Settings first.
Xbox Game Bar: what it is and when to use it
Use Game Bar when the thing you want to record is one game or app that has focus. Use Snipping Tool when you need the desktop, several windows or a precise area.
Pick Xbox Game Bar for gameplay and single-app clips with sound, and for saving a moment after it happened. It records the focused app with one shortcut, can mix game, app, system and microphone audio, and keeps a background buffer when you turn that on. It is also the only built-in recorder on Windows 10.
Prep: enable Game Bar and configure captures
Game Bar has to be switched on before any of its shortcuts respond. The audio choice matters most: without it, a tutorial clip can come out silent.
- Press Windows logo key + I to open Settings.
- Type xbox in the search box and select Enable Xbox Game Bar.
- Turn the Enable Xbox Game Bar toggle on.
- Press Windows logo key + G to open Game Bar, then select the Settings (gear) button.
- Select Capturing.
- Under the audio options, select All to record the game, an enabled mic, apps and system sound.
- Press Windows logo key + G to close Game Bar.
The other capture options, including the save location, background recording, maximum clip length, audio and video frame rate and quality, are in Settings > Gaming > Captures. If you never want a background buffer, turn off background recording there.
Game Bar — fastest way to record an app
- Open the game or app you want to record and click inside it so it has focus.
- Press Windows logo key + Alt + R to start recording.
- Press Windows logo key + Alt + M to turn the microphone on or off during the recording.
- Play the game or use the app until you have what you need.
- Press Windows logo key + Alt + R again to stop.
- Open Videos > Captures in File Explorer to find the MP4.
Game Bar — save the last few seconds
This only works when background recording is on before the moment happens. Game Bar then keeps the most recent stretch of play ready to save as a clip.
- Press Windows logo key + G and select the Settings (gear) button.
- Tick the background recording check box, or turn on background recording in Settings > Gaming > Captures.
- Close Game Bar and play as normal.
- When something worth keeping happens, press Windows logo key + G.
- Select Record last in the capture controls to save the recent moments as a clip.
- Find the clip under Gallery in the Game Bar widget menu or in Videos > Captures.
Background recording stays on until you switch it off, so turn it off again in Settings > Gaming > Captures once you no longer need it.
Xbox Game Bar hotkeys and quick workflow
| Press | What it does |
|---|---|
| Windows logo key + G | Open or close Game Bar |
| Windows logo key + Alt + R | Start or stop recording the focused game or app |
| Windows logo key + Alt + M | Turn the microphone on or off while recording |
| Windows logo key + Alt + Print Screen | Save a PNG screenshot to Videos > Captures |
| Windows logo key + I, then search xbox | Reach the Enable Xbox Game Bar switch |
The quick workflow is three keys: click into the app, press Windows logo key + Alt + R twice to start and stop, and open Captures.
Working with the recorded files
Both tools save MP4 files automatically, but to different folders. Open the folder and play the file to check picture and sound before you share it.
| Recorded with | Default folder | How to open it fast |
|---|---|---|
| Snipping Tool | Videos > Screen Recordings | Open File Explorer, select Videos, then Screen Recordings |
| Xbox Game Bar clips | Videos > Captures | Press Windows logo key + G and open Gallery |
| Xbox Game Bar screenshots | Videos > Captures (PNG) | Same folder as the clips |
| Windows logo key + Print Screen screenshots | Pictures > Screenshots | Open File Explorer, select Pictures, then Screenshots |
| PowerPoint screen recording | Inside the slide until you save it | Right-click the video frame and select Save Media as |
To move Snipping Tool's default folder, select See more > Settings in the app. Game Bar's location is listed under Settings > Gaming > Captures.
Quick start cheat sheet (step-by-step)
| Goal | Press or select | File you get |
|---|---|---|
| Record an area of the screen | Windows logo key + Shift + R, drag, Start, Stop | MP4 in Videos > Screen Recordings |
| Record a game or app | Click into it, Windows logo key + Alt + R, then again to stop | MP4 in Videos > Captures |
| Save the last few moments of a game | Background recording on, Windows logo key + G, Record last | MP4 in Videos > Captures |
| Add your voice to a Game Bar clip | Windows logo key + Alt + M while recording | Same MP4 with mic audio |
| Trim a Snipping Tool clip | Open it, select Trim, drag the grabbers, Apply | Trimmed MP4 |
| Take a still screenshot instead | Windows logo key + Shift + S or Print Screen | Image on the clipboard |
For a still image, the full set of Windows 11 screenshot shortcuts gives you more options than the two in this table.
When built-in tools aren't enough: alternatives and when to pick them
Snipping Tool and Game Bar cover short clips. Longer lessons, multi-source recordings and narrated presentations suit other Microsoft tools or a dedicated recorder.
| Tool | Pick it when | How it starts |
|---|---|---|
| PowerPoint screen recording | The clip belongs in a slide deck, or you want recorded pointer and audio by default | Insert > Screen Recording, then Windows logo key + Shift + E to select an area or Shift + B for the whole screen |
| Clipchamp | You want to edit, caption and export in the same app | Edit in Clipchamp from Snipping Tool |
| NVIDIA app or GeForce overlay | You have an NVIDIA card and want game capture outside Game Bar | The overlay from the NVIDIA software |
| A dedicated recorder | You need scenes, several sources or long sessions | The recorder's own setup |
PowerPoint pauses with Windows logo key + Shift + D and stops with Windows logo key + Shift + Q. The minimum area it records is 64 x 64 pixels. On NVIDIA hardware, you can also record the desktop with Nvidia Share.
Privacy, security and practical caveats
| Caveat | What it means for your recording |
|---|---|
| Everything in the region is captured | Notifications, open tabs and personal details inside the area end up in the video |
| Audio may include system sound | With All selected in Game Bar, chat apps and alerts are recorded too |
| Background recording runs constantly | It keeps recent play ready to save until you switch it off |
| Snipping Tool region is fixed | If the window moves or another window covers it, the recording does not follow |
| Files save automatically | Clips you did not mean to keep stay in Screen Recordings or Captures until you delete them |
| Game Bar clips need a supported encoder | Screenshots work on any PC, video clips need Quick Sync, NVENC or VCE |
Practical tips and best practices for clean recordings
| Tip | Why it helps |
|---|---|
| Close or hide what you do not want shown before you press Start | The region records everything visible inside it |
| Click inside the app before Windows logo key + Alt + R | Game Bar records the app that has focus |
| Set Game Bar audio to All before a tutorial | Your voice and the system sound both land in the clip |
| Choose the right microphone in Snipping Tool settings | Microsoft lets you pick a preferred recording device before you start |
| Draw the smallest region that shows the task | Smaller clips are easier to read and to share |
| Trim the dead seconds at the start and end | Trim in Snipping Tool removes the countdown and the stop click |
Troubleshooting common issues
Windows logo key + G or Windows logo key + Alt + R does nothing
Game Bar is switched off, or the app you want to record does not have focus.
- Press Windows logo key + I, search xbox, and turn on Enable Xbox Game Bar.
- Click inside the game or app, then press Windows logo key + Alt + R again.
- On Windows 10, check Settings > System > About and update to 22H2 or newer.
Game Bar takes screenshots but will not record clips
The video card does not offer one of the encoders Game Bar needs.
- Check that your graphics hardware supports Intel Quick Sync H.264, NVIDIA NVENC or AMD VCE.
- Update the graphics driver from the card maker's site.
- Use Snipping Tool on Windows 11 instead, which does not depend on Game Bar.
Game Bar does not work on a Windows N edition
N editions ship without some media components.
- Install the free Media Feature Pack for your Windows N version from Microsoft.
- Restart the PC.
- Try Windows logo key + Alt + R again.
The recording has no sound
Game Bar is set to game audio only, or Snipping Tool audio buttons are off.
- In Game Bar, open Settings > Capturing and select All.
- In Snipping Tool, turn on the microphone or system audio buttons on the capture bar before you select Start.
- Pick the right recording device in Snipping Tool settings if you have more than one microphone.
Windows logo key + Shift + R does nothing or a 'Select an app to open this ms-screenclip link' box appears
Snipping Tool is out of date, or Windows has no app linked to the capture link.
- Open Microsoft Store, select Library, and install any Snipping Tool update.
- If the ms-screenclip pop-up appears, choose Snipping Tool.
- Open Snipping Tool from Start and select Record to confirm recording is available.
Cannot find the recording
The two tools save to different folders, or the Snipping Tool folder was changed.
- Check Videos > Screen Recordings for Snipping Tool clips.
- Check Videos > Captures for Game Bar clips.
- In Snipping Tool, select See more > Settings to see the current save folder.
Windows built-in screen recording FAQ
Does Windows 11 have a built-in screen recorder?
Yes, two. Snipping Tool records any area of the screen with Windows logo key + Shift + R, and Xbox Game Bar records the focused game or app with Windows logo key + Alt + R. Both save MP4 files and need no extra download.
Does Windows 10 have a built-in screen recorder?
Yes. Xbox Game Bar is built into Windows 10 and records the game or app you are using with Windows logo key + Alt + R. Snipping Tool screen recording is a Windows 11 feature, so Windows 10 users rely on Game Bar or PowerPoint.
Where are Snipping Tool screen recordings saved?
By default they save as MP4 files in the Screen Recordings subfolder of your Videos folder. You can pick a different default folder in Snipping Tool by selecting See more, then Settings.
Where does Xbox Game Bar save recordings?
Game Bar saves clips as MP4 files in the Captures folder inside Videos. Each file name contains the game or app name and the date and time. Screenshots taken with Windows logo key + Alt + Print Screen land in the same folder as PNG files.
Does Snipping Tool record audio?
Yes, in current versions. Microsoft added optional PC audio and microphone recording to Snipping Tool, with a choice of recording device and default audio settings in the app. Turn the audio buttons on in the capture bar before you select Start.
How do I record my voice with Game Bar?
Press Windows logo key + Alt + M while recording to turn the microphone on or off. To capture your voice and system sound together, open Game Bar settings, select Capturing, and choose All under the audio options.
Can I record the whole screen with Snipping Tool?
Yes. Press Windows logo key + Shift + R and drag the selection across the entire screen before you select Start. Snipping Tool records whatever rectangle you draw, including the desktop and taskbar.
Can I trim a Snipping Tool recording?
Yes, in recent versions. Open the recording in Snipping Tool, select Trim, drag the grabbers to the new start and end, and select Apply. For captions or audio changes, select Edit in Clipchamp instead.
Why will Game Bar not record clips on my PC?
Game Bar needs a video card with Intel Quick Sync H.264, NVIDIA NVENC or AMD VCE to record clips, and some features need Windows 10 22H2 or newer. Windows N editions may also need the Media Feature Pack.
Is there a built-in way to record a PowerPoint presentation screen?
Yes. In PowerPoint, select Insert, then Screen Recording, and choose an area with Windows logo key + Shift + E. PowerPoint records audio and the pointer by default, and Save Media as exports the clip as a separate file.
Verdict: when to use built-in tools — and when to graduate
Use Snipping Tool for desktop how-to clips and Game Bar for games and single apps; move to PowerPoint, Clipchamp or a dedicated recorder once you need long sessions, several sources or real editing. Both built-in tools start with one shortcut and save MP4 files automatically, which covers most short recordings. Neither handles scenes, multiple sources or long edited lessons, and Game Bar records only the game or app that has focus.