When the Snipping Tool shortcut stops working, restart Windows first, then repair Snipping Tool from Settings > Apps > Installed apps > Advanced options.
These 13 fixes cover Windows 11 and Windows 10, from app repair and Group Policy blocks to binding Snipping Tool to the Print Screen key.
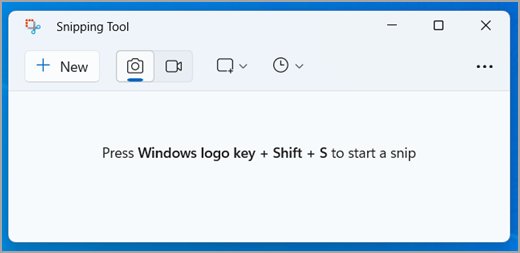
Fastest fix for Windows + Shift + S not working
A quick key test tells you whether the fault sits with the keyboard or with Snipping Tool. Do that before changing any setting.
- Press Windows + E. If File Explorer does not open, the Windows key or keyboard is the problem rather than Snipping Tool.
- Restart the PC and press Windows + Shift + S again.
- If the overlay still does not appear, select Start > Settings > Apps > Installed apps.
- Select the More icon next to Snipping Tool, then select Advanced options.
- Select Repair, press Windows + Shift + S, and select Reset if the shortcut still fails.
If other Windows shortcuts fail too, troubleshoot a Logitech keyboard that isn’t working or a Lenovo keyboard that won’t respond before going further.
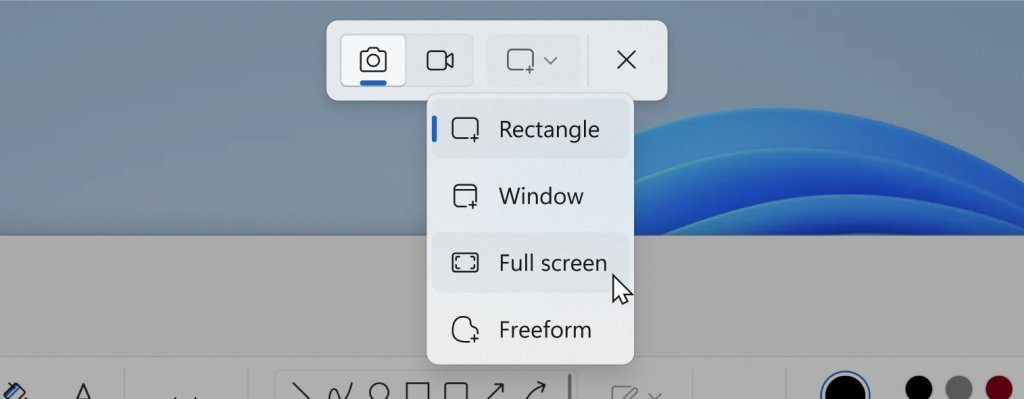
Why is Windows + Shift + S not working?
Match what happens on your screen to a fix number below. If nothing fits, work through the fixes in order.
| What happens | Likely cause | Start with |
|---|---|---|
| Nothing happens, and other Windows key shortcuts also fail | Keyboard or Windows key | Test the keyboard, then fix 2 |
| Nothing happens, but other Windows key shortcuts work | Snipping Tool app fault | Fixes 2, 5 and 6 |
| The region selector appears, but no notification follows | App notifications are off or silenced | Fix 3 |
| The capture works, but you can’t find the image | It went to the clipboard or Screenshots folder | Fix 4 |
| Snipping Tool is missing from Start | The app was removed | Fix 7 |
| Snipping Tool refuses to run on a work PC | A policy blocks it | Fix 8 |
| The problem started after other software was installed | Background software conflict | Fix 12 |
1. Run Store Apps troubleshooter
Snipping Tool is an app with its own Microsoft Store listing, so Store repairs can apply. Microsoft’s current list of active troubleshooters does not name a Store apps entry, so it may not appear on your PC.
- Select Start > Settings > System > Troubleshoot > Other troubleshooters.
- Run the Store apps troubleshooter if your list shows one.
- Press Windows + R, type
wsreset.exe, and select OK to reset the Store cache. - Wait for the blank window to close and Microsoft Store to open, which takes about 10 seconds.
- In Microsoft Store, select Library > Get updates to install app updates.
2. Restart your computer
A full restart reloads Windows and every app that handles the shortcut. It costs a minute and changes no settings.
- Save your work and close open apps.
- Right-click Start and select Shut down or sign out > Restart.
- After you sign in, press Windows + Shift + S before opening other apps.
3. Enable notifications
A capture from Windows + Shift + S goes to the clipboard, and notification settings control any prompt you see afterward. A silenced app can make a working capture look like a failed one.
- On Windows 11, select Start > Settings > System > Notifications.
- On Windows 10, open Settings and select System > Notifications & actions.
- Turn Notifications on.
- Select Snipping Tool in the app list if it appears, then turn its notifications and banners on.
- On Windows 11, open the notification center and select the bell icon with zZ if Do Not Disturb is on.
4. Activate clipboard history
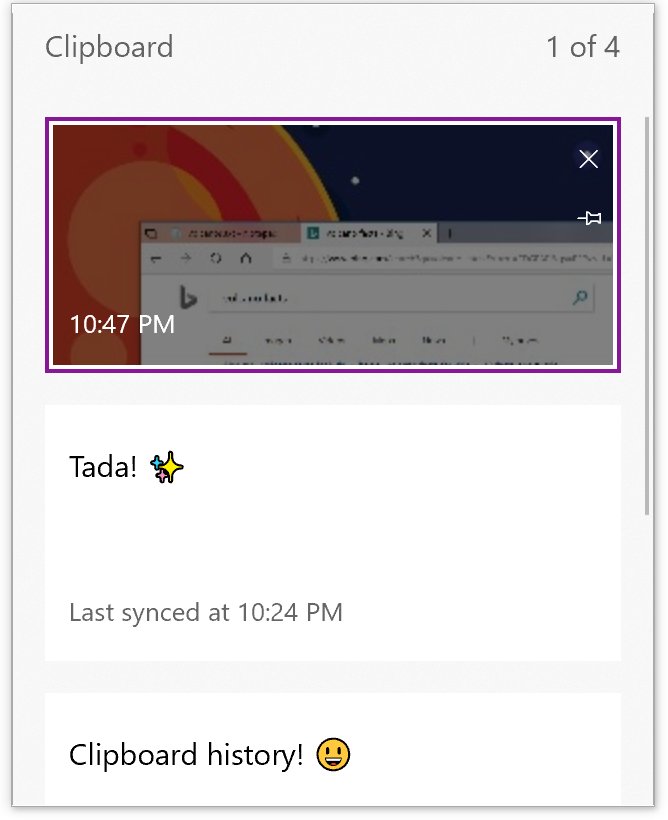
Microsoft describes Windows + Shift + S as capturing a screen region to the clipboard. Clipboard history lets you see whether the capture actually landed there.
- Press Windows + V.
- Select Turn on if clipboard history is off.
- Press Windows + Shift + S and select a region.
- Press Windows + V again and look for the screenshot.
- Select the screenshot, or press Ctrl + V in an app such as Paint, to paste it.
5. Repair and reset Snip & Sketch tool
Older Windows 10 builds can list this app as Snip & Sketch, so use whichever name your PC shows. Microsoft puts Repair first and Reset second, so follow that order.
- On Windows 11, select Start > Settings > Apps > Installed apps.
- On Windows 10, select Start > Settings > Apps > Apps & features.
- Find the app and open Advanced options, using the More icon on Windows 11 if needed.
- Select Repair if it is available.
- Press Windows + Shift + S to test the shortcut.
- If the shortcut still fails, return to the same page and select Reset.
6. Re-register Snip and Sketch
Re-registering rebuilds the app’s Windows registration without removing the app. Microsoft Learn identifies the package as Microsoft.ScreenSketch, and its Add-AppxPackage reference documents this method for corrupted apps.
$InstallLocation = Get-AppxPackage -Name Microsoft.ScreenSketch | Select-Object -ExpandProperty InstallLocation
$ManifestPath = $InstallLocation + '\Appxmanifest.xml'
Add-AppxPackage -Path $ManifestPath -Register -DisableDevelopmentMode
Select Start, type PowerShell, and open Windows PowerShell. Run the three lines in order. They find the app’s folder, build the path to its manifest, and register the package again.
You should see: PowerShell returns to a new prompt with no red error text. Restart the PC, then press Windows + Shift + S.
If the first line returns nothing, the package is not installed for your account, so move to fix 7.
7. Uninstall and reinstall the Snipping Tool
Microsoft lets you remove the inbox app on Windows 10 22H2 build 19045.3758 or later, and on Windows 11. A clean install replaces any damaged app files.
- Open Settings and select Apps > Installed apps.
- Find Snipping Tool, select the three dots to its right, then select Uninstall.
- Select Uninstall again to confirm.
- Open Snipping Tool in Microsoft Store.
- Select Install, or open Library in Microsoft Store, find the app and install it there.
- Press Windows + Shift + S to test the new copy.
If the install stalls, fix Snipping Tool download or install errors before you try again.
8. Check Local Group Policy Editor settings
Microsoft documents a policy named Do not allow Snipping Tool to run for both users and devices. It applies to Pro, Enterprise, Education and IoT Enterprise editions, so skip this fix on Windows Home.
- Press Windows + R, type
gpedit.msc, and press Enter. - Go to User Configuration > Administrative Templates > Windows Components > Tablet PC > Accessories.
- Double-click Do not allow Snipping Tool to run.
- Select Not Configured or Disabled, then select OK.
- Repeat the check under Computer Configuration with the same path.
- Restart the PC and test the shortcut.
On a work or school PC, an administrator may set this policy on purpose. Ask your IT team before you change it.
9. Bind Snipping Tool to the PrtScn key
This gives you a one-key way into the same region capture. It also works when the Windows key is the part that has failed.
- On Windows 11, select Start > Settings > Accessibility > Keyboard.
- Set Use the Print Screen button to open screen snipping to On.
- On Windows 10, select Start > Settings > Ease of Access > Keyboard.
- Turn on the toggle under Print Screen shortcut.
- Press PrtScn and select a region to capture.
10. Update Windows
Microsoft lists a current Windows install among its fixes for problems with Store apps. Update Windows after the app repairs, because a restart is often part of the process.
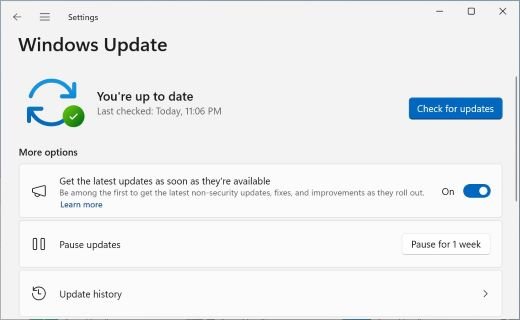
- On Windows 11, select Start > Settings > Windows Update.
- On Windows 10, select Start > Settings > Update & Security > Windows Update.
- Select Check for updates.
- Install what Windows offers, then restart if prompted.
- Press Windows + Shift + S after you sign in again.
11. Run SFC or DISM scan
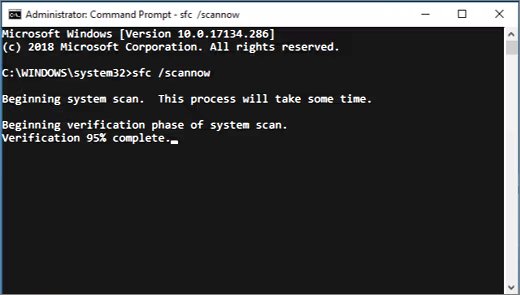
System File Checker looks for corrupted Windows files, and DISM repairs the image it relies on. Run DISM first, as Microsoft’s own steps do.
- Install the latest Windows updates and restart the PC.
- Type
command promptin the taskbar search box, right-click Command Prompt, select Run as administrator, then select Yes. - Type
DISM.exe /Online /Cleanup-image /Restorehealthand press Enter. - Wait for the message The operation completed successfully.
- Type
sfc /scannowand press Enter. - After you see Verification 100% complete, type
exitand press Enter.
12. Troubleshoot in clean boot
A clean boot starts Windows with only essential drivers and startup programs. If the shortcut works there, another app or service is interfering with it.
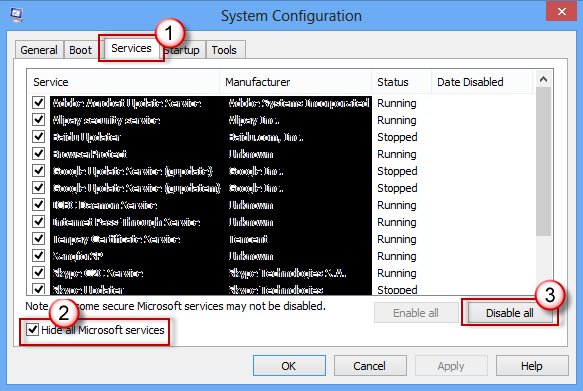
- Sign in as an administrator, select Search, type
msconfig, and open System Configuration. - On the Services tab, select Hide all Microsoft services, select Disable all, then select Apply.
- On the Startup tab, select Open Task Manager.
- On Startup apps, select each enabled item, select Disable, and write down what you changed.
- Close Task Manager, select OK in System Configuration, and restart the PC.
- Press Windows + Shift + S to test the shortcut.
- To return to normal, open
msconfig, select Normal Startup, clear Hide all Microsoft services, select Enable all, then select Apply. - Re-enable your startup apps in Task Manager, then restart when prompted.
If the shortcut works in a clean boot, turn half the services back on at a time until the conflict returns. Your PC can temporarily lose some functions while in this state.
13. Use an alternative tool
These built-in options need no extra software, so you can keep working while you fix the shortcut.
| What you need | Use this | Where it goes |
|---|---|---|
| The whole screen as a file | Windows + PrtScn | Pictures > Screenshots |
| A keyboard with no PrtScn key | Fn + Windows + Space Bar, depending on your hardware | Pictures > Screenshots |
| The active window only | Alt + PrtScn | Clipboard |
| The whole screen on Windows 10 | PrtScn | Clipboard |
| A capture with editing tools | Open Snipping Tool from Start, then select New | Snipping Tool window |
| A capture from a game | Windows + G to open Game Bar | Set in capture settings |
Where do Windows + Shift + S screenshots go?
Use these steps after any fix to prove the shortcut is working again. A successful test leaves the capture in the clipboard, and Windows 11 can also save it as a file.
- Press Windows + Shift + S, select a region, and release the mouse.
- Open Paint or a document and press Ctrl + V.
- Open File Explorer, select Pictures, then select Screenshots to find any saved file.
- To change the save behavior in Snipping Tool, select See More > Settings.
Snipping Tool keyboard shortcuts
| Press | What it does |
|---|---|
| Windows + Shift + S | Opens the overlay for an image capture |
| Windows + Shift + R | Opens the overlay for a video clip on Windows 11 |
| PrtScn | Selects a region on Windows 11 by default |
| Alt + M | Chooses a snipping mode inside the app |
| Alt + N | Creates a new snip in the last mode used |
| Alt + D | Delays a capture by 1 to 5 seconds |
| Ctrl + S | Saves the snip |
| Ctrl + C | Copies the snip to the clipboard |
Windows + Shift + S FAQ
What is the shortcut for Snipping Tool?
Press Windows + Shift + S to open the Snipping Tool overlay for an image capture. On Windows 11, Windows + Shift + R opens the overlay for a video clip, and PrtScn selects a screen region by default.
Why is my Windows + Shift + S not working?
The usual causes are a faulty keyboard or Windows key, a damaged Snipping Tool app, or a policy blocking the app. Press Windows + E to test the key, restart the PC, then repair Snipping Tool from Installed apps in Settings.
Where do Snipping Tool screenshots save?
On Windows 11, Snipping Tool saves captures automatically to the Screenshots folder inside Pictures. You can change that behavior from See More > Settings in the app. On Windows 10, select Save Snip and choose a name, location and file type.
How do I make Print Screen open Snipping Tool?
On Windows 11, select Settings > Accessibility > Keyboard, then set Use the Print Screen button to open screen snipping to On. On Windows 10, select Settings > Ease of Access > Keyboard and turn on the toggle under Print Screen shortcut.
Can I reinstall Snipping Tool if I removed it?
Yes. Install Snipping Tool from Microsoft Store, or open Library in Microsoft Store, find the app and select Install. Microsoft supports removing and reinstalling it on Windows 10 22H2 build 19045.3758 or later, and on Windows 11.
How do I take a screenshot without Snipping Tool?
Press Windows + PrtScn to save the whole screen to Pictures > Screenshots, or press Alt + PrtScn to copy the active window to the clipboard. If the keyboard has no PrtScn key, try Fn + Windows + Space Bar, depending on your hardware.
Can Group Policy disable the Snipping Tool shortcut?
Yes. When Do not allow Snipping Tool to run is enabled, Microsoft says Snipping Tool will not run. The policy sits under Windows Components > Tablet PC > Accessories in both User Configuration and Computer Configuration.