To send from an alias in Exchange Online, add the alias as a proxy address on the mailbox, run Set-OrganizationConfig -SendFromAliasEnabled $true in Exchange Online PowerShell, and then pick the alias in the From field of Outlook on the web, Outlook for Windows or Outlook mobile.
This guide covers adding aliases in the Exchange admin center, the Microsoft 365 admin center and PowerShell, which Outlook apps support sending from them, what the setting changes for the whole organization, and the errors admins hit along the way.
How to send from an alias in Exchange Online
Without this setting, Exchange Online rewrites every alias to the mailbox's primary SMTP address, so recipients never see the alias. The change takes an Exchange administrator about five minutes, plus up to 60 minutes to reach the tenant.
- Add the alias to the user's mailbox in the Exchange admin center or the Microsoft 365 admin center, if it is not there already.
- Open PowerShell and run
Connect-ExchangeOnline -UserPrincipalName [email protected]with your own admin account. - Run
Set-OrganizationConfig -SendFromAliasEnabled $true. - Wait up to 60 minutes for the change to take effect across the tenant.
- In Outlook, start a new message, show the From field and select the alias.
- Run
Disconnect-ExchangeOnlinewhen you are done.
Send from alias support in Outlook on the web, Windows, Mac and mobile
The setting is server-side, but each Outlook app decides how you choose the alias. Match the app your users run to a row.
| Outlook app | Sends from aliases? | How the user picks the alias |
|---|---|---|
| Outlook on the web | Yes | Select the aliases to list in Outlook settings, then pick one in From |
| Classic Outlook for Windows (Microsoft 365 Apps) | Yes, Version 2403 (Build 17425.20236) or later for Online Mode | Select From, then the alias; Manage List… edits the list |
| Outlook for iOS and Android | Yes | Type the alias into From; used aliases are remembered |
| Outlook for Mac | No; Microsoft lists it as planned without a date | Mac also does not keep aliases in email threads |
| Shared mailbox in Outlook on the web | Only when opened with Open another mailbox | Not supported in the Outlook desktop and mobile apps |
What is an SMTP proxy address in Exchange Online?
A proxy address is an extra email address on the same mailbox. Mail sent to it lands in the user's normal inbox, which is why Microsoft 365 calls it an alias.
| Term | What it means | Example |
|---|---|---|
| Primary SMTP address | The default reply address, written with an uppercase SMTP: prefix |
SMTP:[email protected] |
| Proxy address (alias) | Any other address on the mailbox, written with a lowercase smtp: prefix |
smtp:[email protected] |
| EmailAddresses property | The multivalued list that holds the primary address and every alias | Shown by Get-Mailbox in PowerShell |
| Alias limit | Up to 400 aliases per user, with no extra licence | sales@, info@ and jen@ on one mailbox |
| Alias domain | The alias must end in a domain already added to Microsoft 365 | contoso.com or contoso.onmicrosoft.com |
If several people need to read and answer one address, such as support@, an alias on one person's mailbox is the wrong tool. Add a shared mailbox in Microsoft 365 instead.
How to create an alias in Exchange Online
The Exchange admin center adds the address straight to the mailbox. You need an Exchange role that covers recipient management, such as Exchange Administrator.
- Sign in to the Exchange admin center and go to Recipients > Mailboxes.
- Select the user's mailbox to open its display pane.
- Under General > Email addresses, select Manage email address types.
- Select Add email address type, then select SMTP.
- Type the alias in the Email address box, choose the domain from the drop-down and select OK.
- Select Save. The primary address stays in bold; the new alias is listed beneath it.
How to add an alias in the Microsoft 365 admin center
The Microsoft 365 admin center offers the same result for business subscriptions. The alias option appears only for users with a licence assigned.
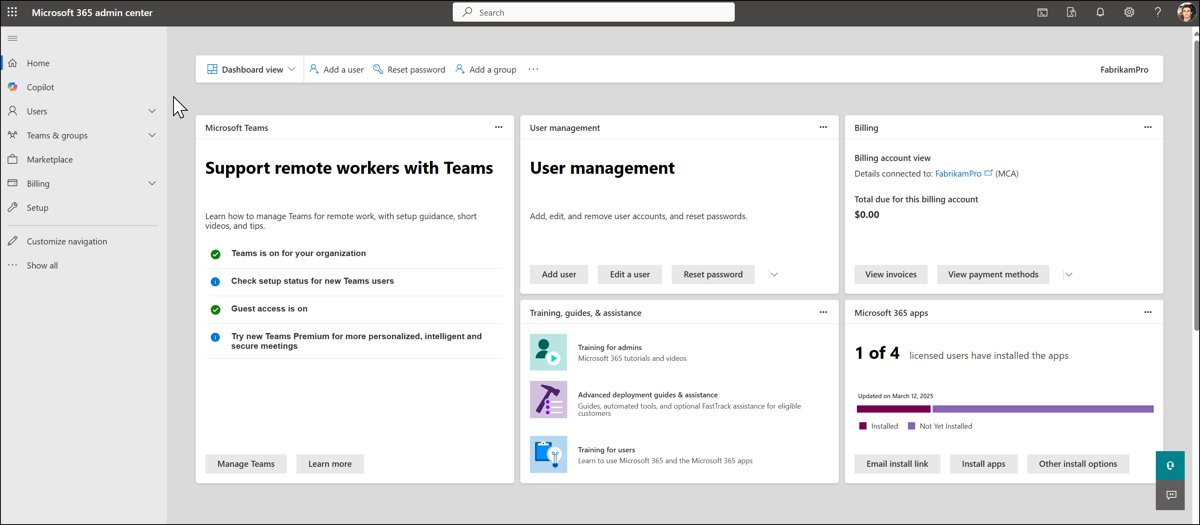
- In the Microsoft 365 admin center, go to Users > Active users.
- Select the user you want to manage.
- Under Aliases, select Manage username and email.
- Type the new alias in the Username field, select a domain and choose Add.
- Choose Save changes. The new alias can take up to 24 hours to update.
For a personal Outlook.com account rather than a work account, you create an alias in Outlook.com from the Microsoft account settings instead.
Add an alias with Set-Mailbox in Exchange Online PowerShell
PowerShell is faster for many mailboxes. The @{add=...} syntax adds an address without touching the others, while a plain list would replace every existing address.
Set-Mailbox -Identity 'Jenna Lopez' -EmailAddresses @{add='[email protected]','[email protected]'}Adds two SMTP aliases to Jenna's mailbox and keeps her primary address and existing aliases. Replace add with remove to take an alias off.
You should see: The command returns no output. Run Get-Mailbox -Identity 'Jenna Lopez' | Select-Object -ExpandProperty EmailAddresses and the new smtp: entries are listed.
To add one alias each to many users, save a CSV with Mailbox,NewEmailAddress columns and run Import-CSV 'C:\Temp\AddEmailAddress.csv' | ForEach {Set-Mailbox $_.Mailbox -EmailAddresses @{add=$_.NewEmailAddress}}.
Enable SendFromAliasEnabled with Set-OrganizationConfig
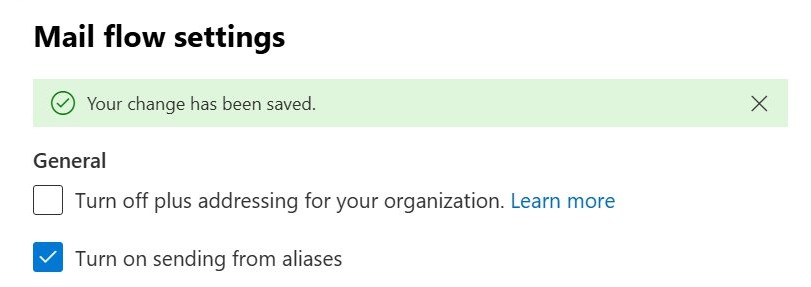
This is the switch that lets users send and reply as an alias. It applies to every Exchange Online mailbox in the organization; there is no per-user version.
Install the module once with Install-Module -Name ExchangeOnlineManagement, then connect with Connect-ExchangeOnline -UserPrincipalName and your admin account.
Set-OrganizationConfig -SendFromAliasEnabled $trueStops Exchange Online rewriting aliases to the primary SMTP address on messages sent and received. Compatible Outlook apps then offer the aliases in the From field, and replies to a message sent to an alias come from that alias by default.
You should see: Get-OrganizationConfig | Format-List SendFromAliasEnabled returns SendFromAliasEnabled : True. Allow up to 60 minutes before testing in Outlook.
PowerShell: Configure certificate-based authentication for Exchange Online (Azure)
Certificate-based authentication, also called app-only authentication, lets a script connect to Exchange Online without a stored password or a sign-in prompt. Use it when alias changes run from a scheduled task or Azure Automation. It needs version 2.0.4 or later of the Exchange Online PowerShell module.
- In the Microsoft Entra admin center, open App registrations and select New registration. Name the app, keep Accounts in this organizational directory only and select Register.
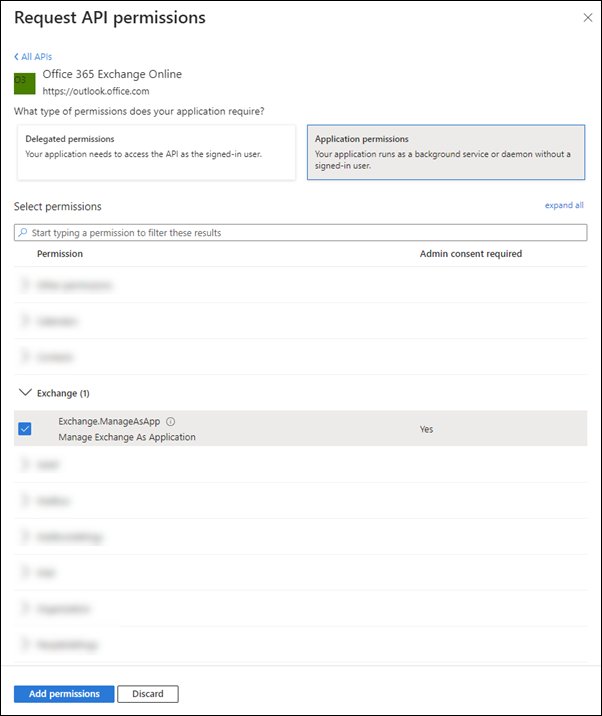
- Open API permissions > Add a permission > APIs my organization uses, select Office 365 Exchange Online, choose Application permissions, tick Exchange.ManageAsApp and select Add permissions.
- Select Grant admin consent for your organization and confirm with Yes.
- In an elevated PowerShell window, create a certificate with
$mycert = New-SelfSignedCertificate -DnsName 'contoso.com' -CertStoreLocation 'cert:\CurrentUser\My' -NotAfter (Get-Date).AddYears(1) -KeySpec KeyExchange, then export it with$mycert | Export-Certificate -FilePath mycert.cer. - In the app, open Certificates & secrets > Upload certificate, choose
mycert.cerand select Add. - Open Microsoft Entra roles and administrators, select Exchange Recipient Administrator or Exchange Administrator, choose Add assignments and add the app.
- Connect with
Connect-ExchangeOnline -CertificateThumbPrint '<thumbprint>' -AppID '<application ID>' -Organization 'contoso.onmicrosoft.com'.
Use the primary .onmicrosoft.com domain for -Organization. The thumbprint method works only on Windows, with the certificate in the current user's store. Cryptography Next Generation (CNG) certificates are not supported, which is why the command uses -KeySpec KeyExchange.
How to send from an alias in Outlook on the web
Once the setting is on, Outlook settings show one check box for each alias on the mailbox. The aliases you tick appear in the From drop-down when you compose.
- Open Settings in Outlook on the web and tick the aliases you want offered when you send mail.
- Select New mail.
- If the From line is hidden, select Options > Show From.
- Select the arrow next to From and choose the alias.
- If the alias is not listed, select Other email address… and type it.
- Write the message and select Send.
When you reply to a message that was sent to an alias, Outlook on the web uses that alias as the From address by default.
How to send from an alias in Outlook for Windows
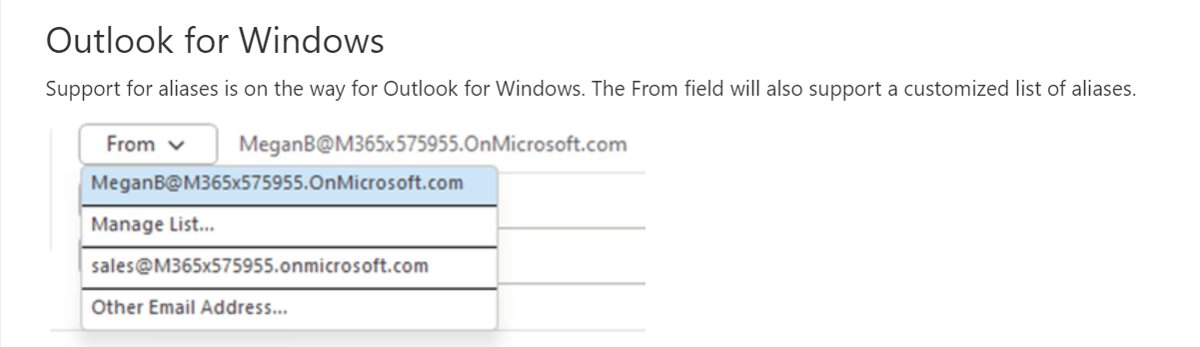
Classic Outlook for Windows supports aliases in Microsoft 365 Apps. In Online Mode, or without an offline address book, it needs Version 2403 (Build 17425.20236) or later.
- Select New Email.
- If From is missing above To, select Options, then From in the Show Fields group.
- Select From. The list shows the aliases enabled for your mailbox.
- Select Manage List… to choose which aliases appear, matching the list in Outlook on the web.
- Pick the alias and send the message.
In new Outlook for Windows, select Options > Show From in the message window, then select From and the alias.
How to tell if send from alias is enabled in Exchange Online
- Connect to Exchange Online PowerShell and run
Get-OrganizationConfig | Format-List SendFromAliasEnabled. True means the feature is on. - Run
Get-Mailbox -Identity 'Jenna Lopez' | Select-Object -ExpandProperty EmailAddressesand check that the alias is listed withsmtp:. - Send a test message from the alias to an external mailbox you control, such as a personal Outlook.com address.
- Open the received message. The sender shows the alias, not the primary address.
- In message trace, search by the alias itself. A trace on the primary SMTP address does not return messages sent from the alias.
Exchange Online PowerShell commands for aliases and proxy addresses
These commands cover the alias jobs admins repeat most. Run them after Connect-ExchangeOnline.
| Task | Command |
|---|---|
| List every address on a mailbox | Get-Mailbox -Identity 'Jenna Lopez' | Select-Object -ExpandProperty EmailAddresses |
| Add an alias to a mailbox | Set-Mailbox -Identity 'Jenna Lopez' -EmailAddresses @{add='[email protected]'} |
| Remove an alias from a mailbox | Set-Mailbox -Identity 'Jenna Lopez' -EmailAddresses @{remove='[email protected]'} |
| Add an alias to a Microsoft 365 group | Set-UnifiedGroup -Identity 'Marketing' -EmailAddresses @{Add='smtp:[email protected]'} |
| Remove an alias from a Microsoft 365 group | Set-UnifiedGroup -Identity 'Marketing' -EmailAddresses @{Remove='smtp:[email protected]'} |
| Bulk-add aliases from a CSV file | Import-CSV 'C:\Temp\AddEmailAddress.csv' | ForEach {Set-Mailbox $_.Mailbox -EmailAddresses @{add=$_.NewEmailAddress}} |
| Turn sending from aliases on or off | Set-OrganizationConfig -SendFromAliasEnabled $true or $false |
How to block sender domain or email address
Aliases such as info@ or sales@ attract spam. The Tenant Allow/Block List in the Microsoft Defender portal blocks a sender for every mailbox and alias in the organization.
- Open the Microsoft Defender portal at
security.microsoft.com. - Go to Email & collaboration > Policies & rules > Threat policies, then select Tenant Allow/Block Lists in the Rules section.
- On the Domains & addresses tab, select Add, then Block.
- Enter one email address or domain per line, up to 20.
- Choose how long to keep the entry under Remove block entry after, such as 30 days or Never expire.
- Select Add. The entry is active within five minutes.
In Exchange Online PowerShell, run New-TenantAllowBlockListItems -ListType Sender -Block -Entries '[email protected]','fabrikam.com' -NoExpiration. Mail from blocked senders is quarantined as high confidence phishing, and users can no longer send mail to those addresses either.
A block on fabrikam.com does not cover its subdomains. Add a second entry for *.fabrikam.com to block them too.
Disable welcome message for Microsoft 365 groups
A Microsoft 365 group has its own address and can hold aliases, which makes it an option for a team address. By default, the group emails a welcome message to every member you add.
Set-UnifiedGroup -Identity 'Marketing' -UnifiedGroupWelcomeMessageEnabled:$falseStops the system-generated welcome email that the Marketing group sends to new members. Use this exact :$false syntax; to turn the message back on, run the switch without a value.
You should see: The command returns no output, and the next member you add to the group receives no welcome email.
This setting covers only email sent by the Microsoft 365 group itself. Notifications from connected products such as Teams or Viva Engage are not affected.
What changes when SendFromAliasEnabled is turned on
The setting affects every message sent and received by every mailbox, even for users who never pick an alias. Check these before you switch it on in a large tenant.
| Area | What changes | What to do |
|---|---|---|
| Address rewriting | Aliases on sent and received messages are no longer rewritten to the primary SMTP address | Tell users that replies may now come from an alias |
| Mail flow and journaling rules | Rules that match a specific address may not match its aliases | Add the aliases to rules that must catch them |
| Routing | Routing that relied on the rewrite can break, especially for aliases on other domains | Test mail to and from every alias domain |
| Inbox forwarding rules | Forwarding resolves to the primary address while Resent-From shows the alias | Expect the alias in forwarded headers |
| Message trace | Traces on the primary address miss alias messages | Search by the alias address |
| Hybrid organizations | Mail sent from on-premises keeps the mail.contoso.onmicrosoft.com address, which can show in out-of-office replies | The feature covers Exchange Online mailboxes only |
| Delegates | Users with Send As or Full Access on another mailbox cannot send from that mailbox's aliases in Outlook | Give each sender their own alias, or use a shared mailbox |
How to turn off send from alias or remove an alias in Exchange Online
- Connect to Exchange Online PowerShell with
Connect-ExchangeOnline. - Run
Set-OrganizationConfig -SendFromAliasEnabled $falseto restore the default rewriting to the primary SMTP address. - To remove one alias, run
Set-Mailbox -Identity 'Jenna Lopez' -EmailAddresses @{remove='[email protected]'}. - Or, in the Exchange admin center, open Recipients > Mailboxes, select the mailbox, select Manage email address types, select the alias, select the Remove icon and then Save.
- Run
Disconnect-ExchangeOnlinewhen you finish.
Send from alias not working in Exchange Online
Email from the alias is still sent from the primary address
The organization setting is off, has not reached the tenant yet, or the Outlook app does not support aliases.
- Run
Get-OrganizationConfig | Format-List SendFromAliasEnabledand set it to$trueif it shows False. - Wait up to 60 minutes after the change.
- Update classic Outlook to Version 2403 (Build 17425.20236) or later.
- Test from Outlook on the web; Outlook for Mac does not send from aliases.
The alias does not show in the From list
The alias was added recently or is not ticked in the user's Outlook settings.
- Allow up to 24 hours after adding an alias in the Microsoft 365 admin center.
- In Outlook on the web, open Settings and tick the alias.
- In classic Outlook, select From > Manage List… and add it.
- As a fallback, choose Other email address… and type the alias.
Can't send from an alias of a shared mailbox
Alias sending for shared mailboxes works only in Outlook on the web when the delegate opens the mailbox with Open another mailbox.
- Sign in to Outlook on the web with your own account.
- Use Open another mailbox to open the shared mailbox in its own browser tab, and compose from there.
- Pick the alias in From. Outlook desktop and mobile apps do not support this.
"A parameter cannot be found that matches parameter name EmailAddresses"
Setup of a new tenant or a newly added custom domain has not finished.
- Wait up to 4 hours for the setup to complete.
- Run the command again.
- Contact Microsoft support for a full sync if the error stays.
"This user is synchronized with your local Active Directory"
The account syncs from on-premises Active Directory, so its addresses are managed there.
- Open Active Directory Users and Computers and turn on View > Advanced Features.
- Open the user, select Properties > Attribute Editor > proxyAddresses.
- Add the alias with a lowercase prefix, for example
smtp:[email protected]. - Wait for the next sync to Microsoft Entra ID.
Outlook keeps asking for password on Windows
Outlook keeps asking for a password after you add the alias as a new account
An alias is only an extra address on the existing mailbox. It has no mailbox of its own, so there is nothing for a separate Outlook account to connect to.
- In classic Outlook, select File > Account Settings > Account Settings.
- Select the account you created for the alias and select Remove.
- Keep the user's main Microsoft 365 account, which already receives the alias's mail.
- Send from the alias with the From field instead.
Outlook keeps asking for a password and shows "trying to connect…"
In older Outlook builds, the account's Logon network security setting is not Anonymous Authentication.
- On current Microsoft 365 Apps, run the Diag: Outlook keeps asking for my password self-diagnostic from Microsoft support.
- On older Outlook, exit Outlook, open Control Panel and double-click Mail.
- Select Show Profiles, choose the profile, select Properties > E-mail Accounts, then the account and Change.
- Select More Settings, open the Security tab and set Logon network security to Anonymous Authentication.
- Select OK, Next, Finish and Close, then restart Outlook.
Exchange Online send from alias FAQ
How do I create an alias in Exchange Online?
In the Exchange admin center, go to Recipients > Mailboxes, select the mailbox, select Manage email address types, then Add email address type > SMTP. Type the alias, pick the domain and save. PowerShell users run Set-Mailbox with -EmailAddresses @{add='alias@domain'}.
How do I create an alias in Outlook 365?
Work and school aliases are created by an admin, not in Outlook. The admin goes to Users > Active users in the Microsoft 365 admin center, selects the user and chooses Manage username and email under Aliases. The alias can take up to 24 hours to appear.
Why is my email still sent from my primary address instead of the alias?
Exchange Online rewrites aliases to the primary SMTP address unless an admin runs Set-OrganizationConfig -SendFromAliasEnabled $true. After the change, allow up to 60 minutes, then pick the alias in the From field of a supported Outlook app.
Can I send from an alias in Outlook for Mac?
Not yet. Microsoft supports sending from aliases in Outlook on the web, Outlook for Windows and Outlook for iOS and Android, and lists Outlook for Mac as planned. Outlook for Mac also does not keep aliases in email threads.
Can I enable send from alias for only some users?
No. SendFromAliasEnabled is a Set-OrganizationConfig setting, so it applies to every Exchange Online mailbox in the organization. Users who never choose an alias keep sending from their primary address, but replies to mail received at an alias come from that alias.
How many aliases can a Microsoft 365 user have?
Up to 400 aliases per user, with no extra fee or licence. Each alias must use a domain that is already added to the Microsoft 365 tenant, such as your custom domain or the onmicrosoft.com domain.
Can I send from an alias on a second domain in Microsoft 365?
Yes, once the second domain is added to Microsoft 365 and the alias uses it. Microsoft warns that routing that relied on rewriting to the primary address can break for aliases on different domains, so test mail flow for that domain after you enable the feature.
Is an alias the same as Send As permission?
No. An alias is another address on your own mailbox. Send As lets you send as a different mailbox or group. Users with Send As or Full Access on another mailbox cannot send from that mailbox's aliases in Outlook.