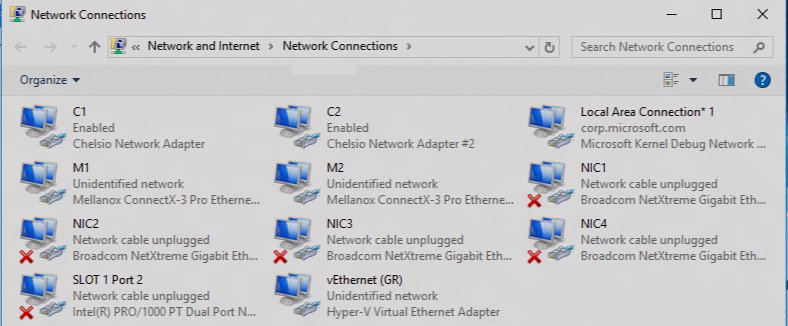
The ncpa.cpl command opens the classic Network Connections window: press Win + R, type ncpa.cpl and select OK on Windows 11, Windows 10 or Windows Server.
This guide covers what the command is, every place you can run it, what each action in the window does, who is allowed to change what, and how to use it when a connection fails.
The fastest way to run ncpa.cpl
The Run box is the quickest route on every current version of Windows, and it does not depend on where Settings has moved things.
- Press Win + R to open the Run box.
- Type
ncpa.cpl. - Select OK or press Enter. The Network Connections window opens with every adapter on the PC.
- Right-click an adapter to reach Status, Properties, Enable or Disable.
What Is the ncpa.cpl Command?
ncpa.cpl is a Control Panel item file. Microsoft's Windows Server documentation calls it the Network Control Panel (ncpa.cpl) and uses it to manage network adapters alongside the NetAdapter PowerShell cmdlets.
The window it opens is the same folder that control.exe netconnections displays, which Microsoft's Control Panel reference names the Network Connections folder.
| Fact | Detail |
|---|---|
| What it opens | The Network Connections folder: one icon per Wi-Fi, Ethernet, VPN, dial-up or virtual adapter |
| File type | A .cpl Control Panel item, so control.exe ncpa.cpl also launches it |
| Same window as | control netconnections, Change adapter settings in Network and Sharing Center, and a Start search for View Network Connections |
| Parent Control Panel item | Network and Sharing Center, canonical name Microsoft.NetworkAndSharingCenter |
| What ncpa.cpl is commonly used for | Checking adapter status, enabling or disabling an adapter, static IP and DNS entries, protocol bindings, and driver options through Configure |
| What it does not do | Network reset, DNS over HTTPS, metered connections and network profile type live in the Settings app instead |
If you want the Settings-app side of adapter management as well, network adapter settings in Windows 11 covers every route across Settings, Device Manager and PowerShell.
How to Open Network Connections Using ncpa.cpl
Every route below opens the same window. Pick the one that matches where you already are.
| Where you are | What to do | Notes |
|---|---|---|
| Desktop or any app (open ncpa.cpl from Run) | Win + R, type ncpa.cpl, select OK |
Fastest route on Windows 11 and Windows 10 |
| Command Prompt, PowerShell or Windows Terminal | Type ncpa.cpl and press Enter |
Useful when you are already running ipconfig or netsh |
| A script or shortcut target | control.exe ncpa.cpl or control.exe netconnections |
Both are documented ways to start Control Panel items from the command line |
| Start menu | Select Start, type View Network Connections and open the result | Microsoft's own instructions for Windows 10 and Windows 11 |
| Control Panel | Control Panel > Network and Internet > Network and Sharing Center > Change adapter settings | The mouse-only route |
| Windows 10 Settings | Settings > Network & Internet > Status > Change adapter options | Windows 11 moved adapter controls to Advanced network settings; use ncpa.cpl there for the classic window |
Every other way into Control Panel itself is covered in 12 ways to open Control Panel.
Who can change settings in Network Connections
Anyone can run ncpa.cpl and look. Changing things is restricted by default, which is why buttons can appear unavailable on a standard account.
| Action | Standard user | Network Configuration Operators | Administrators |
|---|---|---|---|
| Open the window and view connection Properties | Yes, view only | Yes | Yes |
| Enable or disable a LAN connection | No | Yes | Yes |
| Rename a LAN connection | No | Yes | Yes |
| Change TCP/IP properties (IP address, DNS) | No | Yes | Yes |
| Change properties of other components | No | No | Yes |
| Advanced Settings on the Advanced menu (bindings and provider order) | No | No | Yes |
These are Windows defaults as Microsoft documents them in the Network Connections policy reference. An organisation can tighten them further with Group Policy, including for administrators.
Managing Network Adapters from the Network Connections Window
Each adapter is an icon. Its right-click menu holds almost every action you need, and identifying the correct adapter first saves you disabling the wrong one.
| Common adapter action | How to do it | What happens |
|---|---|---|
| Identify the correct adapter | Read the name and the device description under each icon, then compare with Get-NetAdapter -Name * in PowerShell |
Physical Wi-Fi and Ethernet adapters sit beside VPN and virtual adapters, so match the description, not just the name |
| Check status | Right-click the adapter > Status, General tab | Shows the connection state, so you can tell a disabled or disconnected adapter from a settings problem |
| Disable an adapter | Right-click > Disable | The connection drops at once; never do this to the adapter carrying a remote session |
| Enable an adapter | Right-click > Enable, or double-click the disabled icon | Windows brings the adapter back and reconnects |
| Rename an adapter | Click the connection icon to rename it, or run Rename-NetAdapter in PowerShell |
Changes the connection name only, not the hardware description |
| Open Properties | Right-click > Properties | Lists protocols and services under This connection uses the following items |
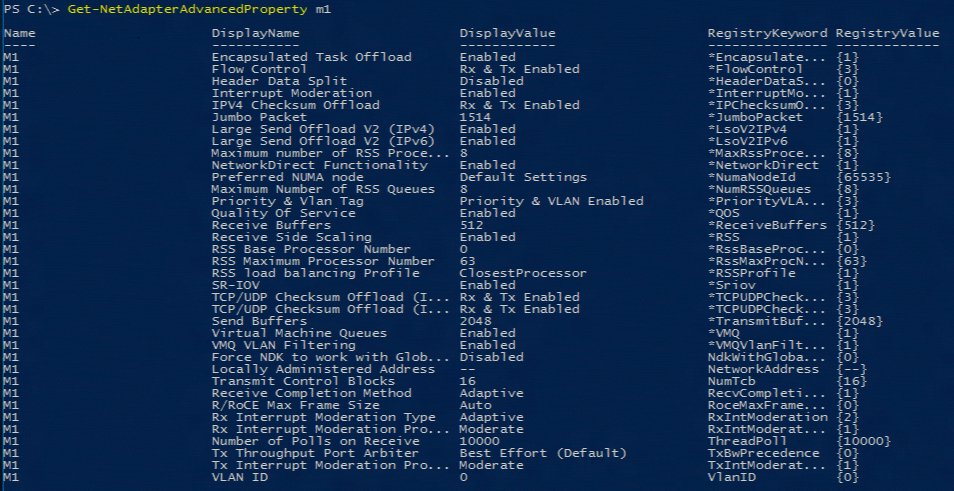
| Advanced adapter options | Properties > Configure > Advanced tab | Driver settings from the manufacturer; the same list Get-NetAdapterAdvancedProperty prints |
| Delete a VPN or dial-up connection | Right-click the connection > Delete | Removes a remote access connection you no longer use |
Clearing a check box in This connection uses the following items unbinds that protocol or service from the adapter. Select it again to bind it back.
Changing Adapter Settings and IP Configuration
Automatic versus manual IP configuration is the main choice here. Leave Obtain options on unless you need a fixed address for port forwarding, a printer or a lab network.
This dialog changes one adapter at a time, so pick the adapter you actually connect through.
- Run
ncpa.cpl, right-click the adapter you want, and select Properties. - Double-click Internet Protocol Version 4 (TCP/IPv4) in the items list.
- For a fixed address, select Use the following IP address.
- Enter the IP address, Subnet mask and Default gateway for your network.
- For changing DNS servers, fill in Preferred DNS server and Alternate DNS server.
- Select Advanced for extra tabs such as WINS, where Enable NetBIOS over TCP/IP sits.
- Select OK on each dialog, then Close.
To go back to router-assigned settings, reopen the same dialog and choose the automatic options. DNS over HTTPS is not in this dialog; set it in Settings > Network & internet > your network > IP assignment > Edit.
Useful ncpa.cpl Shortcuts and Admin Tips
Pair ncpa.cpl with command-line network tools. The window shows state; the commands below read or change the same settings faster.
Use clear adapter names such as Office LAN or Lab Wi-Fi. They show up in the window, in ipconfig output and in PowerShell, which prevents mistakes on machines with several adapters.
ncpa.cpl                                          Opens Network Connections
control.exe netconnections                        Opens the same folder by its legacy command
control /name Microsoft.NetworkAndSharingCenter   Opens Network and Sharing Center
ipconfig /all                                     Full TCP/IP configuration for every adapter
Get-NetAdapter -Name *                            Lists every visible adapter in PowerShell
Rename-NetAdapter -Name "Ethernet" -NewName "Office LAN"   Gives an adapter a clear name
Get-NetAdapterAdvancedProperty                    Driver options from the Configure > Advanced tab
To launch ncpa.cpl with admin permissions for command-line work, select Start, type cmd, right-click Command Prompt and select Run as administrator, then run ncpa.cpl alongside your netsh and ipconfig commands. Canonical names such as Microsoft.NetworkAndSharingCenter stay in English on every language of Windows, so they are the safer choice in scripts.
You should see: ncpa.cpl opens the Network Connections window, and Get-NetAdapter returns one row per adapter with names that match the icons in that window.
Group Policy has a whole User Configuration > Administrative Templates > Network > Network Connections folder. Admins use it to hide Properties, block enabling and disabling, or stop renaming, so settings on managed PCs stay as IT set them.
How to check your change worked
- Close the Properties dialog, right-click the adapter in
ncpa.cpland select Status to confirm the connection is up. - Run
ipconfig /alland check the adapter's IP address, subnet mask, default gateway and DNS servers against what you entered. - Run
Get-NetAdapter -Name *and confirm an adapter you enabled or disabled shows the status you expect. - After a rename, confirm the new name appears both in the window and in
Get-NetAdapteroutput. - Open a website. If it fails after a static IP change, switch the adapter back to automatic settings and test again.
Troubleshooting Network Issues with ncpa.cpl
Check adapter status first: the icon in ncpa.cpl tells you whether the problem is the adapter, the settings or the network beyond it.
The adapter is missing from the Network Connections window
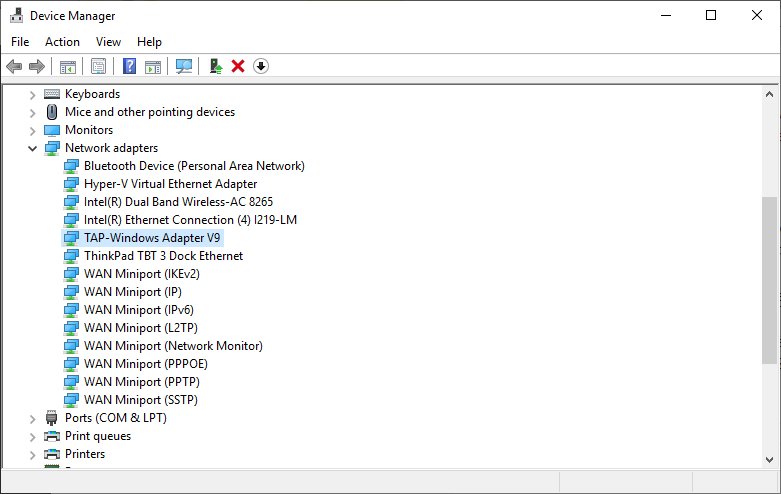
The device is disabled in Device Manager, hidden, or its driver is not loaded.
- Select Start, type
device managerand open Device Manager. - Select View > Show hidden devices, then expand Network adapters.
- If the adapter is turned off, right-click it and select Enable device.
- If it is listed but broken, select Uninstall device, check Attempt to remove the driver for this device, select Uninstall and restart.
- Run
ncpa.cplagain after the restart and confirm the icon is back.
Enable, Disable, Rename or Properties is unavailable
You are on a standard account, or a Network Connections Group Policy blocks the action.
- Sign in with an administrator account and run
ncpa.cplagain. - On a work or school PC, contact IT; policies such as Ability to Enable/Disable a LAN connection and Prohibit access to properties of a LAN connection are set deliberately.
- On your own PC with Group Policy Editor, open
gpedit.mscand go to User Configuration > Administrative Templates > Network > Network Connections. - Set any enabled restriction back to Not Configured, select OK, and reopen
ncpa.cpl.
The adapter is connected but there is no internet
Wrong static IP or DNS values, or a damaged network stack.
- Open the adapter's Internet Protocol Version 4 (TCP/IPv4) properties and switch back to the automatic options.
- Right-click the adapter, select Disable, wait a few seconds, then select Enable.
- Open Command Prompt with Run as administrator and run
netsh winsock reset,netsh int ip reset,ipconfig /release,ipconfig /renewandipconfig /flushdns, then restart. - If nothing works, reset common adapter problems with Settings > Network & internet > Advanced network settings > Network reset > Reset now.
Network reset removes every installed network adapter and its settings, then reinstalls them with defaults after a restart. Re-enter static IP values and reinstall VPN software afterwards.
Frequently Asked Questions
What is the ncpa.cpl command?
ncpa.cpl is the Control Panel file that opens the Network Connections window in Windows. Microsoft's documentation calls it the Network Control Panel. The window lists every network adapter and lets you check status, enable or disable adapters, and change IP and DNS settings.
How do I open ncpa.cpl?
Press Win + R, type ncpa.cpl and select OK. You can also type ncpa.cpl in Command Prompt, PowerShell or Windows Terminal, or search Start for View Network Connections. All three routes open the same Network Connections window on Windows 11 and Windows 10.
Does the ncpa.cpl command work in Windows 11?
Yes. The Run command ncpa.cpl opens Network Connections on Windows 11 exactly as it does on Windows 10. Windows 11 puts newer adapter controls in Settings > Network & internet > Advanced network settings, but the classic window with Properties and Status still opens from ncpa.cpl.
What does ncpa.cpl stand for?
Microsoft does not publish an official expansion of the letters. Its Windows Server documentation refers to the file as the Network Control Panel (ncpa.cpl), and the .cpl extension marks it as a Control Panel item that control.exe can launch.
Do I need administrator rights to use ncpa.cpl?
Not to open it. Any user can run ncpa.cpl and view connection properties. By default, only Administrators and members of Network Configuration Operators can enable, disable or rename LAN connections, and only Administrators can change components other than TCP/IP.
How do I run ncpa.cpl as administrator in Windows 10?
Sign in with an administrator account and run ncpa.cpl from the Run box. For command-line work, select Start, type cmd, right-click Command Prompt and select Run as administrator, then type ncpa.cpl there alongside netsh and ipconfig commands.
Can I change my IP address or DNS server from ncpa.cpl?
Yes. Right-click the adapter, select Properties, then double-click Internet Protocol Version 4 (TCP/IPv4). Choose Use the following IP address to enter a static address, and fill in Preferred DNS server and Alternate DNS server. Select OK on each dialog to apply.
Is ncpa.cpl a Control Panel item?
Yes. It opens the Network Connections folder under Control Panel's Network and Sharing Center, and control.exe netconnections opens the same folder. Inside Control Panel, the route is Network and Internet > Network and Sharing Center > Change adapter settings.
Can ncpa.cpl help fix internet connection problems?
Yes, for adapter-level faults. Use it to confirm the adapter is enabled, check its Status, disable and re-enable it, and restore automatic IP and DNS settings. If the connection still fails, run netsh winsock reset from an administrator Command Prompt, then Network reset in Settings.
Bottom Line
Keep ncpa.cpl as your direct route to adapter Properties, Status, bindings and driver options, and use Settings for network reset, DNS over HTTPS and network profiles. It opens the same Network Connections window on Windows 11, Windows 10 and Windows Server in two keystrokes, skips every Settings redesign, and pairs cleanly with ipconfig and PowerShell when you need to confirm a change.

![OneDrive icons meaning [all symbols explained in 2026]](https://techdows.com/wp-content/uploads/2026/10/OneDrive-Files-On-Demand-setup-screen-showing-cloud-and-green-check-icons-518x338.jpg)
How to Connect a Computer to a Wi-Fi Network: A Step-By-Step Guide - Techdows
[…] For the older adapter view, run ncpa.cpl to open Network Connections, covered in this ncpa.cpl command guide. […]