To update Java on Windows 11, open Configure Java from the Start menu, go to the Update tab and click Update Now.
That route covers the Java 8 runtime from java.com; this guide also covers updating a JDK, winget and Chocolatey installs, setting JAVA_HOME, and fixing the errors that follow an update.
The fastest way to update Java on Windows 11
This works for the Java 8 runtime (JRE) installed from java.com, which is what most desktop apps rely on. It needs an internet connection.
- Open Start, type
Configure Javaand select it to open the Java Control Panel. - Select the Update tab.
- Click Update Now at the bottom of the tab.
- Click Yes if User Account Control asks to let Java Auto Updater make changes.
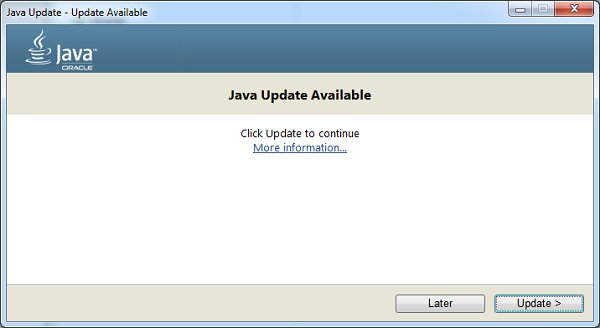
- In the Update Available dialog, click Update, then click Finish when the install completes.
- Close and reopen the Java Control Panel so it loads the updated version.
If Update Now reports that you already have the latest version, there is nothing to install. Developers running a JDK should follow the step-by-step sections below instead, because the Control Panel updates only the java.com runtime.
Why Updating Java is Important
| Reason | What it means for you |
|---|---|
| Security fixes | Oracle calls old Java versions a serious security risk, and each update ships vulnerability fixes. |
| Performance and features | The latest version carries performance improvements and feature updates over earlier releases. |
| Compatibility | The latest version stays compatible with apps written for older versions, so updating rarely breaks software. |
| Removing old copies | Leaving older versions installed keeps their flaws on the PC even after a newer one is added. |
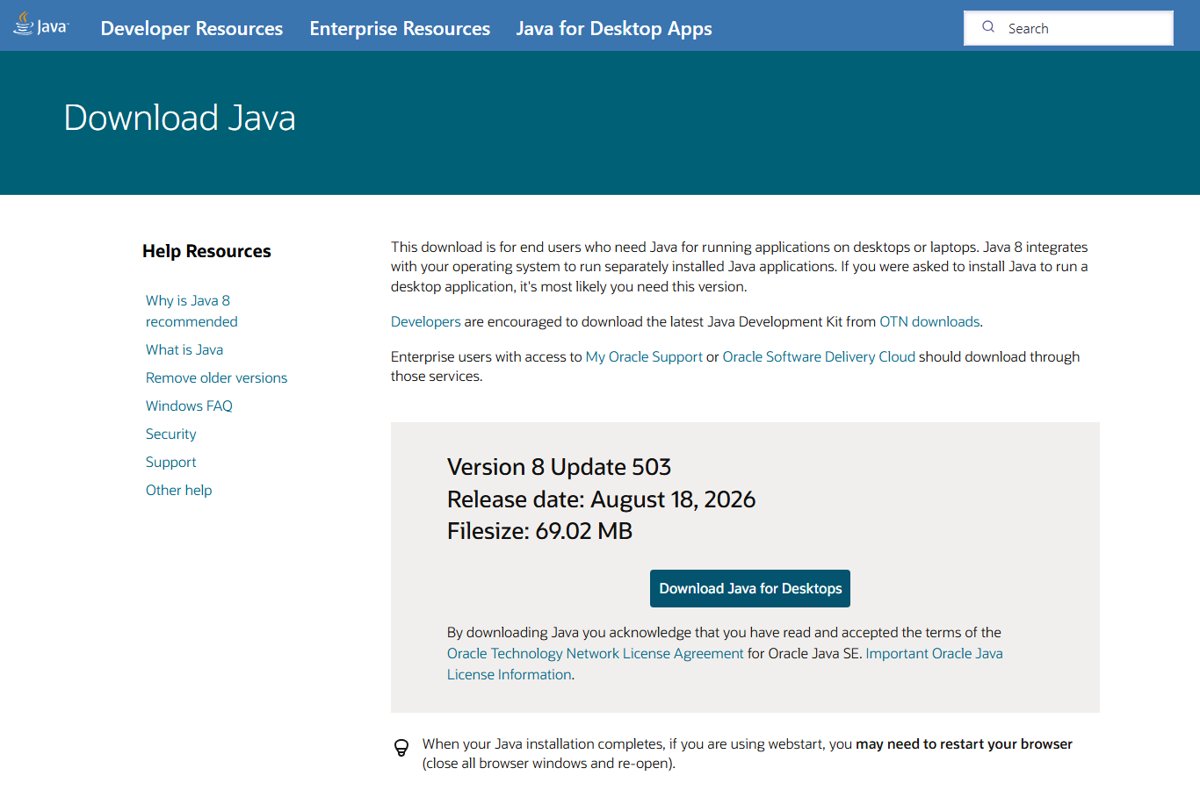
At the time of writing, java.com offered Java 8 Update 503, released on August 18, 2026.
Which update route fits your Java install?
Java on Windows comes in two forms: the JRE from java.com for running apps, and a JDK for building them. The two are separate and can sit side by side, so pick the route that matches what you have.
| Your situation | Use this | Why |
|---|---|---|
| You only run Java apps on the desktop | Java Control Panel > Update Now | Updates the java.com Java 8 runtime in place |
| You installed Oracle JDK from oracle.com | Download and run the newer JDK installer | The Control Panel does not update a JDK |
| You use the Microsoft Build of OpenJDK | winget upgrade or the newer EXE installer |
Microsoft publishes it to winget as Microsoft.OpenJDK.<version> |
| You installed Java through Chocolatey | choco upgrade <package> -y |
Keeps the package manager's record accurate |
| An app needs one exact older version | Leave it installed and ask the app's developer to support the current release | Oracle notes some apps pin a specific version |
Prerequisites for Updating Java on Windows 11
| Requirement | Details |
|---|---|
| Administrator account | Installing Java or a JDK requires administrator access. Without it, the Control Panel's Update settings are also greyed out. |
| Internet connection | Update Now and the online installer both download from Oracle. |
| 64-bit or 32-bit match | Since Java 8 Update 20, the Update tab updates 64-bit and 32-bit runtimes. Download the build that matches the app you run. |
| Free disk space on the TEMP drive | The JDK installer unpacks into TEMP and fails with a decompression error if it runs out of space. |
| Closed Java apps and browsers | Close anything that uses Java so the installer can replace its files. |
Step 1: Confirm Your Current Java Version
Check what you have before downloading anything. You may already be current, or you may have several versions installed.
- Open Start, type
About Javaand select it. The dialog shows the runtime version, such as Version 8 Update 503. - For a JDK, open Command Prompt and run
java -version. Java 7 Update 55 would report1.7.0_55; JDK 25 reports a number starting with25. - Open Settings > Apps > Installed apps and type
Javain the search box to see every installed copy. - Look for older names too: Java(TM), Java Runtime Environment, Java SE, J2SE or Java 2 are all earlier releases.
If About Java and java -version disagree, a JDK and a JRE are both installed. That is normal; update each one with its own route.
Step 2: Download the Latest Java Version
Only download Java from Oracle or Microsoft. If an update pop-up looks suspicious, ignore it and go to java.com directly.
| You need | Official source | What to pick |
|---|---|---|
| Java runtime for apps | java.com/download | The Windows installer for Java 8 |
| Oracle JDK for development | Java SE Downloads on oracle.com | The Windows .exe installer or the .msi installer for your JDK version |
| Free OpenJDK build | Microsoft Build of OpenJDK on learn.microsoft.com | The Windows EXE installer for version 11, 17, 21 or 25 |
The Oracle JDK installer file is named like jdk-25.interim.update.patch_windows-x64_bin.exe. Save it anywhere you can find it, such as Downloads.
Step 3: Uninstall the Existing Java Version (Optional but Recommended)
Oracle recommends removing older Java versions because they stay exploitable. The Java 8 installer offers to do this for you, so this step is only needed for leftovers or JDKs.
- Open Start > Settings > Apps > Installed apps.
- Type
Javain the search box. - Next to an old version, select More (the three dots) > Uninstall.
- Confirm the prompt and follow the uninstaller to the end.
- Repeat for each outdated Java or JDK entry you no longer need.
Keep an older copy only if a specific app refuses to run without it. The Microsoft Build of OpenJDK also asks you to uninstall a version before reinstalling it with a different installer type (EXE, MSI or ZIP).
Step 4: Install the Updated Java Version
- Double-click the installer you downloaded in Step 2.
- Click Yes in the User Account Control prompt.
- For Java 8, click Install in the Java Setup – Welcome dialog to accept the license terms.
- If the installer lists out-of-date versions, choose Uninstall to remove them now.
- For a JDK, follow the installer screens; Oracle's JDK goes to
C:\Program Files\Java\jdk-25by default. - Click Close on the final dialog, then restart your browser or IDE so it picks up the new version.
Oracle's JDK installer also creates the junction C:\Program Files\Java\latest\jdk-25, which always points to the newest JDK 25 update you have installed.
Step 5: Set Environment Variables (If Needed)
Most people can skip this. Oracle notes that changing PATH is usually unnecessary on Windows, and the Microsoft OpenJDK installer adds itself to PATH by default. Set these only when a build tool asks for JAVA_HOME or java is not recognized.
Use the path of your new JDK. The example below uses Oracle's default for JDK 25.
- Open Control Panel, select System, then select Advanced system settings.
- On the Advanced tab, click Environment Variables.
- To set JAVA_HOME, click New under System variables, enter
JAVA_HOMEas the name andC:\Program Files\Java\jdk-25as the value, then click OK. If JAVA_HOME already exists, select it and click Edit to change the version number instead. - To add Java to the PATH variable, select Path under System variables and click Edit.
- Add the JDK's
binfolder, such asC:\Program Files\Java\jdk-25\bin, and remove any entry that points to an uninstalled version. - Click OK in every open window.
- Close any open Command Prompt or terminal windows and open a new one, because old windows keep the old values.
Step 6: Verify the Java Update
java -versionRun it in a new Command Prompt window. It prints the version of the first java.exe Windows finds on PATH.
You should see: The first line shows the version you just installed, for example a number starting with 25 for JDK 25, or 1.8.0_503 for Java 8 Update 503.
For additional verification, open About Java from Start and confirm the update number, then run where java in Command Prompt. where lists every java.exe on PATH in search order, so the new version should appear first. Check echo %JAVA_HOME% too if you set that variable.
Alternative: Use Package Managers for Java on Windows 11
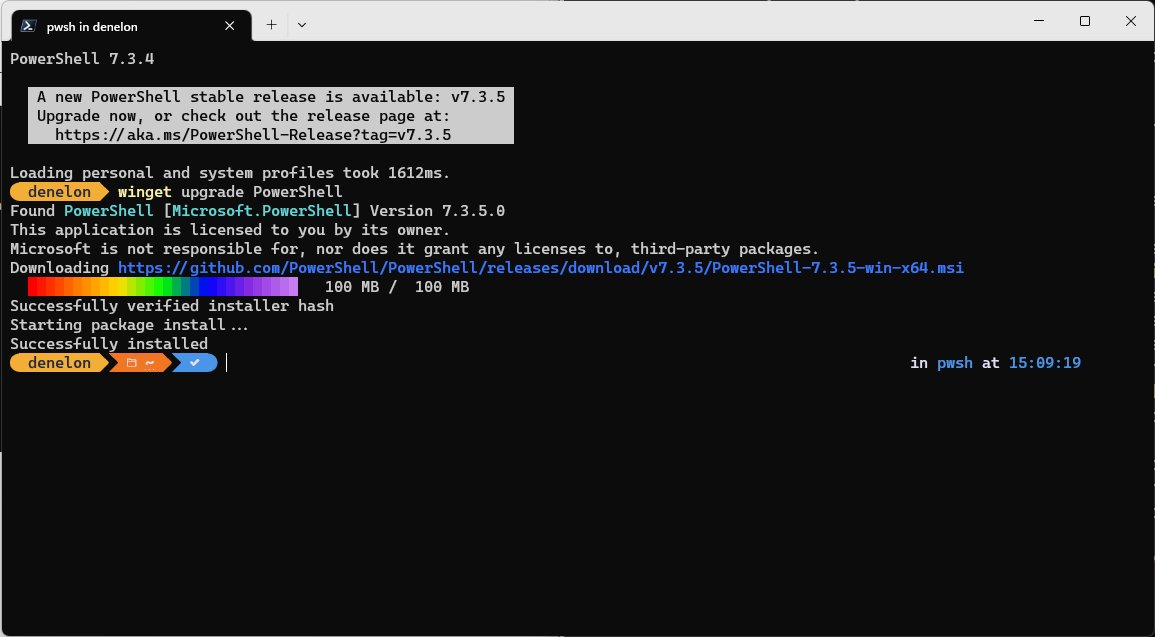
If Java came from winget or Chocolatey, update it the same way so the package manager keeps an accurate record. Both commands run in Terminal or Command Prompt.
- Using winget, run
winget upgradewith no arguments to list every package that has an update, including Java builds. - Update the Microsoft Build of OpenJDK by its ID, for example
winget upgrade --id Microsoft.OpenJDK.25. - To move to a new major version, run
winget search Microsoft.OpenJDKand install the ID you want, such aswinget install Microsoft.OpenJDK.25. - Using Chocolatey, run
choco outdatedto see which installed packages have newer versions. - Run
choco upgrade <package> -ywith the Java package name shown bychoco list. - Open a new terminal and run
java -versionto confirm the update.
Tips for Maintaining Java Updates
Java 8 can check for updates on its own. The default schedule notifies you before downloading, which you can keep or change here. Oracle advises keeping the check turned on and adjusting how often it runs.
- Open Configure Java from Start and select the Update tab.
- Tick Check for Updates Automatically if it is cleared.
- Click Advanced and choose Daily, Weekly or Monthly, plus the day and time, then click OK.
- Under Notify Me, choose Before downloading to approve each download, or Before installing to download automatically and approve only the install.
- Click OK to save, then uninstall old Java versions whenever an update leaves them behind.
Monthly checks still notify you within a week when Oracle marks an update critical. The Control Panel does not update a JDK, so check oracle.com or run winget upgrade from time to time. For the full set of Control Panel options, see Manage Java Settings in Windows 11/10. Other runtimes need their own updates too, for example DirectX.
Troubleshooting Common Issues
Java not recognized after installation
The JDK's bin folder is not on PATH, or the Command Prompt window was opened before the install.
- Close every Command Prompt and terminal window and open a new one.
- Run
where java. If nothing is found, add the JDK'sbinfolder to Path as shown in Step 5. - Run
java -versionagain in a new window.
Installation fails or errors occur
Low disk space, a non-matching system locale, missing admin rights, or registry entries left by a failed uninstall.
- For system error during decompression, free up space on the drive that holds your TEMP folder and run the installer again.
- For error 1722, make sure the user and system locales match and the install path uses only characters from the system code page.
- Sign in with an administrator account, or right-click the installer and run it as administrator.
- If an old version will not uninstall or blocks the new install, run Microsoft's Program Install and Uninstall troubleshooter, then retry.
Multiple Java versions conflicting
An older java.exe appears earlier on PATH. Installing JRE 8 after JDK 25 puts Oracle's javapath folder first, so java -version shows 1.8.0.
- Run
where javato see whichjava.exeWindows finds first. - Remove Java versions you no longer need from Installed apps.
- If JRE 8 still wins over JDK 25, uninstall JDK 25 and reinstall it, as Oracle advises.
- Point JAVA_HOME and Path at the version you want, then open a new terminal.
Update settings are greyed out or not saved
You are not signed in as an administrator, or your organization turned the feature off at install time.
- Sign in with an administrator account and open Configure Java again.
- On a work PC, ask your IT team, because they manage Java updates centrally.
- Download the current version from java.com as a manual fallback.
Frequently Asked Questions
How do I update Java on Windows 11?
Open Configure Java from the Start menu, select the Update tab and click Update Now. Approve the User Account Control prompt, click Update, then Finish. A JDK is updated separately by installing the newer JDK from oracle.com or Microsoft.
How do I update Java on Windows 10?
The steps are the same as on Windows 11. Open the Java Control Panel from the Java folder in the Start menu, select Update and click Update Now. Uninstall old versions from Settings > Apps afterwards.
How do I update the Java version on Windows 11 from the command line?
Use winget. Run winget upgrade to list available updates, then winget upgrade --id <package ID>, for example winget upgrade --id Microsoft.OpenJDK.25. Chocolatey users run choco upgrade <package> -y. Confirm with java -version in a new window.
How do I check for Java updates on Windows 11?
Open Configure Java, select the Update tab and click Update Now to check immediately. To check automatically, tick Check for Updates Automatically and set a daily, weekly or monthly schedule under Advanced.
What is the latest Java update for Windows 11?
At the time of writing, java.com offered Java 8 Update 503, released on August 18, 2026. Developers use a JDK instead; the Microsoft Build of OpenJDK is published for versions 11, 17, 21 and 25. Click Update Now in the Java Control Panel to get the newest runtime.
How do I update the Java JRE on Windows 11?
The JRE is the Java 8 runtime from java.com, and the Java Control Panel's Update Now button updates it in place. You can also download the Windows installer from java.com and run it; it offers to remove older JRE versions during setup.
Does Java update work on 64-bit Windows 11?
Yes. Since Java 8 Update 20, the Update tab in the Java Control Panel updates 64-bit Java runtimes as well as 32-bit ones. Versions before Java 8 had no Update tab for 64-bit installs.
How do I update Java 8 to Java 11 or later?
java.com only offers Java 8, so a newer version comes as a JDK. Install JDK 11, 17, 21 or 25 from oracle.com or the Microsoft Build of OpenJDK, set JAVA_HOME to its folder, and keep Java 8 only if an app still needs it.
Where do I download the Java update for Windows 11?
Download the Java runtime from java.com and the JDK from oracle.com or Microsoft Learn's Microsoft Build of OpenJDK page. Avoid third-party download sites and pop-ups that claim to update Java.
Final Thoughts
Use Update Now in the Java Control Panel for the java.com runtime, and install the newer JDK (or run winget upgrade) for development kits. Each Java type has its own update path, and only the runtime updates itself. Removing old versions afterwards and checking java -version in a new window closes the security gap an update is meant to fix.