To turn off AutoFit in PowerPoint, click the AutoFit Options button at the lower-left corner of the text placeholder and select Stop Fitting Text to This Placeholder, and PowerPoint stops shrinking the font.
This guide also covers the Format Shape setting, turning AutoFit off for every new slide, slide masters, PowerPoint for Mac, a macro for whole decks, and the AutoFit controls in Word and Excel.
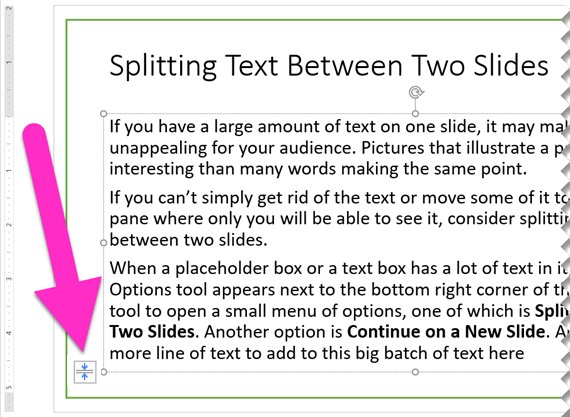
Disable Autofit automatic text resizing in PowerPoint
AutoFit shrinks the font size and line spacing so that overflowing text stays inside its placeholder. The AutoFit Options button only appears once text has overflowed and been resized.
- Click inside the text placeholder whose text has shrunk.
- Find the AutoFit Options button at the lower-left corner of the placeholder.
- Click the button to open its menu.
- Select Stop Fitting Text to This Placeholder.
- Check that the text returns to its original font size and spills past the placeholder border.
This change applies to the one placeholder only. Other slides, and new slides you add later, keep resizing text until you change the global setting below.
Turn off AutoFit in the PowerPoint Format Shape pane
The Format Shape pane works on any placeholder or text box, even when the AutoFit Options button is not showing.
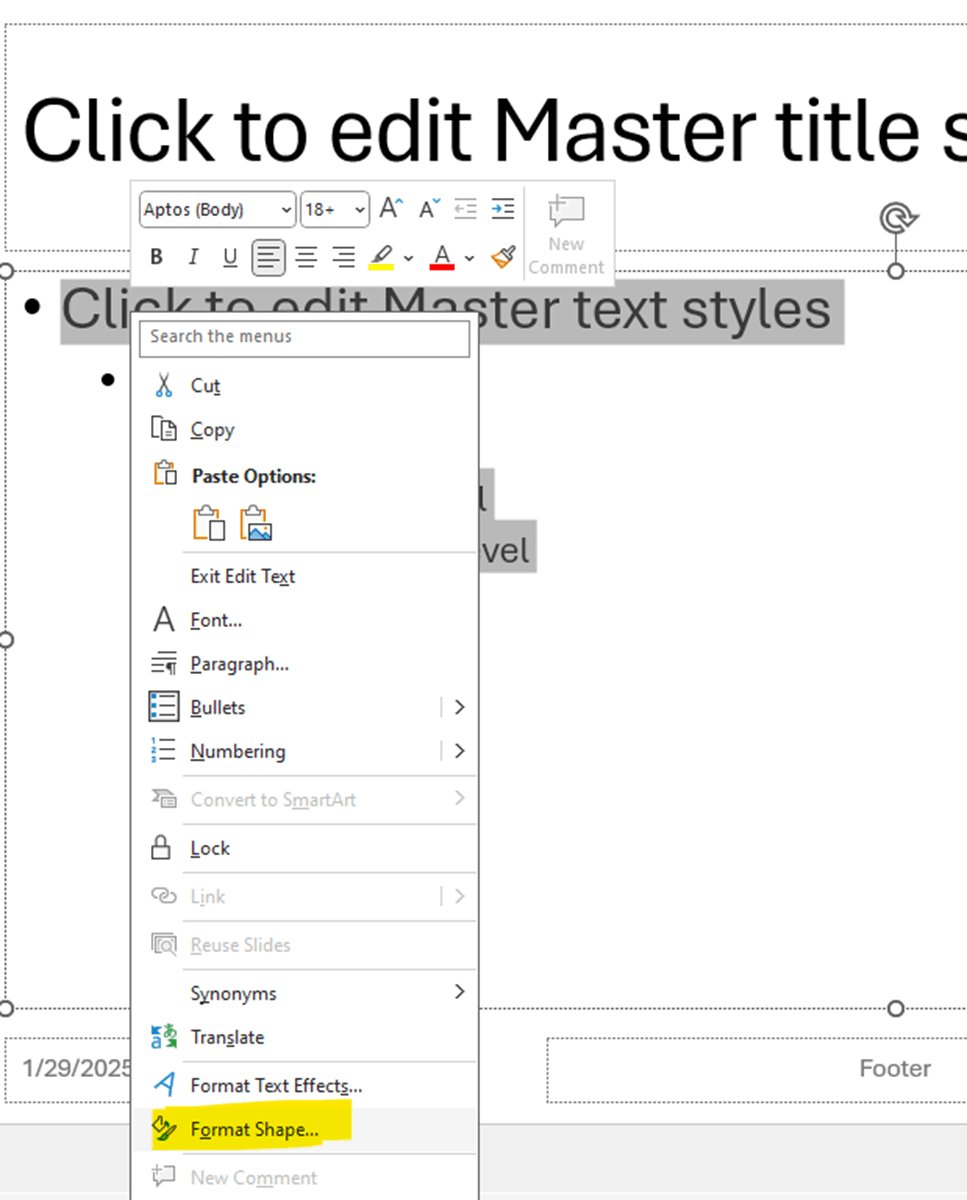
- Right-click the border of the placeholder or text box.
- Select Format Shape on the shortcut menu.
- In the Format Shape pane, select Size & Properties.
- Expand Text Box.
- Select Do not Autofit.
- Close the pane; the font size now stays fixed as you type.
To change several boxes at once, hold Shift, click each border, then open Format Shape and pick Do not Autofit once.
PowerPoint AutoFit options compared
The Text Box section of Format Shape offers three behaviours. Pick the one that matches what you want to happen when text runs past the box.
| Option | What PowerPoint does | Use it when |
|---|---|---|
| Do not Autofit | Keeps the font size and box size fixed; extra text runs outside the box | You want exact, consistent font sizes on every slide |
| Shrink text on overflow | Reduces the text size so it fits the shape | Fitting the text matters more than matching font sizes |
| Resize shape to fit text | Makes the shape taller so all the text fits | The slide has room for the box to grow downward |
Wrap text in shape sits in the same section. Leave it selected so long lines break inside the box instead of running off the slide.
Turn off AutoFit for all new slides in PowerPoint
The AutoCorrect settings control whether PowerPoint resizes title and body text as you type. Changing them stops AutoFit on placeholders you fill from now on.
- Select File > Options.
- Select Proofing.
- Under AutoCorrect options, select AutoCorrect Options.
- Select the AutoFormat As You Type tab.
- Clear the two AutoFit check boxes, one for title text and one for body text in placeholders.
- Select OK, then OK again to close PowerPoint Options.
This setting does not undo resizing that already happened. Fix existing placeholders with Stop Fitting Text to This Placeholder or Do not Autofit.
Turn off AutoFit on PowerPoint Slide Master placeholders
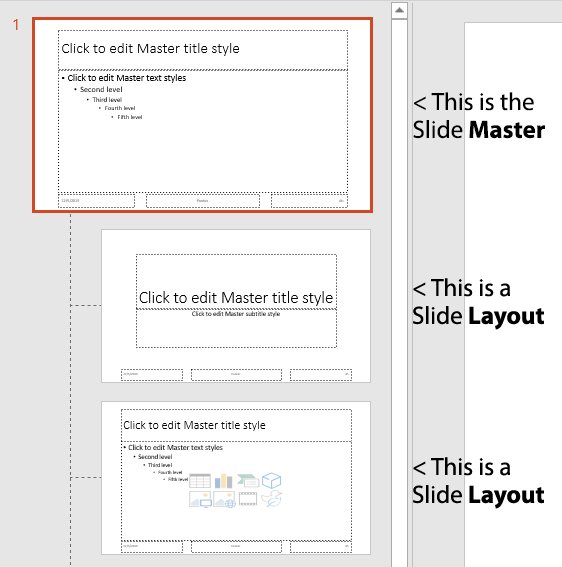
Placeholders on new slides take their settings from the slide layouts. Setting Do not Autofit there fixes every slide that uses those layouts.
- On the View tab, in the Master Views group, select Slide Master.
- Select the slide master at the top of the thumbnail list, or a single layout below it.
- Right-click the border of the title or body placeholder and select Format Shape.
- Under Size & Properties > Text Box, select Do not Autofit.
- Repeat for each placeholder and layout you use.
- Select Close Master View to return to your slides.
Slide master changes are stored in the theme. If you apply a different theme later, the changes are discarded, so save the theme first if you want to reuse it.
Turn off AutoFit in PowerPoint for Mac
PowerPoint for Mac shows the same AutoFit Options button at the lower-left corner of an overflowing placeholder. The global setting sits under Preferences instead of File > Options.
- To fix one placeholder, click its AutoFit Options button and choose Stop Fitting Text to This Placeholder.
- To change the default, open the PowerPoint menu and select Preferences.
- Select AutoCorrect.
- Open the AutoFormat As You Type tab.
- Clear the AutoFit check boxes for title and body text, then close the window.
Turn off AutoFit on every slide with a PowerPoint macro
A large deck can have hundreds of placeholders. This VBA macro sets every text shape on every slide to no AutoFit in one run. It needs the Developer tab, which you can enable on the Office ribbon under File > Options > Customize Ribbon.
Sub TurnOffAutoFit()
    Dim sld As Slide, shp As Shape
    For Each sld In ActivePresentation.Slides
        For Each shp In sld.Shapes
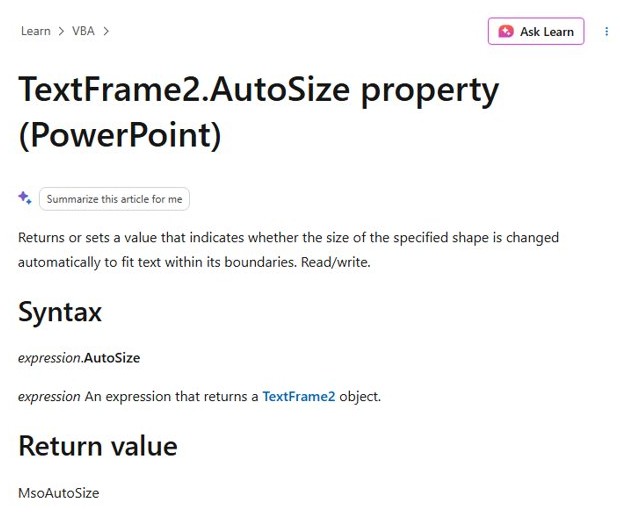
            If shp.HasTextFrame Then shp.TextFrame2.AutoSize = msoAutoSizeNone
        Next shp
    Next sld
End Sub
Open Developer > Visual Basic, select Insert > Module, paste the code, then press F5. The macro loops through every shape with a text frame and sets its AutoSize property to msoAutoSizeNone, the same as Do not Autofit.
You should see: Text on every slide returns to its set font size, and the Format Shape pane shows Do not Autofit for each box.
You do not need to save the macro; close the Visual Basic Editor and save the presentation as a normal .pptx file. Shapes inside groups and tables are not changed by this simple loop.
Check that PowerPoint AutoFit is off
- Click inside a placeholder you changed and note its font size on the Home tab.
- Type extra lines until the text runs past the bottom border.
- Confirm the font size on the Home tab stays the same.
- Confirm no AutoFit Options button appears at the lower-left corner.
- Add a new slide and repeat the test if you changed the global setting.
Fit long text without AutoFit in PowerPoint
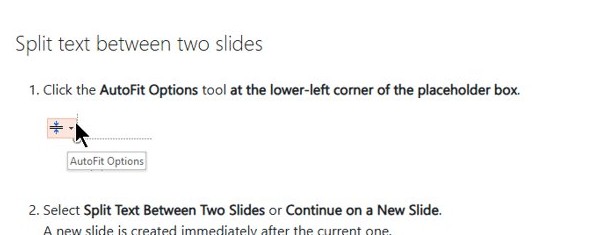
With AutoFit off, overflowing text needs another home. The AutoFit Options menu offers layout fixes that keep your font size.
| Option in the AutoFit Options menu | Result |
|---|---|
| Split Text Between Two Slides | Divides the text roughly evenly across the current slide and a new one |
| Continue on a New Slide | Keeps the current text in place and adds a new slide where you continue typing |
| Change to Two Columns | Reformats the current text into a two-column layout |
PowerPoint for the web does not split text between slides automatically. Cut the extra text and paste it onto a new slide instead.
Turn AutoFit back on in PowerPoint
- Right-click the placeholder border and select Format Shape.
- Under Size & Properties > Text Box, select Shrink text on overflow.
- For new slides, return to File > Options > Proofing > AutoCorrect Options > AutoFormat As You Type.
- Select the two AutoFit check boxes again and select OK.
PowerPoint AutoFit still resizing text: fixes
New slides still shrink text after the AutoCorrect change
The slide layout placeholders still have Shrink text on overflow set.
- Open View > Slide Master.
- Set each title and body placeholder to Do not Autofit in Format Shape.
- Select Close Master View and add a new slide to test.
The AutoFit Options button does not appear
The button only shows on a placeholder whose text has overflowed, not on a resized font or a drawn text box.
- Right-click the box border and select Format Shape.
- Open Size & Properties > Text Box.
- Select Do not Autofit.
The text box keeps growing taller instead of shrinking the text
The box is set to Resize shape to fit text.
- Open Format Shape > Size & Properties > Text Box.
- Select Do not Autofit.
- Drag a sizing handle to set the box height you want.
PowerPoint AutoFit FAQ
How to turn off AutoFit in PPT?
Click the AutoFit Options button at the lower-left of the placeholder and select Stop Fitting Text to This Placeholder. For a text box, right-click its border, select Format Shape, then Size & Properties > Text Box > Do not Autofit.
How to disable AutoFit in PowerPoint for all slides?
Go to File > Options > Proofing > AutoCorrect Options, open AutoFormat As You Type, and clear the AutoFit check boxes for title and body text. Then set Do not Autofit on the Slide Master placeholders so new slides follow.
How to turn on AutoFit?
In PowerPoint, right-click the placeholder border, select Format Shape, and choose Shrink text on overflow under Text Box. To make it the default again, select the AutoFit check boxes on the AutoFormat As You Type tab of AutoCorrect Options.
How to turn off AutoFit in Word?
Select the table, then on the Table Layout tab, in the Cell Size group, click AutoFit and choose Fixed Column Width. Word then stops widening or narrowing columns to match their contents.
How to turn off AutoFit in Excel?
Excel resizes a column only when you run AutoFit Column Width or double-click a column boundary. To lock a width, select the column, go to Home > Format > Column Width, and type a fixed value.
How to remove AutoFit in Excel?
Set a manual size over it. Select the columns or rows, open Home > Format, choose Column Width or Row Height, and enter the value you want. Each row or column holds only one size setting, so the manual value replaces the AutoFit result.
How to use AutoFit?
In Excel, select a column and choose Home > Format > AutoFit Column Width, or double-click the boundary right of the column heading. In Word, click AutoFit > AutoFit Contents on the Table Layout tab. In PowerPoint, choose Shrink text on overflow in Format Shape.