To run Disk Management as admin in Windows 11, search Start for diskmgmt.msc, right-click the result, select Run as administrator and then select Yes on the User Account Control prompt.
This guide covers every route Microsoft supports, including the Run box, Windows Terminal, Task Manager, a desktop shortcut and Computer Management, plus what to do when Disk Management will not elevate or its options stay grayed out.
The fastest method: open Disk Management from the Start button menu
Microsoft recommends the Start button menu as the quickest way in. It takes two clicks and works on Windows 11 and Windows 10.
- Right-click the Start button, or press Win + X.
- Select Disk Management in the menu.
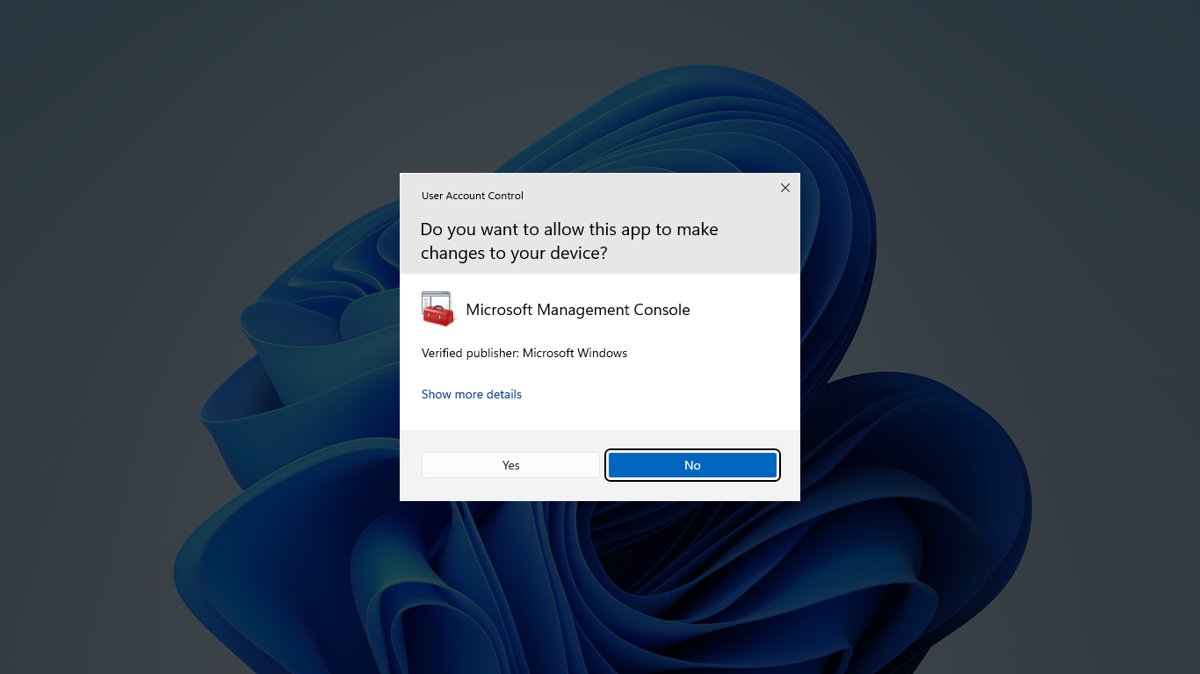
- If a User Account Control prompt appears, select Yes, or enter an administrator password if you use a standard account.
- Wait for the disk list to load in the lower half of the window, then make your change.
If Disk Management does not open this way, or an option you need is grayed out, close it and launch it with an explicit Run as administrator from Search, the next method. Microsoft gives that same fallback in its own volume guides.
Run Disk Management as admin from Search
Search is the explicit elevated route that Microsoft documents. Disk Management appears in Search under the name Create and format hard disk partitions, and also under its file name, diskmgmt.msc.
- Select Start or the search box on the taskbar.
- Type
diskmgmt.msc, or type Create and format hard disk partitions. - Right-click the result and select Run as administrator.
- Select Yes on the User Account Control prompt.
- Disk Management opens with administrator rights.
Keyboard users can skip the right-click: with the result highlighted, press Ctrl + Shift + Enter to start it as administrator. The same right-click works for any other tool you need to run as administrator in Windows 11.
Run Disk Management as admin using the Run box
The Run box accepts the same diskmgmt.msc command. Pressing Ctrl + Shift + Enter instead of Enter asks Windows to run it as administrator.
- Press Win + R to open Run.
- Type
diskmgmt.mscin the Open box. - Press Ctrl + Shift + Enter. Selecting OK or pressing Enter opens it normally instead.
- Select Yes on the User Account Control prompt.
- Disk Management opens elevated.
Run Disk Management as admin from Windows Terminal, Command Prompt, or PowerShell
Anything you start from an elevated console inherits its administrator rights. That makes an admin terminal a reliable route when other shortcuts misbehave.
- Press Win + X and select Terminal (Admin), labelled Windows Terminal (Admin) on some builds.
- Select Yes on the User Account Control prompt.
- Check that the window title shows Administrator.
- Type
diskmgmt.mscand press Enter. - To elevate from a normal PowerShell window instead, run
Start-Process -FilePath "mmc.exe" -ArgumentList "$env:windir\system32\diskmgmt.msc" -Verb RunAsand approve the prompt.
Command Prompt works the same way: search Start for cmd, right-click Command Prompt, select Run as administrator, then type diskmgmt.msc. If you prefer PowerShell, run PowerShell as administrator and type the same command.
Run Disk Management as admin from Task Manager
Task Manager can start a new task with administrative privileges. Use it when the Start menu, Search or the taskbar will not respond.
- Press Ctrl + Shift + Esc to open Task Manager.
- Select Run new task (under the File menu in the older Task Manager layout).
- Type
diskmgmt.mscin the Open box. - Tick the checkbox that creates the task with administrative privileges.
- Select OK. Disk Management opens elevated.
Create a desktop shortcut that opens Disk Management
A shortcut that points at mmc.exe can be set to always run as administrator, so one double-click replaces the routine.
- Right-click an empty area of the desktop and select New > Shortcut.
- Enter
%windir%\system32\mmc.exe %windir%\system32\diskmgmt.mscas the location and select Next. - Name it
Disk Management (Admin)and select Finish. - Right-click the shortcut and select Properties.
- On the Shortcut tab, select Advanced, tick Run as administrator, then select OK twice.
- Double-click the shortcut and select Yes on the prompt.
On Windows 11, select Show more options if Properties or Run as administrator is missing from the compact right-click menu.
Open Disk Management from Computer Management
This is the route in Microsoft's Disk Management troubleshooting article, and the fallback it gives when Disk Management will not open with administrator permissions.
- Type Computer Management in the search box on the taskbar.
- Right-click Computer Management in the results and select Run as administrator.
- Select Yes on the prompt.
- In the left pane, go to Storage > Disk Management.
Disk Management then runs inside the elevated Computer Management window, alongside Device Manager, Services and Event Viewer.
What Disk Management does in Windows 11
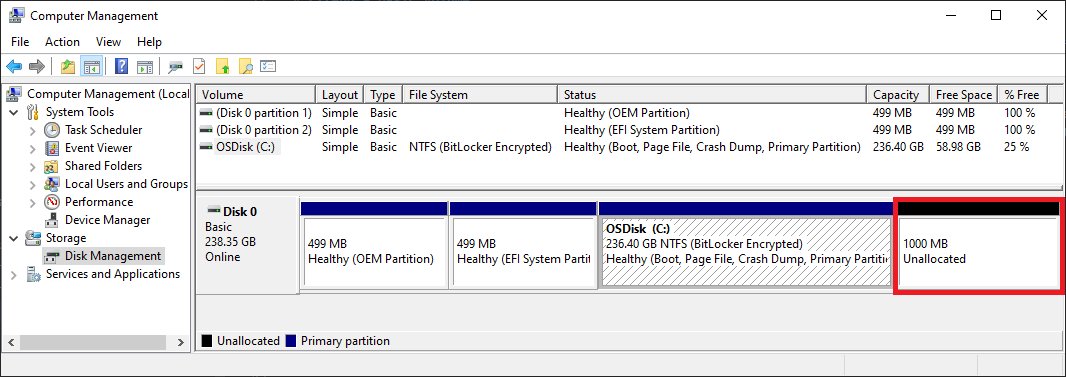
Disk Management is a Windows system utility for advanced storage work. It shows every drive, every partition on each drive, and how much space each one uses.
| Partition or task | What it is |
|---|---|
| Local Disk (C:) | Holds the Windows installation and is the usual place for apps and files |
| EFI System partition | Supports the start (boot) process of the PC and Windows |
| Recovery partition | Stores tools that help when the PC does not start |
| Initialize a disk | Prepares a new drive so Windows can use it |
| Extend or shrink a volume | Grows a volume into empty space, or frees space for a new partition |
| Change a drive letter | Changes or assigns the letter a drive shows in File Explorer |
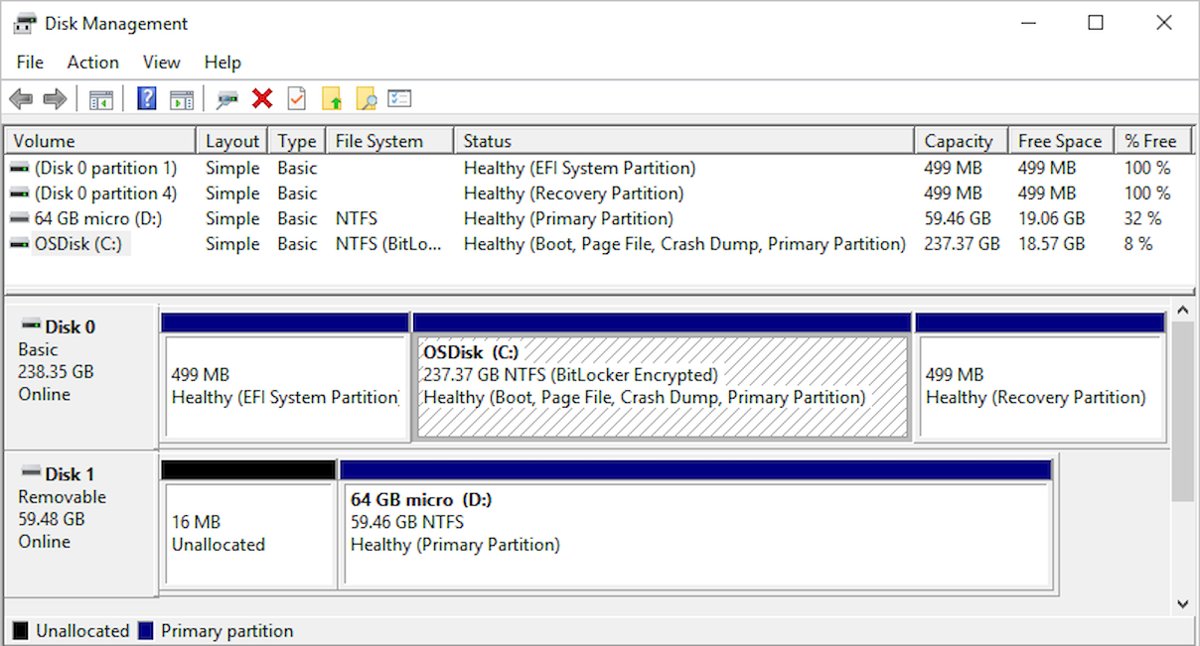
Disk Management can show the EFI System and Recovery partitions as 100 percent free. Microsoft says they hold critical files and should not be modified.
Do you actually need to “Run as admin”?
Yes, for any change. Microsoft lists membership of the Administrators or Backup Operators group as a requirement for initializing disks, shrinking volumes and changing drive letters.
| Your account | What happens when you launch it elevated | Can you change disks? |
|---|---|---|
| Administrator (the usual home PC owner) | Windows shows a consent prompt; select Yes | Yes |
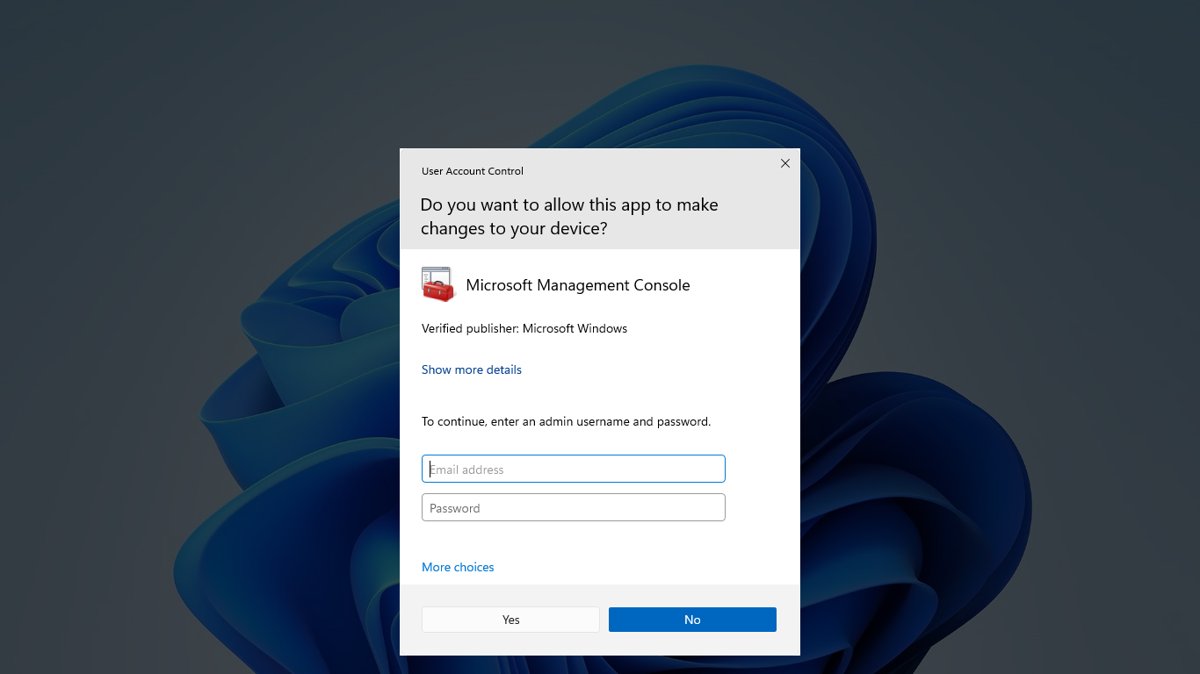
| Standard user | Windows shows a credential prompt; enter an administrator's user name and password | Yes, with the administrator's credentials |
| Member of Backup Operators | Elevate the same way as an administrator | Yes, for the tasks Microsoft lists for that group |
| No admin password available | Elevation cannot complete | No; ask an administrator to make the change |
When Extend Volume is unavailable, the first thing Microsoft tells you to check is whether Disk Management or Computer Management has elevated permissions.
Understanding the UAC prompt
User Account Control keeps even administrator accounts on a standard token until you approve a task that needs more. Disk Management changes are such a task.
| What you see | What it means |
|---|---|
| A prompt with Yes and No | The consent prompt: you are an administrator and only need to approve |
| A prompt asking for a user name and password | The credential prompt: you are a standard user, or policy requires credentials |
| Gray prompt background | A Windows administrative app or an app signed by a verified publisher; Disk Management falls here |
| Yellow prompt background | The app is unsigned, or signed but not trusted; do not approve it unless you started it on purpose |
| The rest of the screen dims | The secure desktop: only Windows processes can reach the prompt until you answer it |
| A Windows Hello request instead of Yes | Administrator protection is turned on in Windows 11; verify with your PIN, face or fingerprint |
Common Disk Management tasks after opening as admin
Each task starts with a right-click on a disk or volume in the lower half of the window. The label you need appears in that menu.
| Task | Right-click this | Then select |
|---|---|---|
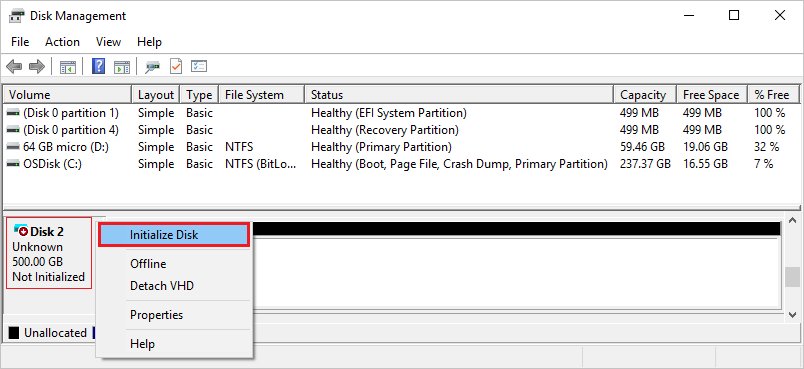
| Initialize a new SSD or hard drive | The disk marked Not Initialized (bring it Online first if it is offline) | Initialize Disk, keep GPT unless you need MBR, then OK |
| Create a new volume | The Unallocated space | New Simple Volume, then follow the wizard for size, letter and file system (usually NTFS) |
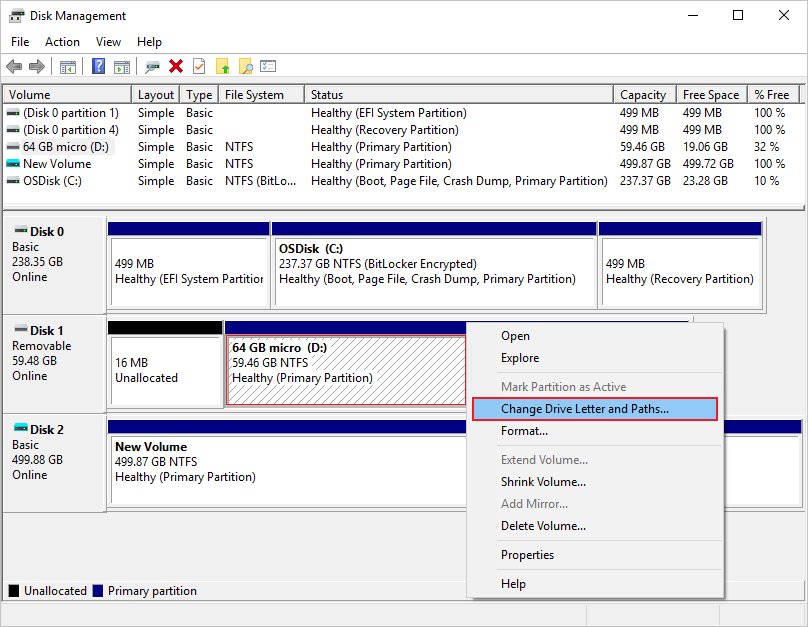
| Change a drive letter | The volume | Change Drive Letter and Paths > Change or Add > Assign the following drive letter |
| Extend a volume | The volume with unallocated space directly after it | Extend Volume > Next > choose the size > Finish |
| Shrink a volume | An NTFS or raw basic volume | Shrink Volume, then enter the amount to shrink |
| Format a volume | The volume (back it up first; this erases it) | Format |
These right-click menus match the ones in the Windows 10 Disk Management walkthrough, because Microsoft documents one Disk Management for both versions.
Disk Management vs. Settings storage tools in Windows 11
Windows 11 Settings now covers some volume jobs too, under Settings > System > Storage > Advanced storage settings > Disks & volumes.
| Your situation | Use this | Why |
|---|---|---|
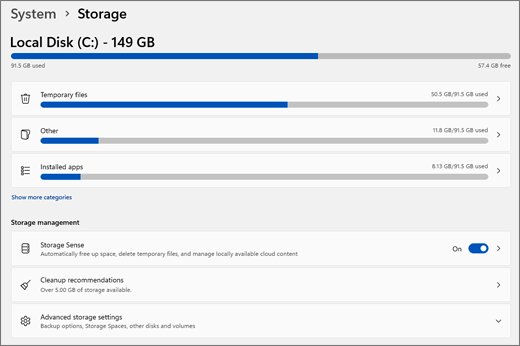
| You want to see each disk's type, capacity and usage | Settings, Disks & volumes | Lists every connected disk and volume in one page |
| You need to create, format or resize a volume with a drive letter | Either tool; in Settings, select Properties on the volume | Both support these jobs |
| You need to initialize a disk or change a drive letter | Disk Management | Microsoft documents these tasks in Disk Management |
| You need free space, not a new partition | Settings, Storage Sense and Cleanup recommendations | They remove temporary files, Recycle Bin items and unused files |
| You need to script a change or clean a whole disk | DiskPart | A command interpreter with commands Disk Management does not expose |
If space is your real problem, run Disk Cleanup before you shrink or delete any partition.
When to use DiskPart instead
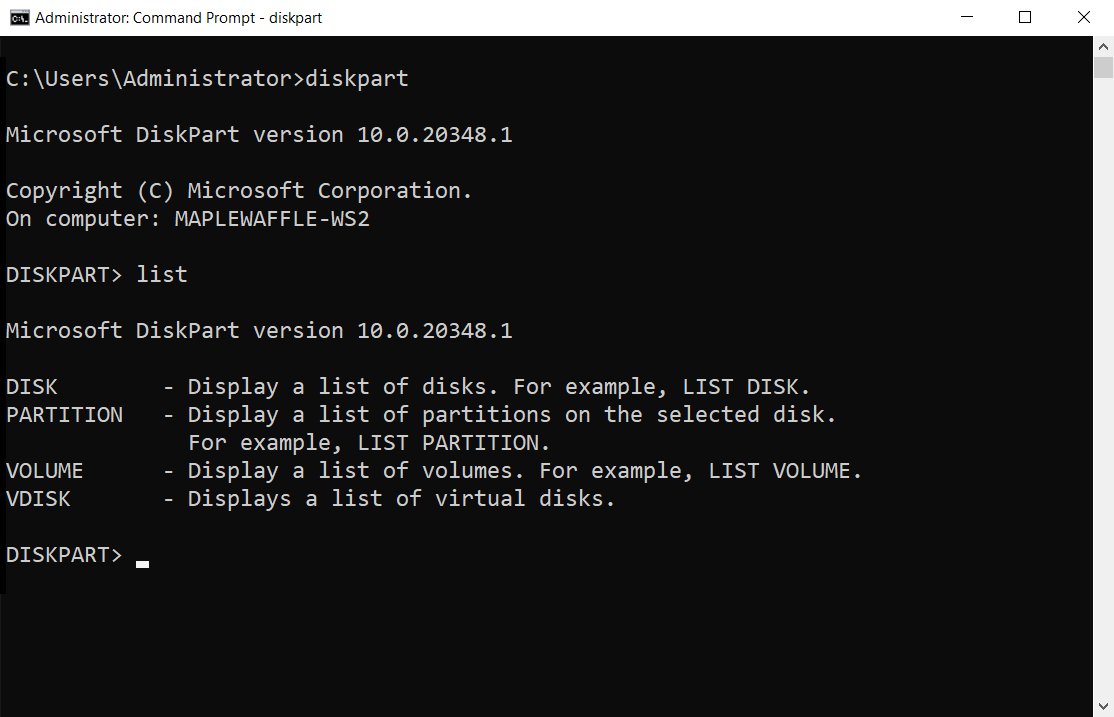
Use DiskPart when you need a script, a remote session without a desktop, or a command such as clean that removes all partitioning from a disk. Microsoft states you must be in the local Administrators group, or a group with similar permissions, to run it.
diskpartRun it in an elevated Terminal or Command Prompt. At the DISKPART> prompt, type list disk to see disks, select disk 1 to give a disk focus, and list volume to see volumes. Every later command acts on the object that has focus, marked with an asterisk after list.
You should see: The prompt changes to DISKPART> and list disk returns a table of your disks with their numbers, status and size.
Check which object has the asterisk before you run clean, delete or format, because each one acts on the object with focus. Type exit to leave DiskPart.
Troubleshooting: Disk Management will not open as admin
Windows asks for a password you do not have
You are signed in with a standard account, so Windows shows the credential prompt.
- Ask the PC's administrator to enter their password on the prompt.
- Or ask them to make the disk change while signed in with their own account.
Ctrl + Shift + Enter opens Disk Management without elevation
The key combination only elevates while the Run box or a Start search result has focus.
- Close Disk Management.
- Press Win + R, type
diskmgmt.mscand press Ctrl + Shift + Enter with the cursor in the Open box. - If that still fails, use Computer Management with Run as administrator and go to Storage > Disk Management.
Run as administrator is missing from the right-click menu
Windows 11 hides some classic items behind the compact context menu.
- Right-click the shortcut or file again.
- Select Show more options.
- Select Run as administrator.
Disk Management can't start the Virtual Disk Service
You are connecting to a remote PC that does not support the Virtual Disk Service (VDS), or Windows Firewall blocks the connection.
- On both PCs, allow the Remote Volume Management exception in Windows Firewall.
- Make sure both PCs are members of a domain, because workgroups do not support remote connections.
- Or connect with Remote Desktop Connection and run Disk Management directly on the remote PC.
Start and Search do not respond, so you cannot launch it
The shell is frozen, but Task Manager still works.
- Press Ctrl + Shift + Esc.
- Select Run new task, type
diskmgmt.mscand tick the administrative privileges checkbox. - Select OK.
Troubleshooting: Options are grayed out in Disk Management
Extend Volume is grayed out
There is no unallocated space directly after the volume, the volume is not NTFS or ReFS, Disk Management is not elevated, or a disk over 2 TB uses MBR.
- Reopen Disk Management with Run as administrator.
- Check that the black Unallocated bar sits immediately to the right of the volume on the same disk.
- If another volume sits in between, back it up and delete it, or create a new volume in the free space instead.
- For a disk larger than 2 TB, make sure it uses GPT.
Change Drive Letter and Paths is grayed out or missing
The disk is unallocated, the partition is an EFI System or Recovery partition, or you lack permissions.
- Initialize the disk and create a volume on it first.
- Leave EFI System and Recovery partitions alone; they are not meant to have letters.
- Reopen Disk Management as administrator and try again.
Shrink Volume offers less space than expected
Unmovable files such as the page file or the shadow copy storage area sit near the end of the volume.
- Open Event Viewer and check the Application log for event ID 259, which names the blocking file.
- Move the page file or shadow copies to another disk from Control Panel.
- Shrink the volume, then move the page file back.
Initialize Disk is unavailable on a new drive
The disk is Offline.
- Right-click the disk label on the left, such as Disk 1.
- Select Online.
- Right-click it again and select Initialize Disk.
Safety tips before changing partitions
| Before you | Know this | Safer habit |
|---|---|---|
| Initialize or format a disk | Both erase all data on it | Copy the files to another drive first |
| Touch the EFI System or Recovery partition | They hold files the PC needs to start and recover, even when shown as empty | Leave them unchanged |
| Change a BitLocker-protected drive | Some tasks need your BitLocker recovery key | Find and save the recovery key first |
| Make any partition change | A mistake can leave Windows unable to start | Create a restore point and a recovery drive |
| Change the letter of the Windows or app drive | Apps might fail to run or find their files | Only change letters on data or new drives |
Run DiskPart clean |
It removes all partition and volume formatting from the selected disk | Run list disk and confirm the asterisk is on the right disk |
Disk Management admin rights FAQ
How do I open Disk Management as administrator in Windows 11?
Search Start for diskmgmt.msc, right-click the result and select Run as administrator, then select Yes. You can also press Win + R, type diskmgmt.msc and press Ctrl + Shift + Enter, or open Computer Management as administrator and select Storage > Disk Management.
What is the Run command for Disk Management?
The Run command is diskmgmt.msc. Press Win + R, type it and select OK to open Disk Management. Press Ctrl + Shift + Enter instead of Enter to start it as administrator. The same command works in Command Prompt, PowerShell and Windows Terminal.
Does Disk Management need admin rights?
Yes, to make changes. Microsoft requires membership of the Administrators or Backup Operators group to initialize disks, shrink volumes and change drive letters. A standard user can still complete them by entering an administrator's credentials on the User Account Control prompt.
How do I open Disk Management as admin from CMD?
Search Start for cmd, right-click Command Prompt and select Run as administrator. Approve the prompt, check that the title starts with Administrator, then type diskmgmt.msc and press Enter. Disk Management inherits the console's administrator rights.
How do I run Disk Management as admin from PowerShell?
In an elevated PowerShell window, type diskmgmt.msc and press Enter. From a normal window, run Start-Process -FilePath "mmc.exe" -ArgumentList "$env:windir\system32\diskmgmt.msc" -Verb RunAs and approve the prompt. RunAs is the documented Run as administrator verb.
Where is Disk Management in Windows 11?
Right-click the Start button and select Disk Management, or search for Create and format hard disk partitions. It is also inside Computer Management under Storage. The program itself is the diskmgmt.msc console in the System32 folder.
Why are options grayed out in Disk Management?
Usually Disk Management lacks admin rights, the disk is offline or uninitialized, or the volume does not meet the task's rules. Extend Volume needs unallocated space directly after an NTFS or ReFS volume. Reopen it as administrator and check the disk's status first.
Can I use Disk Management without admin rights?
Not for changes. Without an administrator account or its password, elevation cannot complete, so you cannot initialize, format, resize or reletter drives.