Dell SupportAssist OS Recovery is already installed on most Dell PCs that shipped with Windows 10 or Windows 11, so you open it by tapping F12 at the Dell logo rather than downloading it.
If the recovery partition is gone, you can get it back over the internet with BIOSConnect or download it to a 16 GB USB drive with the Dell OS Recovery Tool. This guide covers starting it, each tool on its home page, the USB route, the version check and fixes for the usual problems.
How to start SupportAssist OS Recovery
The F12 one-time boot menu is the fastest way in, and it works whether or not Windows still starts.
By default, the tool also opens on its own after two failed boots in a row.
- Turn on or restart the Dell computer.
- Tap F12 repeatedly as soon as the Dell logo appears, until the one-time boot menu opens.
- If the Windows logo appears instead, let Windows finish loading, restart and try again.
- Select SupportAssist OS Recovery and press Enter.
- On the first launch, click APPROVE to accept the privacy policy.
- Click START WALKTHROUGH for a short tour, or SKIP to go straight to the home page.
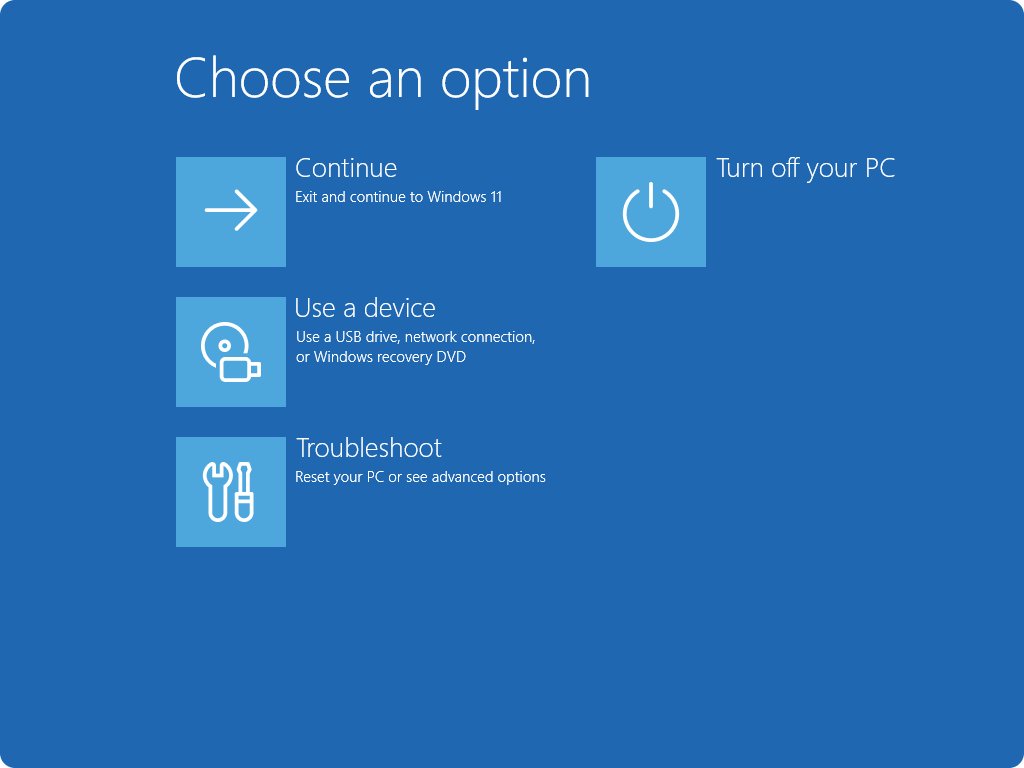
When Windows still runs, you can also get there from Windows Recovery. On Windows 11, open Settings > System > Recovery and select Restart now next to Advanced startup. You can also hold Shift while you select Power > Restart.
In Windows Recovery, select Troubleshoot, then Factory Image Restore, to open SupportAssist OS Recovery.
Which SupportAssist OS Recovery route fits your situation?
| Your situation | Use this | Why |
|---|---|---|
| Windows fails to start but the drive is untouched | F12 > SupportAssist OS Recovery | The recovery partition is still on the drive |
| Windows works and you want a clean start | Windows Recovery > Troubleshoot > Factory Image Restore | No key timing needed at boot |
| The drive was formatted, replaced or the partition is damaged | BIOSConnect from the F12 menu | Downloads a fresh copy of the recovery environment from Dell |
| BIOSConnect is unavailable or fails | Recovery USB made with the Dell OS Recovery Tool | Works from any Windows 10 or 11 PC with a 16 GB drive |
| Dell with a Qualcomm processor | Windows Push-Button Reset | SupportAssist OS Recovery is not supported on those models |
Before you start: check whether your Dell supports it
SupportAssist OS Recovery comes factory-installed on supported Dell models and needs no extra service plan. It also works after the Dell warranty ends.
| Requirement | Detail |
|---|---|
| Operating system | Factory-installed Windows 10 or Windows 11 |
| Product lines in the Support Matrix | Alienware, Dell, Dell Pro, Dell Pro Max, Dell Pro Rugged, G Series, Inspiron, Latitude, OptiPlex, Precision, Vostro and XPS (check your exact model) |
| Not supported | Dell computers with Qualcomm processors |
| Disk space used | About 900 MB on the system drive |
| Backup media | A USB flash drive, USB hard drive or SD card with more free space than your files |
| Encrypted drives | Your BitLocker recovery key, or your Microsoft account sign-in for device encryption |
| Cloud features | Wi-Fi or a wired Ethernet connection |
The quickest test is the F12 menu itself. If SupportAssist OS Recovery is listed there, your computer supports it. Dell's SupportAssist OS Recovery Support Matrix on its documentation page lists every supported model.
What SupportAssist OS Recovery can do
SupportAssist OS Recovery is a separate recovery environment, not the Windows SupportAssist app. It runs before Windows loads, so it still works when Windows will not boot.
| Home page tool | What it does | Deletes your files? |
|---|---|---|
| Scan Hardware | Runs hardware diagnostics in about 10 to 15 minutes | No |
| Back up Files / Disk Cloning | Copies personal files to an external drive, or clones the whole disk | No |
| Repair | Fixes the partition table, boot files and Windows health | No |
| Reset to factory settings | Reinstalls the Windows image that shipped with the computer | Yes, unless you back up first |
| Reset and update | Downloads and installs the latest Windows with critical Dell drivers and apps | Yes, unless you back up or transfer first |
After a reset, SupportAssist Recovery Assistant appears at the first Windows sign-in. It installs Windows and Dell driver updates, puts back Dell factory-installed software and restores backups made with the tool.
Use BIOSConnect if the recovery partition is damaged
BIOSConnect is a firmware feature on most Dell models from 2018 onward. It first tries the recovery environment on the drive, and if that fails it downloads a fresh copy from Dell's servers.
There is no F12 entry called BIOSConnect. You still pick SupportAssist OS Recovery, and BIOSConnect takes over when the local copy is missing.
- Turn on the computer and tap F12, then select BIOS Setup or System Setup.
- Open SupportAssist (it may sit under Update, Recovery or Maintenance).
- Set BIOSConnect to On and make sure SupportAssist OS Recovery is also enabled.
- Save the changes and let the computer restart.
- Tap F12 again and select SupportAssist OS Recovery.
- Plug in an Ethernet cable, or select your Wi-Fi network, type the password and click Connect.
- Wait while the recovery environment downloads and starts; it is roughly 1 to 2 GB.
Some models keep part of BIOSConnect on the drive. On those, a formatted drive removes Wi-Fi support and only a wired connection works. If BIOSConnect fails, update the Dell BIOS to the latest version from Dell's support site and try again.
How to download SupportAssist OS Recovery to a USB drive
You cannot download SupportAssist OS Recovery as a normal Windows program. Instead, the Dell OS Recovery Tool writes it, together with a Windows image, to a bootable USB drive.
Use any working Windows 11 or Windows 10 PC. The tool has X64 and ARM64 versions, so pick the one that matches the PC you run it on.
- Back up anything on the USB drive, because the tool formats it.
- Download the Dell OS Recovery Tool from Dell's support site, install it and open it.
- Select This computer, or enter the Service Tag of the broken Dell computer.
- Choose the Automated by SupportAssist image if it is offered for your Service Tag.
- Disconnect other USB drives, then connect a USB drive with at least 16 GB.
- Select the drive in the USB Drive list and tick the box confirming it will be reformatted.
- Click Download and wait while the tool downloads, verifies and writes the image.
- Click Close when the summary appears, then remove the drive.
The host PC needs administrator rights, Microsoft .NET Framework 4.8.1 or later and at least 16 GB of free disk space. Dell recommends a wired connection for the download.
If the tool shows only Windows images for your Service Tag, SupportAssist OS Recovery is not available for that model.
Boot from the recovery USB
- Connect the recovery USB drive to the Dell computer you want to fix.
- Restart it and tap F12 at the Dell logo to open the one-time boot menu.
- Under UEFI Boot, select the USB drive and press Enter.
- Wait for the SupportAssist OS Recovery home page to load.
- Select Start Reset in the Reset panel and choose a reset option.
- Remove the USB drive when the Recovery process guide screen tells you to, then restart.
Scan the hardware first
Run this scan before any repair or reset. A failing drive or memory module will break a fresh Windows install too.
- On the SupportAssist OS Recovery home page, click APPROVE if it asks for access to system information.
- Select Scan on the Scan Hardware tile.
- Click Start Scan and wait 10 to 15 minutes.
- If the result reads Everything looks good, click DONE and move on to the backup.
- If a test fails, note the failed test, error code, validation code and Service Tag.
- Enter those details on Dell's SupportAssist Pre-Boot System Performance Check page, or scan the QR code with your phone.
Back up files before repairing or resetting
This backup copies personal files only. It does not save installed programs or system settings.
- Select Start on the Back up Files/Disk Cloning tile.
- Enter your BitLocker recovery key if the drive is encrypted and the tool asks for it.
- Select Back Up Files, click Next, then click Start Backup.
- Clear the check box next to any folder you do not want to copy.
- Note the Total backup size shown on the screen.
- Connect a USB drive with more free space than that total, select it and click NEXT.
- Click DONE when the backup finishes.
Format the backup drive as exFAT or NTFS. A FAT32 drive cannot hold files larger than 4 GB, and the backup reports file errors for them.
Repair Windows without a reset
Repair keeps your files and apps. Try it first when the hardware scan passes but Windows still will not start.
- Select Repair on the Repair software tile.
- Click START REPAIR.
- If device encryption is on, sign in with your Microsoft account email or phone number and password.
- Wait while the tool checks the partition table, boot files and Windows health.
- Click DONE when the screen reads Everything back to normal, then restart.
If the repair fails, back up your files and use one of the two reset options below.
Reset to factory settings
This reinstalls the Windows image your computer shipped with. It erases the drive and removes every installed program and driver, so keep your product keys for paid software such as Microsoft 365.
- Select Start Reset on the SupportAssist OS Recovery home page.
- Select Reset to factory settings and click NEXT.
- Choose Yes, back up my files and pick a drive, or No, do not back up my files.
- Click CONTINUE when the backup finishes.
- Tick I understand that the reset will delete all of my system data and personal files, and optionally pick a reason.
- Click NEXT to start; without a backup it can take 45 minutes or more.
- Click RESTART when it finishes and let Windows complete its setup.
If only Reset and update appears, the tool could not find the factory image or decided the system cannot be repaired. Use the next section instead.
Reset and update from the cloud
Reset and update downloads the latest Windows version plus critical Dell drivers and applications. It needs an internet connection, and it works even when the factory image is gone.
- Select Start Reset, and use Set up network to join Wi-Fi if the tool asks.
- Select Reset and update and click NEXT.
- Choose Yes, give access and transfer my settings and personal file, or the No option to skip the transfer.
- If you transfer, accept the Microsoft and Dell license terms and enter the BitLocker key if asked.
- Select the user accounts to transfer, set an optional backup password and click BEGIN TRANSFER.
- Connect a larger USB or external drive if your data does not fit on local storage.
- Confirm the reset and click RESTART when it finishes.
On Dell Pro, Dell Pro Max, Latitude, OptiPlex and Precision computers, missing drivers can come back through Dell Command Update. Run it as administrator and turn on Advanced Driver Restore in its settings.
Check the SupportAssist OS Recovery version
The version number appears only inside the recovery environment, under its About entry.
- Start SupportAssist OS Recovery from the F12 menu.
- Select the More options icon in the top-right header.
- Select About to see the model, Service Tag, warranty expiry date and installed SupportAssist OS Recovery version.
- If an UPDATE NOW button shows in the header, click it to install the newer version.
- If there is no UPDATE NOW button, the installed version is already current.
Change when SupportAssist OS Recovery starts automatically
The automatic start is controlled in the BIOS. The default is two failed boots in a row.
- Restart the computer and tap F2 until Preparing to enter setup appears.
- Open SupportAssist System Resolution (called SupportAssist in some BIOS versions).
- Make sure SupportAssist OS Recovery is selected.
- Set Auto OS Recovery Threshold to 1, 2 or 3, or OFF to stop the automatic start.
- Save the changes and exit; the computer restarts.
Fix common SupportAssist OS Recovery problems
SupportAssist OS Recovery is missing from F12 or not loading
The option is turned off in the BIOS, or the recovery partition was deleted when the drive was formatted or Windows was clean-installed.
- Restart and tap F2 to open BIOS setup.
- Expand SupportAssist System Resolution and select SupportAssist OS Recovery.
- Check that Auto OS Recovery Threshold is not set to OFF, then save and exit.
- If the entry is still missing, enable BIOSConnect and start it from F12 to download a fresh copy.
- If BIOSConnect is not available, create a recovery USB with the Dell OS Recovery Tool.
It does not start automatically after failed boots
The automatic start is disabled, the boot files are missing, or the service OS was removed.
- Set Auto OS Recovery Threshold to 1, 2 or 3 in BIOS setup.
- Start the tool manually from the F12 menu to confirm it still exists.
- If it does not load, use Reset and update from a recovery USB, or reinstall it through BIOSConnect.
The USB creation tool reports insufficient space
The USB drive is under 16 GB, or the PC running the tool has less than 16 GB free for the download.
- Use a USB drive of at least 16 GB.
- Free up at least 16 GB on the host PC's system drive.
- Disconnect other USB drives so you select the right one, then run the tool again.
The recovery environment cannot connect to Wi-Fi
Some models keep the wireless driver on the drive, so a damaged partition leaves only wired networking; saved networks can also reconnect unexpectedly.
- Connect an Ethernet cable; the tool detects a wired connection automatically.
- Re-type the Wi-Fi password and remember that it is case-sensitive.
- If an unwanted saved network keeps reconnecting, open BIOS Setup from the F12 menu and restore the wireless settings to their defaults.
- If BIOSConnect still fails to connect, update the BIOS to the latest version.
Dell SupportAssist OS Recovery FAQ
How do I use Dell SupportAssist OS Recovery?
Tap F12 at the Dell logo and select SupportAssist OS Recovery. Run Scan Hardware first, then back up your files, then try Repair. Use Reset to factory settings or Reset and update only when the repair fails.
How do I access Dell SupportAssist OS Recovery?
Restart the computer and tap F12 to open the one-time boot menu, then select SupportAssist OS Recovery. From Windows Recovery, select Troubleshoot and then Factory Image Restore. It also opens on its own after two failed boots.
How do I update Dell SupportAssist OS Recovery?
Open SupportAssist OS Recovery and look for an UPDATE NOW button in the top header. It appears only when a newer version exists. If the environment is damaged, BIOSConnect downloads a fresh copy from Dell instead.
Can I download SupportAssist OS Recovery as a normal Windows program?
No. It lives in a hidden recovery partition and runs before Windows starts. To get it back, use BIOSConnect or the Dell OS Recovery Tool. The Dell SupportAssist app for Windows is a different program.
Is Dell SupportAssist OS Recovery necessary?
It is not required for Windows to run, but it is the simplest way to diagnose, repair or reset a Dell PC that will not boot. It uses only about 900 MB of disk space, so keeping it costs little.
Does SupportAssist OS Recovery work on every Dell computer?
No. It supports selected Dell models that shipped with Windows 10 or Windows 11, and it is not supported on Dell computers with Qualcomm processors. Dell's Support Matrix lists every supported model.
Will SupportAssist OS Recovery delete my files?
Scan Hardware, Back Up Files and Repair keep your files. Reset to factory settings and Reset and update erase the drive and remove installed programs, so back up first or accept the backup offer during the reset.
What is the difference between Reset to factory settings and Reset and update?
Reset to factory settings reinstalls the Windows image your computer shipped with. Reset and update downloads the latest Windows version with critical Dell drivers and apps, and it works even when the factory image is missing.
What size USB drive is required?
Use a USB drive of at least 16 GB for the recovery media. The Dell OS Recovery Tool formats it, so copy anything you need off the drive first.
Do I need the BitLocker recovery key?
Yes, if the drive is encrypted. The tool asks for the BitLocker key before a file backup or a transfer during Reset and update. With device encryption, Repair asks for your Microsoft account sign-in instead.
Bottom line on Dell SupportAssist OS Recovery
Keep SupportAssist OS Recovery enabled and reach it with F12 whenever Windows will not start: scan, back up, then repair before you reset. It is already on supported Dell PCs, costs about 900 MB, and BIOSConnect or a 16 GB recovery USB can rebuild it if the partition is lost.