To use Snip & Sketch in Windows 10, press Windows logo key + Shift + S, choose a rectangle, freeform, window or full-screen snip, then select the notification that appears to annotate, save or share the screenshot.
This guide covers every way to open Snip & Sketch, the annotation tools, saving and printing, its settings, keyboard shortcuts, and what changed on Windows 11.

Take a screenshot using Snip & Sketch
Windows logo key + Shift + S opens the snipping toolbar from anywhere in Windows 10, even when Snip & Sketch is closed. The capture goes straight to the clipboard.
- Set up the screen you want to capture.
- Press Windows logo key + Shift + S. The screen dims and the snipping toolbar appears at the top.
- Select a snip type on the toolbar: rectangle, freeform, window or full screen.
- Drag around the area you want, or click the window you want for a window snip.
- Select the notification that appears right after the snip to open it in Snip & Sketch.
- Annotate the screenshot, then save, copy or share it from the toolbar.
If you miss the notification, the snip is still on the clipboard. Paste it with Ctrl + V into a document, chat or email.
Snip & Sketch remembers the snip type you picked and uses it the next time you start a snip.
Snip & Sketch app in Windows 10
Snip & Sketch, previously known as Screen Sketch, started inside the Windows Ink Workspace and became a separate app that updates through the Microsoft Store app. It was built to take over from the classic Snipping Tool.
| Feature | What it does in Snip & Sketch |
|---|---|
| Snip types | Rectangle, freeform, window and full screen |
| Delayed snip | Starts the capture after a short countdown, added in app version 10.1807 |
| Annotation | Pen tools, line width, stencils, sharing and exporting |
| Borders | Adds an outline so a screenshot stands out on a similar background |
| Saving | PNG by default, with JPG and GIF also available; default folder is Pictures |
| Printing | A Print button, including print to PDF |
| Open an existing image | Draw on a previous image as well as on a new snip |
| Windows | Shows on the taskbar and in Alt + Tab, and several windows can be open at once |
Windows 10 reached the end of support on October 14, 2025. On Windows 11, Windows logo key + Shift + S opens Snipping Tool instead, and the Microsoft Store listing for Snip & Sketch now leads to Snipping Tool.
How to open Snip and Sketch
Snip & Sketch has more entry points than most built-in apps. Pick the one that fits how you work.
| How you want to start | Do this | What happens |
|---|---|---|
| Snip right now from any app | Press Windows logo key + Shift + S | The snipping toolbar opens, and the snip goes to the clipboard |
| Open the app window first | Select Start, type Snip & Sketch and select it | The app opens, ready for New or to open an image |
| Use a single key | Turn on the Print Screen setting, then press PrtScn | Print Screen opens screen snipping instead of copying the whole screen |
| Use the mouse only | Open Action Center and select the Screen snip quick action | The snipping toolbar opens |
| Use a digital pen | Double-press the pen's top button, or set a single click to screen snipping in Pen & Windows Ink settings | Snip & Sketch or the snipping toolbar opens |
| Open it in one click later | Pin Snip & Sketch to the taskbar or Start | The app opens from its pinned icon |
If Screen snip is missing from Action Center, add it under Notifications & actions in Settings.
Edit a screenshot using Snip & Sketch
Every snip opened from the notification lands in the Snip & Sketch editor. You can also annotate any saved image by opening it from the app.
- Select the notification after a snip, or open Snip & Sketch and open an existing image.
- Select a pen tool on the toolbar to draw or write on the screenshot.
- Select the same tool again to change its colour and line width.
- Use the highlighter tool to mark text without hiding it.
- Select the eraser and touch a stroke to remove it.
- Use the ruler or protractor stencil when you need straight lines or arcs.
- Select Save, the copy button or Share when the screenshot is ready.
Turn on the border option in Snip & Sketch settings if you capture white windows on a white page. The outline keeps the screenshot from blending into the background.

How to use protractor in Snip & Sketch
The protractor sits under the ruler button and works like a stencil: the pen follows its edge, so arcs and circles come out clean.
- Open a snip or image in Snip & Sketch.
- Select the arrow next to the ruler button and select Protractor.
- Drag the protractor to the part of the image you want.
- Resize it with the mouse wheel, or pinch with two fingers on a touch screen.
- Select a pen tool and draw along the protractor's edge.
- Select the ruler button again to hide the protractor.
Launch Snip & Sketch app with Print Screen key
The Print Screen key copies the whole screen by default. One setting changes it to open screen snipping, which is off until you turn it on.
- Press Windows logo key + I to open Settings.
- Type print screen in the Settings search box and open the keyboard setting it finds.
- Turn on Use the Print Screen key to launch screen snipping.
- Restart the PC if Print Screen still copies the full screen.
- Press PrtScn and check that the snipping toolbar opens.
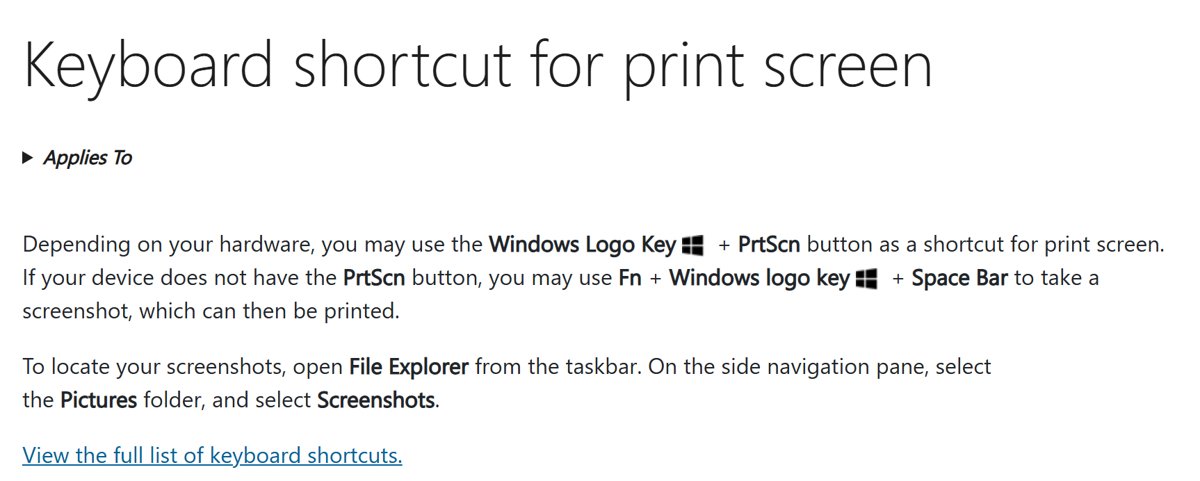
With the setting on, Print Screen behaves like Windows logo key + Shift + S. Use Windows logo key + PrtScn when you want a full-screen capture saved straight to the Screenshots folder.
Launch Snip & Sketch via CMD or Run
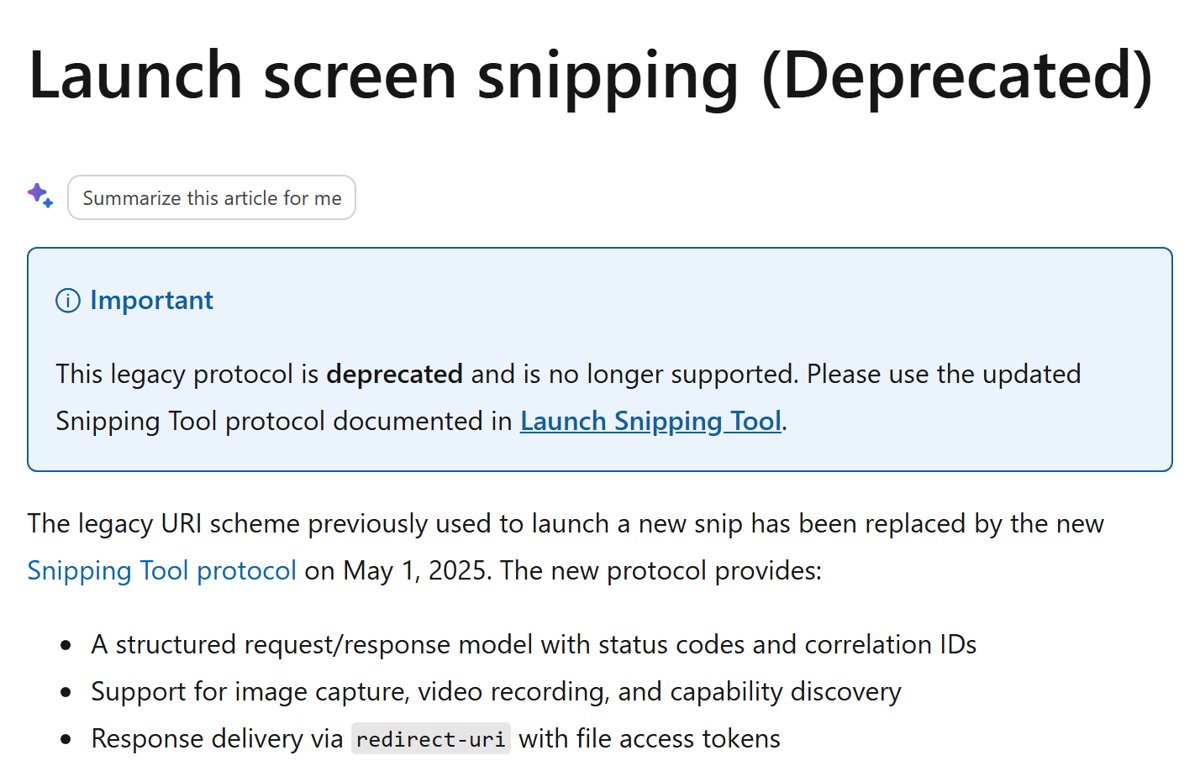
Older guides start Snip & Sketch from Run or Command Prompt with the ms-screenclip: or ms-screensketch: URI. Microsoft has deprecated both legacy schemes and replaced them with a new Snipping Tool protocol on May 1, 2025.
| Command or route | Status | Use instead |
|---|---|---|
ms-screenclip: in Run or CMD |
Deprecated and no longer supported by Microsoft | Windows logo key + Shift + S |
ms-screensketch: to open the editor |
Deprecated and no longer supported by Microsoft | Search Snip & Sketch from Start |
| Snipping Tool protocol | Current, for apps and developers on Windows 11 | Snipping Tool on Windows 11 |
| A taskbar or Start pin | Supported | One click, no command needed |
If a script or shortcut still uses the old URI and stops working, replace it with a pin or the keyboard shortcut rather than troubleshooting the command.
Create a shortcut for Snip & Sketch
A pinned icon opens the full app window, which is useful for opening saved images or starting a delayed snip.
- Select Start and scroll the app list to Snip & Sketch.
- Right-click Snip & Sketch and select More.
- Select Pin to taskbar.
- Right-click it again and select Pin to Start if you also want a Start tile.
- For a desktop shortcut, drag Snip & Sketch from the Start list onto the desktop.
How to access Snip and Sketch pictures
Snips taken with Windows logo key + Shift + S stay on the clipboard until you save them. Saved snips go to the folder you pick, which is Pictures by default.
- Open the snip in Snip & Sketch and select Save.
- Keep the suggested file name, which includes a timestamp, or type your own.
- Pick PNG, JPG or GIF in the file type list. PNG is the default.
- Choose a folder, or leave it on Pictures, and select Save.
- Open File Explorer and go to Pictures to view your saved snips.
- To annotate an old snip again, open Snip & Sketch and open the image from there.
To print a snip or turn it into a PDF, select Print on the toolbar or in the … menu and pick a PDF printer.
Keyboard shortcuts to use in Snip & Sketch
| Shortcut | What it does |
|---|---|
| Windows logo key + Shift + S | Opens the snipping toolbar for a rectangle, freeform, window or full-screen snip |
| PrtScn | Copies the full screen to the clipboard, or opens screen snipping once the Print Screen setting is on |
| Windows logo key + PrtScn | Saves a full-screen screenshot to Pictures > Screenshots, depending on your hardware |
| Fn + Windows logo key + Space Bar | Takes a screenshot on devices without a PrtScn key |
| Ctrl + V | Pastes the last snip from the clipboard into another app |
| Ctrl + C | Copies the snip shown in Snip & Sketch |
| Ctrl + S | Saves the snip shown in Snip & Sketch |
| Alt + Tab | Switches to an open Snip & Sketch window |
| Pen top button, double-press | Opens Snip & Sketch on a pen-enabled PC |
How to change Snip & Sketch settings
Snip & Sketch has its own settings page with three options that change how snips are copied, outlined and saved.
- Open Snip & Sketch from Start.
- Select … (See more) at the top right.
- Select Settings.
- Turn on the auto copy option to copy every edit to the clipboard automatically.
- Turn on the snip outline option and pick a colour and thickness to add a border to every snip.
- Turn on the save prompt so the app asks to save before you close a snip with changes.
Snipping Tool or Snip & Sketch on Windows 10 and Windows 11
Windows 10 shipped both apps side by side, while Windows 11 uses Snipping Tool for the same shortcut. The table shows what you get on each system.
| Snip & Sketch (Windows 10) | Snipping Tool (Windows 11) | |
|---|---|---|
| Windows logo key + Shift + S | Opens the Snip & Sketch snipping toolbar | Opens the Snipping Tool overlay |
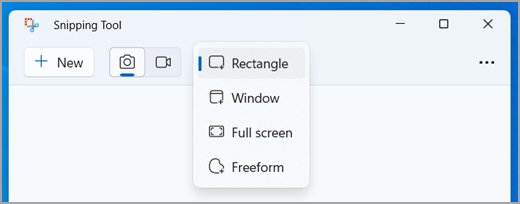
| Snip types | Rectangle, freeform, window, full screen | Rectangle, window, full screen, freeform |
| Video recording | Not available | Windows logo key + Shift + R |
| Automatic saving | No; save each snip yourself | Yes, to the Screenshots folder |
| Annotation | Pen tools, highlighter, eraser, stencils | Pen, highlighter, shapes, eraser, image crop, text actions |
| Delay | Delayed snip, added in app version 10.1807 | Delay option, such as 5 seconds |
| Support status | Windows 10 support ended October 14, 2025 | Current |
On Windows 11, the Snipping Tool screenshot methods replace everything Snip & Sketch did, plus screen recording.
Snip & Sketch not working in Windows 10
Snip & Sketch is missing – how to download Snip and Sketch
Snip & Sketch can be uninstalled from the Start menu like other inbox apps, and it updates through the Microsoft Store.
- Open Microsoft Store and search for Snip & Sketch.
- Install the app the Store offers. On current systems the listing leads to Snipping Tool.
- Restart the PC and press Windows logo key + Shift + S to test it.
- If the Store does not find it, reinstall Snip & Sketch from the official listing.
Print Screen does not open Snip & Sketch
The Print Screen setting is off by default, so the key copies the full screen instead.
- Open Settings and search for print screen.
- Turn on Use the Print Screen key to launch screen snipping.
- Restart the PC.
- Press PrtScn again and check that the snipping toolbar opens.
Can't find Snip & Sketch pictures
Snips from the snipping toolbar stay on the clipboard and are not saved until you select Save.
- Take the snip again and select the notification that appears.
- Select Save in Snip & Sketch and note the folder it suggests.
- Open File Explorer > Pictures to find snips saved with the default location.
- Turn on the save prompt in Snip & Sketch settings so unsaved snips are not lost when you close the app.
Windows logo key + Shift + S opens Snipping Tool, not Snip & Sketch
The PC runs Windows 11, or Snip & Sketch has been replaced by Snipping Tool from the Store.
- Press Windows logo key + Shift + S and use the Snipping Tool overlay in the same way.
- Select a mode, capture the area and select the preview to annotate it.
- Find saved snips in the Screenshots folder, because Snipping Tool saves them automatically.
Snip & Sketch FAQ
What is Snip & Sketch?
Snip & Sketch is a Windows 10 screenshot app, previously called Screen Sketch, that captures rectangle, freeform, window or full-screen snips and lets you annotate, save, print and share them. It updates through the Microsoft Store.
How do you use Snip & Sketch in Windows 10?
Press Windows logo key + Shift + S, pick a snip type and select the area. Select the notification that appears to open the snip in Snip & Sketch, annotate it with the pen tools, then save, copy or share it.
What is the Snip and Sketch shortcut?
Windows logo key + Shift + S opens the Snip & Sketch snipping toolbar in Windows 10. You can also set the Print Screen key to open screen snipping, and a digital pen's top button opens the app with a double-press.
How do I use Snip and Sketch on Windows 11?
On Windows 11, Windows logo key + Shift + S opens Snipping Tool, which does the same job. Pick a mode, capture the area, then annotate it. Snipping Tool also saves snips automatically to the Screenshots folder.
How do I open Snip and Sketch pictures?
Open File Explorer and go to Pictures, the default save folder, or the folder you chose when you selected Save. To edit a picture again, open Snip & Sketch and open the image from inside the app.
How does Snip and Sketch work?
The snipping toolbar copies your capture to the clipboard, then a notification offers to open it in the Snip & Sketch editor. Nothing is saved to a file until you select Save in the editor.
How do I download Snip and Sketch?
Snip & Sketch comes from the Microsoft Store. Search for it in the Store app and install what is offered; on current systems the Snip & Sketch listing leads to Snipping Tool, which replaces it.
Should I use Snipping Tool or Snip & Sketch?
On Windows 11, use Snipping Tool, because the shortcut and the Store listing now lead there and it adds screen recording. On Windows 10, Snip & Sketch adds stencils, borders and printing, while the classic Snipping Tool is still available there.