Get the free Minecraft Launcher from the Microsoft Store or minecraft.net, sign in with the Microsoft account that owns Minecraft, then pick an edition and select Play.
This guide covers installing and signing in, launching Java, Bedrock and Dungeons, managing versions, skins and settings, and fixing a launcher that will not install, open or update.
The fastest way to get the Minecraft Launcher running
The launcher works on Windows 10 and Windows 11. Installing it from the Microsoft Store is the shortest route, because the launcher depends on the Store anyway.
- Open the Minecraft Launcher page in the Microsoft Store.
- Select Get or Install, depending on which editions your account already owns.
- Open Minecraft Launcher from the Start menu when the install finishes.
- Sign in with the Microsoft account you used to buy Minecraft.
- Select Minecraft: Java Edition or Minecraft: Bedrock Edition in the left column.
- Select Install the first time, then Play once the game has downloaded.
For the installer file itself and the other download routes, see Download Minecraft for PC, Windows 11/10/8/7 & Mac.
What Is the Minecraft Launcher for Windows?
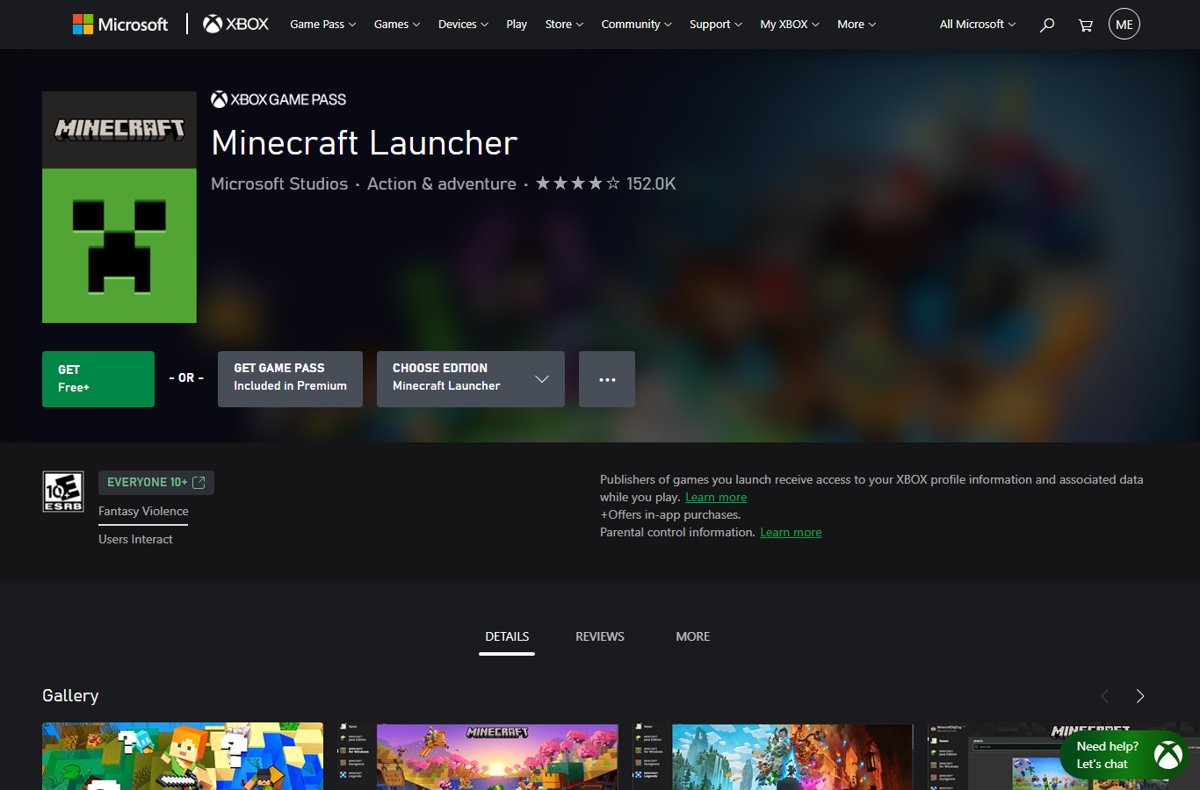
The Minecraft Launcher is a free Microsoft app that downloads, updates and starts Mojang's PC games from one window. It does not include a game by itself; each title needs a purchase or an Xbox Game Pass subscription on the signed-in account.
The Microsoft Store listing describes it as a version of the launcher built for Windows 10 and Windows 11.
| What you can do in the launcher | Details |
|---|---|
| Play Minecraft for Windows (Bedrock Edition) | Cross-play with Xbox, PlayStation, Nintendo Switch and mobile players |
| Play Minecraft: Java Edition | Cross-play with Windows, Mac and Linux players; supports mods and snapshots |
| Play Minecraft Dungeons, Dungeons II and Legends | Each Windows version of these games is sold with the launcher included |
| Install updates and snapshots | Game updates arrive through the launcher; Java snapshots preview upcoming features |
| Use Quick Play | Shortcuts that jump straight into a recent world, server or Realm |
| Manage your profile | Change Java skins and capes and view account details |
| Adjust settings | Language, accessibility, features, Quick Play and account options |
| Read news | Minecraft announcements and events on the home screen |
System Requirements for Windows 10 and 11
The launcher itself needs Windows 10 or later to keep receiving updates. The heavier requirement is the game you run inside it, and Java Edition asks for noticeably more hardware than Bedrock.
| Requirement | Bedrock Edition (Minecraft for Windows) | Java Edition |
|---|---|---|
| Windows version (minimum) | Windows 10 version 19041.0 or later | Windows 10 64-bit or Windows on ARM |
| Windows version (recommended) | Windows 10 version 19041.0 or later | Windows 11 64-bit |
| Memory (minimum) | 4 GB | 8 GB with a discrete GPU, 12 GB with integrated graphics |
| Memory (recommended) | 8 GB | 16 GB |
| Processor (minimum) | Intel Celeron J4105 or AMD FX-4100 | Intel Core i3-10100, AMD Ryzen 3 3100 or Qualcomm Snapdragon X (4 physical cores) |
| Graphics (minimum) | Intel HD Graphics 4000 or AMD Radeon R5 | Vulkan 1.3 GPU with 2 GB VRAM, such as NVIDIA GTX 950 or AMD Radeon RX 460 |
| Storage | 4 GB minimum, 8 GB recommended | 2 GB minimum, 4 GB recommended |
| Account | Microsoft account that owns the game or has Game Pass | Microsoft account that owns the game or has Game Pass |
The Microsoft Store listing states the launcher is not supported on Windows 10 in S mode. Since March 2025, Windows versions older than Windows 10 no longer receive Minecraft updates through the launcher.
How to Download the Official Minecraft Launcher
There are three official sources, and all three install the same app. Even the minecraft.net download needs a working Microsoft Store sign-in to finish installing.
The download routes and file details live in the Minecraft download guide; the table below is only for choosing one.
| Your situation | Download from | Why |
|---|---|---|
| Microsoft Store works normally | Microsoft Store listing for Minecraft Launcher | Fewest steps, and updates arrive through the Store |
| The Store install fails or stalls | minecraft.net download page, Windows 10/11 option | Separate installer, though it still uses your Store sign-in |
| You already use the Xbox app for PC games | Xbox app, search Minecraft Launcher | Same account and Game Pass library in one place |
| Bedrock fails to install with Error 0X80242020 | Xbox app or Microsoft Store | Minecraft Help's workaround for that specific error |
How to Install and Sign In to the Launcher
Sign-in problems usually come from different accounts being used in different apps. The launcher, the Microsoft Store and the Xbox app all need the same Microsoft account, so check the Store first.
- Open the Microsoft Store, select the profile icon at the top, and confirm it shows the account that owns Minecraft. If not, select Sign out and sign in with the right one.
- Install the launcher from the Store listing, the Xbox app, or the minecraft.net download page.
- Open Minecraft Launcher from the Start menu.
- Sign in with your Microsoft account when the launcher asks.
- Confirm the account name in the top-left corner of the launcher.
- Select Let's go if a welcome prompt shows the correct account.
- Select Change Launcher Login if a prompt says the Microsoft Store and launcher accounts do not match.
To switch accounts later, select your username in the upper-left corner, choose View all accounts, then Switch Account.
How to Launch Minecraft Java, Bedrock, and Minecraft Dungeons
Every game appears in the launcher's left column. The button beside it tells you whether your account owns that game.
- Open the Minecraft Launcher and sign in.
- Select Minecraft: Java Edition, Minecraft: Bedrock Edition (Minecraft for Windows) or Minecraft Dungeons in the left column.
- Read the main button: Install or Play means the account owns that game, and Buy Now means it does not.
- Select Install and wait for the progress bar to finish the first download.
- For Java Edition, check the version menu to the left of Play; it defaults to Latest Release.
- Select Play to start the game.
Java Edition and Bedrock Edition have been sold as one PC bundle since June 7, 2022, and players who migrated from a Mojang account also get both. Minecraft Dungeons is a separate purchase, also included with some Xbox Game Pass plans.
Managing Updates, Game Versions, and Installations
Updates normally install automatically when the launcher is open and online. Everything else here lives on the Installations tab or in Settings.
Back up your Java worlds before switching versions. Opening a world in an older version of the game can permanently damage it.
| Task | Where | Steps |
|---|---|---|
| Update Java Edition | Launcher main screen | Select Update when it appears; otherwise sign out and back in, check your connection, or restart the PC |
| Update Bedrock Edition | Minecraft: Bedrock Edition > Installation tab | Select Check for Updates next to your installation |
| Play an older Java version | Minecraft: Java Edition > Installations | Select New installation, name it, choose the version from the VERSION list, select Create, then pick it beside Play |
| Try a Java snapshot | Version menu beside Play | Select Latest Release, switch to Latest Snapshot, then select Play |
| Back up a Java world first | In the game: Singleplayer > world > Edit | Select Make Backup; the .zip appears under Open Backups Folder |
| Change Java memory (RAM) | Installations > your installation > More Options | Save a copy of the JVM arguments, change -Xmx2G to a new value such as -Xmx4G, then select Save |
| Change your Java skin | Minecraft: Java Edition > Skins tab | Select New Skin, name it, pick Wide or Slim, select Browse, upload the PNG, then Save & Use |
| Equip a cape | Skins tab | Duplicate a skin, open its … menu, select Edit, choose the cape, then Save & Use |
| Turn on Quick Play | Settings | Tick Enable Quick Play feature for Minecraft: Java Edition and Minecraft: Bedrock Edition |
On a 64-bit Windows install, allocate no more than half of your RAM to Java Edition. If the PC has 4 GB of RAM or less, set it to 2 GB for stability.
How to check the launcher is set up correctly
- Look at the top-left corner of the launcher and confirm it shows the account that bought Minecraft.
- Select each edition in the left column and confirm the main button reads Play or Install, not Buy Now.
- Open the Microsoft Store profile icon and confirm the same account is signed in there.
- On the Java Edition Installations tab, confirm the installation you plan to use shows the version you expect.
- Select Play and wait for the game's title screen to load.
To double-check ownership outside the launcher, sign in to the Minecraft: Java & Bedrock Edition for PC store page. Editions you own show You Own This.
Common Minecraft Launcher Problems and Fixes
Work through the fixes under your symptom in order, and retry the launcher after each one. Back up your worlds before any uninstall.
Minecraft Launcher will not install on Windows 10 or 11
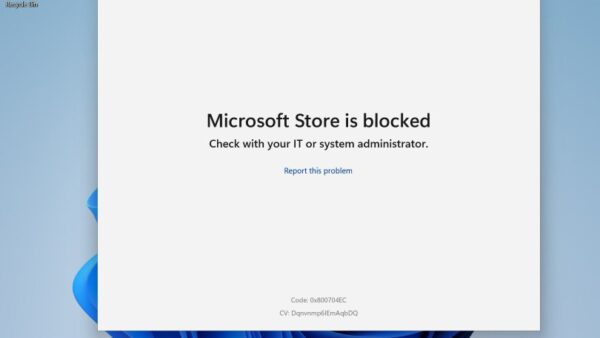
The Microsoft Store is signed in to a different account, or its cache is stuck.
- Open the Microsoft Store, select the profile icon, select Sign out, then sign in with the account you want to use in the launcher.
- Press Windows key + R, type WSReset, and press Enter to reset the Store.
- Retry the install from the Store, or install it through the Xbox app by searching Minecraft Launcher and selecting Get or Install.
- Download it from the minecraft.net download page if both Store routes fail.
Error 0X80131500 when installing the launcher
A Windows Store apps fault or outdated TLS settings in Internet Options.
- On Windows 10, open Settings > Update & Security > Troubleshoot > Additional troubleshooters, then run Windows Store Apps.
- Restart the PC and retry the install.
- If the error returns, open Internet Options in Control Panel and select the Advanced tab.
- Under Use SSL/TLS, clear SSL 3.0, TLS 1.0 and TLS 1.1, and tick TLS 1.2 and, if listed, TLS 1.3.
- Select Apply, then OK, and restart the PC.
Launcher will not open or closes immediately
Damaged app files, a stuck Store cache, or broken Xbox Gaming Services.
- Open Start, search for Minecraft Launcher, right-click it and select App Settings.
- Select Repair, then open the launcher again.
- If it still fails, return to App Settings and select Reset.
- Press Windows key + R, run WSReset, and try again.
- Run the Gaming Services Repair Tool from Xbox Support.
- Uninstall the launcher from Settings (search Add or Remove Programs, select … next to Minecraft Launcher, then Uninstall) and reinstall it.
Launcher is stuck updating, or games will not download
The launcher or the Store background services have stalled mid-update.
- Repair the launcher from App Settings as above, then select Reset if it still stalls.
- Reset the Microsoft Store with WSReset.
- Run the Gaming Services Repair Tool, which fixes stalled game updates delivered through Xbox services.
- For Bedrock Error 0X80242020, cancel the download with the X at the right of the progress bar and install Bedrock from the Xbox app or Microsoft Store instead.
- If a new game version was released recently, wait and check again, because updates roll out gradually.
Sign-in errors, a missing Play button, or license error 0X803F8001
The launcher, Microsoft Store and Xbox app are signed in to different accounts, or to one that does not own the game.
- In the launcher, select the account name in the top-left corner, select Log out, and sign back in with the account that owns Minecraft or subscribes to Xbox Game Pass for PC.
- In the Microsoft Store, select the profile icon, select Sign Out, and sign in with that same account.
- Open the Xbox app, check the account in the top-left corner, and sign in with that same account.
- If "can't connect to Minecraft services" appears, open the Xbox app and install any missing items it lists, such as Xbox Identity Provider.
- If the launcher asks you to sign in every time, open Settings > Accounts > Advanced Options and select Clean up cached account tokens.
The Microsoft Store opens instead of the game
Outdated Store apps or a broken Gaming Services install.
- Open the Microsoft Store, select Downloads at the bottom left, then select Get Updates.
- Right-click Windows PowerShell in Start search and select Run as administrator.
- Run the command below to remove Gaming Services.
- Install Gaming Services again from the Microsoft Store, accept the UAC prompt, and restart the PC.
Java Edition crashes on Play, or shows launcher.dll: LoadErrorNotPresent
A corrupted installation, mods or custom settings, or a missing launcher file.
- Open Minecraft: Java Edition > Installations and select New installation.
- Choose the same game version as the crashing world, then select Install and launch it.
- If the new installation runs, remove mods or copy its default JVM arguments and resolution to the old one.
- For the launcher.dll error, uninstall the launcher and reinstall it from the Microsoft Store, Xbox app or minecraft.net.
The PowerShell command for the Gaming Services fix is get-appxpackage Microsoft.GamingServices | remove-AppxPackage -allusers.
Frequently Asked Questions
Does the Minecraft Launcher work on Windows 10?
Yes. The Microsoft Store version of the Minecraft Launcher is built for Windows 10 and Windows 11, and Windows 10 is the minimum for receiving updates. Bedrock Edition needs Windows 10 version 19041.0 or later. The Store listing says the launcher is not supported in Windows 10 S mode.
Is the Minecraft Launcher free to download on Windows 10 and 11?
Yes. The launcher is free in the Microsoft Store and on minecraft.net. The games inside it are not: you need a Microsoft account that bought Minecraft, Minecraft Dungeons or Minecraft Legends, or one with an active Xbox Game Pass subscription that includes them, before the Play button appears.
How do I install the Minecraft Launcher on Windows 10?
Open the Minecraft Launcher listing in the Microsoft Store and select Get or Install. When it finishes, open it from the Start menu and sign in with the Microsoft account that owns Minecraft. The Xbox app and the minecraft.net download page install the same launcher if the Store route fails.
Should I download the Minecraft Launcher from the Microsoft Store or Minecraft.net?
Use the Microsoft Store first, because it takes the fewest steps and handles updates. The minecraft.net download is the fallback when a Store install fails. Both still need the Microsoft Store signed in to the same Microsoft account you use in the launcher.
Why won't the Minecraft Launcher open on Windows 10?
The usual causes are damaged app files, a stuck Microsoft Store cache or broken Gaming Services. Right-click Minecraft Launcher in Start, choose App Settings, then Repair or Reset. If that fails, run WSReset, use the Gaming Services Repair Tool, and reinstall the launcher.
Why can't I install the Minecraft Launcher on Windows 10?
Most failed installs come from the Microsoft Store being signed in to a different account or holding a stuck cache. Sign out of the Store and back in with your Minecraft account, then run WSReset. Error 0X80131500 has its own fix: the Windows Store Apps troubleshooter and TLS 1.2 in Internet Options.
Can I play both Minecraft Java Edition and Bedrock Edition from the same launcher?
Yes. Both editions appear in the launcher's left column, and PC copies bought since June 7, 2022 include both as a bundle. Select Minecraft: Java Edition or Minecraft: Bedrock Edition, then Install or Play. A Buy Now button means your account does not own that edition.
How do I change Minecraft Java versions or create a separate installation?
Select Minecraft: Java Edition, open the Installations tab, and select New installation. Name it, choose a version from the VERSION list, and select Create. Pick it beside the Play button to launch it. Back up your worlds first, because older versions can damage newer worlds.
Can I use the Minecraft Launcher on Windows 7 or 8?
The minecraft.net download page still offers a Windows legacy option, but since March 2025 the launcher only delivers Minecraft updates on Windows 10 or later. On older Windows, you keep your existing worlds but lose updates and some multiplayer options.
Do I have to buy Minecraft again on a new Windows PC?
No. Install the Minecraft Launcher on the new PC and sign in with the same Microsoft account that bought the game. Your owned editions show a Play or Install button. Copy your world files separately, because the launcher does not move saved worlds for you.
Bottom Line
Install the Minecraft Launcher from the Microsoft Store, and keep the Store, the Xbox app and the launcher signed in to the same Microsoft account. Most install failures, missing Play buttons and license errors trace back to mismatched accounts or a stuck Store cache, which a sign-out and WSReset clear in a few minutes.