To connect a scanner in Windows 11, plug it in by USB or join it to your Wi-Fi, switch it on, then open Settings > Bluetooth & devices > Printers & scanners and select Add device.
This guide covers USB, wireless, network and Bluetooth scanners, driver installs, your first scan in the Windows Scan app, and fixes for a scanner Windows lists but cannot use.
How to connect a scanner to your device in Windows 11
Windows 11 installs most scanners automatically as soon as they are connected and switched on. These steps cover the case where it does not.
- Connect the scanner to the PC with its USB cable and switch the scanner on.
- Select Start, then Settings.
- Select Bluetooth & devices, then Printers & scanners.
- Select Add device next to Add printer or scanner.
- Wait while Windows searches for nearby printers and scanners. This can take a few minutes.
- Select Add device next to your scanner when it appears.
- Confirm the scanner now sits in the Printers & scanners list.
Press Windows key + R, type ms-settings:printers and press Enter to jump straight to that page.
USB, wireless, network or Bluetooth scanner: which connection to use
| Your scanner | How to connect it | What to watch for |
|---|---|---|
| USB-only desktop or portable scanner | Plug it in, then Add device if Windows does not install it on its own | Connect it straight to the PC, not through a hub |
| All-in-one printer on Wi-Fi | Join it to your Wi-Fi from its own panel, then Add device | The PC and the scanner must be on the same network name (SSID) |
| Network scanner on Ethernet | Cable it to the same router as the PC, then Add device | Use Add a new device manually if the search finds nothing |
| Bluetooth scanner | Make it discoverable, then Add device on Printers & scanners | Discoverable mode differs per model; the maker's manual has it |
| Scanner that needs scan-to-PC buttons | Add it in Windows, then install the maker's software | The scan buttons on the device are run by that software, not by Windows |
Important precautions before you begin: Connect scanner to PC
Before connecting the scanner, settle the physical side. Windows cannot add a device it has no path to.
- Connect the power cable and switch the scanner on, then wait for it to finish starting.
- Sign in to Windows with an administrator account, which driver installs need.
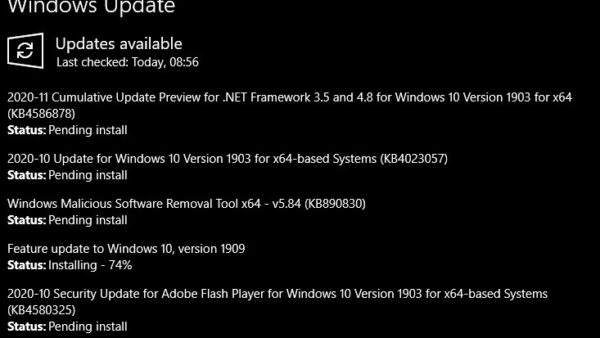
- Install pending Windows updates so the PC has Microsoft's current inbox scanner drivers.
- For a wireless scanner, note the Wi-Fi network name (SSID) your PC is using.
- Keep the scanner's model number to hand for any driver download later.
If the scanner is plugged in and switched on but stays unavailable, you may need to enable the scanner on this PC before anything below will work.
Connect a USB scanner
- Plug the USB cable into the scanner and into a USB port on the PC itself.
- Switch the scanner on and give Windows a moment to install it automatically.
- Open Settings > Bluetooth & devices > Printers & scanners and look for the scanner's model name.
- If it is missing, select Add device next to Add printer or scanner.
- Select Add device next to the scanner when the search lists it.
- If the scanner is part of an all-in-one printer, select the printer entry and check that Scanner settings appears.
A Scanner settings entry on an all-in-one printer means Windows detected the scan function as well as the print function.
Connect a wireless, network, or Bluetooth scanner
A scanner that is switched on and connected to the network is normally found by Windows automatically. Windows can scan over WS-Scan or eSCL on the network, so many models need no extra software.
- Connect the scanner to Wi-Fi from its own control panel, or cable it to your router. For Bluetooth, put the scanner in discoverable mode as its manual describes.
- Check that the PC is on the same wireless network (SSID) as the scanner.
- Open Settings > Bluetooth & devices > Printers & scanners.
- Select Add device next to Add printer or scanner and wait for the search to finish.
- Select Add device next to the scanner when it appears.
- If it is not listed, select Add a new device manually next to The printer that I want isn't listed and follow the Add Printer wizard.
Wireless setup on the scanner side differs per model, so the scanner's manual or the maker's website has the exact panel steps. On an all-in-one, the same steps that connect a wireless printer to your PC also bring its scanner onto the network.
Install or update the scanner driver
Windows Update carries vetted drivers for most hardware, so try it before a manufacturer installer.
- Open Settings > Windows Update and select Check for updates.
- Select Advanced options and turn Receive updates for other Microsoft products on.
- Under Additional options, select Optional updates and install any driver listed for the scanner.
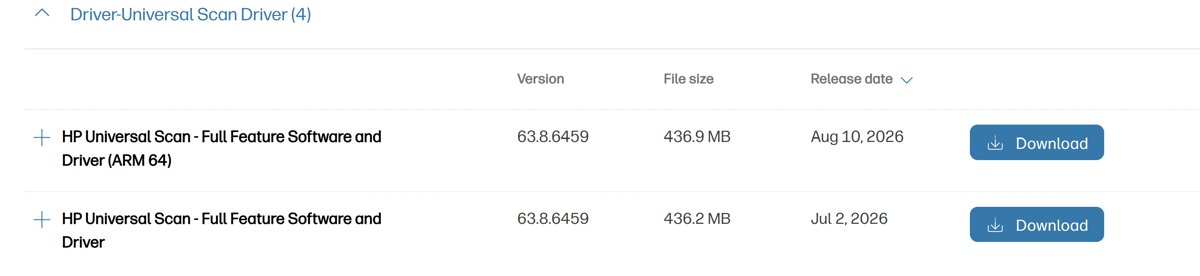
- If nothing arrives, open the scanner maker's own support site and download the package for your exact model.
- Run the installer and choose USB or network when it asks how the scanner connects.
- Restart the PC if the installer asks you to.
To update one device by hand, right-click Start, select Device Manager, right-click the scanner and select Update driver, then Search automatically for updated driver software.
On ARM-based PCs, including Copilot+ PCs, add the scanner with Add device rather than running a manual driver install.
Check that Windows installed the scanner
- Switch the scanner on.
- Open Settings > Bluetooth & devices > Printers & scanners and confirm the scanner is listed by its model name.
- Right-click Start, select Device Manager, and confirm the scanner shows no warning icon.
- Open the Scan app and confirm the scanner appears in the Scanner list.
- Run one test scan and confirm a file lands in Pictures/Scans.
Scan a document with Windows Scan
Windows Scan is Microsoft's own scanning app. Get it from Microsoft Store if search does not find it.
- Right-click Start, select Search, type
Windows Scan, and select Scan under Apps. - Check that the right scanner is chosen under Scanner.
- Set Source to Auto-configured, which suits most scans, or pick Flatbed or Feeder.
- Set File type to JPEG, PNG, TIFF or Bitmap.
- Select Show more, then the link under Save file to if you want a folder other than Pictures/Scans.
- Select Scan at the bottom of the window.
- Select View to open the result in Photos, or Close to finish.
Windows Fax and Scan is still available as an optional feature. Add it from Settings > Apps > Optional features, then View features next to Add an optional feature.
Place the document correctly
| Where the page goes | How to place it | Source to pick in Scan |
|---|---|---|
| Flatbed glass | Face down on the glass, then close the cover | Flatbed or Auto-configured |
| Document feeder | In the feeder tray, face up or down as the scanner's manual states | Feeder or Auto-configured |
| Scanner with both | Either one; the feeder suits multi-page stacks | Match the source to where the page sits |
A page in the feeder with Source set to Flatbed scans an empty glass, so match the two before you select Scan.
Windows 11 scanner paths that changed
Windows 11 moved the scanner pages under Bluetooth & devices. The classic Devices and Printers window still opens from Control Panel.
| Task | Windows 11 | Windows 10 |
|---|---|---|
| Add or remove a scanner | Settings > Bluetooth & devices > Printers & scanners > Add device | Settings > Devices > Printers & scanners > Add a printer or scanner |
| Open that page directly | Run ms-settings:printers |
Run ms-settings:printers |
| Optional driver updates | Settings > Windows Update > Advanced options > Optional updates | Settings > Update & Security > Windows Update > View optional updates |
| Add Windows Fax and Scan | Settings > Apps > Optional features | Settings > Apps > Apps & features > Optional features |
| Scanning service | services.msc > Windows Image Acquisition (WIA) |
services.msc > Windows Image Acquisition (WIA) |
Fix a scanner that is detected but will not scan
The scanner is listed but the Scan app cannot reach it
The Windows Image Acquisition (WIA) service, which runs scanning, has stopped or failed to start the device.
- Press Windows key + R, type
services.mscand press Enter. - Find Windows Image Acquisition (WIA).
- Right-click it and select Restart.
- Reopen the Scan app and try one page.
- Restart the PC with the scanner connected if the service will not start.
The printer prints but the scanner does nothing
Print and scan are separate functions. Printing can run on Microsoft's inbox IPP class driver while scanning needs WS-Scan, eSCL or the maker's driver.
- Select the printer on Printers & scanners and check for Scanner settings.
- Install the maker's full driver and scanning package for your model.
- Select Remove on the device, then Add device to add it again.
- Scan from the Scan app to rule out the maker's own utility.
Windows does not find the scanner at all
The cable, the port or the network is the break, not a Windows setting.
- Reseat the USB cable at both ends and try a different USB port.
- Connect the scanner straight to the PC, without a hub.
- For a wireless scanner, join the PC to the same SSID as the scanner.
- Right-click Start, open Device Manager, right-click the scanner and select Uninstall device, then restart.
- Open the Get Help app and run the automated printer troubleshooter.
Connecting a scanner in Windows 11 FAQ
Does Windows 11 install scanners automatically?
Yes, for most models. Windows 11 detects and installs local and network scanners on its own once they are connected and switched on. If one does not appear, select Add device on Settings > Bluetooth & devices > Printers & scanners.
How do I connect a wireless scanner to Windows 11?
Join the scanner to your Wi-Fi from its control panel, and keep the PC on the same network name (SSID). Then open Printers & scanners, select Add device, and select Add device again next to the scanner.
Can I connect a Bluetooth scanner to Windows 11?
Yes. Make the scanner discoverable as its manual describes, open Settings > Bluetooth & devices > Printers & scanners, select Add device, and select the scanner when Windows lists it. The search can take a few minutes.
Do I need to install a driver to use a scanner?
Often not. Windows Update and Microsoft's inbox drivers cover many scanners, and network models can scan over WS-Scan or eSCL. Install the maker's package when Windows finds no driver or you want the scanner's own buttons.
Where do scanned files go in Windows 11?
The Windows Scan app saves to the Scans folder inside Pictures in your user folder by default. Change it under Show more, using the link below Save file to, before you select Scan.
What app do I use to scan in Windows 11?
Use Windows Scan, Microsoft's own scanning app, available from Microsoft Store if it is not installed. Windows Fax and Scan is also available as an optional feature, and most scanner makers supply their own scanning software.
Why is my scanner not showing up in Windows 11?
The scanner is usually off, on a different Wi-Fi network, or behind a faulty cable or hub. Check those, then select Add device on Printers & scanners and use Add a new device manually if the search finds nothing.
Why does my all-in-one printer print but not scan?
Printing and scanning are separate functions with separate drivers. Check that Scanner settings appears for the printer, restart the Windows Image Acquisition (WIA) service, and install the maker's full software package if scanning still fails.
The bottom line on connecting a scanner in Windows 11
Connect the scanner, let Windows 11 install it, and use Add device on Printers & scanners only when it does not appear. Windows reaches most USB and network scanners with its own drivers, so the maker's software is only needed for scan-to-PC buttons or when Windows finds no driver.