Migration Assistant is included with every Mac, so you get the latest copy by updating macOS in Software Update, and only a Windows PC needs a separate download from Apple.
Below are the update steps, the Windows Migration Assistant version for each macOS, and how to run a transfer from a Mac, a Windows PC or a Time Machine backup.
How to get the latest Migration Assistant on a Mac
Apple ships Migration Assistant as an app on your Mac and as part of the setup assistant on a new Mac. Each macOS release includes the latest built-in apps for that release.
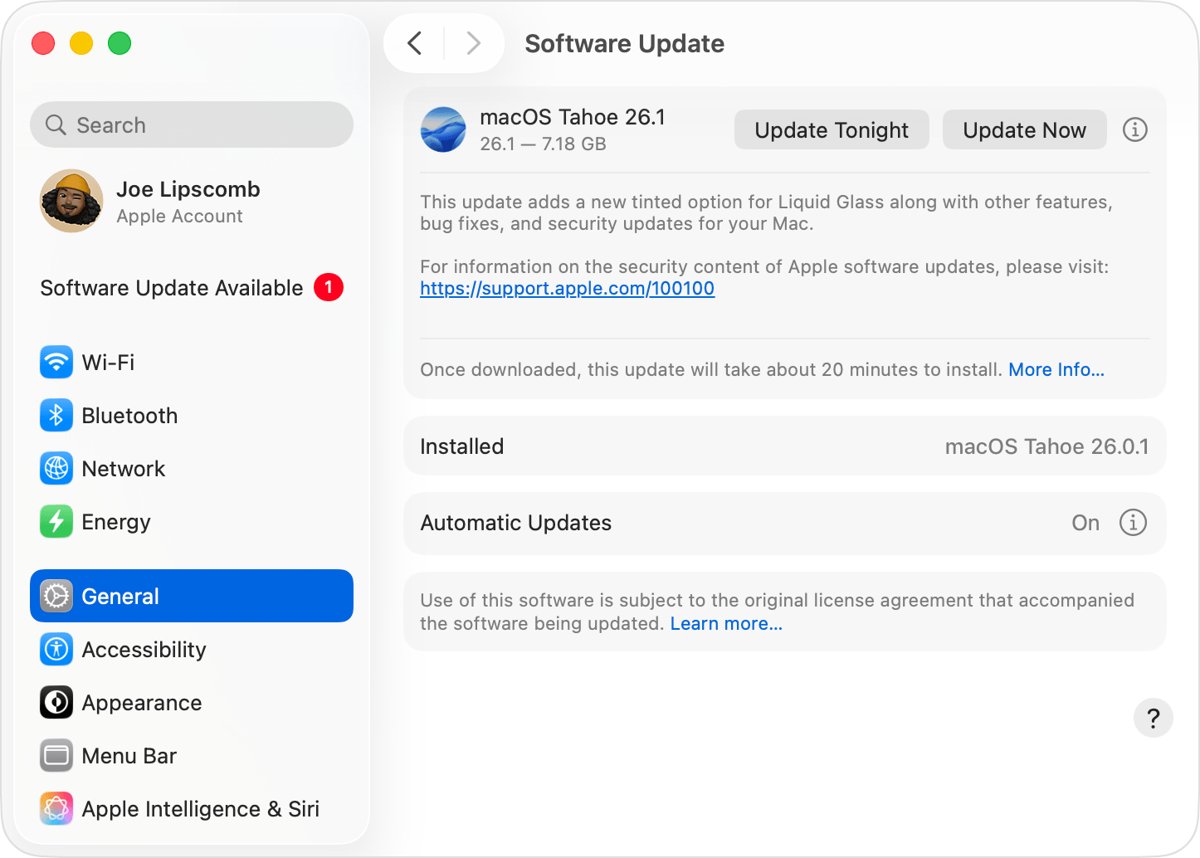
- Choose System Settings from the Apple menu.
- Click General in the sidebar, then Software Update on the right.
- Click the button to update, upgrade or restart now if software is available.
- Enter your administrator password when asked.
- Keep the Mac awake with the lid open until installation finishes.
- Open Migration Assistant from the Utilities folder in Applications.
Update macOS on both Macs before a transfer. They do not have to run the same version. If your Mac has no Software Update panel, you can still download macOS for an older Mac.
Do I need to download Migration Assistant?
| Your situation | What to do | Download needed? |
|---|---|---|
| New Mac showing the setup assistant | Continue setup, because migration is part of it | No |
| Mac that has finished setup | Open the app from the Utilities folder | No |
| Old Mac you are moving away from | Update macOS, then open the app | No |
| Restoring from a Time Machine backup | Open the app and choose the backup disk | No |
| Moving from a Windows PC | Install Windows Migration Assistant on the PC | Yes, on the PC only |
Where is Migration Assistant on Mac?
- Open Finder and go to the Applications folder.
- Open the Utilities folder.
- Double-click Migration Assistant, or find it with Spotlight instead.
- Enter your administrator password if macOS asks for permission to make changes.
Windows Migration Assistant version for your macOS
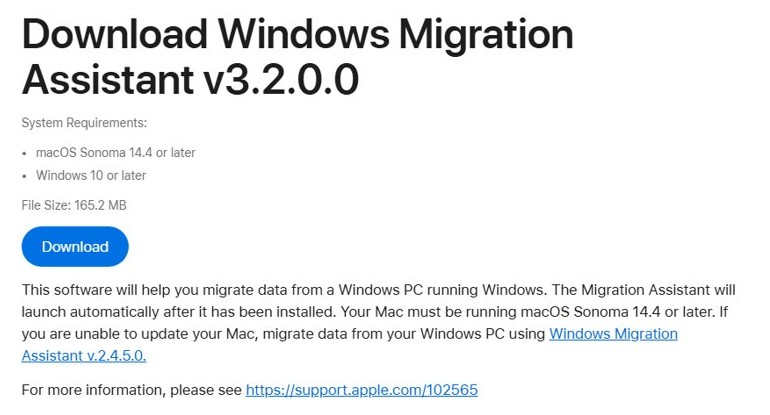
Pick the version by the macOS on the Mac you are moving to. Version 3.2.0.0 needs a Mac running macOS Sonoma 14.4 or later, and Apple lists its download at 165.2 MB.
| Windows Migration Assistant | PC runs | Mac runs |
|---|---|---|
| 3.2.0.0 | Windows 10 or later | macOS 27 Golden Gate, Tahoe 26, Sequoia 15 or Sonoma 14 |
| 2.4.5.0 | Windows 7 or later | macOS Ventura 13 or Monterey 12 |
| 2.3.1.0 | Windows 7 or later | macOS Big Sur 11 |
| 2.2.0.1, 2.1.2.0 or 1.0.5.7 | Check the Apple page for that version | Earlier versions of macOS |
A mismatch between the Windows version of the tool and the Mac's macOS is one of the first things to check after a failed transfer.
How to download Windows Migration Assistant on a PC
- On the Mac, choose About This Mac from the Apple menu and note the macOS name.
- On the PC, install any waiting Windows updates.
- Open the Apple download page for the matching version in the table above.
- Select Download and save the file on the PC.
- Quit your other apps on the PC.
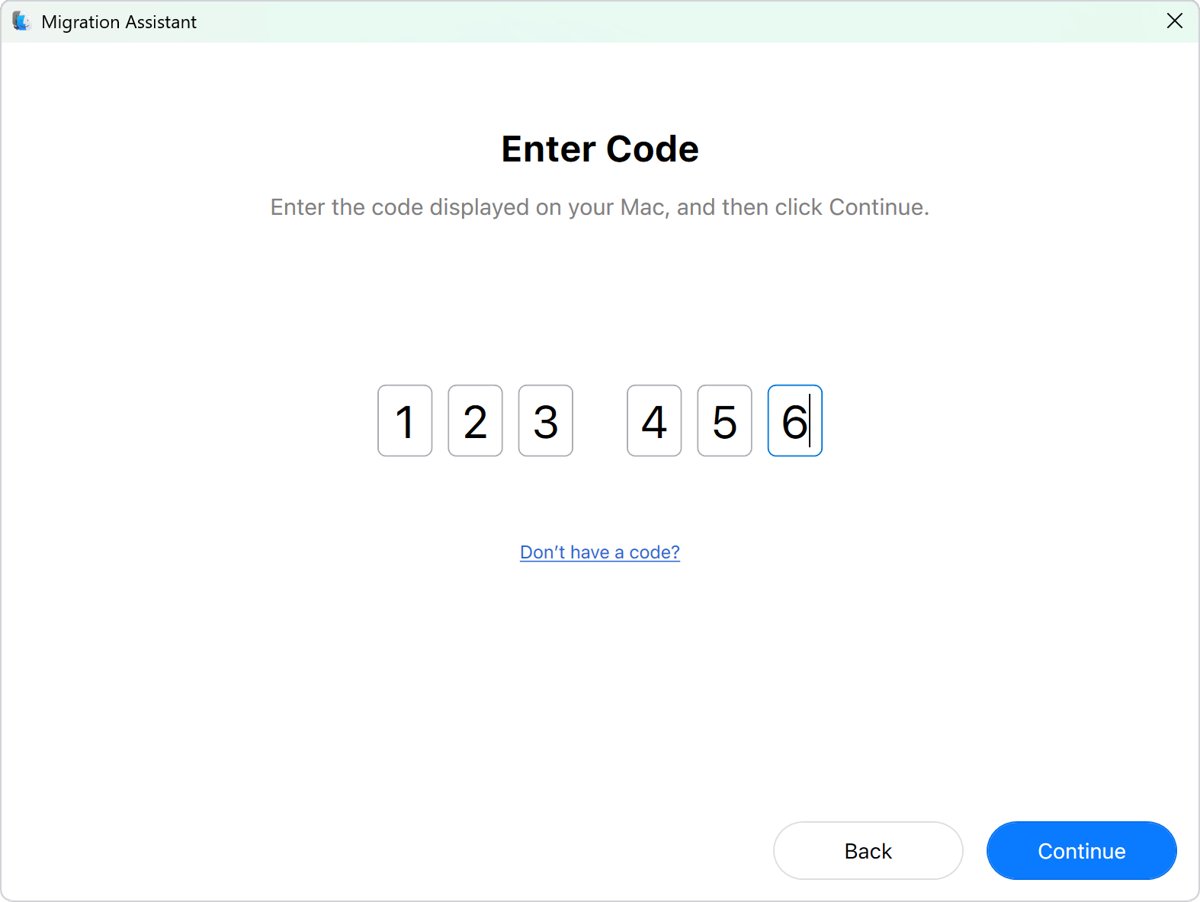
- Open the downloaded Windows Migration Assistant and follow the onscreen instructions until it asks for a code.
How to use Migration Assistant from a Windows PC to a Mac
Keep the two computers near each other with Wi-Fi and Bluetooth on. If the Mac runs macOS 13 or earlier, or you are not sure, connect both to the same network or link them with an Ethernet cable.
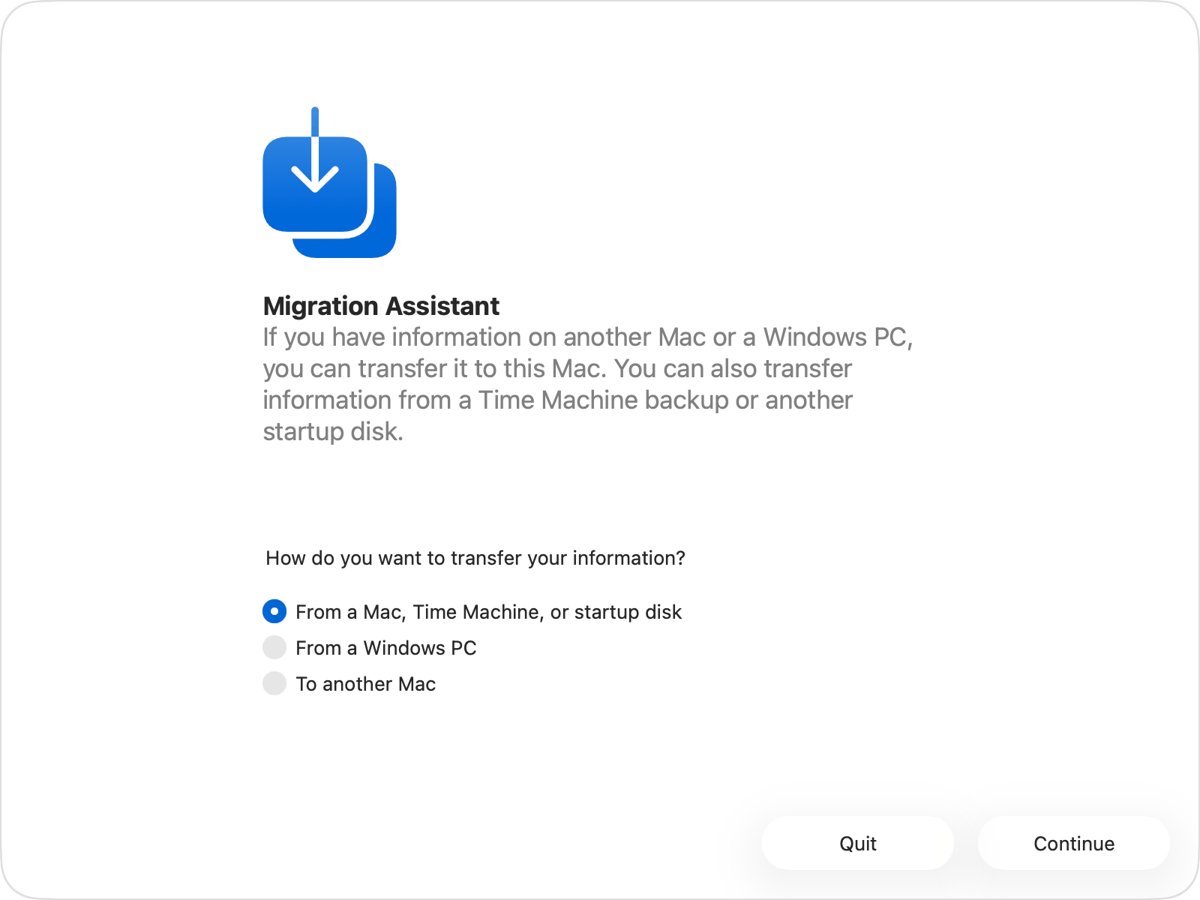
- On the Mac, open Migration Assistant, select From a Windows PC and click Continue.
- When the Mac shows a code, enter it in Windows Migration Assistant on the PC and click Continue.
- On the Mac, wait while it calculates the storage used by your data.
- Select the categories you want to transfer and click Continue.
- For an administrator account, click Set Password and choose a secure password.
- For a standard account, write down the temporary password shown on screen.
- Quit Migration Assistant when it finishes, then log in with the password you set.
- To move another Windows account, log in to it on the PC and repeat these steps.
Non-system files from other disks transfer only if you run the tool while logged in to the PC as an administrator. Authorize the Mac with your Apple Account before you sync or play Apple content.
How to use Migration Assistant from Mac to Mac
To transfer wirelessly, keep both Macs nearby with Wi-Fi on. If either Mac uses OS X El Capitan or earlier, or you are not sure, connect them to the same Wi-Fi network too.
- On the new Mac, open Migration Assistant and select the option to transfer from a Mac, Time Machine or startup disk, then click Continue.
- On the old Mac, open Migration Assistant, select the option to transfer to another Mac and click Continue.
- On the new Mac, select the icon of the old Mac and click Continue.
- On the old Mac, check that any security code matches the new Mac and click Continue.
- On the new Mac, wait for the storage calculation to finish.
- Select the categories or items to transfer and click Continue.
- Set passwords for transferred accounts when asked.
- Quit Migration Assistant on both computers when it finishes, then log in to the migrated account.
If an account with the same name already exists on the new Mac, you can replace it or rename the old account so both remain.
How to restore a Mac from Time Machine with Migration Assistant
Reinstall macOS first if the Mac starts to a flashing question mark. You can reinstall macOS from Recovery, and then come back to these steps.
- Connect your Time Machine backup disk and turn it on.
- Open Migration Assistant, or continue in the setup assistant.
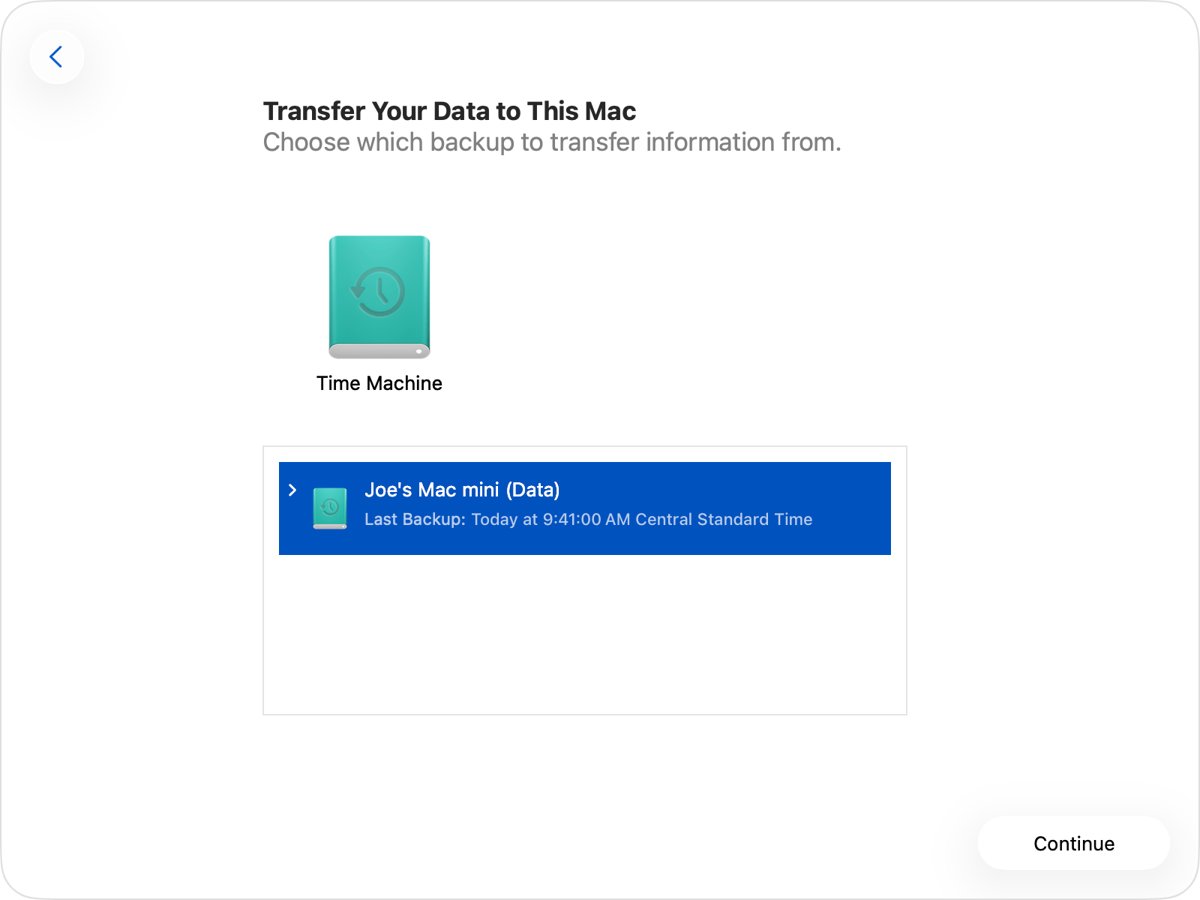
- Select the option to transfer from a Mac, Time Machine or startup disk, then click Continue.
- Select your backup disk and click Continue.
- Select a backup and click Continue.
- Wait for the storage calculation, select what to transfer and click Continue.
What does Migration Assistant transfer from Windows?
| From the PC | Where it goes on the Mac |
|---|---|
| Outlook and Windows Mail email and settings | |
| Contacts from People, Outlook and your home Contacts folder | Contacts |
| Calendar and Outlook calendar items | Calendar |
| Outlook tasks | Reminders, on macOS 13 or later |
| Music, podcasts, audiobooks, movies and TV | The matching Mac apps |
| Bookmarks from Chrome, Edge, Firefox, Internet Explorer and Safari | Safari |
| Documents and files from your home directory | Your Home folder |
| Desktop pictures, language and location settings | System Settings |
| Known Wi-Fi networks | System Settings, on macOS 13 or later |
Migration Assistant copies this information, so nothing is deleted from the PC and macOS is not replaced. Photos are not automatic, so add them to Photos afterwards or let Photos search the Mac for images.
How to find out which macOS your Mac is using
The macOS version decides both the built-in Migration Assistant you have and the Windows version you need.
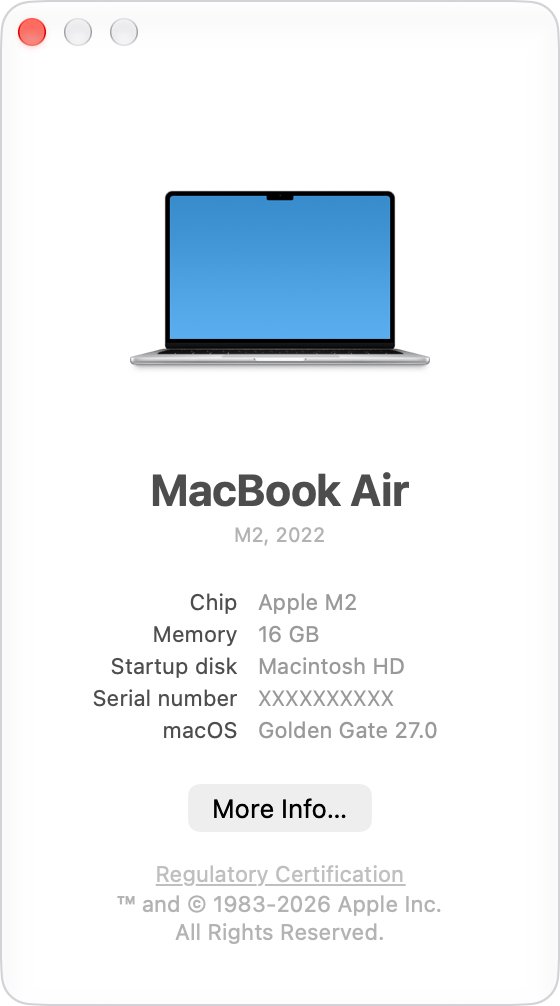
- Choose About This Mac from the Apple menu.
- Read the macOS name and version number in the window that opens.
- Open Software Update and check whether it reports that your Mac is up to date.
- Click Check for Updates or press Command-R to check again.
The macOS versions list shows where your release sits against newer ones.
Migration Assistant not working or failed: how to fix it
Software Update offers no newer macOS
Software Update shows only software compatible with your Mac model, so an older Mac can already be current.
- Open Software Update and click Check for Updates.
- Treat the built-in Migration Assistant as current if the panel says your Mac is up to date.
- Run the transfer anyway, because the two Macs can use different versions of macOS.
Windows Migration Assistant says a Bluetooth adapter is required
An older PC may not support Bluetooth Low Energy.
- Plug a USB Bluetooth adapter into the PC.
- Turn Bluetooth on and open Windows Migration Assistant again.
- Keep the PC and Mac near each other during the transfer.
Migration from a Windows PC failed
The wrong Windows Migration Assistant version or a disk problem on the PC can stop the transfer.
- Check that the version matches the macOS on the Mac.
- Right-click Start, choose Run, type
cmdand press Enter. - Type
chkdskand press Enter. - If it finds problems, type
chkdsk C: /Fusing your Windows startup drive letter and press Enter. - Type
Y, restart the PC, and repeat untilchkdskreports no issues. - If the transfer still fails, copy important files with an external drive or file sharing.
Migration Assistant seems stuck or paused
Large transfers can take hours and might appear to pause occasionally.
- Keep both computers on and near each other.
- Wait for the transfer to finish before you quit the app on either computer.
- Log in to the migrated account once it finishes.
Email is missing after the transfer
Migration Assistant moves your email, but you might need to set up the account again.
- Open Mail on the new Mac.
- Set up your email account again.
- Check that your transferred messages appear.
If the Mac has a storage or update problem unrelated to the transfer, work through common Mac and macOS fixes first.
Migration Assistant download FAQ
Can I download Migration Assistant for Mac?
You do not need to. Migration Assistant is included with your Mac, both as an app in the Utilities folder and as part of the setup assistant. To get the latest copy, update macOS using Software Update in System Settings.
Where do I download Migration Assistant for Windows?
Download Windows Migration Assistant from Apple's support site. Version 3.2.0.0 is for a Windows 10 or later PC moving to macOS Sonoma 14.4 or later, and older versions remain available for earlier versions of macOS.
Do both Macs need the same macOS for Migration Assistant?
No. Apple says it is not necessary for each Mac to use the same version of macOS, although both should be up to date. A newer Mac can receive data from an older one running an older release.
Does Migration Assistant delete anything from my old computer?
No. Migration Assistant does not delete information from your old Mac or PC, and it does not replace macOS on your new Mac. If you are giving the old computer away, erase it yourself after the transfer.
How long does Migration Assistant take?
It depends on how much you transfer, and large transfers might need hours. The app calculates the storage used before it starts, and the transfer can seem to pause occasionally, so keep both computers on until it finishes.
Can Migration Assistant restore from a Time Machine backup?
Yes. Connect the backup disk, open Migration Assistant, and select the option to transfer from a Mac, Time Machine or startup disk. It restores your personal files, including apps and everything in your user account.
Why can't I find Migration Assistant on my new Mac?
A Mac that is still in the setup assistant handles migration inside setup, so you do not open a separate app. After setup, look in the Utilities folder of the Applications folder, or search for it with Spotlight.
Does Windows Migration Assistant work on Windows 7?
Only with older versions. Versions 2.4.5.0 and 2.3.1.0 migrate from Windows 7 or later to macOS Ventura, Monterey or Big Sur. Version 3.2.0.0 for macOS Sonoma and later needs Windows 10 or later.