To create a custom resolution on Windows 11, open your graphics driver's control panel, define the new width, height and refresh rate, test it, then select it under Display resolution in Settings.
Windows Settings itself only lists the modes your monitor and driver report, so the custom mode is always made in the GPU software first; this guide covers NVIDIA and Intel graphics, plus fixes for resolution, full screen and Remote Desktop scaling problems.
How to create and set custom resolution on Windows 11/10
NVIDIA Control Panel has the most complete custom resolution tool on Windows 11 and Windows 10. NVIDIA describes it as a feature for advanced users who understand display timings, so start close to a mode your monitor already supports.
- Open NVIDIA Control Panel from the Start menu.
- In the navigation tree, under Display, select Change resolution.
- Click the image of the monitor you want to change.
- Click Customize, then click Create Custom Resolution.
- Enter the Horizontal pixels, Vertical lines and Refresh rate (Hz) you want, and leave Scan type on Progressive unless the display needs interlaced.
- Click Test. If the picture shows correctly and you want to keep the mode, click Save.
- Back on Change resolution, pick the new mode in the Resolution list and click Apply.
If the test leaves the screen blank, wait without pressing anything; the test mode times out and the previous resolution returns.
Custom resolution options for NVIDIA and Intel graphics
| Your graphics | Where to create the mode | What to know |
|---|---|---|
| NVIDIA GeForce, Quadro or NVS | NVIDIA Control Panel > Display > Change resolution > Customize > Create Custom Resolution | Full timing control, test before save, export and import as XML |
| Intel integrated graphics, external monitor | Intel Graphics Command Center > Display > Resolution list | Intel only offers custom modes for external displays |
| Intel integrated graphics, laptop screen | None | Intel states custom resolutions are not supported on internal displays; choose a listed mode in Settings |
| Any GPU, standard modes only | Settings > System > Display > Display resolution | Lists only modes the monitor and driver report |
If the only adapter listed in Device Manager is Microsoft Basic Display Adapter, none of the vendor tools are installed yet. Install the manufacturer's graphics driver first, such as the latest NVIDIA drivers or the Intel graphics driver for your GPU.
Change screen resolution in Windows 11 Settings
Once a custom mode exists in the driver, Windows Settings lists it alongside the standard modes. This is also the route for anyone who only needs a different standard resolution.
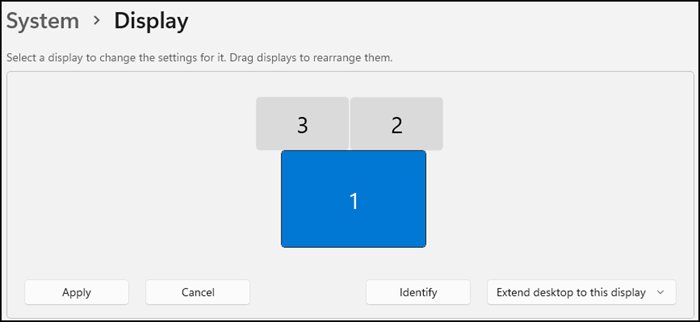
- Select Start > Settings > System > Display.
- If more than one monitor is connected, click the display you want to change at the top of the page.
- Open the Display resolution list and choose the resolution.
- Look at the screen before confirming; if the picture is wrong, let Windows revert to the previous mode.
Microsoft advises keeping the mode marked (Recommended). Lower resolutions work, but text is less sharp and the picture may look small, centered, letterboxed or stretched.
Apply a saved custom resolution in NVIDIA Control Panel
A custom mode you created earlier can drop off the Resolution list after a driver update or monitor change. NVIDIA keeps it in the Customize list, so you can switch it back on.
- In NVIDIA Control Panel, under Display, click Change resolution.
- Click the image of the display you want to affect.
- Click Customize, then tick Enable resolutions not exposed by the display.
- In the Resolutions box, tick the custom resolution you want and click OK.
- Select the custom resolution in the Resolution list box and click Apply.
Enable resolutions not exposed by the display clears the Windows Hide modes that this monitor cannot display setting, so modes the monitor never advertised become selectable.
Custom resolution timing standards: CVT, CVT-RB, GTF and DMT
Expanding the Timing section of the Create Custom Resolution dialog shows a Standard list. Leave it on Auto unless a mode fails, then try the others in this order.
| Standard | What it is | When to pick it |
|---|---|---|
| Auto | The driver picks the best standard for the mode | First attempt for any new mode |
| CVT | VESA Coordinated Video Timings, the standard since March 2003 | Higher resolutions on modern monitors |
| CVT reduced blank | CVT with shorter blanking, so a lower pixel clock and higher frame rates | High refresh rates over a bandwidth-limited cable; default for Quadro and NVS |
| DMT | Predefined VESA Discrete Monitor Timings | A standard mode at a slightly different refresh rate |
| GTF | General Timing Formula, an older widely used standard | Older monitors that reject CVT |
| Manual | You set front porch, sync width, totals and polarity yourself | Only when you have the monitor's exact timing figures |
Keep Refresh rate (Hz) at or below the monitor's maximum vertical scanning frequency. NVIDIA notes the reachable rate is also limited by the display's maximum horizontal scan rate at that resolution.
Confirm the custom resolution is applied in Windows 11
- Open Start > Settings > System > Display and read the value shown under Display resolution.
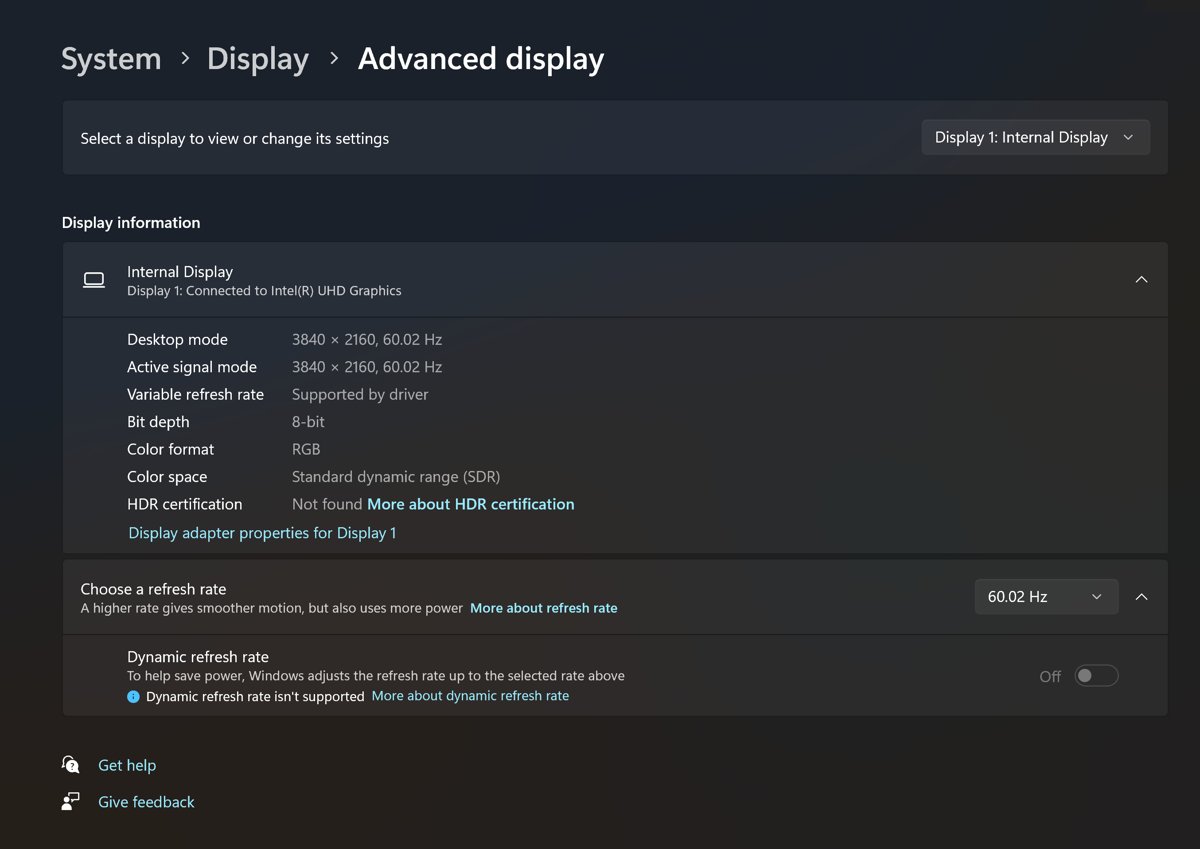
- Select Advanced display and confirm the rate next to Choose a refresh rate matches the one you entered.
- Check that text is sharp and the desktop reaches all four edges of the screen.
- In NVIDIA Control Panel, open Change resolution and confirm the custom mode is selected in the Resolution list.
On Advanced display, refresh rates marked with an asterisk (*) do not support the current resolution. Picking one changes the resolution as well.
Is it safe to use custom resolution?
A custom resolution is safe when you test it first and stay within the monitor's rated refresh rate and resolution. NVIDIA's dialog makes you click Test before Save, and a failed test reverts on its own. The real risks are a blank screen from an unsupported mode and blurry text from a non-native one, both reversed by deleting the mode.
Avoid Manual timings unless you have the monitor's published timing figures. NVIDIA flags the whole feature as intended for advanced users.
Remove a custom resolution in NVIDIA Control Panel
- In NVIDIA Control Panel, under Display, click Change resolution and select the display.
- Switch the Resolution list to a standard mode and click Apply, because NVIDIA will not delete a mode that is in use.
- Click Customize, then tick Enable resolutions not exposed by the display.
- Select the custom resolution in the Resolutions box.
- Click the Delete icon or press Delete on the keyboard.
To keep a mode for later, select it and click the Export icon first. NVIDIA saves its settings as an XML file you can import again from the Create Custom Resolution dialog.
Fix screen resolution problems in Windows 11
Display resolution list is short or the right resolution is missing
Windows is running the generic Microsoft Basic Display Adapter driver.
- Right-click Start and select Device Manager.
- Expand Display adapters and look for Microsoft Basic Display Adapter.
- Open Settings > Windows Update and select Check for updates.
- If no driver arrives, install the driver from your PC or graphics card maker's website and restart.
Screen resolution changes by itself
Microsoft points to an outdated graphics driver.
- Open Settings > Windows Update and select Check for updates.
- Install any display driver offered under optional updates, then restart.
- Set the resolution again under Settings > System > Display.
Resolution problems started after a driver update
The new driver changed the mode list or broke output.
- Press Windows logo key + Ctrl + Shift + B to reset the graphics driver.
- If that fails, open Device Manager, right-click the adapter and select Properties.
- On the Driver tab, select Roll Back Driver.
- If roll back is unavailable, uninstall the device, restart, then reinstall the driver.
A custom mode shows a blank screen or no signal
The monitor cannot accept the timing or refresh rate you entered.
- Wait for the NVIDIA test to time out and return to the previous mode.
- Lower the Refresh rate (Hz) in the Create Custom Resolution dialog.
- Change Standard under Timing to CVT reduced blank and test again.
- If no mode works, delete the custom resolution and keep the recommended mode.
Monitor not displaying full screen in Windows 11
Black bars around the desktop on a flat panel
A non-native resolution is shown with No scaling or Aspect ratio scaling.
- Set Display resolution back to the (Recommended) mode in Settings.
- If you need the lower resolution, open NVIDIA Control Panel and click Adjust desktop size and position.
- Choose Full-screen to stretch the desktop, or Aspect ratio to fill as much as possible without distortion.
- Click Apply.
Desktop edges cut off on a TV
The TV overscans the picture past its visible area.
- In NVIDIA Control Panel, under Display, click Adjust desktop size and position.
- Open the Size tab.
- Tick Enable desktop resizing, then click Resize.
- Move the sliders until the desktop edges are visible and click OK.
- Select the resized resolution, marked with an asterisk, and its refresh rate on the Change resolution page.
Picture looks stretched or blocky at a low resolution
Full-screen scaling distorts a mode with a different shape from the panel.
- On Adjust desktop size and position, choose Aspect ratio instead of Full-screen.
- For games and pixel art on Turing or newer NVIDIA GPUs, choose Integer scaling with scaling performed on the GPU.
- Click Apply and check the result.
High DPI issues with Remote Desktop on Windows 11
A high resolution laptop connecting to an older PC or server often gets a remote desktop with tiny text, or a session that does not resize with the window. Both are controlled by properties in the connection's .rdp file; if the session will not connect at all, fix Remote Desktop connection problems first.
Text and icons are tiny in the Remote Desktop session
The remote session is not scaled to match the local high DPI display.
- Save the connection as an .rdp file and open it in Notepad.
- Add the line
desktopscalefactor:i:150, or use 125, 175 or 200 for a different size. - Save the file and connect by opening it.
- Microsoft lists
desktopscalefactoras being deprecated, so set scaling inside the remote PC's own Display settings if the line stops working.
Remote desktop does not fill the window or leaves black borders
The session keeps a fixed resolution when the local window changes size.
- Open the .rdp file in Notepad.
- Add
dynamic resolution:i:1so the session resolution follows the window size. - If the remote PC cannot resize, add
smart sizing:i:1to scale the picture to the window instead. - Save the file and reconnect.
Remote session opens at the wrong resolution
A fixed width and height in the .rdp file overrides the local display.
- Open the .rdp file in Notepad.
- Set
desktopwidth:i:anddesktopheight:i:to the size you want, from 200 to 8192 pixels. - Delete both lines instead if you want the session to match the local display.
- Save the file and reconnect.
Custom resolution on Windows 11 FAQ
Can you set a custom resolution in Windows 11 Settings?
No. Windows 11 Settings lists only the modes your monitor and graphics driver report under Display resolution. Create the custom mode in NVIDIA Control Panel or Intel Graphics Command Center first, then it appears in the Settings list.
Why is custom resolution not supported on my laptop screen?
Intel states that custom resolutions are not supported on internal displays with its integrated graphics, and calls this expected behaviour caused by hardware limits. Choose one of the listed modes in Settings, or connect an external monitor to use a custom mode.
What does Custom Resolution Utility do?
Custom Resolution Utility is a third-party tool, not part of Windows or any graphics vendor's software. Intel says it does not support third-party resolution tools. NVIDIA Control Panel and the other vendor apps create custom modes without extra software.
Why does my custom resolution disappear after a driver update?
The new driver can drop custom modes from the visible list. In NVIDIA Control Panel, open Change resolution, click Customize, tick Enable resolutions not exposed by the display, then tick the saved mode and click OK.
How do I undo a custom resolution that leaves a black screen?
Wait without pressing a key; the NVIDIA test and the Windows resolution prompt revert on their own. If the screen stays black, press Windows logo key + Ctrl + Shift + B to reset the graphics driver.
Does a custom resolution damage the monitor?
A tested mode within the monitor's rated resolution and refresh rate does not. An unsupported mode usually just shows no signal. Keep the refresh rate at or below the monitor's maximum vertical scanning frequency, as NVIDIA advises.
Which timing standard should I choose for a custom resolution?
Leave Standard on Auto first. If the mode fails, try CVT for high resolutions or CVT reduced blank for high refresh rates on a bandwidth-limited cable. Use Manual only with the monitor's published timing figures.
Why is the Display resolution option greyed out in Windows 11?
A greyed out or very short resolution list usually means Windows is using Microsoft Basic Display Adapter. Check Display adapters in Device Manager, then install the manufacturer's driver through Windows Update or the PC maker's website.