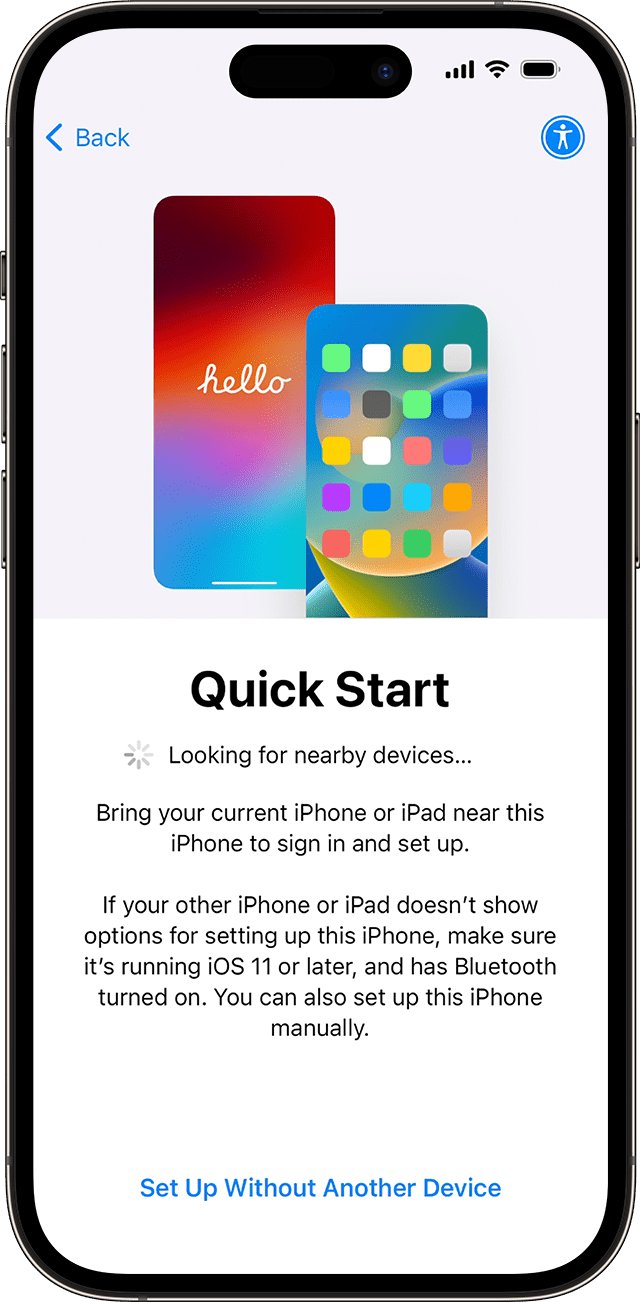
To transfer iPhone to iPhone, turn on the new iPhone, place it next to your unlocked old iPhone with Wi-Fi and Bluetooth on, and follow the Quick Start prompts.
This guide covers Quick Start, a direct cable transfer, iCloud and computer backups, moving data after setup, your phone number, and fixes when the transfer fails.
Step by step tutorial: How to transfer iPhone to iPhone
Quick Start works when the old iPhone runs iOS 11 or later. Both phones are busy while it runs, so pick a time when you can leave them alone.
- On the old iPhone, open Settings > General > Software Update and install any update with Download and Install.
- Plug both iPhones into power. On the old iPhone, connect to Wi-Fi, turn on Bluetooth, unlock it, and go to the Home Screen.
- Turn on the new iPhone and place it next to the old one. A prompt to set up the new iPhone appears on the old one.
- Follow the onscreen instructions on both phones. If the prompt disappears from the old iPhone, restart both iPhones and start again.
- Connect the new iPhone to Wi-Fi or your cellular network, and activate cellular service if setup asks.
- Set up Face ID or Touch ID on the new iPhone.
- Choose how to move your data: download from iCloud to use the new iPhone right away, or transfer directly from the old iPhone and wait for both to finish.
- Keep both iPhones next to each other and on power until the migration completes.
A direct phone-to-phone transfer needs iOS 12.4 or later on both iPhones. Quick Start does not work on a new iPhone enrolled in Apple School Manager or Apple Business.
iPhone transfer methods comparison
| Your situation | Use this | Why |
|---|---|---|
| Old iPhone in hand, both on a recent iOS version | Quick Start, transfer directly | Copies apps and data phone to phone with no backup step |
| You need the new iPhone working right away | Quick Start, download from iCloud | Apps and data keep downloading in the background after setup |
| You prefer a cable to a wireless link | Wired transfer | Connects the two charging ports directly with the right cable |
| Old iPhone lost, broken or already traded in | Restore from an iCloud backup | Needs only your Apple Account and a recent backup |
| Not enough iCloud storage for a backup | Prepare for New iPhone temporary backup | Apple adds free temporary storage for 21 days |
| Backups live on a Mac or PC, or Health data must move | Encrypted backup in Finder, Apple Devices or iTunes | An unencrypted computer backup leaves Health and Activity data behind |
| New iPhone already set up | Erase and transfer again, or sync with iCloud | Quick Start and backup restores run only during setup |
Tips: How to transfer iPhone to iPhone
| Tip | What to do | Why it matters |
|---|---|---|
| Update first | Install the latest iOS on the old iPhone | The new iPhone can ask for a newer iOS before it restores a backup |
| Power | Plug both iPhones into power | Both must stay on power until the migration completes |
| Wi-Fi and Bluetooth | Turn both on, on the old iPhone | Quick Start needs them on the current iPhone |
| Apple Account | Know the email or phone number and password for your Apple Account | Setup asks you to sign in, and app restores can ask again |
| Health data | Turn on Health in iCloud, or encrypt your computer backup | An unencrypted computer backup skips Health and Activity data |
| Apple Watch | Update the watch and old iPhone, and charge the watch and new iPhone to at least 50 percent | Apple lists both as conditions for moving the watch |
| Phone number | Keep the old iPhone unlocked and nearby with Bluetooth on | eSIM Quick Transfer moves the number on iOS 18.4 or later |
| Time | Start when you can leave both iPhones alone | A direct transfer keeps both phones busy until it ends |
Step-by-step guide to transfer iPhone data with a cable
A wired transfer uses the same setup screens as Quick Start, with a cable between the two charging ports. The cable you need depends on the ports on each iPhone.
- Pick the cable: a USB-C Charge Cable for iPhone 15 or later to iPhone 15 or later, or a USB-C to Lightning Cable for iPhone 14 or earlier to iPhone 15 or later.
- For iPhone 14 or earlier to iPhone 14 or earlier, power a Lightning to USB 3 Camera Adapter with a 12W or higher adapter, connect it to the old iPhone, and run a Lightning to USB Cable from the new iPhone to the adapter.
- Connect the cable to the charging ports of both iPhones.
- Turn on both iPhones and follow the onscreen instructions.
- Connect the new iPhone to Wi-Fi or your cellular network, and activate cellular service if asked.
- Set up Face ID or Touch ID.
- Wait for the transfer to complete on both iPhones before you use either one.
How to transfer iPhone to iPhone with iCloud
An iCloud backup works when the old iPhone is gone, or when you want to back up now and restore later. The restore needs Wi-Fi, because it cannot run over cellular data.
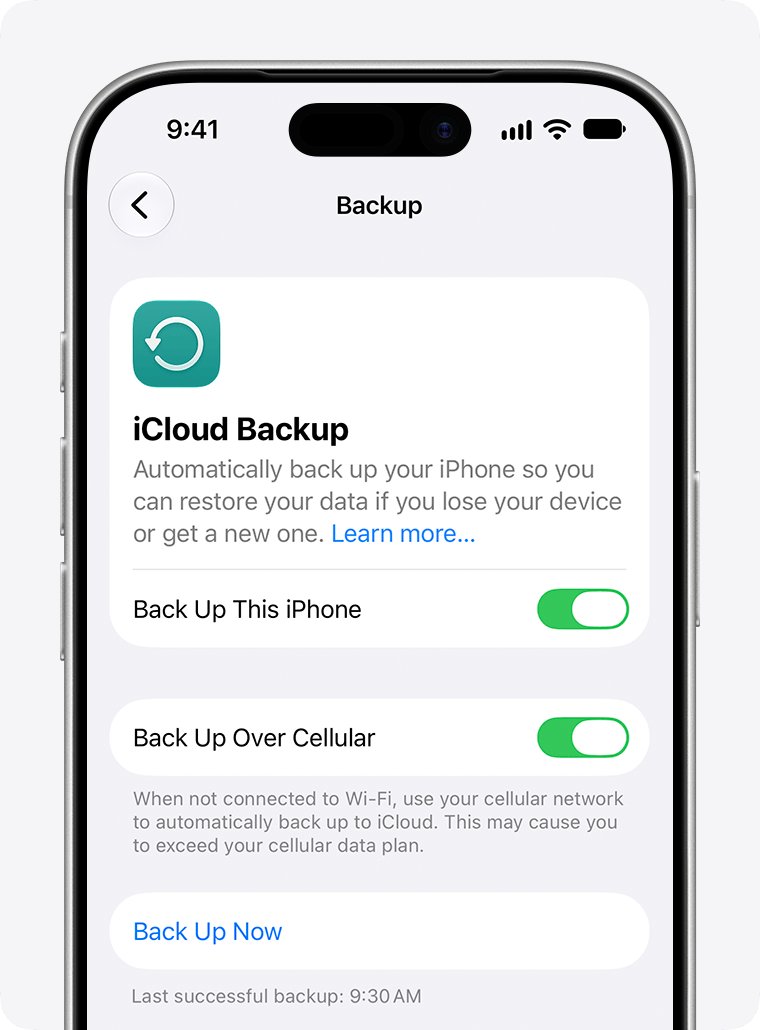
- On the old iPhone, connect to Wi-Fi and open Settings, tap your name, tap iCloud, then tap iCloud Backup.
- Tap Back Up Now and stay on Wi-Fi until the date and time of your last backup show under it.
- If iCloud says you lack storage, open Settings > General > Transfer or Reset iPhone and tap Get Started under Prepare for New iPhone for a free temporary backup.
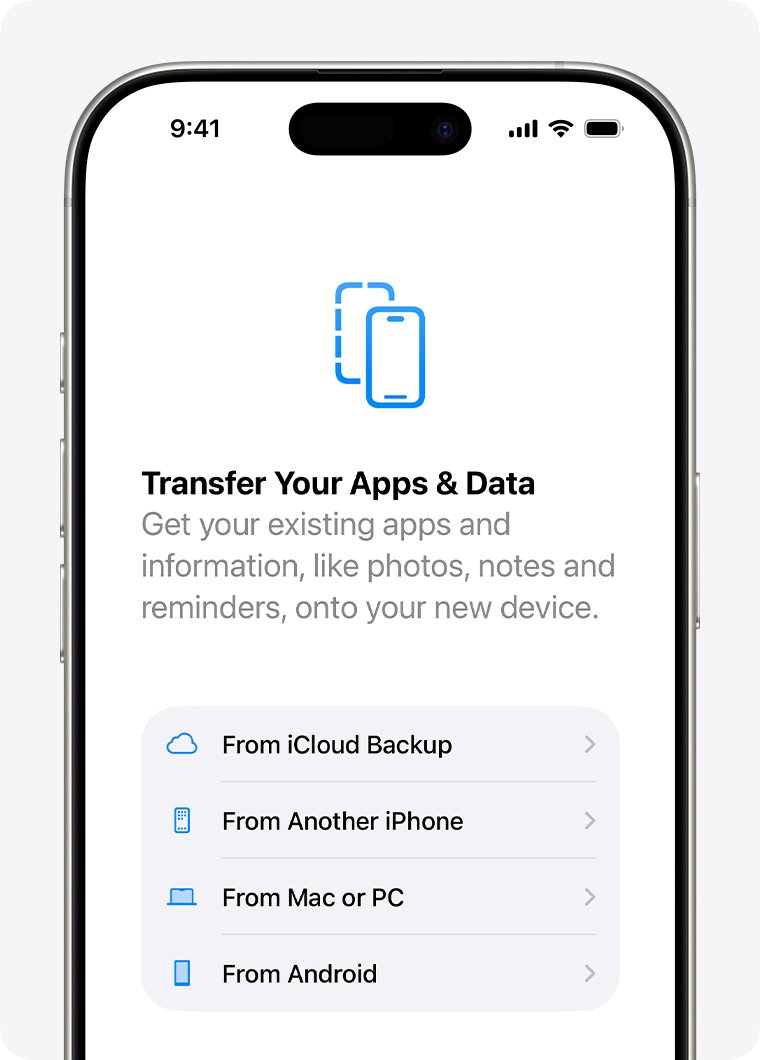
- Turn on the new iPhone and follow setup until the Transfer Your Apps & Data screen appears.
- Tap From iCloud Backup and sign in with your Apple Account.
- Check the date and size of each backup, then choose the most recent one.
- Sign in again when asked, so your apps and purchases restore.
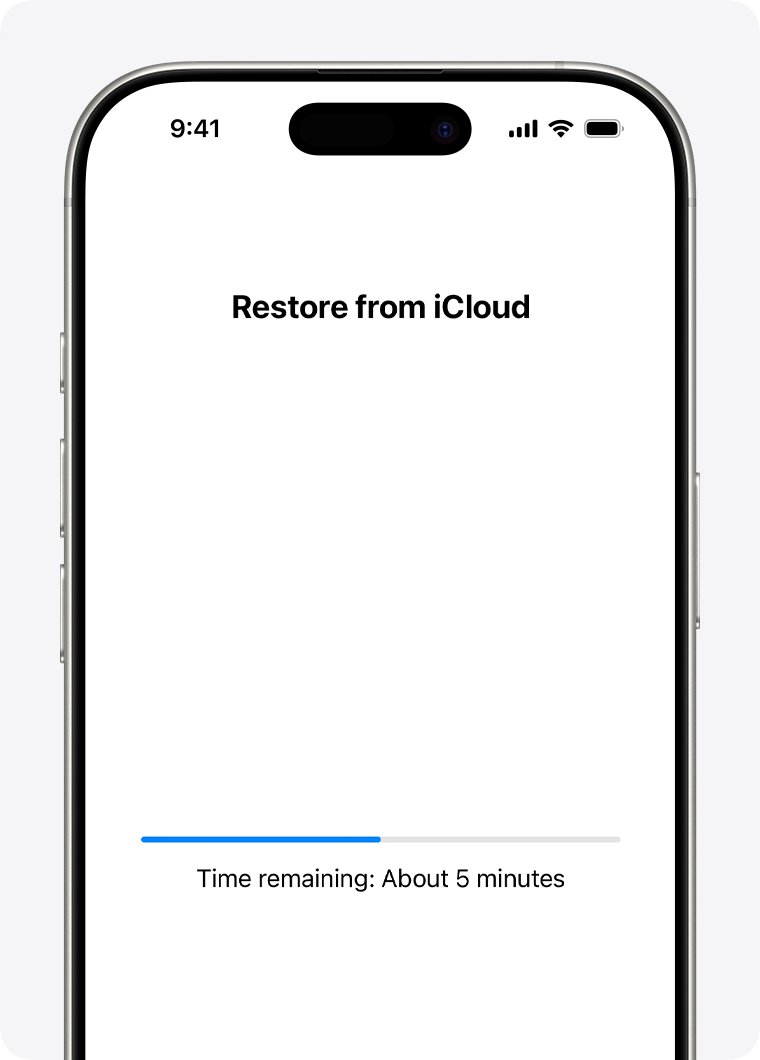
- Keep the new iPhone on Wi-Fi and power until the progress bar finishes, then complete setup.
Photos, music and apps keep downloading after setup ends. A temporary backup lasts 21 days; if the new iPhone is late, tap Keep My Backup Longer in Settings on the old iPhone for 21 more days. Do not erase the old iPhone until the restore finishes.
How to transfer iPhone to iPhone using iTunes or a PC
A computer backup suits large libraries and keeps Health and Activity data when you encrypt it. Use the Finder on a Mac with macOS Catalina 10.15 or later, the Apple Devices app on Windows 10 or later, or iTunes on an older Mac or a PC.
- Connect the old iPhone to the computer with a cable, then tap Trust on the iPhone and enter its passcode if asked.
- Select the iPhone in the Finder sidebar or the Apple Devices sidebar. In iTunes, click the Device button near the top left, then click Summary.
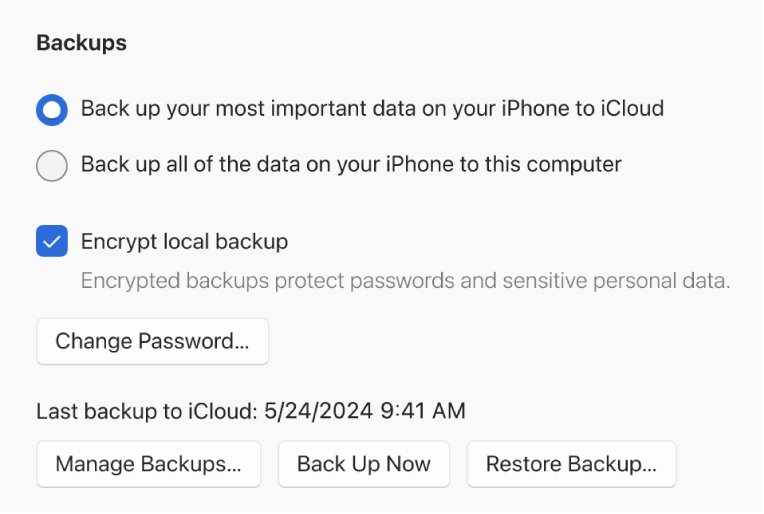
- In Apple Devices, select General and choose Back up all of the data on your iPhone to this computer.
- Select Encrypt local backup, type a password, and click Set Password. Without this password the backup cannot be restored.
- Click Back Up Now (Backup Now in Apple Devices) and wait for the date and time of the new backup to appear.
- Turn on the new iPhone, follow setup to the apps and data screen, and tap Restore from Mac or PC. Connect it to the same computer.
- Select the new iPhone, click Restore Backup, choose the newest backup by date and size, and enter the backup password.
- Keep the iPhone connected while it restarts and syncs, then finish setup on the phone.
The Apple Devices app can also back up an iPhone to a Windows PC over Wi-Fi once syncing over Wi-Fi is set up. iTunes backs up automatically each time you connect, so check the backup date before you restore.
How to transfer iPhone to iPhone after setup
Quick Start and backup restores run only during setup. To use them on an iPhone you already set up, erase the iPhone first, which removes everything on it.
- Save anything new on the new iPhone that you want to keep, such as photos taken since setup.
- Open Settings > General > Transfer or Reset iPhone.
- Tap Erase All Content and Settings and follow the prompts.
- Wait for the iPhone to restart and show the Hello screen.
- Run Quick Start, a cable transfer or a backup restore from the steps above.
If you only need some of your data, skip the erase and sync it through iCloud as shown in the next section.
Alternative transfer methods without erasing your iPhone
Signing in to the same Apple Account on both iPhones syncs much of your data through iCloud, with no erase and no backup. iCloud includes 5 GB of free storage, so a large photo library may need an iCloud+ plan.
- On the old iPhone, open Settings, tap your name, tap iCloud, then tap See All.
- Turn on the apps you want on the new iPhone, such as Photos, iCloud Drive, Messages, Contacts, Calendars, Notes and Passwords.
- On the new iPhone, sign in with the same Apple Account in Settings.
- Open Settings, tap your name, tap iCloud, tap See All, and turn on the same apps.
- Stay on Wi-Fi while photos, messages and files download.
- Open the App Store on the new iPhone and download the apps you used.
How to transfer your phone number and eSIM to a new iPhone
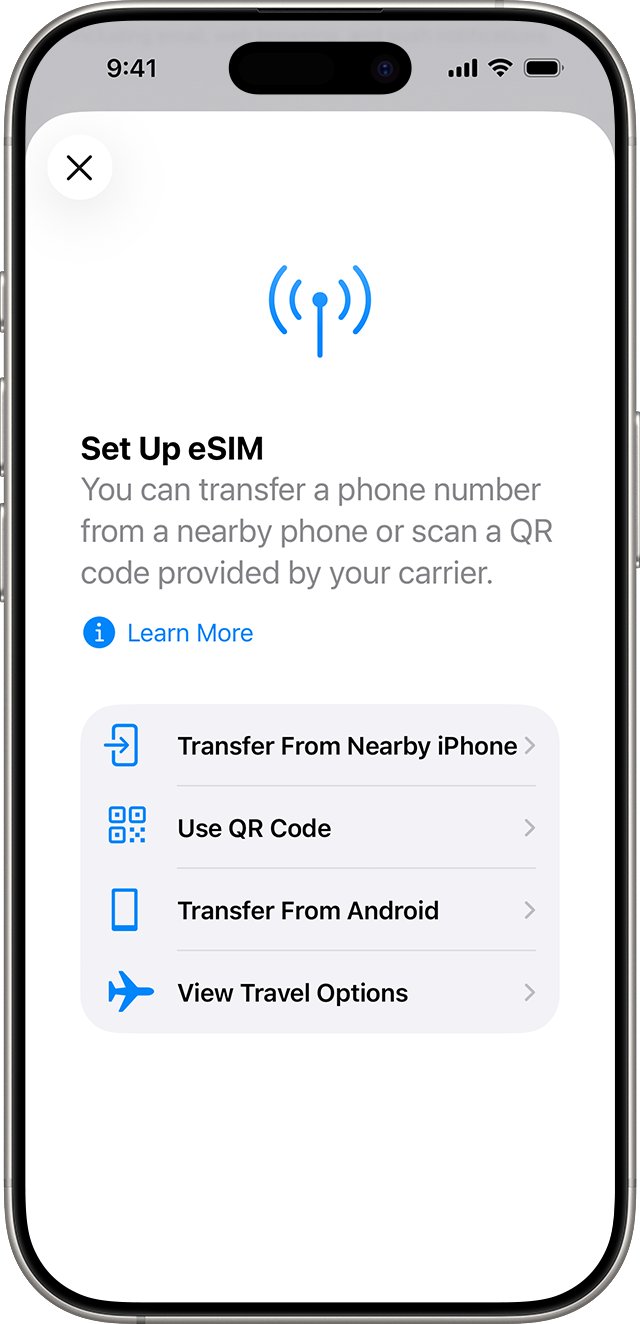
eSIM Quick Transfer moves your number from the old iPhone without a call to the carrier, if your carrier supports it. Both iPhones need iOS 18.4 or later, the same Apple Account, Bluetooth on, and the old iPhone unlocked.
- During setup, accept the prompt to transfer your phone number and follow the onscreen steps.
- After setup, open Settings on the new iPhone and tap Cellular.
- Tap Set Up Cellular or Add eSIM.
- Choose the plan to transfer, or tap Transfer From Nearby iPhone if no numbers appear.
- On the old iPhone, tap Transfer, or enter the code the new iPhone shows.
- Wait for the plan to activate. The SIM in the old iPhone stops working at that point.
- If a Finish Setting Up Your Carrier's Cellular Plan banner appears, tap it and finish on the carrier's website.
iOS 26 or later can move more than one number. Carriers without eSIM Quick Transfer activate the new iPhone through eSIM Carrier Activation or a QR code instead.
How to completely transfer iPhone to iPhone
Setup can finish while photos, messages and apps are still arriving. Work through these on the new iPhone before you erase the old one.
- Open Settings, tap your name, tap iCloud, then tap iCloud Backup. A message that the iPhone is currently being restored means the restore is still running, so leave it on Wi-Fi and power.
- Open Photos, Messages and Notes and compare recent items with the old iPhone.
- Enter the password for each Apple Account when the App Store asks, so purchased apps download.
- Open your third-party apps and sign in. Some need their data downloaded again from the app provider.
- Open the Apple Watch app on the new iPhone with the watch unlocked and on your wrist, then follow the onscreen steps.
- Make a call and send a text to check that your phone number works on the new iPhone.
If the iPhone asks you to start pairing instead of using your watch, unpair the watch first, then pair the Apple Watch with the new iPhone.
Why is transferring data between iPhones difficult?
Each kind of data reaches the new iPhone by its own route. That is why a transfer can look finished while items are still downloading.
| Data | How it reaches the new iPhone | What to watch for |
|---|---|---|
| Apps | Download again from the App Store | Some third-party apps need their data downloaded from the app provider |
| Photos in iCloud Photos | Download from iCloud after setup | Not part of the iCloud backup, so stay on Wi-Fi until they finish |
| Messages and Voice Memos in iCloud | Download from iCloud after setup | Left out of the backup while Messages in iCloud is on |
| Health and Activity | iCloud sync or an encrypted computer backup | An unencrypted computer backup skips them |
| Stays on the mail server | Only the account settings are in the backup | |
| Contacts and calendars | Restore, then iCloud pushes the current data | iCloud replaces the restored copy with the latest entries |
| Purchased music, movies and books | Download again from Apple services | Refunded or removed items may not come back |
| Phone number | eSIM Quick Transfer or the carrier | The old SIM stops working when the new plan activates |
What to do with your old iPhone after transferring data
Erasing the old iPhone removes its Apple Pay cards, photos, contacts and apps, but your iCloud content stays in iCloud. Keep it untouched until the new iPhone has everything.
- Unpair your Apple Watch from the old iPhone if one was paired.
- Open Settings, tap your name, scroll down, and tap Sign Out. On iOS 26 or later, choose Erase this iPhone or Sign Out But Don't Erase.
- Open Settings > General > Transfer or Reset iPhone and tap Erase All Content and Settings.
- If you are selling the phone, choose to erase the eSIM profile along with the iPhone when asked.
- Enter your passcode and Apple Account password if asked, then tap Erase iPhone.
- Remove the old iPhone from the list of trusted devices on your Apple Account.
iPhone to iPhone transfer still not working? Common issues and solutions
Quick Start prompt does not appear on the old iPhone
Bluetooth or Wi-Fi is off, the old iPhone is locked, or it runs a version older than iOS 11.
- Turn on Bluetooth and connect the old iPhone to Wi-Fi.
- Unlock the old iPhone and go to the Home Screen.
- Update the old iPhone in Settings > General > Software Update.
- Restart both iPhones and place them side by side again.
Why won't my iPhone transfer to my new iPhone?
One iPhone runs an iOS version too old for a direct transfer, or the new iPhone is enrolled in Apple School Manager or Apple Business.
- Check that both iPhones run iOS 12.4 or later, and update the old one if not.
- If the iPhone belongs to a school or company, ask its administrator for setup instructions.
- Use an iCloud backup or a computer backup instead of Quick Start.
Transfer stuck or taking hours
Transfer time depends on how much data you have and on network conditions.
- Keep both iPhones plugged in and next to each other.
- Switch to a wired transfer with the right cable if the wireless link is slow.
- If the new iPhone stays stuck on setup, restart both phones and run the transfer again.
- Choose download from iCloud on the next attempt, so you can use the new iPhone while data arrives.
Not enough iCloud storage to back up the old iPhone
The backup is larger than your iCloud plan.
- Open Settings > General > Transfer or Reset iPhone.
- Tap Get Started under Prepare for New iPhone.
- Tap Turn On Backup to Transfer if iCloud Backup is off, then tap Continue on the free extra storage message.
- Restore the temporary backup to the new iPhone within 21 days.
iCloud backup missing or restore from iCloud backup failed
The new iPhone is on cellular data, the network dropped, or a different Apple Account made the backup.
- Connect the new iPhone to Wi-Fi and plug it into power.
- Update iOS if the iPhone asks for a newer version.
- Sign in with the Apple Account that made the backup, then tap Show All Backups to see older ones.
- Try the restore on another Wi-Fi network.
Repeated Apple Account password prompts during the restore
Your apps were bought with more than one Apple Account.
- Enter the password for each Apple Account the iPhone requests.
- Tap Skip this Step for any password you do not know, and sign in later.
- Repeat until the prompts stop.
Photos or messages missing after the transfer
iCloud Photos and Messages in iCloud download after setup and are not part of the backup.
- Keep the new iPhone on Wi-Fi and power until downloads finish.
- Open Settings, tap your name, tap iCloud, tap Photos, and check that Sync this iPhone is on.
- If some photos never arrive from iCloud, compare the Photos settings on both iPhones.
- Check a computer backup for anything still missing.
Computer backup will not restore
The computer, Apple Devices or iTunes is out of date, or the backup is corrupt.
- Update the Mac or PC, and update Apple Devices or iTunes.
- Restart the computer and both iPhones.
- Choose a different backup, or restore from iCloud instead.
iPhone to iPhone transfer FAQ
How does iPhone to iPhone transfer work?
Quick Start links the new iPhone to your old one when you place them side by side. It then copies your apps and data directly, or downloads them from iCloud in the background. A cable transfer and backup restores use the same setup screens.
Can I transfer iPhone to iPhone after setup?
Not with Quick Start or a backup restore, which run only during setup. Erase the new iPhone from Settings > General > Transfer or Reset iPhone and start again, or sync Photos, Contacts and Messages through iCloud without erasing.
How do I transfer iPhone to iPhone using a PC?
Back up the old iPhone in the Apple Devices app or iTunes with Encrypt local backup turned on. During setup on the new iPhone, choose Restore from Mac or PC, connect it, and click Restore Backup.
How do I transfer iPhone to iPhone with iCloud?
Tap Back Up Now in Settings > your name > iCloud > iCloud Backup on the old iPhone. During setup on the new iPhone, tap From iCloud Backup on Transfer Your Apps & Data and choose that backup.
How do I transfer contacts from iPhone to iPhone?
Contacts move with Quick Start or any backup restore. To move only contacts, turn on Contacts in Settings > your name > iCloud > See All on both iPhones while signed in to the same Apple Account.
Can I transfer data from iPhone to iPhone without iCloud?
Yes. Quick Start can transfer directly from the old iPhone, a cable connects both phones, and a computer backup in Finder, Apple Devices or iTunes needs no iCloud storage.
Will my apps transfer to the new iPhone?
Yes. Apps download again from the App Store during or after the transfer, and you may be asked to sign in to each Apple Account used for purchases. Some third-party apps need their data downloaded again from the provider.
Can I use my new iPhone while the data is transferring?
Yes, if you choose download from iCloud during Quick Start, because apps and data arrive in the background. A direct transfer from the old iPhone keeps both phones busy until it finishes.
Is the transfer the same for iPhone 17, iPhone 16 and older models?
Yes. Every iPhone uses the same Quick Start and Transfer Your Apps & Data screens. Only the cable changes: iPhone 15 and later use USB-C, while iPhone 14 and earlier use Lightning.
What should I do with my old iPhone after transferring data?
Check that the new iPhone has everything, unpair your Apple Watch, sign out of your Apple Account, and erase the old iPhone with Erase All Content and Settings. Erase the eSIM profile too if you are selling it.
Quick summary: Steps to transfer iPhone to iPhone
Use Quick Start with both iPhones on power and side by side: transfer directly when you can wait, or download from iCloud when you need the new iPhone right away. Quick Start copies apps, settings and data with no separate backup step. iCloud and computer backups are the route when the old iPhone is gone, and among computer backups only an encrypted one keeps Health and Activity data.