To recover BIOS on a laptop, connect the AC adapter, then use the manufacturer's built-in recovery: hold Windows + B while pressing the power button on HP, hold Ctrl + Esc while plugging in the power cable on Dell, or boot an ASUS laptop with its BIOS file on a FAT32 USB drive.
This guide covers the recovery steps for HP, Dell and ASUS laptops, what to do after a BIOS update was interrupted, how to reset BIOS settings, and the Secure Boot errors that often appear after a firmware recovery.

How to recover BIOS on Windows computers
Every major laptop maker keeps a recovery routine in a protected part of the firmware. It rewrites the BIOS from a backup copy or from a file you supply, even when the screen stays black. The general sequence is the same on all brands.
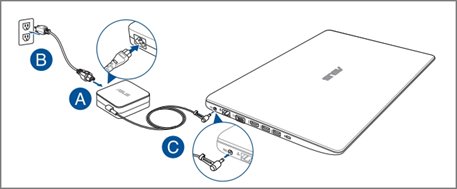
- Connect the laptop's AC adapter and leave it plugged in until recovery finishes. On Dell, also make sure the battery is charged to at least 25%.
- On a second, working computer, open the manufacturer's support site and download the BIOS file for your exact laptop model.
- Copy the file to the root of a USB flash drive formatted as FAT32, not inside a folder. Dell needs the file renamed to
BIOS_IMG.rcv. - Turn the laptop fully off and plug in the USB drive.
- Start the brand's recovery: Windows + B with the power button on HP, Ctrl + Esc while connecting power on Dell, or a normal power-on with the USB drive inserted on ASUS.
- Leave the laptop alone while the recovery screen runs. It can restart several times, and the screen may stay black for a while.
- When the laptop starts normally, open BIOS setup and load the default settings, then reinstall the latest BIOS from the manufacturer.
BIOS recovery only rewrites the firmware. Files, apps and Windows stay on the drive, but have your BitLocker recovery key ready, because a firmware change can trigger the BitLocker recovery screen.
What is the key for BIOS recovery?
There is no universal BIOS recovery key. Each manufacturer wires its own combination into the firmware, and it only works on that brand's laptops.
| Laptop brand | Recovery key or trigger | When to press it | Recovery file |
|---|---|---|---|
| HP notebooks | Windows + B (some models use Windows + V) | Hold the keys, then press and hold the power button | Built-in backup, or a recovery USB drive made with HP's BIOS update utility |
| Dell laptops | Ctrl + Esc | Hold the keys while you plug in the power cable | Recovery image on the hard drive, or BIOS_IMG.rcv on a FAT32 USB drive |
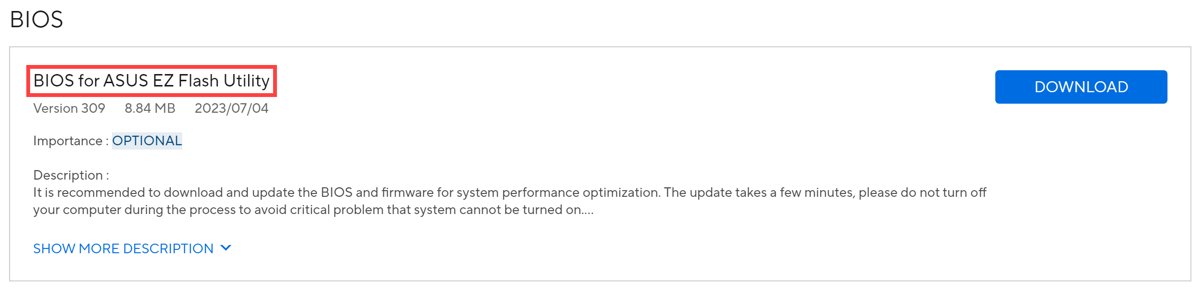
| ASUS notebooks | No key needed | Power on with the USB drive and AC adapter connected | BIOS file from ASUS support in the root of a FAT32 USB drive |
The key combination only works on the laptop's built-in keyboard. Dell states that external keyboards do not work for recovery.
How to recover BIOS on HP laptop
HP notebooks keep a copy of the BIOS that the key combination restores. HP business models with HP Sure Start repair a corrupted BIOS automatically, and HP does not support the key-press recovery on those computers.
- Turn off the notebook and connect the AC adapter.
- Press and hold the Windows and B keys together.
- While still holding them, press and hold the power button.
- Release the power button but keep holding Windows + B until the HP BIOS Update screen appears.
- Let the recovery run without pressing anything. The screen can stay blank for a while before the update shows.
- If nothing happens, turn the notebook off and repeat the steps with Windows + V instead, which some HP models use.
- Leave the AC adapter connected until the notebook restarts and Windows loads.
If the key combination fails on every attempt, use a second computer to download the BIOS update for your model from HP support and choose the option in HP's BIOS update utility that creates a recovery USB flash drive.
How to recover BIOS on Dell laptop
Dell's BIOS Recovery first looks for a recovery image on the internal drive, which is the route Dell recommends. Use the built-in keyboard and remove every USB drive before you start.
- Disconnect all USB drives and check that the battery is charged to at least 25%.
- Unplug the power cable from the laptop.
- Press and hold Ctrl + Esc on the laptop keyboard.
- While holding the keys, plug the power cable back in.
- Release the keys when the BIOS Recovery screen appears.
- Select Recover BIOS, then select Continue or press Enter.
- Wait while the laptop restarts several times. Do not turn it off.
Some Dell models show a Reset NVRAM option on the recovery screen. Leaving it disabled tries to keep your current BIOS settings; Dell suggests enabling it only if the first recovery attempt fails, because it returns every setting to factory defaults. If the laptop reports No recovery image found, use the USB method below. After recovery, update the BIOS on your Dell to the latest version so the stored recovery image is current too.
Dell laptop BIOS update failed: how to recover with a USB drive
Use this route when a Dell laptop shows no recovery image, blinks its power light, or stopped responding after a BIOS update. Each recovery drive works only for the model it was made for.
- On a working computer, download the BIOS file for your Dell model from Dell's Drivers & Downloads page.
- Rename the file to
BIOS_IMG.rcv, with capital letters, the underscore and the.rcvextension. - Format a USB flash drive as FAT32. Formatting erases everything on the drive.
- Copy
BIOS_IMG.rcvto the root of the USB drive, not into a folder. - Plug the drive into the Dell laptop, make sure the battery is at least 25%, and unplug the power cable.
- Hold Ctrl + Esc and plug the power cable back in, then release the keys at the BIOS Recovery screen.
- Select Recover BIOS and Continue, and leave the laptop connected to power until it boots normally.
Dell systems built from December 2015 use BIOS Recovery 2, which is manual only. Systems built from August 2016 use BIOS Recovery 3, which adds an optional automatic recovery at boot that must be turned on in BIOS setup.
How to recover BIOS on ASUS laptop
ASUS notebooks resume an interrupted BIOS update by themselves when they find the right file on a USB drive. There is no key combination to press.
- On another PC, open the ASUS support site and download the BIOS file for your notebook model. If the laptop screen names a recommended recovery BIOS version, download that version; otherwise download the latest.
- Copy the BIOS file to the root directory of a FAT32 USB flash drive.
- Press and hold the laptop's power button for 15 seconds, until the power LED turns off.
- Plug the USB drive into the laptop and connect the AC adapter.
- Turn the laptop on. The BIOS update resumes automatically.
- Keep the AC adapter connected and do not force a shutdown until the update finishes.
- After the laptop restarts, open BIOS setup and load the default settings.
How to restore BIOS settings to default on a laptop
If the firmware still starts but settings are wrong, you need a settings reset rather than a full recovery. Windows can restart straight into the firmware screen through its boot and recovery options.
- Open Settings > System > Recovery.
- Next to Advanced startup, select Restart now.
- Select Troubleshoot > Advanced options > UEFI Firmware Settings, then select Restart.
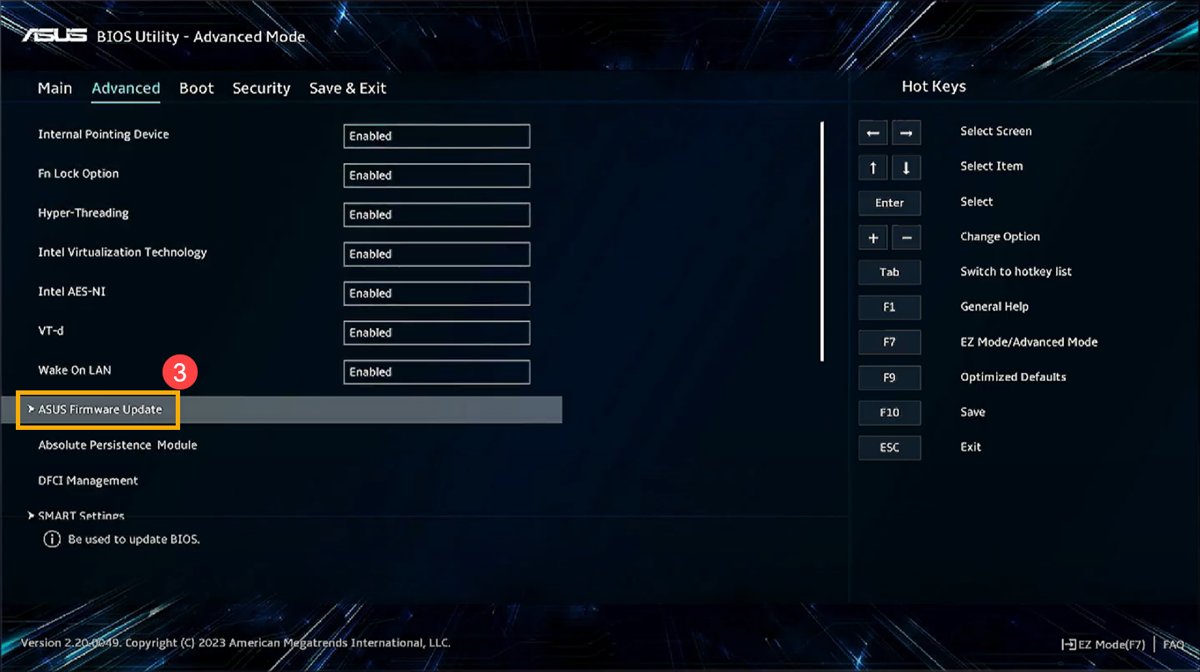
- In BIOS setup, find the defaults option. HP calls it Restore Defaults or Load Setup Defaults; other makers use similar wording on the exit or main page.
- Confirm the reset, then save the changes and exit.
If Windows will not start, press the setup key at power-on instead. On HP, press Esc repeatedly right after power-on to open the Startup Menu, then F10 for BIOS setup. Other brands use their own keys to enter the BIOS at power-on.
How to reset laptop from BIOS
BIOS setup cannot reinstall or reset Windows; it only stores firmware settings. A full laptop reset runs from Windows Settings or from the Windows Recovery Environment, which you can reach even when the desktop will not load.
- Back up your files, and have your BitLocker recovery key ready if the drive is encrypted.
- Open Settings > System > Recovery and select Reset PC next to Reset this PC.
- Choose Keep my files to keep personal files, or Remove everything to delete files, apps and settings.
- Pick Cloud download or Local reinstall, then follow the prompts.
- If Windows will not start, open the Windows Recovery Environment and select Troubleshoot > Reset this PC instead.
Do not restart the laptop by hand during the reset. Microsoft warns that the screen can stay black for 15 minutes or more.
Accidentally turned off PC during BIOS update on Windows 11
An interrupted update rarely kills a modern laptop, because the recovery code sits in a separate, protected area. What you see on the next power-on tells you which route to take.
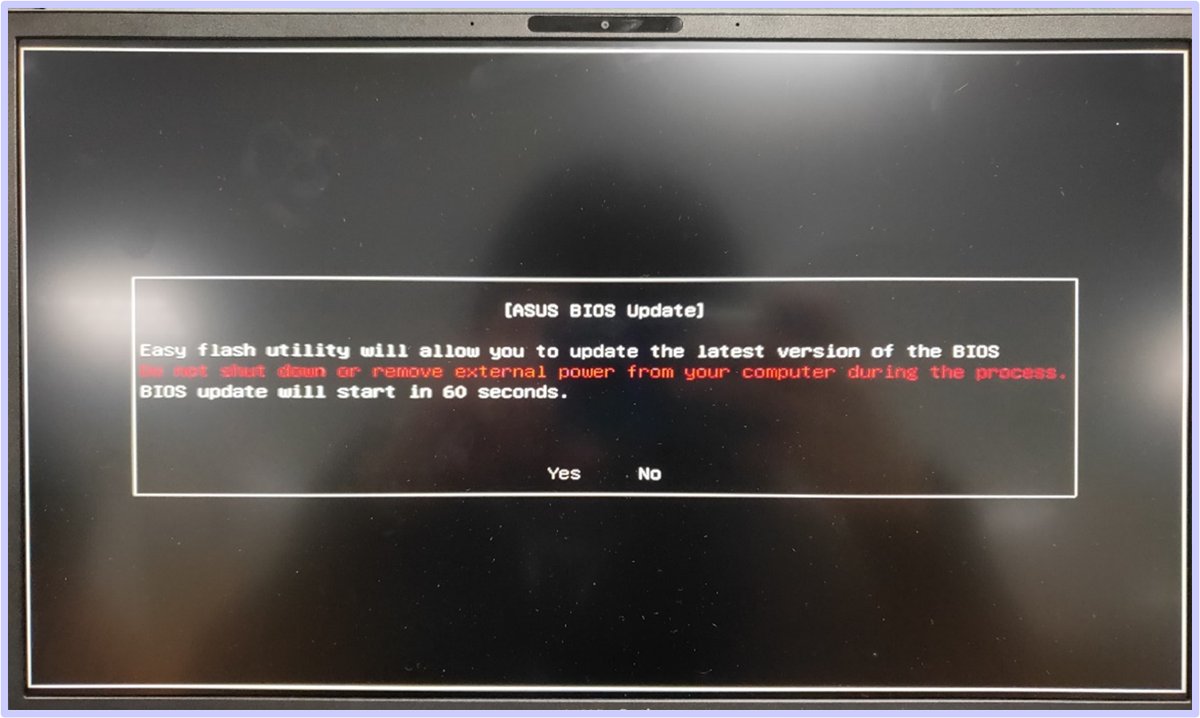
ASUS laptop shows a BIOS update prompt on the next start
The firmware detected the incomplete update and can resume it from its own copy.
- Connect the AC adapter.
- Wait 60 seconds, or select Yes on the screen.
- Leave the laptop plugged in until the update completes and Windows starts.
ASUS power light is on but the screen stays black
The update stopped before the display could start.
- Remove the AC adapter, and the battery if it is removable. The TP420IA and UX425IA must stay plugged in.
- Press and hold the power button for 40 seconds.
- Reconnect the AC adapter and battery, then power on. The BIOS update should resume.
- Do not unplug the AC adapter until it finishes, then load the BIOS default settings.
Dell laptop will not start after the update was cut off
The BIOS image is incomplete, so the system cannot complete POST.
- Run the Dell Ctrl + Esc recovery from the hard drive image.
- If it reports no recovery image, prepare a
BIOS_IMG.rcvUSB drive on another computer and repeat. - Once the laptop boots, install the latest BIOS from Dell support again.
HP notebook shows a black screen after the update
The active BIOS is damaged; HP notebooks normally restore it from a backup at restart.
- Restart the notebook once with the AC adapter connected and wait.
- If it still does not start, run the Windows + B recovery.
- If that fails, create a recovery USB flash drive on another computer with HP's BIOS update utility.
BIOS recovery not working on laptop
Dell BIOS Recovery screen never appears
The keys were released too early or an external keyboard was used.
- Use the laptop's built-in keyboard.
- Hold Ctrl + Esc for up to 30 seconds after plugging in the power cable.
- Remove other USB devices and try again.
Dell shows "No recovery image found" or only blinks its lights
No usable recovery file is on the drive or the USB stick.
- Check the file is named exactly
BIOS_IMG.rcv. - Check the USB drive is formatted FAT32 and the file sits in the root.
- Make sure the BIOS file was downloaded for the same model.
Dell keeps restarting during recovery
Several restarts are part of the process.
- Keep the power cable connected.
- Wait at least 15 minutes before doing anything else.
Windows + B does nothing on an HP notebook
The model uses a different key combination or has HP Sure Start.
- Repeat the steps with Windows + V.
- Check whether the notebook is an HP business model with HP Sure Start, which repairs the BIOS automatically instead.
- Create a recovery USB flash drive on another computer as the fallback.
If no route works, contact the manufacturer's support with the serial number or Service Tag. A BIOS chip that recovery cannot rewrite usually needs a motherboard repair.
Can BIOS be recovered?
Yes. Current HP, Dell and ASUS laptops include a recovery routine that can rewrite a corrupted or half-installed BIOS. Here is what a recovery changes and what it leaves alone.
| Item | After BIOS recovery | What to do |
|---|---|---|
| Files, apps and Windows | Unchanged | Nothing; recovery only rewrites firmware |
| BIOS settings | May return to factory defaults | Re-check boot order, Secure Boot and any custom settings |
| BitLocker | May ask for the 48-digit recovery key | Keep the key from your Microsoft account or IT department ready |
| BIOS version | Can be the older backup copy | Install the latest BIOS from the manufacturer afterwards |
| Secure Boot | Keys may reset with the defaults | Check the Secure Boot state in System Information |
Windows Boot Manager has been blocked by the current security policy
This firmware message is a Secure Boot violation: the firmware no longer trusts the Windows boot manager. Microsoft documents it after Secure Boot is reset to firmware defaults, which can happen when BIOS settings are reset or the BIOS is recovered.
Boot is blocked right after resetting BIOS or Secure Boot to defaults
The reset cleared the Secure Boot databases, so the firmware no longer trusts a boot manager signed with the Windows UEFI CA 2023 certificate.
- On a second Windows PC with the July 2024 or newer Windows update installed, copy
SecureBootRecovery.efifromC:\Windows\Boot\EFI\. - Format a USB drive as FAT32, create the folder
\EFI\BOOT\on it, and place the file there. - Rename the file to
bootx64.efi. - Boot the blocked laptop from the USB drive and let the recovery utility run. It adds the Windows UEFI CA 2023 certificate back to the firmware database.
- Restart the laptop. Windows should start normally.
The message returns after a later BIOS reset
The laptop's factory Secure Boot defaults do not yet include the 2023 certificates.
- Install the latest BIOS from the laptop manufacturer once Windows starts.
- Avoid resetting Secure Boot to firmware defaults unless the new firmware includes updated Secure Boot defaults.
The recovery utility restores only one of the new certificates, so let Windows Update reapply the rest once the laptop boots.
Secure Boot state off in System Information, but on in BIOS
System Information reports what the firmware actually did during the last boot, not what the setup screen says. A mismatch usually means the laptop is still booting in Legacy mode.
BIOS Mode shows Legacy in System Information
The laptop boots through Legacy BIOS (CSM), and Secure Boot only works in UEFI mode.
- Open an elevated Command Prompt and run
mbr2gpt /validate /allowFullOSto check whether the system disk can be converted. - If validation succeeds, run
mbr2gpt /convert /allowFullOS. The tool converts the disk from MBR to GPT without deleting data. - Restart into BIOS setup, switch the boot mode from Legacy/CSM to UEFI, and turn on Secure Boot.
- Save and exit, then check Secure Boot State again in System Information.
BIOS Mode shows UEFI but Secure Boot State is Off
Secure Boot is not active in the firmware, even if a related option looks enabled.
- Restart into UEFI Firmware Settings from Settings > System > Recovery > Advanced startup.
- Find the Secure Boot setting, which is usually on the Security or Boot page, and set it to enabled.
- Save the change and exit, then check the state again.
Secure Boot State shows Unsupported
The firmware does not offer Secure Boot in its current mode.
- Check the BIOS Mode line; a Legacy result needs the conversion above.
- If the laptop only supports Legacy mode, contact the manufacturer for BIOS upgrade instructions.
Suspend BitLocker before converting the disk. MBR2GPT can convert a BitLocker-encrypted disk only while protection is suspended, and the conversion cannot be undone.
How to check BIOS version and Secure Boot state in Windows
- Press Windows + R, type
msinfo32and press Enter. - Select System Summary in the left pane.
- Read BIOS Version/Date and compare it with the latest version on the manufacturer's support page for your model.
- Check that BIOS Mode shows UEFI.
- Check that Secure Boot State shows On.
For a quick command-line check, run Confirm-SecureBootUEFI in PowerShell opened as administrator. It returns True when Secure Boot is on, False when it is off, and "Cmdlet not supported on this platform" on a Legacy BIOS computer.
How to recover BIOS password on HP and Dell laptops
BIOS recovery does not remove a BIOS password. A forgotten administrator or system password goes through the manufacturer, which checks that you own the laptop.
| Your laptop | What to do | What you are asked for |
|---|---|---|
| Dell laptop you own | Contact Dell Support for password recovery | Computer model, Service Tag and proof of ownership |
| Laptop managed by work or school | Ask your IT administrator to reset the password | Your device details |
| HP laptop | Contact HP Customer Support for your model | The serial number and model details |
| You still know the current password | Change or remove it in BIOS setup | The current password |
Dell notes that when ownership cannot be verified, a motherboard replacement may be the only fix. Avoid third-party password generators; Dell warns that unauthorized reset tools exist precisely because they bypass this check.
Laptop BIOS recovery FAQ
How do I do BIOS recovery?
Connect the AC adapter, then run your laptop maker's recovery: Windows + B with the power button on HP, Ctrl + Esc while plugging in power on Dell, or a BIOS file on a FAT32 USB drive on ASUS. Keep the laptop plugged in until it restarts normally.
How to recover corrupt Dell laptop BIOS?
Unplug the power cable, hold Ctrl + Esc and plug it back in, then select Recover BIOS on the BIOS Recovery screen. If no recovery image is found, copy the model's BIOS file renamed to BIOS_IMG.rcv onto a FAT32 USB drive and repeat.
How to recover BIOS in HP laptop?
Turn the notebook off with the AC adapter connected, hold Windows + B, then press and hold the power button. Release the power button but keep the keys held until the HP BIOS Update screen appears. Some models use Windows + V.
How to get back to BIOS?
From Windows, open Settings > System > Recovery, select Restart now next to Advanced startup, then choose Troubleshoot > Advanced options > UEFI Firmware Settings and Restart. The laptop opens straight into BIOS setup.
How to restart laptop to BIOS?
Use Advanced startup in Settings > System > Recovery and choose UEFI Firmware Settings, or turn the laptop off and press its setup key at power-on. On HP notebooks, press Esc repeatedly for the Startup Menu, then F10.
Where to find BIOS on laptop?
The BIOS is firmware stored on a chip on the motherboard, not a file in Windows. You reach its setup screen through UEFI Firmware Settings in Advanced startup, and System Information shows its version under BIOS Version/Date.
How to reset PC using BIOS?
BIOS setup can only reset its own settings, through an option such as Load Setup Defaults. To reset Windows itself, use Settings > System > Recovery > Reset PC, or Troubleshoot > Reset this PC in the Windows Recovery Environment.
Does BIOS recovery delete my files?
No. Dell states that BIOS recovery only restores the firmware and leaves files, programs and Windows unchanged. BIOS settings may return to defaults, and BitLocker can ask for its recovery key on the next start.