To create a quiz in Microsoft Forms, sign in at forms.office.com, select New Quiz, add questions, mark each correct answer with the check mark and give it points.
This guide covers building the quiz by hand or with Copilot, math questions, feedback, quiz settings, sharing, Teams assignments, grading and posting scores.
The fastest way to create a quiz in Microsoft Forms
These steps give you a scored quiz ready to send. Forms saves the quiz automatically while you build it, so there is no save button to find.
- Go to forms.office.com and sign in with your school, work or personal Microsoft account.
- Select New Quiz, then close the Copilot draft box with the X if you want to build it yourself.
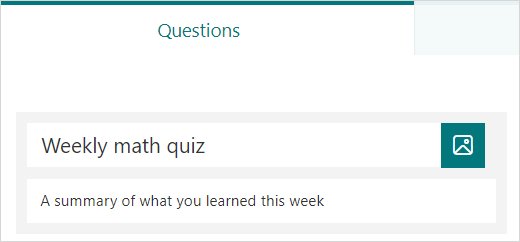
- Type a name for the quiz, then choose a question type such as Choice.
- Type the question and each answer, selecting Add option for every extra answer.
- Select the Correct Answer check mark next to the right answer and type a value in the Points box.
- Repeat for each question, then select Preview to take the quiz yourself.
- Select Collect responses, choose who can respond and select Copy link to share it.
Understanding Microsoft Forms
Forms has two starting points: New Form and New Quiz. Both use the same question types, but only a quiz carries correct answers, points and scoring. For an unscored questionnaire, follow the survey guide for MS Forms instead.
| Feature | New Form | New Quiz |
|---|---|---|
| Question types (Choice, Text, Rating, Date, Ranking, Likert, File upload, Net Promoter Score, Section) | Yes | Yes |
| Correct Answer check mark on answers | No | Yes |
| Points per question and a total score | No | Yes |
| Per-answer feedback message | No | Yes, through the Message icon |
| Show results automatically and Practice mode settings | No | Yes |
| Review Answers grading and Post scores | No | Yes |
| Branching, sections, themes, Excel export | Yes | Yes |
Getting Started with Microsoft Forms
Forms runs in a web browser, so there is nothing to install. The account you sign in with decides which sharing and grading options you get.
| Requirement | Details |
|---|---|
| An account | A Microsoft 365 school or work account, or a personal Microsoft account such as Outlook.com |
| Where to start | Go to forms.office.com, or sign in at Office.com and select Forms from the app icons |
| School or work account for restricted quizzes | Only people in my organization can respond and Specific people in my organization can respond are limited to Office 365 Education and Microsoft 365 business users |
| School or work account for names | Record name and One response per person depend on those organization-only options, so a public quiz cannot capture who answered |
| Copilot license for AI drafts | Generating a quiz with Copilot needs a Microsoft 365 account and a Copilot license |
| Office 365 Education for OneNote and Teams Assignments | The OneNote Forms for OneNote panel and Teams quiz assignments are school features |
Which way to start your quiz
All four routes produce the same Forms quiz, stored in your My forms list. Pick the one that matches where you work.
| Your situation | Start here | Why |
|---|---|---|
| You want full control over every question | forms.office.com > New Quiz, built by hand | No license needed beyond a Microsoft account |
| You have a Copilot license and want a first draft fast | New Quiz > describe the quiz > Generate | Copilot drafts the title, questions and answers for you to edit |
| You teach from a OneNote Class or Staff Notebook | OneNote Insert > Forms > New Quiz | The finished quiz can be embedded in the notebook page |
| You grade through Teams for Education | Class team > Assignments > Create > New Quiz | Due dates, auto-grading and returning work stay inside Teams |
Adding Questions
Every question starts from the same list of types. Set each option while the question card is open so you do not have to revisit it later.
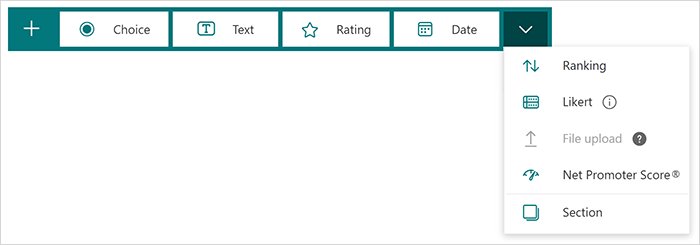
- Select Add new and choose Choice, Text, Rating or Date, or open More question types for Ranking, Likert, File upload, Net Promoter Score or Section.
- Type the question. Highlight text to apply Bold (Ctrl+B), Italic (Ctrl+I), Underline (Ctrl+U), font color, size, numbering or bullets; use Cmd on a Mac.
- For a Choice question, type each answer and select Add option for more; you can also offer All of the above or None of the above.
- Turn on Multiple answers if more than one answer is correct, and Required if every student must answer.
- Open More settings for question (the three dots) for Shuffle options, Drop-down, Subtitle or Add branching.
- Select the trash can to delete an answer, the copy icon to duplicate the question, and the Up and Down arrows to reorder it.
Deleting a question after the quiz is live also deletes every response collected for it. Branching and sections work exactly as in a form; the survey guide linked above walks through both.
Set correct answers, points and answer feedback
These three controls turn a question into a scored quiz item. They appear on each question card once the quiz is open for editing.
- Open a Choice question.
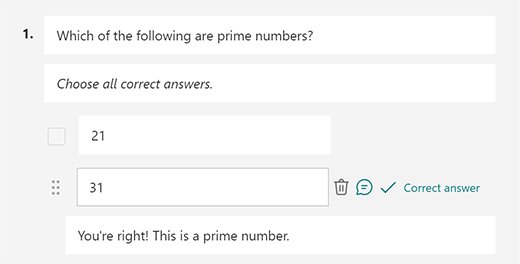
- Select the Correct Answer check mark next to the right answer, or next to each right answer if Multiple answers is on.
- Type a number in the Points box to set what a correct answer is worth.
- Select the Message icon next to any answer and type the feedback respondents should see when they pick that answer.
- Use the message on wrong answers to explain the mistake or point to the lesson that covers it.
- Repeat for each scored question; the total score is the sum of the Points values.
Respondents see the points each question is worth only when Show results automatically is on in Settings.
Create math questions with the Math option
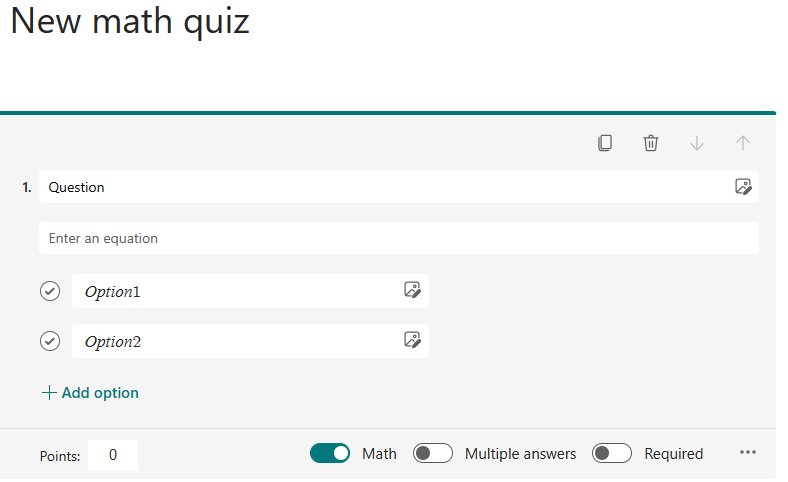
The Math option on a Choice question shows math symbols and formula tools. Forms can then suggest correct and incorrect answers for the equation.
- Add a Choice question and turn on the Math switch.
- Type the question text, then select Enter an equation and type the equation.
- Review the answer options Forms suggests, both correct and incorrect.
- Select the options you want, or select Add all.
- Check that the Correct Answer check mark sits on the right option and set the Points.
- For the next question, pick one of the similar equations Forms offers, or enter your own.
Start a quiz with Copilot
Copilot writes a full draft that you edit like any other quiz. This route needs a Microsoft 365 account with a Copilot license.
- Go to forms.office.com and select New Quiz.
- In the Copilot box, describe the quiz you want, or select View prompts for examples.
- Select Generate to create a draft with a title, questions and answers.
- Select the regenerate icon to try again, or Keep it when the draft looks right.
- Teachers can check the box at the bottom of the draft to add Copilot answer explanations for students.
- Check every Correct Answer mark and Points value before sharing; the draft is a starting point, not a checked answer key.
Configuring Quiz Settings
Open the quiz and select Settings, or More options > Settings. Decide these before you share, because they control what students see and when.
| Setting | What it does | Use it when |
|---|---|---|
| Show results automatically | On by default. After submitting, respondents see green check marks on correct answers, red text on wrong ones, and each question's points | Instant feedback matters; clear it for a graded test you will release later |
| Practice mode | Respondents work at their own pace and see the correct answer for each question before submitting | Revision and self-study quizzes |
| Show answer explanations for respondents | Shows Copilot-generated reasoning for each answer, which you can edit | You want students to learn why an answer is right |
| Set time duration | Sets a time limit, warns one minute before the end and submits answers automatically when time runs out | Timed tests |
| Shuffle questions and Lock questions | Gives each respondent a different question order; locked questions keep their place | Reducing answer sharing; unavailable once the quiz has sections |
| Take a Test app | Opens the quiz in Take a Test, a secure environment that limits access to other resources | Formal exams on managed school devices |
| Record name and One response per person | Captures who answered and blocks second attempts | Graded quizzes; needs an organization-only audience |
| Accept responses, Start date and End date | Opens and closes the quiz, with a custom message for late arrivals | The quiz has a deadline |
| Allow receipt of responses after submission | Lets respondents keep a copy of their answers | Students need proof of submission |
| Get email notification of each response | Emails you on every submission | Small classes you want to watch closely |
Preview and test the quiz before you send it
A test run is the only reliable check that every answer key and point value is right.
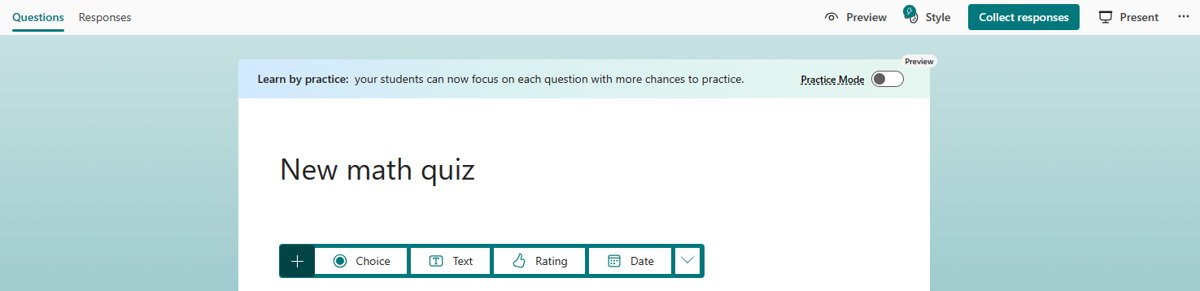
- Select Preview, then Computer or Mobile to see each layout.
- Answer every question, getting some deliberately wrong.
- Select Submit.
- With Show results automatically on, confirm right answers show green check marks, wrong ones show red, and your feedback messages appear.
- Check the score adds up to the total you expect, then select Back to fix anything off.
- Open Responses, confirm the test entry is there, then delete it with More options > Delete response before sharing.
Deleting a response cannot be undone, so delete only your own test entries.
Sharing Your Quiz
All sharing options sit on one screen. Choose the audience first, because anyone who receives an open link can forward it.
- Open the quiz and select Collect responses.
- Choose Anyone can respond, Only people in my organization can respond, or Specific people in my organization can respond.
- Select Copy link to paste the link into an email, chat or learning platform; check Shorten URL first on a school or work account.
- To send an invitation, select the Outlook or Teams icon, add people or a group, and edit the message.
- For a classroom screen or handout, select the QR code icon, then Download.
- To place the quiz in a webpage or Sway, select Embed, then Copy and paste the code.
Assign a quiz through Microsoft Teams
Teachers using Teams for Education can attach a Forms quiz to an assignment. Forms grades the choice questions and Teams handles due dates and returns.
- Open your class team and select Assignments.
- Select Create > New Quiz.
- Create a new quiz, or select an existing one; use the search bar if it is not listed.
- Confirm the quiz appears under Instructions, then set the points and due date.
- Select Assign.
- After students submit, open the To return tab to see auto-graded responses and adjust points.
- Select More options > Post scores to return the work; it moves to the Returned tab.
Analyzing Responses
Results update in real time as students submit. The Responses tab gives you the class view; Excel gives you one row per student.
- Open the quiz and select the Responses tab to see the number of responses and the average score.
- Review the summary under each question to spot the questions most students got wrong.
- Select Open in Excel for a workbook listing each student's total points, quiz feedback, grade posted time and every answer.
- To share results without edit access, select More options > Get a summary link > Copy.
- To print, select More options > Print a summary.
A summary link stays active until you delete it with the trash icon, even if you later narrow who can respond.
Grade answers and post scores
Forms marks choice questions automatically from your answer key. Review Answers is where you adjust those points, score other answers and add comments.
- On the Responses tab, select Review Answers.
- Use the People tab to grade one student at a time; it shows completion time, points earned and each answer.
- Use the Questions tab to grade one question across every student.
- Type or change the points for an answer, and select the feedback icon to add a comment; on the Questions tab, feedback can go to everyone who chose that answer.
- Back on the Responses tab, select Post scores.
- Check the box next to each student, or all of them, then select Post scores.
- Tell students to reopen the quiz to see their score and your feedback.
Best Practices for Creating Effective Quizzes
| Practice | How to do it in Forms |
|---|---|
| Explain wrong answers, not just mark them | Add a Message to each incorrect option saying why it is wrong |
| Weight points by difficulty | Give harder questions a higher Points value instead of equal points throughout |
| Separate practice from assessment | Use Practice mode for revision; for a test, clear Show results automatically and release scores with Post scores |
| Reduce answer copying | Turn on Shuffle options per question and Shuffle questions in Settings |
| Know who answered | Share to Only people in my organization so Record name and One response per person apply |
| Keep test answers out of the stats | Delete preview submissions before sharing the link |
| Find weak topics | Check the per-question summary on the Responses tab and reteach the questions most students missed |
Conclusion
Build the quiz with New Quiz, mark every correct answer and set points, then test it in Preview before you select Collect responses. The answer key and points drive automatic grading and instant feedback, so one wrong check mark mis-scores every student; a single test submission catches it before anyone else sees the quiz.
Frequently Asked Questions
How do I create a quiz in MS Forms?
Sign in at forms.office.com and select New Quiz. Add each question, select the Correct Answer check mark on the right answer and type a Points value. Preview the quiz, then select Collect responses and copy the link to share it.
Can I create a quiz in Teams?
Yes, in Teams for Education. Open your class team, select Assignments, then Create and New Quiz. Build a new quiz or pick an existing one, set points and a due date, and select Assign. Forms grades choice questions automatically.
How do I create a quiz in a Teams meeting?
Build the quiz in Microsoft Forms first. Then select Collect responses, choose who can respond, select Copy link and paste the link into the meeting chat. Attendees open it in their browser, answer and select Submit.
How do I make my own quiz that grades itself?
Use New Quiz in Microsoft Forms rather than New Form. Mark the correct answer on every choice question and set points. Forms scores each submission automatically, and Show results automatically lets students see their score as soon as they submit.
How do I build a quiz quickly?
With a Copilot license, select New Quiz in Forms, describe the quiz you want and select Generate. Copilot drafts the title, questions and answers. Select Keep it, then check every correct answer and point value before sharing.
How do I create a quiz for a PowerPoint presentation?
Build the quiz in Microsoft Forms, then select Collect responses and the QR code icon. Select Download to save the QR code image and place it on a slide. The audience scans it with a phone to open and take the quiz.
How do I do a quiz someone sent me in Forms?
Open the link or scan the QR code, answer every question and select Submit. If the owner turned on Show results automatically, you see your score and which answers were right straight away. Otherwise, reopen the quiz after the owner posts scores.