Open Settings > Network & internet > Wi-Fi and select your network's Properties to check your Wi-Fi settings in Windows 11, then use Device Manager to manage the adapter itself.
This guide covers where each setting lives, how to change IP and DNS, power saving, the commands that show adapter details, and how to reset or reinstall the adapter when it misbehaves.
The fastest way to check your Wi-Fi settings
The Properties page of your connected network shows the details most people are after: IP address, DNS servers and network band.
- Right-click the Wi-Fi icon on the taskbar and select Network and internet settings.
- Select Properties next to the Wi-Fi network you are connected to.
- Read the IPv4 address, Network band (channel) and DNS server entries on that page.
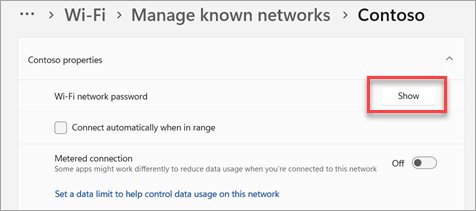
- Select Show next to Wi-Fi network password if you need the password for another device.
Not connected yet? Follow how to connect a computer to a Wi-Fi network first, then come back to this page.
Which tool should you use?
Windows 11 splits Wi-Fi settings across three places. Match what you want to do to the right one.
| What you want to do | Use this | Why |
|---|---|---|
| See your IP address, band or DNS | Settings > Network & internet > Wi-Fi > Properties | Every connection detail on one page, no admin rights needed |
| Change IP or DNS | Settings, IP assignment > Edit | Supports DNS over HTTPS, which the old dialog does not show |
| Check or change the driver, band or power saving | Device Manager > Network adapters | Driver, Advanced and Power Management tabs live only here |
| See Wi-Fi standards and security the adapter supports | netsh wlan show drivers |
Lists radio types such as 802.11ax and WPA3 support |
| Diagnose drops over several days | netsh wlan show wlanreport |
Builds an HTML report of the last three days of Wi-Fi sessions |
| Start fresh after everything else fails | Settings > Network & internet > Advanced network settings > Network reset | Reinstalls every adapter with default settings |
How to Find Your Wi-Fi Adapter in Windows 11
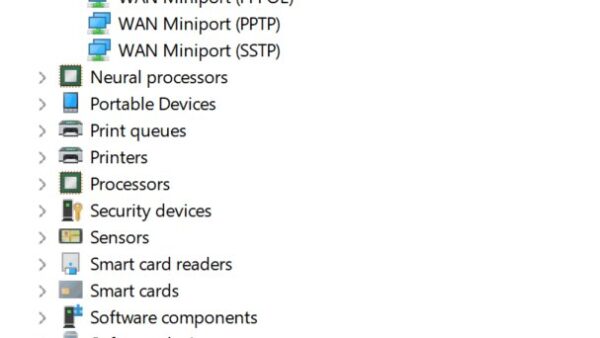
Device Manager lists the physical adapter by its maker and model, which is the name you need for driver downloads.
- Select Start, type device manager and open Device Manager from the results.
- Expand Network adapters.
- Look for the entry with Wireless or Wi-Fi in its name, such as an Intel, Realtek, Qualcomm or MediaTek model.
- Right-click it and select Properties to open its tabs.
- Note the model name on the General tab if you plan to download a driver from the PC maker.
For the classic Control Panel view of every connection, see how to access network adapter settings in Windows 11.
No wireless entry under Network adapters means Windows does not detect the adapter, and the troubleshooting section below covers that case.
Checking Wi-Fi Adapter Status and Connection Details
These are the details worth checking, where each one lives and what a bad value looks like.
| Detail | Where to see it | What it tells you |
|---|---|---|
| Connection status | Quick settings: select the Network, Sound or Battery icons | The network name should show Connected; No Internet means the local link works but the internet does not |
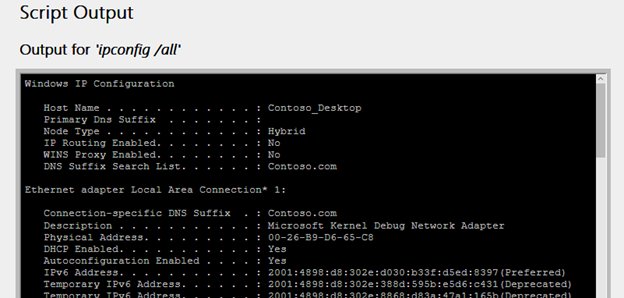
| IPv4 address | Settings > Wi-Fi > Properties, or ipconfig |
An address starting 169.254 means Windows could not get an address from the router (DHCP) |
| Default gateway | ipconfig |
The router's address; ping it to test the link between PC and router |
| DNS servers | Settings > Wi-Fi > Properties, or ipconfig /all |
Missing or unreachable DNS servers break web browsing even with a valid IP |
| Network band (channel) | Settings > Wi-Fi > Properties | 2.4 GHz reaches further; 5 GHz and 6 GHz are faster and less crowded; two bands listed means Wi-Fi 7 Multi-Link Operation |
| Driver version and date | Device Manager > adapter > Properties > Driver | Compare with the latest version on the PC maker's website |
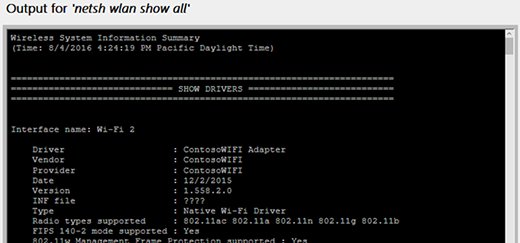
| Supported Wi-Fi standards | netsh wlan show drivers > Radio types supported |
802.11ax means Wi-Fi 6/6E; 802.11be means Wi-Fi 7 |
| Device problem number | Wireless network report, Network Adapters section | Matches a Device Manager error code that explains why the driver did not load |
Managing Adapter Properties in Device Manager
The adapter's Properties window holds the driver controls and the Advanced tab, where band and wireless mode settings live.
The Advanced tab entries come from the driver, so their names differ between Intel, Realtek and other makers.
- In Device Manager, expand Network adapters, right-click your wireless adapter and select Properties.
- Select the Driver tab and check Driver Version and Driver Date.
- Select Update driver > Search automatically for updated driver software to let Windows look for a newer driver.
- Select Roll Back Driver instead if Wi-Fi broke after a recent driver update, choose a reason and select Yes.
- Select the Advanced tab, find the Wireless Mode or Band setting, and make sure it allows the band your router uses.
- Select OK to save the changes.
Rolling back a driver needs administrator rights. The Driver tab dates also help you match the installed driver against the PC maker's latest release.
Changing IP, DNS, and Network Configuration Settings
Leave IP assignment on Automatic (DHCP) unless you need a fixed address; DHCP lets the router hand out the right settings wherever you connect.
- Open Settings > Network & internet > Wi-Fi > Manage known networks and select the network to change.
- Select Edit next to IP assignment.
- Choose Manual under Edit IP settings, then turn on IPv4.
- Type the IP address, Subnet mask and Gateway.
- Type the primary and secondary DNS servers in Preferred DNS and Alternate DNS.
- Set DNS over HTTPS to On (automatic template) if you want encrypted DNS, and choose whether Fallback to plaintext stays on.
- Select Save.
The same Edit IP settings dialog has an IPv6 switch with its own address, Subnet prefix length, gateway and DNS boxes. DNS over HTTPS is a Windows 11 feature; Windows 10 does not offer it.
Where other Wi-Fi network settings live in Windows 11
These per-network options sit next to IP and DNS but are easy to miss.
| Setting | Path in Windows 11 | Use it when |
|---|---|---|
| Public or private network | Wi-Fi > your network > Network profile type | Choose Private network only on trusted networks where you share files or printers |
| Metered connection | Wi-Fi > your network > Metered connection | Your plan charges by data; background updates and syncing are reduced |
| Data limit | Wi-Fi > your network > Set a data limit to help control data usage on this network | You want a warning before you hit a data cap |
| Data usage | Network & internet > Advanced network settings > Data usage | You want to see how much data each connection used |
| Random hardware addresses | Wi-Fi > Random hardware addresses (all networks) or Manage known networks > network (one network) | You want to make tracking by MAC address harder in public places |
| Airplane mode | Network & internet > Airplane mode | Wi-Fi will not turn on; airplane mode switches off every radio |
| Proxy | Network & internet > Proxy | Pages fail to load on a PC that once used a work proxy |
Adjusting Power Management and Performance Options
Two separate power settings can put the Wi-Fi adapter to sleep: one in Device Manager and one in the power plan. Frequent drops on battery are the usual sign.
For power plan settings beyond Wi-Fi, see how to manage power management settings in Windows 11/10.
- In Device Manager, expand Network adapters, right-click your Wi-Fi adapter and select Properties.
- Select the Power Management tab.
- Clear Allow the computer to turn off this device to save power and select OK.
- Open Control Panel > Hardware and Sound > Power Options and select Change plan settings for your plan.
- Select Change advanced power settings and expand Wireless Adapter Settings.
- Set Power Saving Mode to Maximum Performance and select OK.
Maximum Performance costs some battery life on a laptop. Keep it for machines that drop Wi-Fi, not as a blanket tweak.
Using Command Prompt or PowerShell to View Adapter Settings
Open Terminal or Command Prompt and run these one at a time. Open it with Run as administrator so the PowerShell commands that change settings are allowed.
- Run
netsh wlan show interfacesto see the Wi-Fi interface's current connection details and state. - Run
netsh wlan show driversto see the driver, Radio types supported and the authentication types, including WPA3. - Run
ipconfig /allto see the MAC address, IP address, default gateway, DNS servers and whether DHCP is on. - Run
netsh wlan show profilesto list every Wi-Fi network saved on the PC. - In PowerShell, run
Get-NetAdapter -Name * -Physicalto list physical adapters with their names and status. - Run
Get-NetAdapterAdvancedProperty -Name "Wi-Fi"to list the same values shown on the Device Manager Advanced tab, replacing Wi-Fi with your adapter's name. - Run
Set-NetAdapterAdvancedProperty -Name "Wi-Fi" -DisplayName "<setting>" -DisplayValue "<value>"to change one of those values from PowerShell. - Run
Restart-NetAdapter -Name "Wi-Fi"to disable and re-enable the adapter so a change takes effect.
Create a wireless network report
The wireless network report is the most complete single view of the adapter. It adds three days of Wi-Fi history to the output of ipconfig /all and netsh wlan show all.
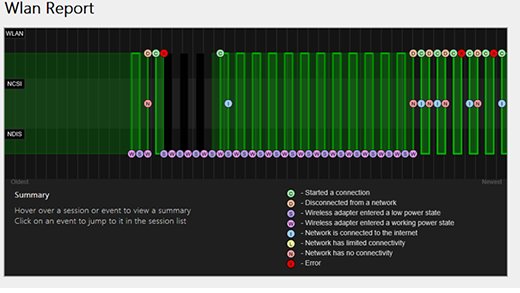
netsh wlan show wlanreportRun it in Command Prompt opened with Run as administrator. It writes an HTML file covering Wi-Fi sessions from the last three days, grouped by connection, plus every network adapter with its driver version, driver date and any problem number.
You should see: The command prints the path of the saved HTML report. Open it in a browser; red circles in the summary chart mark errors you can select for details.
How to check the Wi-Fi adapter is working
- Open quick settings on the taskbar and confirm your network shows Connected.
- Open Command Prompt, run
ipconfigand note the Default Gateway under your Wi-Fi adapter. - Run
pingfollowed by that address, for exampleping 192.168.1.1. - Look for four Reply from lines and Lost = 0; that proves the adapter and the router link work.
- If replies arrive but websites still fail, the fault is past the router: check the modem or contact your internet provider.
Resetting or Reinstalling the Wi-Fi Adapter When Problems Persist
Work down this list and stop at the first step that fixes the connection. Before you uninstall the driver, save the latest Wi-Fi driver from the PC maker's website to a USB drive, because you may have no internet afterwards.
- Run the Network and Internet troubleshooter in the Get Help app.
- Open Command Prompt with Run as administrator and run
netsh winsock reset,netsh int ip reset,ipconfig /release,ipconfig /renewandipconfig /flushdnsin that order. - In PowerShell as administrator, run
Restart-NetAdapter -Name "Wi-Fi"(use your adapter's name) to disable and re-enable the adapter. - To reinstall, right-click the adapter, select Uninstall device, check Attempt to remove the driver for this device and select Uninstall.
- Select Start > Power > Restart; Windows reinstalls the adapter driver on startup, or you install the backup driver you saved.
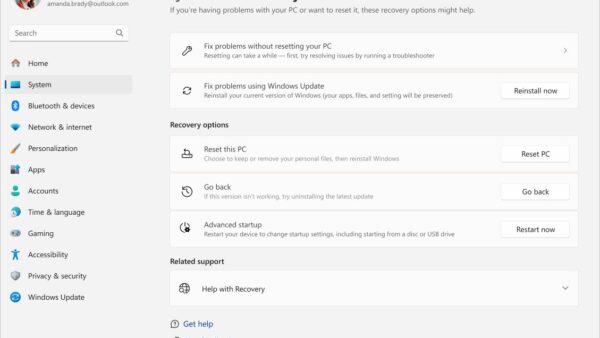
- As a last resort, open Settings > Network & internet > Advanced network settings > Network reset and select Reset now > Yes.
Network reset removes and reinstalls every network adapter with default settings. Afterwards you may need to reinstall VPN software or Hyper-V virtual switches, and known networks may switch to the public profile.
Fix Wi-Fi adapter problems in Windows 11
The Wi-Fi option is missing from Settings
A hardware switch is off, the adapter is disabled, or the WLAN AutoConfig service has stopped.
- Turn on any physical Wi-Fi switch on the laptop.
- In Device Manager, expand Network adapters, right-click the Wi-Fi adapter and select Enable device.
- Press Win + R, type
services.mscand press Enter. - Right-click WLAN AutoConfig and select Restart.
Wi-Fi is connected but there is no internet
The PC has a bad IP address, DNS failure or a leftover proxy, even though the link to the router works.
- Turn Wi-Fi off and on in quick settings and reconnect.
- Run
ipconfig /release,ipconfig /renewandipconfig /flushdnsin an administrator Command Prompt. - Check the IPv4 address; a 169.254.x.x address means DHCP on the router is not answering.
- Open Settings > Network & internet > Proxy and turn off any manual proxy.
Wi-Fi keeps dropping
Power saving turns the adapter off, or the router channel is congested.
- Clear Allow the computer to turn off this device to save power on the adapter's Power Management tab.
- Set Wireless Adapter Settings > Power Saving Mode to Maximum Performance in Power Options.
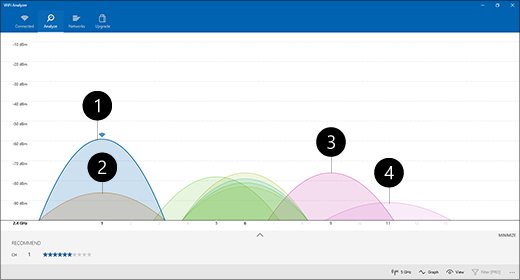
- Change the wireless channel in your router's admin page; on 2.4 GHz, channels 1, 6 and 11 do not overlap.
- Run
netsh wlan show wlanreportto see when and why each disconnect happened.
Wi-Fi is slow
Weak signal, a crowded 2.4 GHz band, or an app using the bandwidth.
- Move closer to the router and away from obstructions.
- Check Network band (channel) on the network's Properties page and connect to the 5 GHz network if the router offers one.
- Press Ctrl + Shift + Esc and end processes using a lot of network bandwidth.
- Test another device on the same Wi-Fi; if it is also slow, the router needs attention.
The adapter is found but no Wi-Fi networks appear
Wi-Fi or airplane mode is set wrong, or the adapter does not allow the band the router broadcasts on.
- Turn off Airplane mode and turn on Wi-Fi in Settings > Network & internet.
- Run
netsh wlan show driversand check that Radio types supported covers your router's standard. - Open the adapter's Advanced tab and set Wireless Mode or Band to allow your network's frequency.
No wireless adapter is listed in Device Manager
Windows does not detect the adapter, usually because no working driver is installed.
- Select Start > Settings > Windows Update > Check for updates and install what it offers.
- Run
netsh wlan show wlanreportand read the Problem number for the adapter. - Install the Wi-Fi driver for your exact model from the PC maker's website.
Frequently Asked Questions
How do I check my Wi-Fi settings in Windows 11?
Open Settings, select Network & internet > Wi-Fi, and select Properties next to your connected network. The page shows the IPv4 address, DNS servers and network band, with an Edit button for IP and DNS settings.
How do I find my Wi-Fi adapter name in Windows 11?
Open Device Manager and expand Network adapters; the Wi-Fi adapter usually has Wireless or Wi-Fi in its name. In a terminal, Get-NetAdapter -Name * -Physical lists each physical adapter's name and description.
How can I check if my Wi-Fi adapter driver is working correctly?
Open the adapter's Properties in Device Manager and check Driver Version and Driver Date on the Driver tab against the PC maker's latest driver. A problem number in the wireless network report points to the matching Device Manager error code.
How do I check if my Wi-Fi is working?
Confirm your network shows Connected in quick settings, then ping your router's default gateway from Command Prompt. Four replies with zero loss mean the adapter and router link work; if websites still fail, check the modem or your provider.
Where do I change DNS or IP settings for my Wi-Fi connection?
Go to Settings > Network & internet > Wi-Fi > Manage known networks, select the network, then select Edit next to IP assignment. Choose Manual, enter the addresses and select Save.
Should I turn off power saving for my Wi-Fi adapter?
Turn it off if Wi-Fi drops after idle periods or on battery. Clear Allow the computer to turn off this device to save power in Device Manager and set Wireless Adapter Settings to Maximum Performance. Leave it on otherwise to save battery.
What command can I use to view Wi-Fi adapter settings?
Use netsh wlan show interfaces for the live connection, netsh wlan show drivers for supported standards and security, and ipconfig /all for addresses and DNS. In PowerShell, Get-NetAdapterAdvancedProperty lists the driver's Advanced tab values.
How do I check my Wi-Fi usage in Windows 11?
Open Settings > Network & internet > Advanced network settings > Data usage and select the Wi-Fi connection. To cap usage, select your network on the Wi-Fi page and choose Set a data limit to help control data usage on this network.
How do I check my Wi-Fi performance?
Check Network band (channel) on the network's Properties page, run netsh wlan show drivers to see the supported radio types, and ping the router. The wireless network report shows disconnects over the last three days.
How do I check who is connected to my Wi-Fi?
Windows 11 settings show only this PC's own connection, not other devices on the network. The list of connected devices is kept by the router, so sign in to your router's admin page or app as its documentation describes.
Bottom Line
Check connection details in Settings under your network's Properties, and manage the adapter itself from Device Manager's Driver, Advanced and Power Management tabs. Settings is where Windows 11 puts IP, DNS and band information, while the driver controls exist only in Device Manager. Keep network reset for last, because it wipes settings for every adapter.

![2 Ways to Completely Delete Bing Search History [Browser & Microsoft Account]](https://techdows.com/wp-content/uploads/2026/09/iPhone-Safari-settings-with-Clear-History-and-Website-Data-link-600x338.jpg)