To change the name associated with iCloud Mail, edit the Full Name for the address in iCloud.com Mail Settings, or choose Edit Email Addresses in Mail on a Mac; that name, not your Apple Account name alone, is what recipients see in the From field.
This guide covers iCloud.com, Mail on Mac, your Apple Account name, sending from an alias with a new name on iPhone, and why the old name can keep showing after a change.
How to change your name in iCloud Mail on iCloud.com
The Full Name you set for an iCloud Mail address appears in the From field of the emails you send. Any browser works, so you can sign in to iCloud Mail from a Windows PC too.
- Go to icloud.com/mail and sign in with your Apple Account if asked.
- Select the settings button at the top of the Mailboxes list, then choose Settings.
- Select the email address whose name you want to change in the list.
- Edit the Full Name field. Type the name exactly as you want recipients to see it.
- Select Save Changes or Done.
- Send a test email to another account you own and check the From line.
Apple documents the Full Name field for email aliases and custom domain addresses. If your primary @icloud.com address shows no name field, use the Mac method or an alias, both covered below.
Where the iCloud Mail sender name comes from
Each kind of iCloud address takes its display name from a different place. Find your address type in the first column to know where to change it.
| Address you send from | Where the From name is set | Can you change it? |
|---|---|---|
| Primary @icloud.com, older @me.com or @mac.com address | The name iCloud Mail stores for the address, which can differ from your current Apple Account name | The name, through iCloud.com or Mail on Mac. The address itself cannot be renamed. |
| iCloud Mail alias (up to nine) | The alias's Full Name in iCloud.com Mail Settings | Yes, at any time |
| Custom domain address (iCloud+) | The Full Name in iCloud.com Mail Settings | Yes, at any time |
| iCloud account in Mail on Mac | Mail > Settings > Accounts > Account Information > Email Address > Edit Email Addresses | Yes, for the name shown in your messages |
| Hide My Email address (iCloud+) | A random address that does not carry your own name | Not a place to set a display name |
Change the iCloud Mail name in Mail on Mac
Mail on Mac has its own route to the name shown in your messages. Use it when iCloud.com offers no name field for your primary address.
- Open the Mail app on your Mac.
- Choose Mail > Settings, then click Accounts.
- Select your iCloud account in the list and click Account Information.
- Click the Email Address pop-up menu and choose Edit Email Addresses.
- Change the name next to the address you send from, then save the change.
- Close the window and send a test message to another account you own.
Any aliases you already use are listed in the same Email Address pop-up menu, and in the From pop-up menu when you write a new message.
Change your Apple Account name on iPhone, iPad and Mac
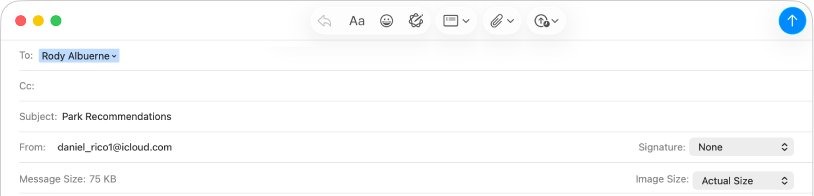
Your Apple Account name is used across Apple services and is often the name your primary iCloud address started with. Changing it alone may not update the From name on mail you send, so also complete one of the methods above.
- On iPhone or iPad, open Settings and tap your name at the top.
- Tap Personal Information, then tap your name and edit it.
- On a Mac, choose Apple menu > System Settings, then click your name at the top of the sidebar.
- Click Personal Information, then change Name.
- Return to iCloud.com Mail Settings or Mail on Mac and check that the sender name matches.
Create an iCloud Mail alias with a new name
An alias is a secondary iCloud email address with its own Full Name. It is the cleanest fix when you need a new name, or when you want a new address because the primary one cannot be renamed.
- Go to icloud.com/mail and sign in.
- Select the settings button at the top of the Mailboxes list, then choose Settings.
- Select Add Alias.
- In Alias Address, type the address you want. It must be 3 to 20 characters.
- In Label, type a label to help you find it in the list.
- In Full Name, type the name recipients should see in the From field.
- Select Create.
You can send and receive from the alias on iCloud.com and on any device with Mail turned on in iCloud settings.
Set a default iCloud Mail send address
Make the alias with the new name your default so every new email uses it without picking it each time.
- In iCloud.com Mail, select the settings button at the top of the Mailboxes list and choose Settings.
- Select the email address below Send From.
- Select every address you want to be able to send from.
- Open the Default Send Address pop-up menu and choose the alias with the new name.
- Select Save.
How to send from a different iCloud email address on iPhone
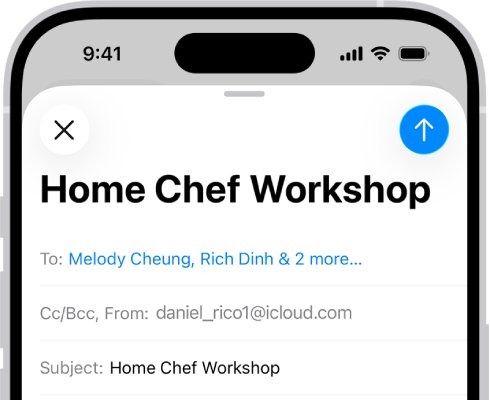
On iPhone, pick the address with the right name in the From field of each message. Aliases you send from appear there once they are set up.
- Open the Mail app and tap the compose button.
- Tap the Cc/Bcc, From field to expand it.
- Tap From, then choose the iCloud address or alias with the name you want.
- Add recipients, a subject and your message, then send it.
On iCloud.com, the same choice is under Cc/Bcc or From in a new message.
How to see which name iCloud Mail sends
Your own Sent mailbox shows what you typed, not always what a recipient's app displays. A test message to another account shows the real result.
- Write a new message from the iCloud address you changed.
- Send it to a different email account you own, such as a work or Gmail address.
- Open the message in that account and read the name in the From line.
- Repeat from iPhone, Mac and iCloud.com if you send from all three.
If the test message never arrives in your other account, check that you have not blocked that email address in iCloud Mail or its spam filter.
iCloud Mail still shows the old name after changing the Apple Account name
Emails still say From: old name after you changed your Apple Account name
The From name is the Full Name stored for the sending address, which is separate from the Apple Account name.
- Change the name for the address on iCloud.com Mail Settings, or with Edit Email Addresses in Mail on Mac.
- If neither offers a name for your primary address, create an alias with the new Full Name.
- Set that alias as the Default Send Address and send a test message.
The new name shows from iCloud.com but not from your Mac
Mail on Mac keeps the name for the account in its own Account Information settings.
- Open Mail > Settings > Accounts > Account Information.
- Choose Edit Email Addresses from the Email Address pop-up menu and update the name.
Emails sent from iPhone use the wrong name
The message is going out from a different address, such as the primary address instead of the alias with the new name.
- In the draft, tap Cc/Bcc, From, then tap From.
- Choose the alias that carries the new name and send again.
One person still sees the old name
Their mail app can show the name saved in their own contacts for your address.
- Send them a message and ask them to update your contact card.
- Check the From line in your own test account to confirm the new name is going out.
iCloud Mail name change FAQ
Does changing my Apple Account name change my iCloud Mail name?
Not always. The name in the From field comes from the Full Name saved for the sending address. After changing your Apple Account name, update the address name on iCloud.com or with Edit Email Addresses in Mail on Mac, then send a test message.
Can I change my @icloud.com email address?
No. Apple does not let you rename your primary iCloud Mail address after you create it. Add an email alias instead, give it the name you want, and set it as your default send address on iCloud.com.
How many iCloud Mail aliases can I have?
You can create up to nine @icloud.com aliases on iCloud.com. Each alias must be 3 to 20 characters. If you have nine and delete one, you must wait 7 days before creating a new alias.
Will people see my alias's full name when I email them?
Yes. The Full Name you give an alias appears in the From field of the emails you send from it. You can edit that name later in iCloud.com Mail Settings and select Save Changes or Done.
Can I send from an iCloud alias on my iPhone?
Yes. In a new message in the Mail app, tap the Cc/Bcc, From field, tap From and choose the alias. Aliases work on iCloud.com and on any device with Mail turned on in iCloud settings.
Can I change the name on a custom domain address in iCloud Mail?
Yes. With iCloud+ and a custom email domain, you can change the full name that appears with your custom domain addresses in iCloud.com Mail Settings. Manage the addresses themselves on the iCloud+ Features page.
What happens if I turn off or delete an iCloud Mail alias?
Email sent to a turned-off or deleted alias is returned to the sender. Turning an alias off is temporary and can be reversed, while deleting an iCloud address is permanent.
Can I use an iCloud Mail alias as a separate Apple Account?
No. An alias is an extra address on your existing iCloud Mail account and cannot be used to create a separate Apple Account.