To access data on an old AirPort Time Capsule, plug it in, connect your Mac to its network, and open it from Network in the Finder sidebar or restore its Time Machine backup with Time Machine or Migration Assistant.
This guide covers browsing the Time Capsule disk, restoring files and whole Macs from its backups, the macOS 27 change that blocks the connection, passwords, and what to do once the data is safe.
How to access an old Time Capsule from a Mac
Use a Mac running macOS 26 or earlier for this. Apple says data transfer to or from a Time Capsule uses Apple Filing Protocol (AFP), which macOS 27 and later do not support.
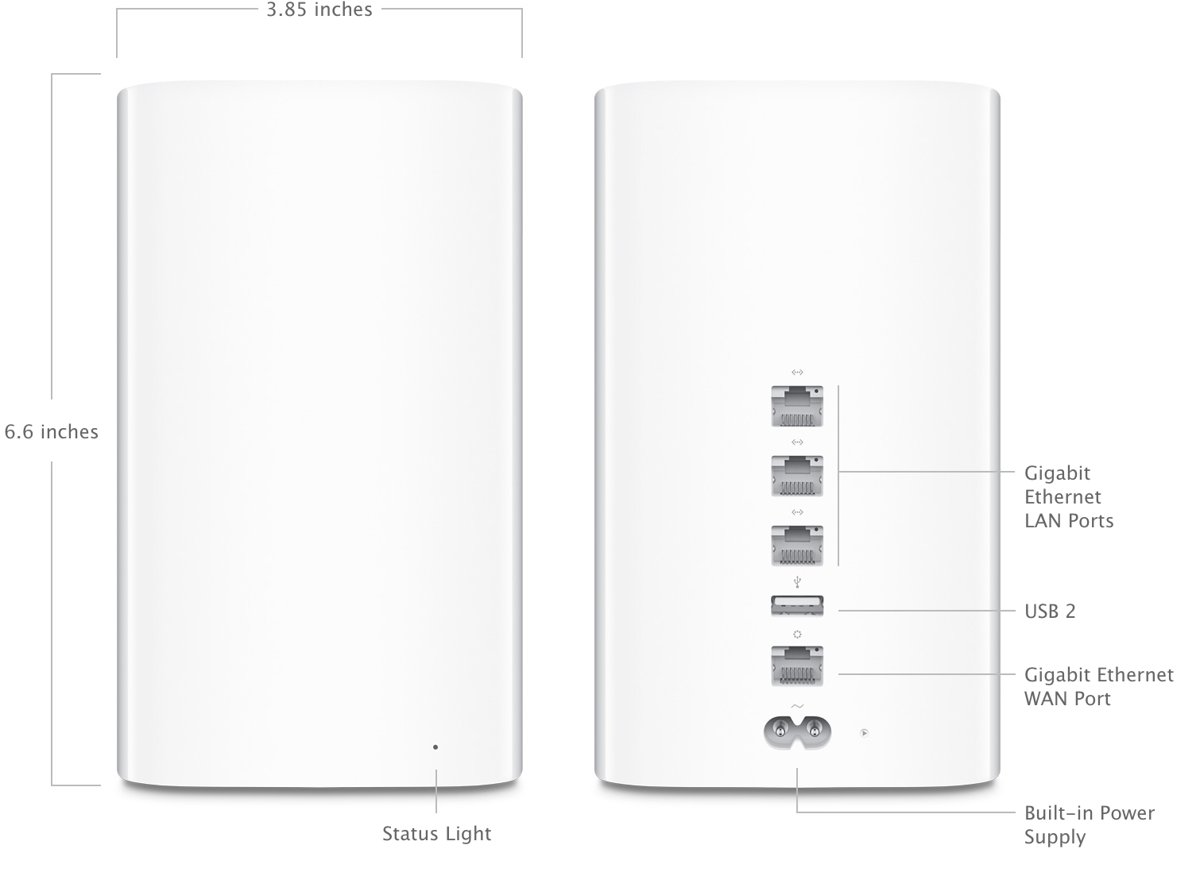
- Plug the Time Capsule into power and wait for the status light to turn solid or flashing green.
- Join the Mac to the Time Capsule's Wi-Fi network, or connect the Mac to one of its Ethernet LAN ports.
- Click the Finder icon in the Dock, then click Network in the Locations section of the sidebar.
- Double-click the Time Capsule, then click Connect As.
- Enter the disk password, the base station password, or your account name and password, depending on how the disk was secured.
- Open the shared disk and drag the files or folders you want onto your Mac or an external drive.
If the files you need are inside a Time Machine backup, restore them with Time Machine instead of copying the backup folder by hand.
Does Time Capsule work with macOS 27?
No. Apple no longer recommends AirPort Time Capsule as a backup disk because backups and other transfers to it use AFP, and AFP is not supported in macOS 27 or later.
Apple's specification page lists Windows XP, Vista, 7 and 8 for the shared hard drive, and no later Windows versions.
| Computer | Can it reach Time Capsule data? | What to do |
|---|---|---|
| Mac with macOS 27 or later | No, AFP is not supported | Use an older Mac to copy the data off, then move it across |
| Mac with macOS 26 or earlier | Yes, through Finder and Time Machine | Browse the disk or restore its backups directly |
| Windows XP (SP3), Vista (SP2), 7 (SP1) or 8 | Listed by Apple for the shared USB hard drive | Copy files from the shared disk |
| Windows 10 or Windows 11 | Not listed in Apple's specifications | Copy the data off with a Mac instead |
| iPhone or iPad | AirPort Utility for iOS manages the base station | Use a Mac to copy the files |
How to restore files from a Time Machine backup on a Time Capsule
Time Machine restores single files, folders or a whole disk to their original locations. If the Time Capsule is not your current backup disk, open its timeline with Browse Other Backup Disks.
- Connect the Mac to the same network as the Time Capsule.
- Open a Finder window for the folder that held the item, such as Documents.
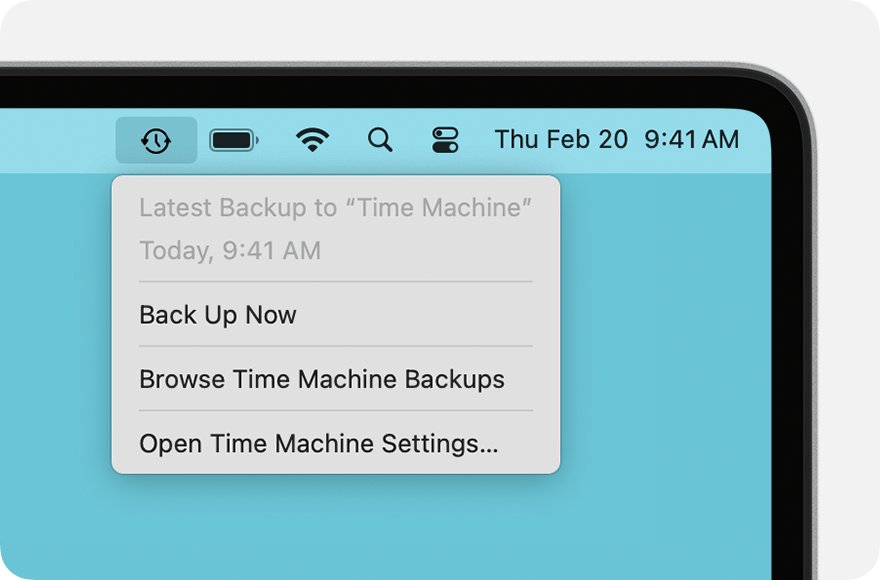
- Click the Time Machine icon in the menu bar, press the Option key, then choose Browse Other Backup Disks.
- Select the Time Capsule, and enter its password if asked.
- Use the arrows next to the Finder windows or the timeline on the right to reach the backup you want.
- Select the items, then click Restore.
If the Time Machine icon is missing, open System Settings > Control Center, scroll to Time Machine and choose Show in Menu Bar. You can also open Time Machine with Spotlight, from the Other folder.
How to transfer a Time Capsule backup to a new Mac with Migration Assistant
Migration Assistant copies user accounts, apps, documents and settings from a Time Machine backup. It does not delete anything from the backup.
- Connect the Mac to the same network as the Time Capsule.
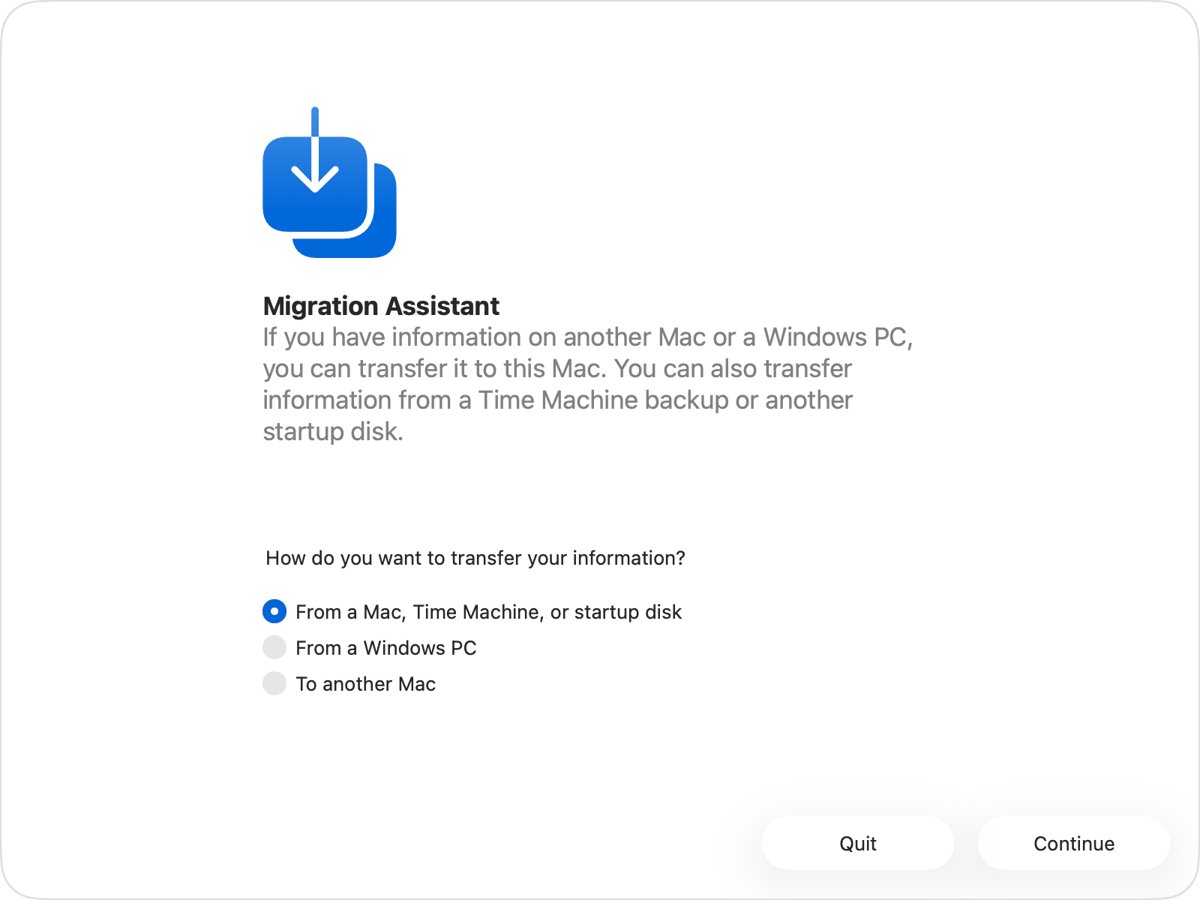
- Open Migration Assistant from the Utilities folder in Applications, or let the setup assistant on a new Mac reach the transfer step.
- Choose the option to transfer from a Mac, Time Machine backup, or startup disk, then click Continue.
- Select the Time Capsule backup, enter its password if asked, then click Continue.
- Pick the backup date if more than one is offered.
- Select the categories or items to transfer, then click Continue and wait for the transfer to finish.
If the new Mac runs macOS 27, it cannot read the Time Capsule. Restore the backup to an older Mac first, then use Migration Assistant to move from that Mac to the new one.
How to recover all files from a Time Capsule backup in macOS Recovery
Use this when the Mac's startup disk was damaged or replaced. Apple requires macOS to be reinstalled first.
- Make sure the Time Capsule is on and the Mac is on the same network.
- On a Mac with Apple silicon, choose Apple menu > Shut Down, press and hold the power button until Loading startup options appears, then click Options and Continue.
- On an Intel-based Mac, choose Apple menu > Restart, then press and hold Command-R until the startup screen appears.
- Select the option to reinstall macOS in the Recovery window and follow the onscreen steps.
- When Migration Assistant appears, select Transfer from a Time Machine Backup, then click Continue.
- Enter the name and password for the backup disk, plus the backup encryption password if one was set.
- Select the date and time of the backup to restore, then follow the onscreen instructions.
How to find a Time Capsule password in AirPort Utility
AirPort Utility is in the Utilities folder of Applications. If you know the base station password, it can show the other stored passwords.
- Open AirPort Utility on the Mac.
- Select the Time Capsule in the graphical overview.
- Click Edit, and enter the base station password if asked.
- Choose Base Station > Show Passwords.
If you no longer know the base station password, the reset steps are in the troubleshooting section below.
Time Capsule disk password, accounts or device password
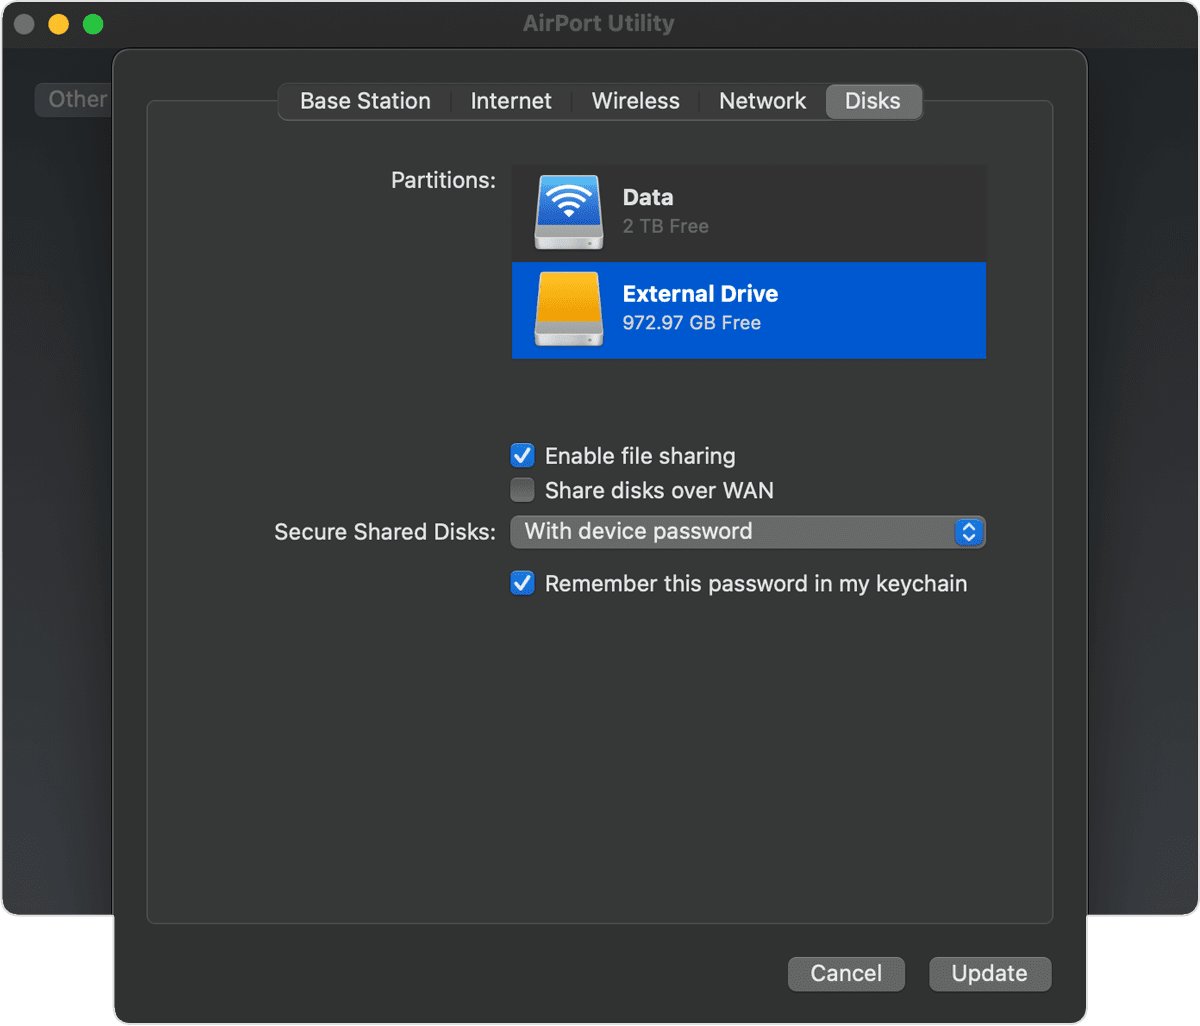
The Secure Shared Disks menu on the Disks tab decides which password the Time Capsule asks for. Apple warns that changing this setting, or renaming an account, can leave users without access to some files.
| Secure Shared Disks setting | What you enter to connect | Access |
|---|---|---|
| With a disk password | The disk password set for the shared disk | Anyone with the password |
| With device password | The base station password | Anyone with the base station password |
| With accounts | An account name and password created in AirPort Utility | Read and write, read only, or not allowed, per account |
To check the setting, open AirPort Utility, select the Time Capsule, click Edit, then click Disks. Make sure Enable file sharing is selected, or the disk will not appear on the network.
How to copy Time Capsule files to an external drive
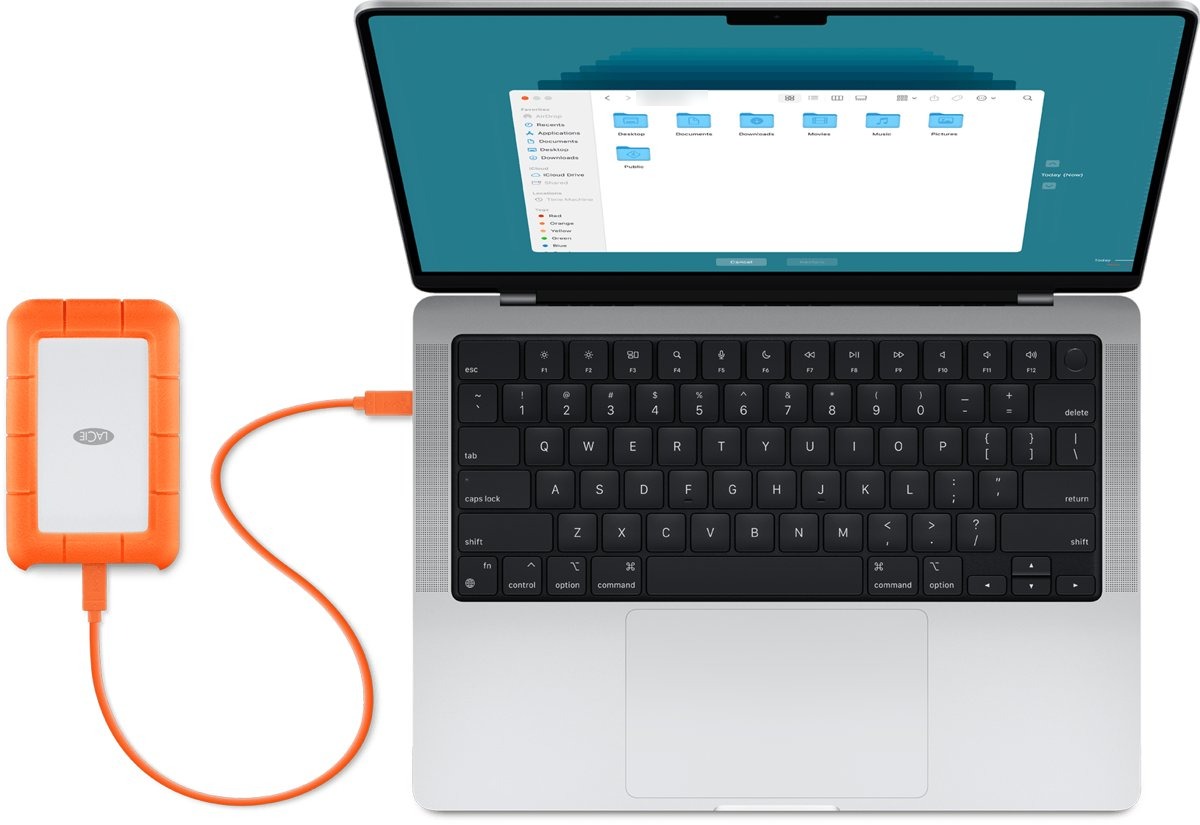
An external drive gives you a copy that does not depend on the Time Capsule or on AFP. Format it as APFS or Mac OS Extended in Disk Utility if a Mac will read it later.
- Connect the external drive directly to the Mac, not through a USB hub.
- Connect to the Time Capsule from Network in the Finder sidebar and open its shared disk.
- Open a second Finder window and select the external drive under Locations.
- Drag the folders you want from the Time Capsule window to the external drive.
- Wait for the copy to finish before you eject the drive or disconnect from the network.
For files that only exist inside a Time Machine backup, restore them to the Mac first, then copy them to the drive. If the Mac is short of room, free up disk space before the restore.
How to tell if a Time Capsule is working
The status light and AirPort Utility show whether the Time Capsule is up before you try to connect.
- Check the status light: solid or flashing green means the Time Capsule is on and working properly.
- Open AirPort Utility and find the Time Capsule in the graphical overview.
- Click it if a red badge appears and read the status message.
- Open a Finder window and check that the Time Capsule appears under Network in the sidebar.
Solid amber means it is still starting up. Flashing amber means it cannot connect to the network or has a problem.
Time Capsule not showing up on Mac
The Mac runs macOS 27 and will not connect
Time Capsule transfers use AFP, which macOS 27 and later do not support.
- Use a Mac running macOS 26 or earlier on the same network.
- Copy or restore the data to that Mac or to an external drive.
- Move the data to the newer Mac with Migration Assistant or the external drive.
Time Capsule is missing from Network in Finder
The Time Capsule is off, on a different network, or file sharing is turned off.
- Confirm the status light is green.
- Connect the Mac to the Time Capsule's own network or an Ethernet LAN port.
- In AirPort Utility, click Edit > Disks and select Enable file sharing, then click Update.
Time Machine can't find the Time Capsule backup disk
The disk is unavailable on the network or its password has changed.
- Check the Locations section of the Finder sidebar for the Time Capsule.
- Use AirPort Utility to check that the Time Capsule is set up and connected to your network.
- Open System Settings > General > Time Machine, reselect the backup disk, and enter the new password.
Forgot the Time Capsule password
The base station password is unknown, so AirPort Utility cannot show the others.
- With the Time Capsule plugged in, press and hold the reset button with a pen tip for no more than 5 seconds.
- Join its Wi-Fi network from the Wi-Fi menu on the Mac; no password is required after the reset.
- Open AirPort Utility, select the Time Capsule, enter a new base station password, then click Update within five minutes.
Time Capsule light flashing amber
The base station cannot connect to the network or the internet, or has a problem.
- Open AirPort Utility and click the Time Capsule to read the status message next to the red badge.
- Fix the problem it names, such as a disconnected Ethernet cable.
- Check for a firmware update: select the Time Capsule and click Update if the button appears next to the version number.
How to erase an AirPort Time Capsule after copying the data
Erase the disk only after the copied files open correctly on another drive. Apple recommends erasing the disk and restoring factory settings before you give a Time Capsule away.
- Open AirPort Utility and select the Time Capsule in the graphical overview.
- Click Edit, enter the password if asked, then click Disks.
- Click Erase Disk, choose a level from the Security Method menu, then click Erase.
- Click Update and wait while the status light flashes amber.
- Choose Base Station > Restore Default Settings, read the message, then click Continue.
Quick Erase leaves recoverable data on the disk. Zero Out Data overwrites the whole disk once, while 7-Pass Erase and 35-Pass Erase take 7 and 35 times as long.
Old Time Capsule data FAQ
How do I access data on my old Time Capsule?
Plug the Time Capsule in, join its network, then open it from Network in the Finder sidebar on a Mac running macOS 26 or earlier. Click Connect As, enter the disk or base station password, and copy the files you need.
Can I still use a Time Capsule with macOS 27?
No. Apple says Time Machine backups and other transfers to or from a Time Capsule use AFP, which is not supported in macOS 27 or later. Use an older Mac to copy the data off, then move it to the newer Mac.
How do I get files from a Time Capsule Time Machine backup?
Open Time Machine, then Option-click its menu bar icon and choose Browse Other Backup Disks if the Time Capsule is not your current backup disk. Pick a backup in the timeline, select the items, and click Restore to put them back in place.
Can I move a Time Capsule backup to a new Mac?
Yes, if the new Mac runs macOS 26 or earlier. Open Migration Assistant, choose to transfer from a Mac, Time Machine backup or startup disk, and select the Time Capsule backup. For a Mac on macOS 27, restore to an older Mac first, then migrate.
Can I access a Time Capsule from Windows 11?
Apple's Time Capsule specifications list only Windows XP, Vista, 7 and 8 for the shared hard drive, so Windows 10 and 11 are not covered. A Mac running macOS 26 or earlier is the supported way to copy the data off.
What password does a Time Capsule ask for?
It depends on the Secure Shared Disks setting in AirPort Utility. The disk can use its own disk password, the base station password, or separate account names and passwords. Choose Base Station > Show Passwords in AirPort Utility to see the stored passwords.
Does resetting a Time Capsule erase its data?
No. Holding the reset button for up to 5 seconds resets the base station password so you can set a new one. Erasing the internal disk is a separate step, the Erase Disk button on the Disks tab in AirPort Utility.
How do I erase my old Time Capsule?
In AirPort Utility, select the Time Capsule, click Edit, then Disks, then Erase Disk. Choose a security method and click Erase, then click Update. Choose Base Station > Restore Default Settings afterward to clear its settings before giving it away.