To add Moobot to Twitch, sign in on Moobot's website with the Twitch account that owns your channel, click Authorize on the Twitch permission page, then type /mod followed by the bot's username in your own chat.
This guide covers each setup step, the Twitch settings that decide whether the bot can act, how to test it, and fixes for a bot that stays silent.
How to add Moobot to Twitch chat
Moobot is a cloud chatbot. Twitch describes this type as one you never install; you only authenticate it and make its Twitch user a moderator in your chat.
- Open Moobot's website in a desktop browser.
- Choose the option to sign in with Twitch.
- Log in to Twitch with the account that owns your channel, if Twitch asks.
- Read the permission list on the Twitch page and click Authorize.
- Open your Twitch channel's chat and type
/modfollowed by the bot's username, then press Enter. - Type
/modsand press Enter to confirm the bot now appears in your moderator list.
Only the broadcaster can run /mod, so a moderator signed in to their own account cannot complete the last two steps for you.
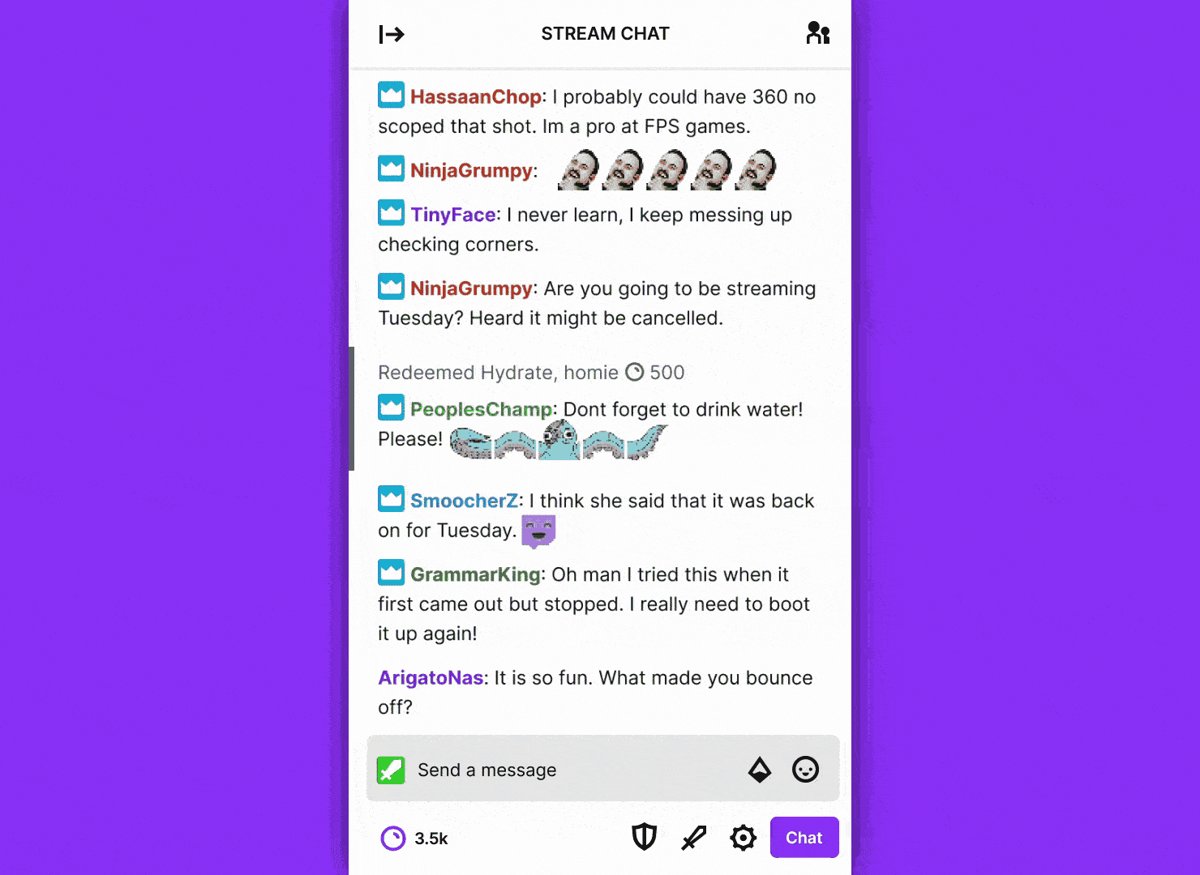
Understanding Moobot and its benefits
Moobot is one of the community-built bots that many Twitch channels run beside Twitch's own AutoMod. Twitch states that these bots come from third parties and are not affiliated with Twitch.
| Question | Answer |
|---|---|
| What is it? | A third-party chatbot that reads and posts in your Twitch chat under its own Twitch account |
| What can bots like it do? | Filter nuisance messages (emote spam, symbol spam, repeated text, ALL CAPS), post scheduled messages, and run loyalty points and games |
| Do you install anything? | No. Cloud chatbots run off your PC; you authorise them and give the bot's account moderator status |
| Why make it a moderator? | As a mod, a chatbot can delete or clear messages, change chat room settings, send announcements and see who is in chat |
| Does it replace AutoMod? | No. AutoMod holds risky messages for review; a bot adds rules AutoMod does not cover, such as caps or emote limits |
| Who supports it? | The bot's own developer. Twitch Support does not troubleshoot third-party bots |
Prerequisites for adding Moobot to Twitch
| You need | Why |
|---|---|
| The Twitch account that owns the channel | Only the broadcaster can promote a user to moderator with /mod |
| A desktop browser | Sign-in and the bot's dashboard run on a website; nothing is downloaded |
| Your Twitch login and any two-factor code | Twitch asks you to log in before it shows the permission page if you are signed out |
| Access to your own chat | You run /mod and test commands from your channel's chat box |
| Your Creator Dashboard | AutoMod, blocked terms and chat delay live under Moderation settings |
Step 1: Create a Moobot account
Moobot accounts are tied to the Twitch login you use, so there is no separate password to manage.
- Open Moobot's website in Chrome, Edge, Firefox or Safari on a computer.
- Select the sign-in option for Twitch.
- If Twitch shows a login screen, enter the username and password of the channel owner account.
- Enter the code from your authentication app or text message if two-factor authentication is on.
- Stay on the next screen, which is the Twitch permission page covered in step 3.
If you stream from a PC, you can add Twitch to your desktop so chat is one click away while you test the bot.
Step 2: Linking Moobot to your Twitch account
Linking happens through the Twitch sign-in itself. The account you sign in with is the channel the bot works for, so use the broadcaster account, not a moderator's or an alt account.
- Before you sign in, open twitch.tv in the same browser and check the avatar at the top right shows the channel owner account.
- If another account is signed in, log out from the avatar menu and log back in as the channel owner.
- Return to Moobot's website and start the Twitch sign-in again.
- When Twitch hands you back to Moobot, check that the dashboard shows your channel name.
Step 3: Authorizing Moobot permissions
Twitch uses scopes to name each thing an app may do, and shows them on a permission dialog. Nothing is linked until you click Authorize.
- Read the list of permissions on the Twitch dialog.
- Click Authorize to let the bot act with those permissions.
- Wait for Twitch to return you to Moobot's website.
- If you clicked cancel by mistake, start the sign-in again; Twitch only sends the app an error when you decline, so nothing was linked.
- Open your channel chat and type
/modfollowed by the bot's username, then press Enter.
The authorization and the moderator role are separate. The first lets the bot use your account's permissions; the second lets its own chat account delete messages and post at the higher moderator rate.
Step 4: Configuring Moobot settings for your stream
Configuration splits into four areas. Some settings live in Moobot's dashboard and some in your Twitch Creator Dashboard, and the two work together.
| Area | Set it in | What to decide |
|---|---|---|
| Basic settings | Moobot dashboard and Twitch Moderation settings | Chat rules, chat delay for non-mods, and how the bot announces itself |
| Moderation features | Moobot spam filters and Twitch AutoMod | Which messages the bot removes and which AutoMod holds for review |
| Interactive elements | Moobot dashboard and Twitch chat commands | Polls, predictions, timers and points, and which tool runs each one |
| Other services | Moobot dashboard and each service's own sign-in | Which outside accounts the bot may post to or read from |
Adjust basic settings
Start with the Twitch side, because chat rules and delay apply to every viewer whatever the bot does.
- Open your Creator Dashboard, select Moderation, then Settings (Moderation).
- Write your chat rules. First-time viewers must click Agree before they can chat.
- Set Non-Moderator Chat Delay to 2, 4 or 6 seconds if you want time to remove messages before viewers see them. Moobot is a moderator, so its own messages are not delayed.
- Go back to Moobot's dashboard and work through its general settings page.
- Save each page before you move on.
Configure moderation features
Twitch AutoMod and a bot's filters catch different things. AutoMod holds risky messages for a moderator to approve or deny; it never times out, bans or mutes anyone.
- In the Creator Dashboard, select Moderation, then Settings (Moderation).
- Under AutoMod & Message Filtering, click Turn On AutoMod.
- Drag the slider from Level 0 (no filtering) to Level 4 (strongest), or set each category on its own.
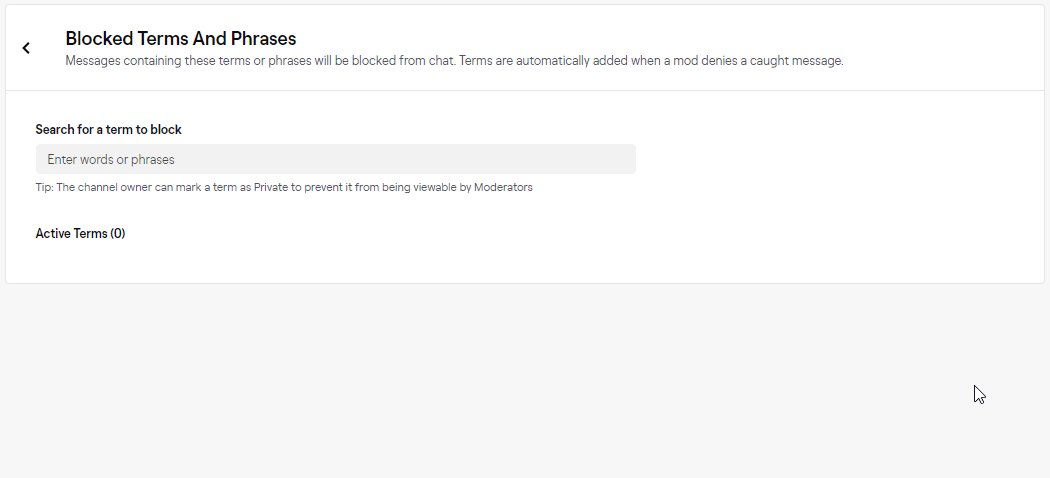
- Add words to the blocked terms list and mark each one Public or Private.
- In Moobot's dashboard, turn on the spam filters your chat needs, such as caps, emote, symbol and repeated-message limits.
- Set the bot's action for each filter, starting with a short timeout rather than a ban.
Twitch's own tools also cover some of this ground: /uniquechat removes copy-pasted repeats and /emoteonly allows only emote messages.
Customize interactive elements
Twitch already has native polls, predictions and shoutouts. Use the bot for what Twitch lacks, and keep one tool per job so chat does not get two answers.
| Feature | Twitch native | Use the bot when |
|---|---|---|
| Polls | /poll opens the poll menu; /endpoll ends it |
You want a chat-typed vote instead of the Twitch poll card |
| Predictions | /prediction (broadcaster and editors) |
Rarely; Twitch's built-in predictions already cover this |
| Announcements | /announce highlights a message |
The same message should repeat on a timer |
| Shoutouts | /shoutout USERNAME shows a follow button |
You want a custom text shoutout with links |
| Loyalty points and games | Channel Point rewards and /requests |
You want a separate points system or chat games |
| Scheduled messages | None | Always; timers are a bot job |
Integrate with other services
Each outside service, such as a music or social account, needs its own sign-in and approval. Twitch lists every app with access to your Twitch account in one place.
- In Moobot's dashboard, open the integrations or connections page.
- Pick a service and sign in on that service's own page, not on a form inside the bot.
- Approve the permissions the service lists.
- On Twitch, open Settings and go to the Connections page.
- Scroll to Other Connections and check which apps have access to your Twitch account.
Remove anything you no longer use with Disconnect. Twitch then invalidates the access tokens tied to that app.
Step 5: Customizing commands and features in Moobot
Bot commands start with !, while Twitch's built-in commands start with /. Name your commands so they never clash with a Twitch slash command.
- Open the commands section of Moobot's dashboard.
- Create a command with a short name, such as
!discordor!schedule. - Write the reply the bot should post.
- If the editor offers a user-level option, limit admin-type commands to moderators.
- Set a cooldown so one viewer cannot flood chat with the same command.
- Save the command and repeat for the others you need.
Step 6: Testing Moobot in your Twitch chat
Test in your own chat before you go live, so mistakes do not happen in front of viewers.
- Open your channel chat and type
/mods. The bot's username should be in the list. - Type one of your
!commands and check the bot replies. - Post a test message that breaks one of the bot's filters from a second account, and check it gets removed.
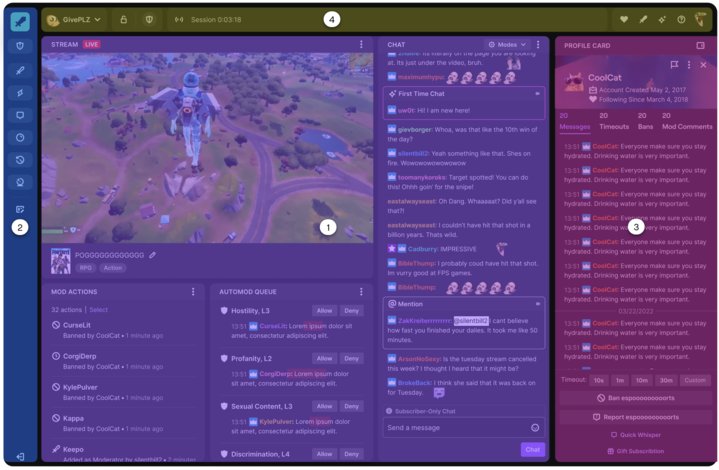
- Open Mod View and look at the Mod Actions widget, which lists timeouts, deletions and chat mode changes.
- Confirm the action came from the bot's username, not yours.
Do not judge by the Chat Bots group in the chatters list. Twitch only places a bot there when it reads chat in a specific way, so a working bot can still show among regular users.
Troubleshooting common issues when adding Moobot to Twitch
Most problems come from the bot's moderator status, its Twitch authorization, or a chat mode that blocks it.
Moobot not responding or connecting
The bot is not a moderator, or Twitch is ignoring it after it hit the message rate limit.
- Type
/modsin your chat and check the bot is listed. - If it is missing, type
/modfollowed by the bot's username. - Know that a non-moderator bot that sends more than 20 messages in 30 seconds is ignored by Twitch for an hour; moderators get 100.
- Turn off subscribers-only mode with
/subscribersoffwhile testing, since it lets only subscribers and moderators talk.
Permissions and OAuth issues
The sign-in was cancelled, a different Twitch account was used, or the app was disconnected on Twitch.
- On Twitch, open Settings, go to Connections, and look for the bot under Other Connections.
- If it is missing, sign out of Moobot's website and sign in again with the channel owner account.
- Click Authorize on the Twitch permission page.
- If an old link seems stuck, click Disconnect on Twitch first, then sign in again.
Commands not working
The command uses the wrong prefix or spelling, or the reply is caught by a Twitch filter.
- Type the command with
!, not/. A slash command Twitch does not know returns Unrecognized Command. - Check the spelling against the command list in Moobot's dashboard.
- Make sure the bot is a moderator. With Block Hyperlinks on, links from non-moderators go to the AutoMod queue, but links from moderators pass through.
- Check the command's cooldown or user level is not blocking your test account.
Connection to third-party services
The outside service's approval expired or was removed on that service's side.
- Open the integrations page in Moobot's dashboard.
- Disconnect the failing service.
- Connect it again and approve the permissions on the service's own page.
- Test the feature that uses it in your chat.
General tips
Bot problems sit with the bot's developer, not with Twitch.
- Contact Moobot's own support for bot-side errors; Twitch Support does not troubleshoot third-party bots.
- Run only one bot per job so two bots do not answer the same command.
- Re-test after any change to AutoMod, chat modes or the bot's moderator role.
Best practices for managing Moobot
| Practice | Why it matters | Twitch tool that helps |
|---|---|---|
| Keep the bot a moderator | Moderator status lifts its rate limit and lets it remove messages | /mod, /mods |
| Layer bot filters on top of AutoMod | AutoMod holds risky language; the bot handles spam patterns | Settings (Moderation) |
| Write chat rules first | Filters are easier to defend when viewers agreed to the rules | Chat rules pop-up |
| Review bot actions weekly | Over-eager filters time out regular viewers | Mod View > Mod Actions |
| Remove unused integrations | Fewer connected apps means fewer tokens to protect | Other Connections > Disconnect |
Configure alerts and commands thoughtfully
- List the questions viewers ask most, such as schedule, socials and setup.
- Make one
!command per question and keep each reply to a single chat line. - Delete commands nobody uses so the list stays short.
- Keep timed messages to a few per hour so they do not bury real chat.
- Use Twitch's
/announceinstead of a bot message when a message needs to stand out.
Automate moderation effectively
Twitch suggests automated moderation plus human mods for large channels, at about one active mod per 600 viewers. Medium channels need about one active mod per 200 viewers.
- Set AutoMod to the level that fits your chat; it starts at Level 1 when you turn it on.
- Let the bot handle caps, emote, symbol and repeat spam with short timeouts.
- Keep human moderators for judgement calls and the AutoMod queue.
- Tell your mod team which filters are on so they do not undo the bot's actions.
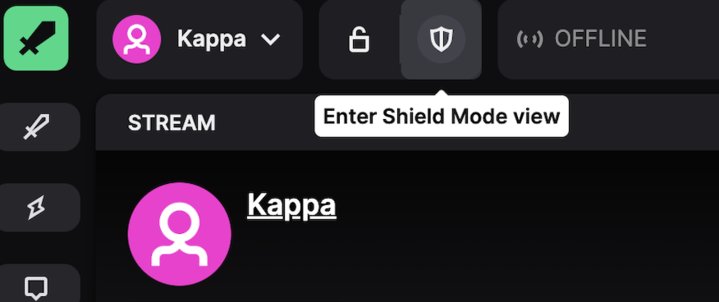
- Turn on Shield Mode from Mod View during a hate raid instead of tightening the bot permanently.
Schedule and keep your commands updated
- Set a recurring reminder to review the bot's command list once a month.
- Update replies that carry dates, links or your stream schedule.
- Remove timers for events that have ended.
- Test each changed command in chat after you save it.
Monitor and analyze performance
Mod View shows what the bot does in your channel. Your layout is stored in the browser, so set it up once per browser.
- Open Mod View from your channel.
- Find the Mod Actions widget, which tracks timeouts, deleted messages and chat mode changes.
- Click the Filter button next to the three-dot menu to hide action types you do not need.
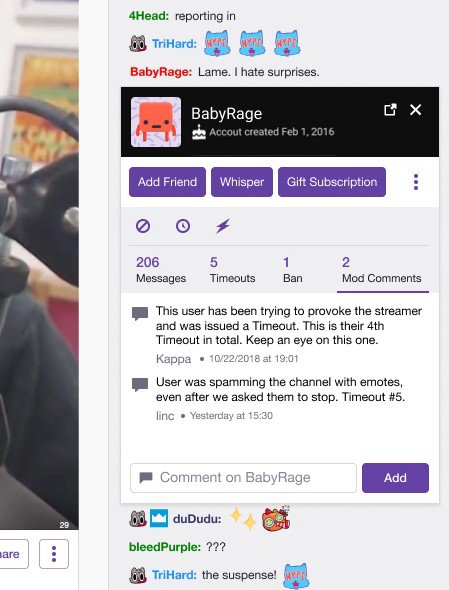
- Click a username in Chat to open its viewer card with past messages and mod actions.
- Loosen any bot filter that keeps timing out regular viewers.
How to remove Moobot from your Twitch channel
Removing the bot takes two actions: drop its moderator role, then cut its access to your account.
- In your chat, type
/unmodfollowed by the bot's username and press Enter. - Open Twitch Settings and go to the Connections page.
- Under Other Connections, find the bot and click Disconnect.
- Type
/modsto confirm the bot is no longer listed.
Disconnecting makes Twitch invalidate the access tokens tied to the app, so it can no longer act with your account's permissions.
Moobot on Twitch FAQ
Does Moobot need to be a moderator on Twitch?
Yes, for most features. As a moderator, a chatbot can delete messages, change chat settings and post at 100 messages per 30 seconds instead of 20. Without the role, it cannot remove spam.
How do I mod a bot on Twitch?
Type /mod followed by the bot's username in your own channel chat and press Enter. Only the broadcaster can use this command. Type /mods afterwards to check the bot is in the moderator list.
Do I need to download Moobot?
No. Moobot is set up from a website, and Twitch describes cloud chatbots as bots you never install. You sign in with Twitch, authorise it, and make its account a moderator in your chat.
Is Moobot made by Twitch?
No. Twitch states that the moderation bots channels use are developed by third parties and are not affiliated with Twitch. Bot problems go to the bot's own developer, not to Twitch Support.
Can I use Moobot and AutoMod together?
Yes. AutoMod holds risky messages for a moderator to review, while a bot adds spam rules such as caps or emote limits. Running both gives broader cover than either tool alone.
Why do Moobot commands start with an exclamation mark?
Bots usually use ! commands, while Twitch's own chat functions use / commands. Typing a bot command with a slash makes Twitch treat it as an unknown built-in command.
Why does Moobot not show a bot badge in my chat?
Twitch shows the Chat Bot badge only when a bot sends messages through a specific API with an app access token. A bot that posts another way still works but shows no badge.
How do I remove Moobot from my Twitch account?
Type /unmod with the bot's username in chat, then open Twitch Settings, go to Connections, find it under Other Connections and click Disconnect. Twitch then invalidates the bot's access tokens.