To set up a Zoom meeting, sign in to the Zoom Workplace app, click Schedule on the Home tab, enter a topic, date and time, then click Save and share the invitation.
This guide covers scheduling from the desktop app, the web portal, iPhone and Android, and Outlook, plus instant meetings, invites, free plan limits and a test call.
How to set up a Zoom meeting
The desktop app is the fastest route on Windows, macOS and Linux. You need a Zoom account to host, but your guests do not.
- Open the Zoom Workplace app and sign in.
- Click the Home tab. If it is hidden, click More, then Home.
- Click Schedule to open the New event window.
- Enter a topic, then set the date and time.
- Click Save.
- Click the ellipsis on the new meeting card and choose Copy invitation, then paste it into an email or chat.
The meeting now sits on your Home tab and in Meetings, ready to start at any time before the scheduled slot.
Before you start: create a Zoom account and install the app
A free Basic account is enough to host meetings. The Zoom desktop app gives you the full set of host controls, although the web portal can also schedule meetings.
- Go to zoom.us/signup in a web browser.
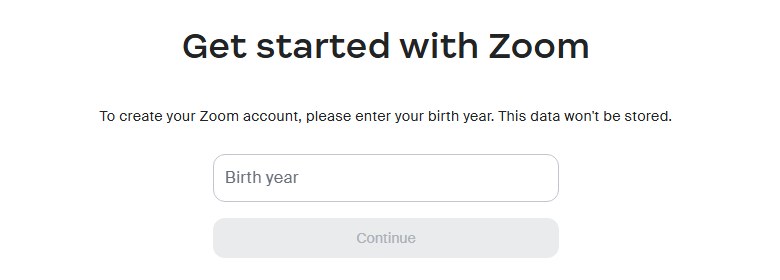
- Enter your birth year to confirm your age.
- Enter your email address and select Continue.
- Open the email from [email protected], copy the verification code, enter it and select Verify.
- Enter your full name, create a password and select Continue to finish the Basic account.
- Go to zoom.us/download and install the Zoom Workplace app for your computer, or get the Zoom Workplace app from the App Store or Google Play on a phone.
- Open the app and select Sign in with the account you just created.
If the app is already installed, update Zoom on Windows or Mac first, because scheduling needs the global minimum version or higher.
Step by step tutorial on how to set up a Zoom meeting
This is the full walkthrough in the desktop app, in four stages: sign in, schedule a new meeting, set your meeting preferences and invite participants.
The options you see depend on whether calendar and contacts integration is turned on. With it on, Zoom can email invitations for you.
- Sign in to your Zoom account: open the Zoom Workplace app, click Sign in and enter the details of the account that will host the meeting.
- Schedule a new meeting: click the Home tab, then Schedule. You can also open the Calendar or Meetings tab, click the add icon and choose Create event.
- Enter a topic for the meeting and set the date and time.
- Set your meeting preferences: choose the meeting ID, passcode, waiting room, video and audio options. With calendar integration on, click Settings to see them; without it, click Advanced for the extra options.
- Invite participants: add invitees by name, email or phone number in the invitee field, or leave it empty and invite people later.
- Click Save.
- If Zoom asks what to do with the calendar invitation, choose Send to deliver it, Don't send to keep it off email, or Back to editing to change details.
A one-time meeting ID expires 30 days after you schedule it unless you start it again inside that window. A recurring meeting ID lasts 365 days after its last occurrence.
How to set up a Zoom meeting on the Zoom web portal
Use the web portal when you cannot install the app, or when you need options that only the portal offers, such as registration and breakout room pre-assignment.
- Go to zoom.us and sign in to the web portal.
- Click the Zoom Products icon in the top-right corner.
- Click Meetings in the Zoom Products menu.
- Click Schedule a Meeting.
- Enter a topic, then set the date and time.
- Add invitees by name, email or phone number if you want Zoom to email them.
- Select the meeting options, then click Save.
Zoom notes that its web experience is being redesigned, so the portal navigation may look slightly different on your account.
How to set up a Zoom meeting on iPhone or Android
The Zoom Workplace mobile app schedules meetings the same way on iPhone, iPad and Android phones.
- Open the Zoom Workplace app and sign in.
- Tap the Home tab.
- Tap Schedule.
- Enter a topic, then set the date and time.
- Select the meeting options. The meeting ID is generated automatically unless you turn on Use personal meeting ID.
- Tap Save.
- To share it, open the Calendar tab, tap the meeting name, tap the ellipsis in the top-right corner and tap Copy invitation.
How to set up a Zoom meeting as host and start it now
An instant meeting starts immediately with no schedule and no invite list. Its meeting ID expires as soon as the meeting ends.
- Sign in to the Zoom Workplace desktop app.
- Click the Home tab.
- Optionally, click the down arrow under New Meeting and choose Start with video or Use my personal meeting ID (PMI).
- Click New Meeting to start.
- In the meeting controls, click Participants, then Invite at the bottom of the panel.
- Click Copy invite link or Copy invitation and send it to your guests.
In a browser, type zoom.new in the address bar to start an instant meeting in the app, or in the Zoom Web App if the app is not installed. It follows your personal default settings under Settings > Meeting.
How to set up a Zoom meeting and send invite
A scheduled meeting is private until you share it. Pick the route that matches where your guests read their messages.
| Where you are | How to send the invite | What guests get |
|---|---|---|
| Desktop app, Home tab | Click the ellipsis on the meeting card, then Copy invitation, and paste it into email or chat | Join link, meeting ID, passcode and dial-in numbers |
| Desktop app, add to your calendar | Click the ellipsis, then Edit, pick a calendar under Calendar and click Save | A calendar event you can forward |
| Web portal, email | Open Meetings, click the meeting topic, click Edit, add addresses in Invitee and click Save | An automatic email, if calendar and contacts integration is on |
| Web portal, calendar file | Open Meetings, click the topic and use Add to for Google Calendar, Yahoo Calendar or Outlook Calendar | An event in that calendar to share |
| Phone app | On the Calendar tab, tap the meeting, tap the ellipsis and tap Copy invitation | The full invitation text to paste |
| During the meeting | Click Participants, then Invite, then Copy invite link | A one-click join link |
The copied link carries the meeting details, so guests can join the Zoom meeting without typing the ID. They do not need a Zoom account to join.
How to set up a Zoom meeting in Outlook
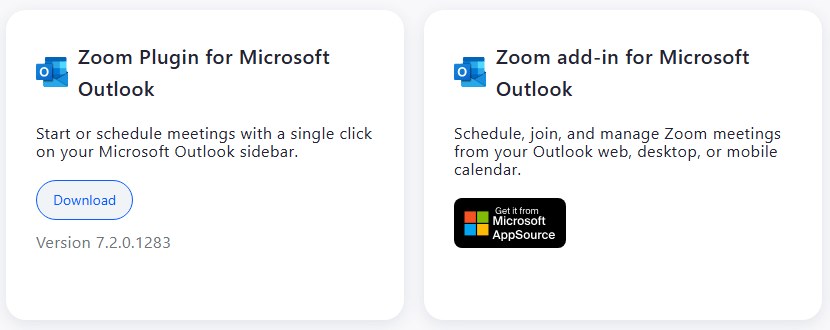
The Zoom for Outlook add-in adds a meeting link to an Outlook calendar event. It works in Outlook on the web, Outlook 2013 and later for PC and Outlook 2016 and later for Mac, and the desktop add-in needs an Exchange or Microsoft 365 account.
To install it on Windows, open Outlook, click File > Info > Manage Add-ins, search for Zoom for Outlook and click Add. In Outlook on the web, open the Zoom for Outlook listing in Microsoft AppSource and click Get It Now.
- Open Outlook and switch to the calendar view.
- On the Home tab, click New Meeting (Windows) or New Event (Mac and the web).
- Add the title, date, time and guests before you add Zoom.
- On Windows, click the ellipsis in the toolbar and choose Settings under Zoom. On Mac and the web, click Zoom and choose Add a Zoom Meeting.
- Sign in to Zoom if asked, choose the video, audio and meeting options, then click Add Zoom Meeting.
- Click Send (Windows) or Save (Mac and the web).
If you move the date or time later, click Update in the Zoom panel so the Zoom meeting matches the Outlook event. A permissions error during install means your IT admin controls add-ins.
Zoom meeting settings to choose when scheduling
These are the options in the scheduling window. An admin can lock some of them, in which case they appear greyed out or are missing.
| Setting | What it does | Where it is available |
|---|---|---|
| Meeting ID: Generate Automatically or Personal Meeting ID | Creates a new unique ID, or reuses your permanent PMI | Desktop, mobile and web portal |
| Passcode | Guests must enter it to join; the invite link can carry it | Desktop, mobile and web portal |
| Waiting room | Holds guests until you admit them | Desktop, mobile and web portal |
| Only authenticated users can join | Admits only signed-in Zoom users | Desktop, mobile and web portal |
| Video: Host and Participant | Sets whether cameras start on or off when people join | Desktop, mobile and web portal |
| Audio | Allows Telephone, Computer Audio, Both or 3rd Party Audio | Desktop, mobile and web portal |
| Allow participants to join anytime | Lets guests join 5, 10 or 15 minutes early, or anytime, without you | Desktop and web portal (Allow participant to join before host on mobile) |
| Mute participants upon entry | Mutes guests as they arrive; they can unmute themselves | Desktop and web portal |
| Automatically record meeting | Records to your computer or to the cloud | Desktop, mobile and web portal |
| Alternative hosts | Lets another licensed user on your account start the meeting | Desktop, mobile and web portal |
| Registration Required and Breakout Room pre-assign | Collects names and emails before the meeting, and places people in rooms in advance | Web portal only |
How to set up a Zoom meeting for free
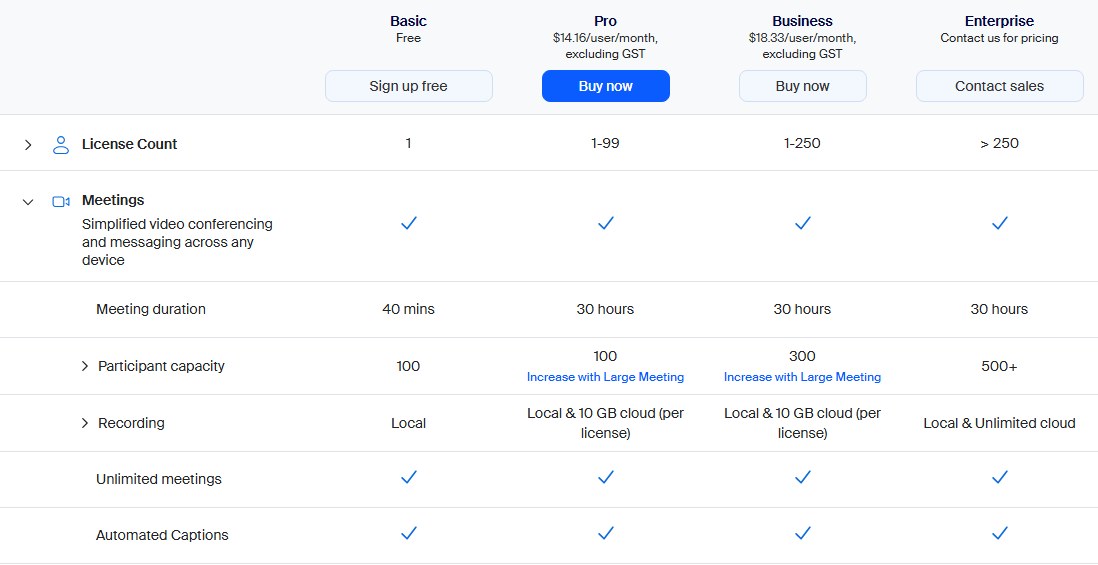
A free Basic account can schedule and host meetings with no payment. The limits matter more for long meetings than for quick calls.
| Plan | Meeting length | Participants | Good to know |
|---|---|---|---|
| Basic (free) | 40 minutes per meeting | 100 per meeting | Screen sharing is set to Only Host by default; local recording works |
| Pro (paid) | Up to 30 hours | 100 per meeting | Adds cloud recording and licensed-only features such as alternative hosts |
On a Basic account, a meeting that allows guests to join anytime still ends after 40 minutes. Check current prices on Zoom's pricing page, because plan features change.
How to set up a Zoom meeting for someone else
Scheduling privilege lets an assistant create meetings that the other person hosts. Both users must be licensed, on the same Zoom account, and an admin must turn the feature on.
- The host signs in to the Zoom web portal, clicks their profile picture and clicks Settings.
- Click Meeting in the side menu and find Schedule Privilege under Other.
- Next to Assign scheduling privilege to, click Add, enter the assistant's email address and click Save.
- The assistant signs out of the Zoom Workplace app and signs back in.
- The assistant clicks Schedule on the Home tab, picks the host in Schedule for and clicks Save.
In the web portal the same choice is Schedule For on the Schedule a Meeting page. On a phone, tap Schedule, then Meeting settings, then Schedule for.
Tips for setting up a Zoom meeting
A few choices at scheduling time prevent the most common problems once guests arrive.
| Tip | Why it helps | Where to set it |
|---|---|---|
| Keep a passcode or the waiting room on | Stops uninvited people from walking into the call | Security or Meeting Security when scheduling |
| Use a generated ID, not your PMI, for public events | Your PMI is permanent, so a leaked link keeps working | Meeting ID when scheduling |
| Turn on Mute participants upon entry for large groups | Avoids echo and background noise as people join | Advanced or Options when scheduling |
| Pre-assign breakout rooms | Saves setup time if you plan to use breakout rooms in Zoom | Breakout Room pre-assign in the web portal |
| Allow participants to share their screen | Basic accounts default to host-only sharing | Host controls during the meeting, or your web portal settings |
| Test your microphone and camera first | Audio problems are easier to fix before guests are waiting; set up a headset on Windows 11 if your laptop mic picks up noise | zoom.us/test |
How to make sure Zoom is working before your meeting
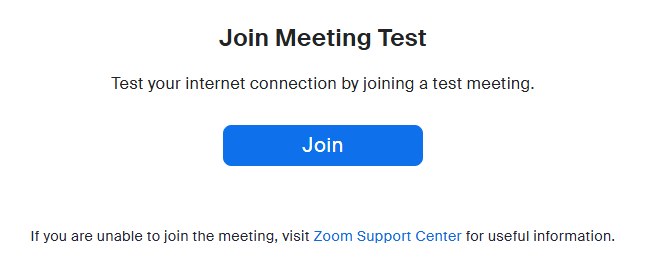
Zoom's test meeting checks your connection, speaker, microphone and camera without inviting anyone.
- Go to zoom.us/test in a browser on the device you will host from.
- Click Join.
- Click Open Zoom Meetings if the app is installed, Download Now if it is not, or Join from your browser if you cannot install it.
- Follow the prompts to check that you hear the ringtone and that your microphone and video work.
- Stay in the test meeting to try the toolbar controls, then leave.
Your scheduled meeting also appears on the Home and Meetings tabs with a Start option. Seeing it there means it saved correctly.
Zoom meeting setup FAQ
Can I schedule a Zoom meeting for free?
Yes. A free Basic account can schedule and host meetings for up to 100 participants. Each meeting on the Basic plan ends after 40 minutes, while the paid Pro plan allows meetings of up to 30 hours.
Do participants need a Zoom account to join a meeting?
No. Only the host needs a Zoom account. Guests can join from the invite link in the Zoom Workplace app or a web browser, unless the host turns on the option that only authenticated users can join.
How do I set up a Zoom link?
Schedule a meeting, then copy its invitation from the meeting card in the Zoom app, or click Participants, then Invite, then Copy invite link during the meeting. The link carries the meeting ID, so guests can join in one click.
How do I share my screen during a Zoom meeting?
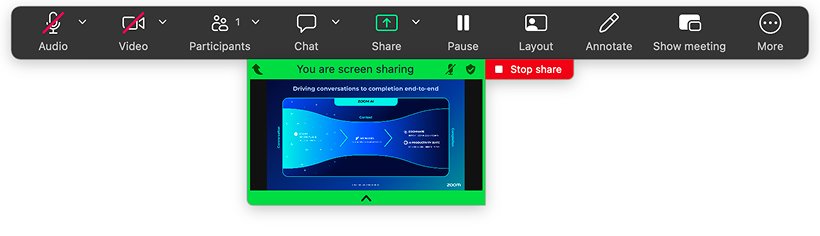
Click Share in the meeting controls toolbar, pick your screen or an app window on the Screens tab, and confirm. On Basic accounts screen sharing is set to Only Host by default, so the host must allow participants to share.
Can I change the meeting settings after I have scheduled it?
Yes. In the web portal, open Meetings, click the meeting topic, click Edit, change the options and click Save. In the desktop app, click the ellipsis on the meeting card and choose Edit. Settings an admin has locked cannot be changed.
How do I mute all participants in a Zoom meeting?
As host or co-host, click Participants in the meeting toolbar, then click Mute all and confirm. Clear Allow participants to unmute themselves first if you want to keep everyone muted. To mute people as they join, use Mute all upon entry under More.
Can I set up Zoom breakout rooms in advance?
Yes. When you schedule the meeting in the Zoom web portal, turn on Breakout Room pre-assign and add participants to rooms. The option is only available in the web portal, not in the desktop or mobile scheduling window.
Can I set up a Zoom meeting for someone else?
Yes, with scheduling privilege. Both users must be licensed and on the same Zoom account, and an admin must enable the feature. The host assigns the privilege in web portal settings, and the assistant then picks the host under Schedule for.
How do I set up a Zoom webinar?
A webinar needs a Pro, Business, Enterprise or Education account plus the Zoom Webinars add-on. Sign in to the web portal, select Webinars, then Schedule a Webinar, choose your settings and select Schedule. A free account cannot host webinars.
How do I set up a Zoom meeting in Outlook?
Install the Zoom for Outlook add-in, create a new meeting or event in the Outlook calendar, set the date and time, then click Zoom and Add a Zoom Meeting. Save or send the event, and the join link is added to the invitation.