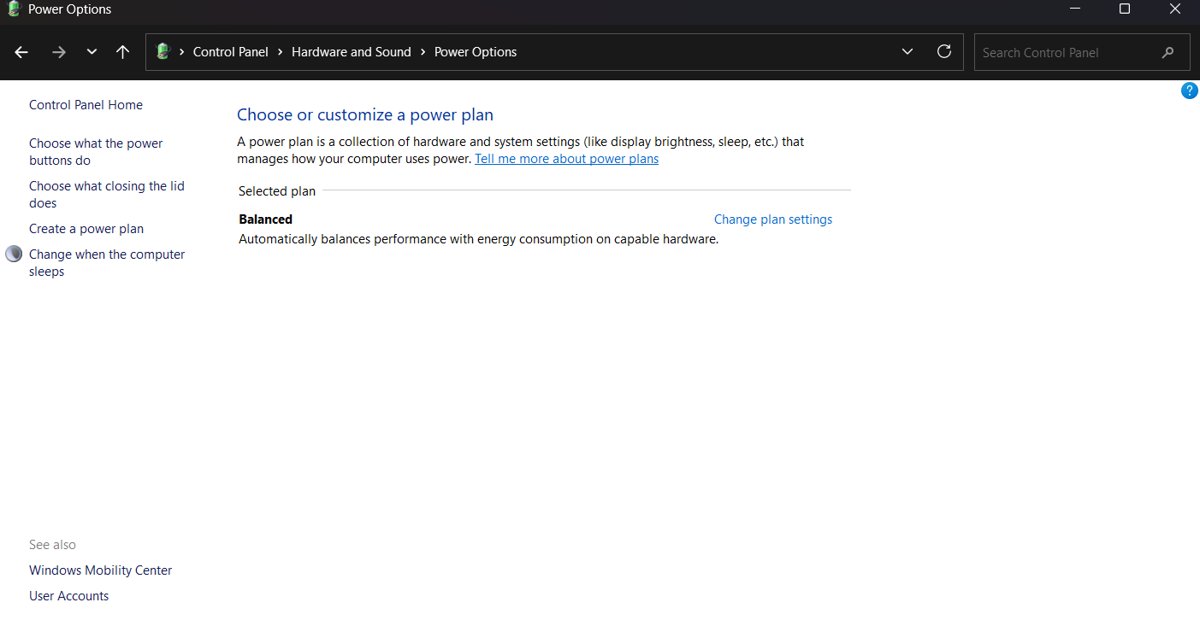
To enable Ultimate Performance, open Control Panel > Hardware and Sound > Power Options and select the Ultimate Performance plan, or make it active from PowerShell with powercfg /setactive.
This guide covers both routes on Windows 11 and Windows 10, how to confirm the plan is active, and what to do when the plan is missing or will not stay selected.
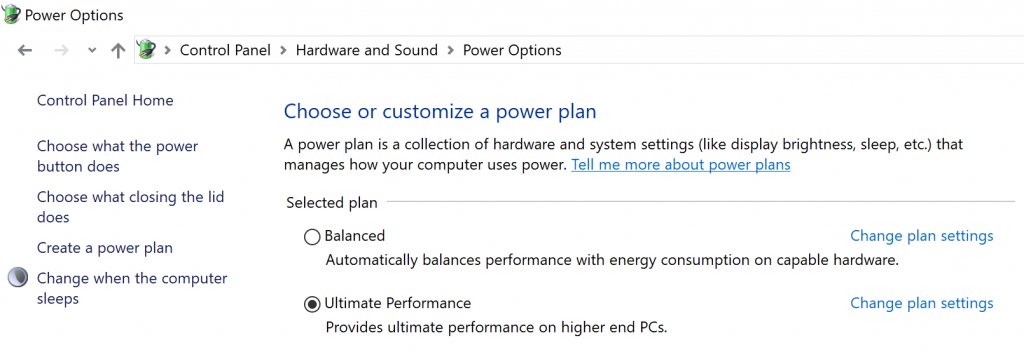
Turn on Ultimate Performance in Power Options
Microsoft built Ultimate Performance on top of the High Performance plan and ships it with Windows 10 Pro for Workstations.
Where the plan exists on your PC, Power Options is the quickest place to select it.
- Press Win + R, type
powercfg.cpland press Enter. - Look for Ultimate Performance in the list of plans on the Power Options page.
- Select the Ultimate Performance radio button.
- Close the window. The plan applies at once and needs no restart.
You can reach the same page from Control Panel > Hardware and Sound > Power Options.
What is Ultimate Performance power mode?
Ultimate Performance is a power policy Microsoft introduced in Windows 10 Insider build 17101 for Windows 10 Pro for Workstations, and it builds on the High Performance power plan.
It targets demanding workloads and removes the micro-latencies caused by fine-grained power management.
| Plan | Built for | Trade-off |
|---|---|---|
| Balanced | Everyday use on any PC | Saves power when the PC is idle |
| High Performance | Sustained speed on plugged-in PCs | Uses more power than Balanced |
| Ultimate Performance | Workstations running heavy, latency-sensitive work | Uses more power than Balanced and can affect hardware directly |
Microsoft states the plan cannot be used on battery-powered devices such as most laptops. Its settings can still be customized like any other plan.
Enable Ultimate Performance from PowerShell
PowerShell sets the plan through powercfg, which reads each plan by its GUID. List the plans first, then make Ultimate Performance active.
- Right-click Start and select Terminal (Admin) on Windows 11, or Windows PowerShell (Admin) on Windows 10.
- Select Yes in the User Account Control prompt.
- Type
powercfg /listand press Enter. - Copy the GUID shown next to (Ultimate Performance).
- Type
powercfg /setactivefollowed by a space and the GUID you copied, then press Enter. - Type
powercfg /getactiveschemeand press Enter to confirm the change.
The active plan in the powercfg /list output carries an asterisk next to its name.
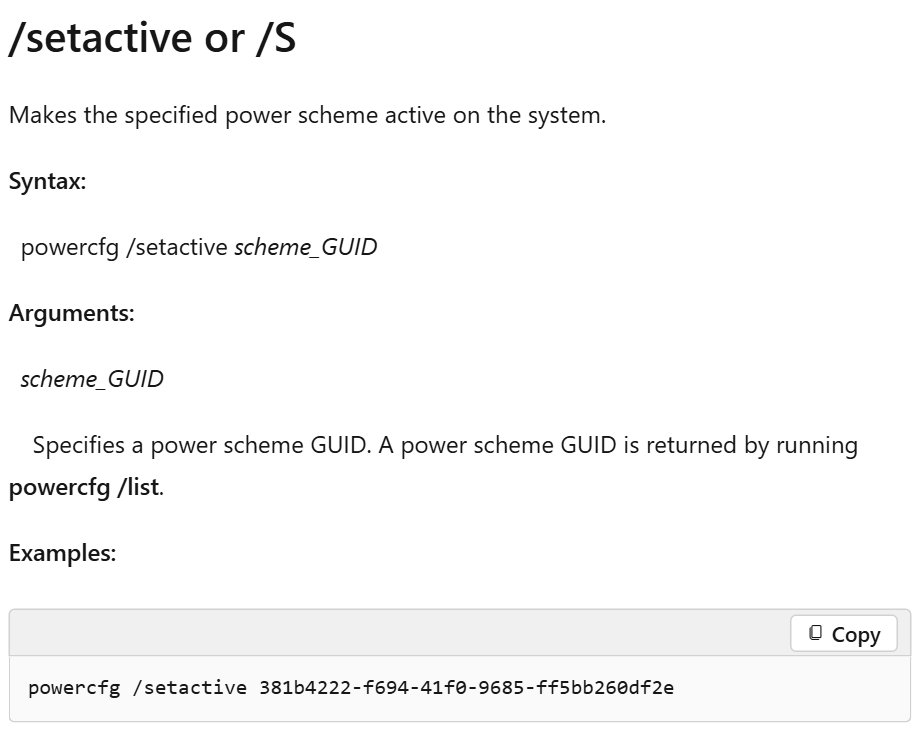
Rename or copy the Ultimate Performance plan with powercfg
A copy lets you change settings without touching the original. powercfg /duplicatescheme creates the copy and prints its new GUID.
| Task | Command | Result |
|---|---|---|
| Copy the plan | powercfg /duplicatescheme <GUID> | Creates a new plan and shows its GUID |
| Rename a plan | powercfg /changename <GUID> "My Ultimate" | Changes the plan name in Power Options |
| Make a plan active | powercfg /setactive <GUID> | Switches the PC to that plan |
| Export a plan | powercfg /export C:\ultimate.pow <GUID> | Saves the plan to a file |
| Import a plan | powercfg /import C:\ultimate.pow | Adds the saved plan back with a new GUID |
Replace <GUID> with the value that powercfg /list shows for the plan.
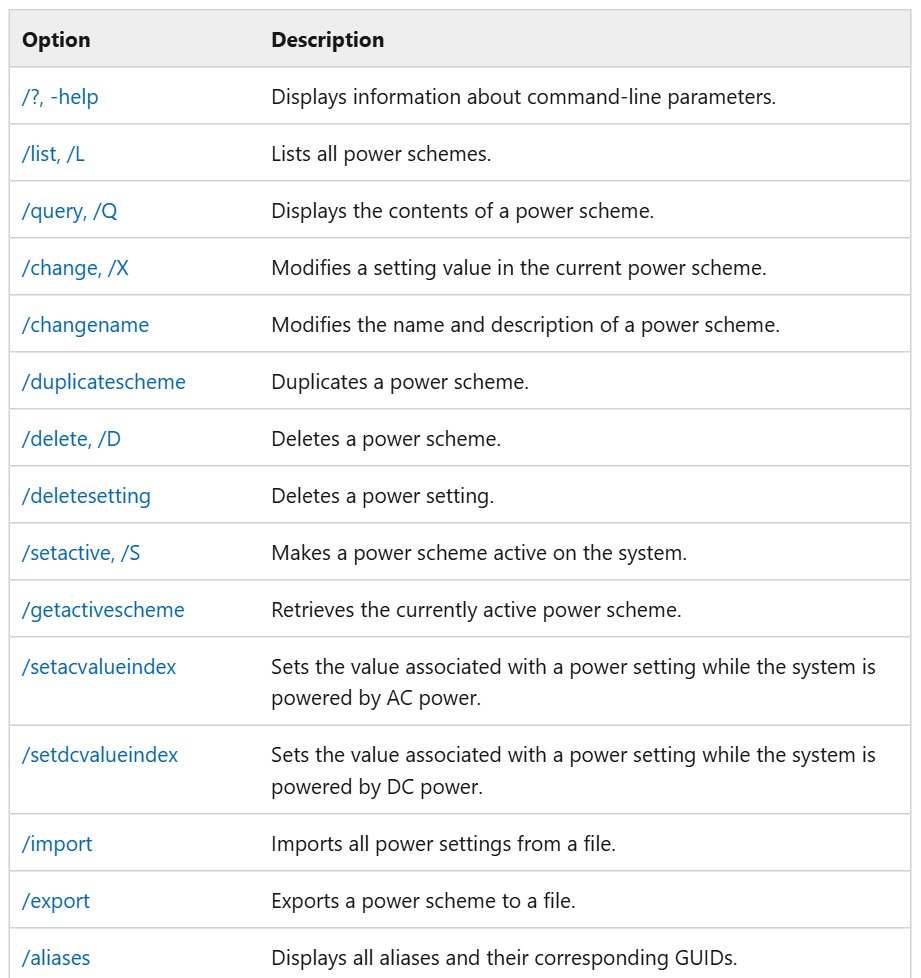
Ultimate Performance vs power mode in Windows 11 Settings
Windows 11 also has a Power mode setting that is separate from Control Panel plans. It offers Best power efficiency, Balanced and Best performance.
| Your situation | Use this | Why |
|---|---|---|
| Desktop workstation running heavy workloads | Ultimate Performance plan | Removes power-management latency |
| Laptop on battery | Best performance in Settings | Ultimate Performance is not available on battery devices |
| Plan not listed on your PC | Best performance in Settings | Works on PCs that only show Balanced |
| Everyday use | Balanced | Saves power with little speed cost |
To set Power mode, select Start > Settings > System > Power & battery, then choose an option for Plugged in or On battery.
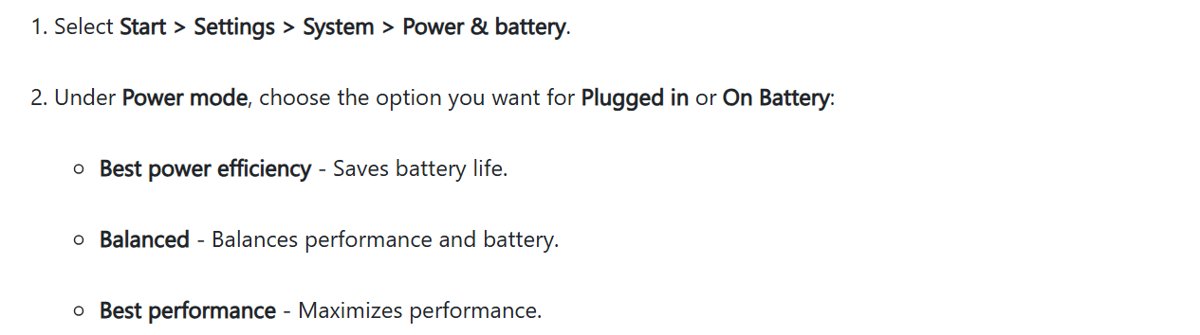
Check which power plan is active in Windows
powercfg /getactiveschemePrints the GUID and name of the power plan Windows is using right now.
You should see: The output ends with (Ultimate Performance).

How to switch back from Ultimate Performance to Balanced
Ultimate Performance uses more power than Balanced, so switch back when you no longer need it.
- Press Win + R, type
powercfg.cpland press Enter. - Select the Balanced plan.
- To delete a copied plan, run
powercfg /deletefollowed by its GUID in an admin terminal. - Run
powercfg /getactiveschemeto confirm Balanced is active.
Windows does not let you delete the plan that is currently active, so switch to Balanced first.
Fix Ultimate Performance missing or not working
Ultimate Performance does not appear in Power Options
The plan ships with Windows 10 Pro for Workstations and is not offered on battery-powered devices.
- Run
powercfg /listin an admin terminal to see every plan Windows has. - If the plan is not in the list, use Best performance under Settings > System > Power & battery instead.
- On a laptop, connect the charger and check again, since the plan is not built for battery devices.
Power mode in Settings cannot be changed after selecting Ultimate Performance
Microsoft notes that a custom power plan can lock the Power mode setting.
- Open Control Panel > System and Security > Power Options.
- Select Balanced.
- Return to Settings > System > Power & battery and pick a Power mode.
powercfg says the scheme does not exist
The GUID was mistyped or belongs to a plan that is not on this PC.
- Run
powercfg /listagain. - Copy the GUID exactly as shown, without the brackets.
- Run the
powercfg /setactivecommand again with that GUID.
Ultimate Performance power plan FAQ
Is Ultimate Performance available on Windows 11?
Windows 11 can run the plan where it is present, and you select it the same way, from Power Options or with powercfg. Many PCs list only Balanced, so check with powercfg /list first.
Does Ultimate Performance work on laptops?
Microsoft states that Ultimate Performance is not available on battery-powered devices. On a laptop, use Best performance under Settings > System > Power & battery when you want more speed.
Does Ultimate Performance use more power?
Yes. Microsoft warns the plan uses more power than the default Balanced plan because it cuts power-management delays and can affect hardware directly.
Is Ultimate Performance better than High Performance?
Ultimate Performance builds on High Performance and goes further by removing micro-latencies from fine-grained power management. It suits heavy workstation workloads more than everyday tasks.
Do I need to restart after enabling Ultimate Performance?
No. A power plan takes effect as soon as you select it in Power Options or run powercfg /setactive, with no restart needed.
How do I turn off Ultimate Performance?
Open Power Options with powercfg.cpl and select the Balanced plan to turn off Ultimate Performance. Run powercfg /getactivescheme afterwards to confirm that Balanced is now the active plan on your PC.
Can I customize the Ultimate Performance plan?
Yes. Microsoft states its settings can be customized. Copy it first with powercfg /duplicatescheme so the original stays unchanged.