Disable SysMain by setting its Startup type to Disabled in Services, and disable Prefetch by running Disable-MMAgent -ApplicationLaunchPrefetching in an administrator PowerShell window.
Both changes reverse just as easily, and the steps work on Windows 11 and Windows 10 whether your drive is an SSD or a hard disk.
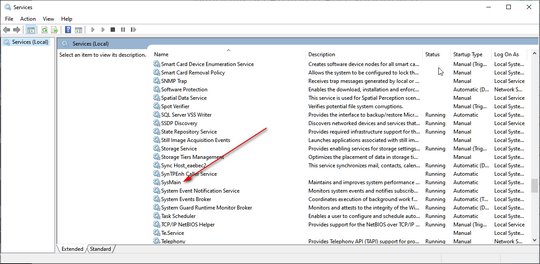
How to disable SysMain in Windows 11/10
SysMain is a Windows service, so the Services console turns it off. Sign in with an administrator account first, because a standard account cannot change a system service.
- Press Windows + R, type
services.mscand press Enter. - Right-click SysMain and select Properties. Older builds list it as Superfetch.
- Open the Startup type list and select Disabled.
- Select Apply, then Stop under Service status.
- Select OK.
If the service only runs hot on your PC, you can optimize SysMain without turning it off by trimming what it has to load.
SysMain (Superfetch), Prefetch & SSD in Windows 11/10
These are separate features with separate switches, so turning off one leaves the other running. Superfetch is the older name of the SysMain service.
| Feature | What it does | Where you control it |
|---|---|---|
| SysMain (Superfetch) | Pre-fetches data that is frequently read at startup and stores it in the hibernation file or RAM, to avoid heavy disk access on resume | Services, sc, or Set-Service |
| Application launch prefetching | Watches the data and code apps access, then preloads them into memory for later launches | Enable-MMAgent and Disable-MMAgent, or the EnablePrefetcher registry value |
| Boot prefetching | Loads data needed during Windows startup into memory before it is demanded | The EnablePrefetcher registry value |
| Application prelaunch | Speculatively launches apps you are likely to use soon, which reduces app switching time | Enable-MMAgent and Disable-MMAgent with -ApplicationPreLaunch |
For SSDs, Microsoft said in 2009 that Windows 7 disables Superfetch and boot and application launch prefetching by default on SSDs with good random read, random write and flush performance. Those features were designed for hard disks, where random reads are the bottleneck.
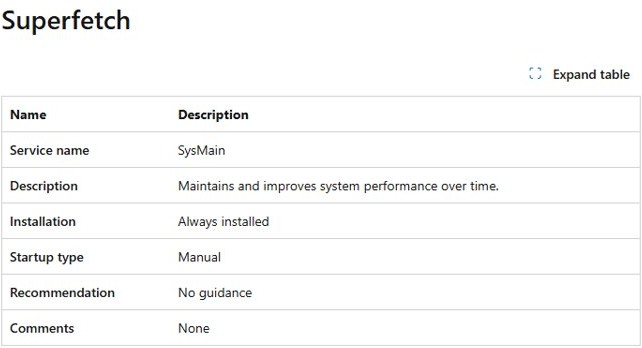
Microsoft has not published the same statement for Windows 11, and its service list gives No guidance on disabling SysMain. Treat the SSD question as a test on your own PC, not a rule.
SysMain disable or enable: should you change it on an SSD?
| Your situation | What to do | Why |
|---|---|---|
| SSD and no slowdown | Leave both alone | There is nothing to fix, and each change can be undone later if that changes |
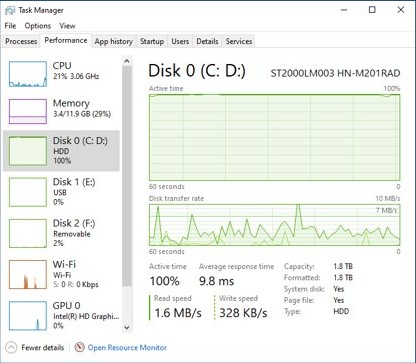
| Service Host: SysMain stays at the top of Task Manager's Disk or CPU column long after startup | Disable SysMain and compare for a day | It is the measured cause, and Windows runs without it |
| Hard disk as the system drive | Keep SysMain and Prefetch on | Both exist to reduce the slow random reads that hold hard disks back |
| Apps launch more slowly after you disabled them | Turn both back on | Windows has stopped preloading what those apps read at launch |
| Device with a write filter protecting the boot volume in RAM | Disable Prefetch | Prefetch cannot keep its data between startups and rebuilds it every boot |
| Work or school PC | Ask your administrator first | Service settings may be managed by policy |
How to check what hard drive you have on Windows 11
Check the drive before you decide, because the answer above depends on it. If you want to go further, you can also check your SSD speed or compare NVMe, M.2 and SATA drives.
- Select Start, type Defragment and Optimize Drives and open it.
- Read the Media type column for each drive.
- For the model and connection too, right-click Start and select Terminal.
- Run
Get-PhysicalDisk | Select-Object FriendlyName, MediaType, BusType, Size. - Read MediaType for HDD or SSD, and BusType for SATA or NVMe.
How to disable Prefetch in Windows 11/10
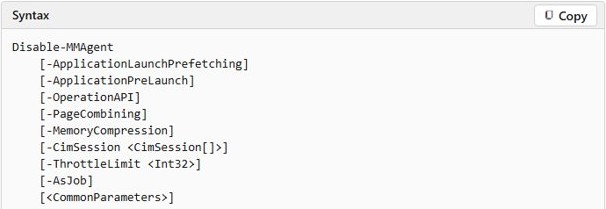
Disable-MMAgent is Microsoft's documented PowerShell switch for application launch prefetching. It needs an elevated window.
- Select Start, type PowerShell, right-click the result and select Run as administrator.
- Run
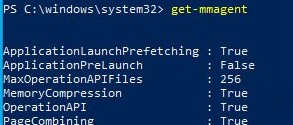
Get-MMAgentand note the current values, so you can restore them. - Run
Disable-MMAgent -ApplicationLaunchPrefetching. - To stop apps being launched ahead of time as well, run
Disable-MMAgent -ApplicationPreLaunch. - Run
Get-MMAgentagain and confirm ApplicationLaunchPrefetching reads False.
How to enable Prefetch in Windows 11
These commands also work on Windows 10. Each switch changes only the feature you name, and the others stay as they are.
- Open PowerShell with Run as administrator.
- Run
Enable-MMAgent -ApplicationLaunchPrefetching. - If you turned off prelaunch too, run
Enable-MMAgent -ApplicationPreLaunch. - Run
Get-MMAgentand confirm ApplicationLaunchPrefetching reads True. - If you changed EnablePrefetcher in the registry, set it back to the value you noted and restart.
Turn off Windows Prefetch in Registry Editor
The registry value also controls boot prefetching, which the PowerShell switch does not name. A wrong edit can cause serious problems, so export the key first and change only this value.
- Open Registry Editor and accept the User Account Control prompt.
- Go to
HKEY_LOCAL_MACHINE\SYSTEM\CurrentControlSet\Control\Session Manager\Memory Management\PrefetchParameters. - Select File > Export and save a copy of the key.
- Double-click EnablePrefetcher, a REG_DWORD value, and write down its current data.
- Set Value data to
0and select OK. - Restart the PC.
To undo the change, set EnablePrefetcher back to the number you wrote down, or double-click the file you exported and restart.
EnablePrefetcher registry values for Windows Prefetch
Microsoft documents these four values in its archived Windows Embedded documentation. On Windows 11, the MMAgent cmdlets are the currently documented control, so use them unless you need boot prefetching changed too.
| Value data | What it sets |
|---|---|
0 |
Prefetch disabled |
1 |
Application launch prefetching enabled |
2 |
Boot prefetching enabled |
3 |
Application launch and boot prefetching enabled |
How to enable SysMain in Windows 11
If you noted the startup type before you changed it, restore that value. Otherwise, Automatic lets Windows start the service at every boot.
- Press Windows + R, type
services.mscand press Enter. - Right-click SysMain and select Properties.
- Set Startup type to Automatic.
- Select Apply, then Start.
- Select OK.
From an administrator Command Prompt, the same change is sc config SysMain start= auto followed by sc start SysMain.
Disable Superfetch, SysMain and Prefetch from PowerShell
Run these lines in order in an administrator PowerShell window to change everything in one pass. The second line shows the Prefetch result before the service stops.
Disable-MMAgent -ApplicationLaunchPrefetching
Get-MMAgent
Set-Service -Name SysMain -StartupType Disabled
Set-Service -Name SysMain -Status Stopped
Get-Service SysMain | Select-Object -Property Name, StartType, Status
The first line stops Windows preloading app data. Set-Service then blocks SysMain from starting again and stops the copy running now. From Command Prompt, the SysMain part is sc stop SysMain and sc config SysMain start= disabled, with the space after start=.
You should see: ApplicationLaunchPrefetching reads False, and the last line shows SysMain as Disabled and Stopped.
How to tell if SysMain and Prefetch are disabled in Windows 11
- Restart the PC so you test the saved settings, not just the current session.
- Press Windows + R, type
services.mscand press Enter. - Find SysMain: Startup Type should read Disabled and Status should be empty.
- Press Ctrl + Shift + Esc and confirm no Service Host: SysMain entry appears on the Processes tab.
- Open PowerShell as administrator and run
Get-MMAgentto read the ApplicationLaunchPrefetching value. - If you used the registry, open the PrefetchParameters key and confirm EnablePrefetcher shows
0.
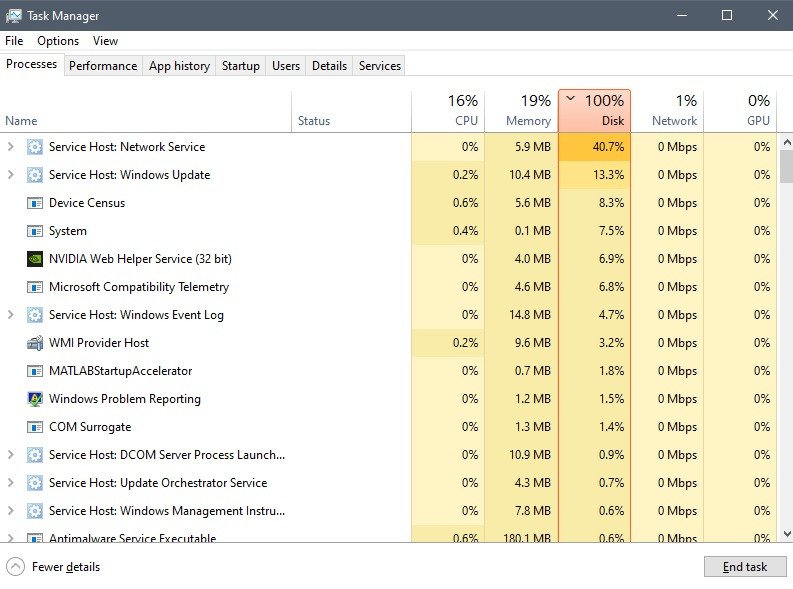
Use the PC normally for a day and compare it with how it felt before. If it is no faster, the cause lies elsewhere, so turn both back on and fix 100% disk usage from its real source.
SysMain disable not working or Prefetch not opening
SysMain starts again after a restart
The service was stopped, but its startup type was left at Automatic or Manual.
- Open Services and double-click SysMain.
- Set Startup type to Disabled and select Apply.
- Select Stop, then OK.
- Restart and check the Startup Type column again.
A command fails or says access is denied
The window is not elevated, or the space after start= is missing.
- Close the window, select Start, type PowerShell or Command Prompt, and select Run as administrator.
- Accept the User Account Control prompt.
- Run the command again, typing
sc config SysMain start= disabledwith the space. - Run
sc query SysMainto read the STATE line.
Why Prefetch is not opening
Windows keeps these files in a system folder for its own use. They are not documents, and Windows has no built-in app that opens them.
- Press Windows + R, type
%SystemRoot%\Prefetchand press Enter to see the folder. - If Windows asks for permission, select Continue with an administrator account.
- Leave the files in place, since Prefetch is controlled by the settings above and not by this folder.
SysMain and Prefetch on SSD FAQ
How do I disable Superfetch or the SysMain service?
Open services.msc, right-click SysMain and select Properties. Set Startup type to Disabled, select Apply, then Stop and OK. Superfetch is the older name of the same service, so these steps apply whichever name your PC shows.
Is it okay to disable Superfetch?
Yes. Windows keeps running without it, and Microsoft disables SysMain on its own soft real-time device setups. The trade-off is that Windows stops preparing frequently read startup data, so some launches and resumes can take a little longer.
Does disabling Superfetch increase performance?
Only when SysMain is the measured bottleneck, such as when Service Host: SysMain stays at the top of Task Manager's Disk column long after startup. If it is quiet, disabling it changes nothing you will notice.
How do I disable Prefetch in Windows 11?
Open PowerShell with Run as administrator and run Disable-MMAgent -ApplicationLaunchPrefetching. Run Get-MMAgent to confirm ApplicationLaunchPrefetching reads False. To include boot prefetching, set the EnablePrefetcher registry value to 0 and restart.
How do I enable Prefetch in Windows 10?
Open PowerShell with Run as administrator and run Enable-MMAgent -ApplicationLaunchPrefetching, the same command as on Windows 11. If you edited the registry, set EnablePrefetcher to 3 for both application launch and boot prefetching, then restart.
Should I disable SysMain and Prefetch on an SSD?
Not by default. Microsoft has given no current recommendation either way for Windows 11, though Windows 7 turned these features off on fast SSDs. Test on your own PC, and change them only if Task Manager points to SysMain.
Does disabling SysMain also disable Prefetch?
Treat them as two separate settings. SysMain is changed in Services, while application launch prefetching is changed with Disable-MMAgent or the EnablePrefetcher registry value. Check each one after a restart to know where you stand.
Where is the Prefetch folder in Windows?
It is at %SystemRoot%\Prefetch, which is usually C:\Windows\Prefetch. Press Windows + R, type that path and press Enter. Microsoft says these files are designed to speed up app startup, and reading them requires a dedicated prefetch file viewer.