To diagnose an iPhone or iPad, turn it off, hold the side button as it starts up to open Recovery Assistant, then tap Diagnostics Mode; on a Mac, start Apple Diagnostics from the startup options or with the D key.
This guide covers which devices support diagnostics mode, what each test checks, how to run Apple Diagnostics on Apple silicon and Intel Macs, what the reference codes mean, and what to do when a test will not start.
How to run diagnostics on iPhone or iPad
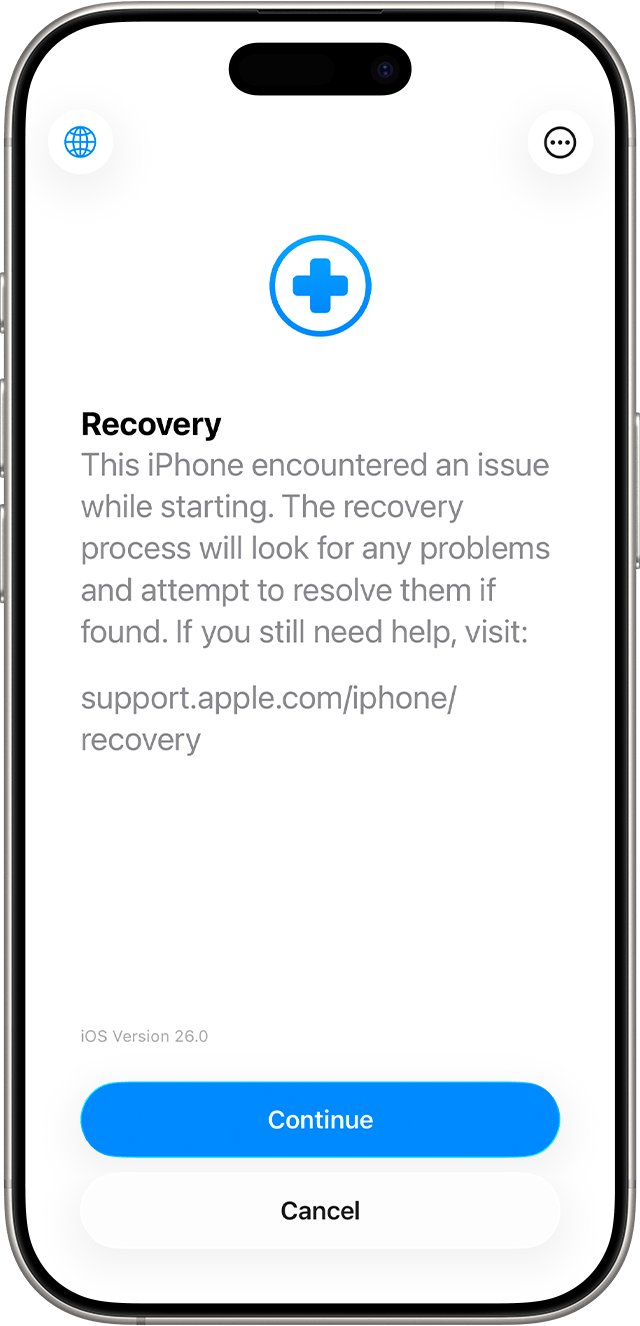
Diagnostics mode is part of Recovery Assistant. It checks the hardware and software on supported iPhone and iPad models and guides you through each test on screen.
- Join a Wi-Fi network that does not need a sign-in page, because diagnostics mode needs Wi-Fi access.
- Turn off the iPhone or iPad.
- Press and hold the side button as the device starts up to open Recovery Assistant.
- Tap Diagnostics Mode.
- Run the tests in the order shown, starting with Mobile Resource Inspector.
- Follow the prompts for each test, such as marking display spots or holding the device for the Face ID check.
- If a test reports an issue, use Apple's Get service page to book a repair or contact Apple Support.
A service provider can run extra tests or repeat some of these tests when it checks the device.
iPhone and iPad models that support diagnostics mode
Recovery Assistant and diagnostics mode are only on recent models. An iPhone 13 or older iPad does not show the Diagnostics Mode option.
| Device | Supported models | Network |
|---|---|---|
| iPhone | iPhone 14 models and later | Wi-Fi access required |
| iPad Pro | iPad Pro M4 and later | Wi-Fi access required |
| iPad Air | iPad Air M2 and later | Wi-Fi access required |
| iPad mini | iPad mini (A17 Pro) | Wi-Fi access required |
| iPad | iPad (A16) | Wi-Fi access required |
Recovery Assistant does not work on networks that require a login page or 802.1X authentication, such as many hotel, school and office networks.
How to start Recovery Assistant on iPhone manually
Recovery Assistant can appear by itself when an iPhone or iPad has a startup problem. If it does not, Apple documents a manual way in.
- Connect the iPhone or iPad to a computer or a power source.
- Turn the device off.
- Press and hold the side button until the connect-to-computer screen appears, then release it.
- Double press the side button.
- Tap Continue.
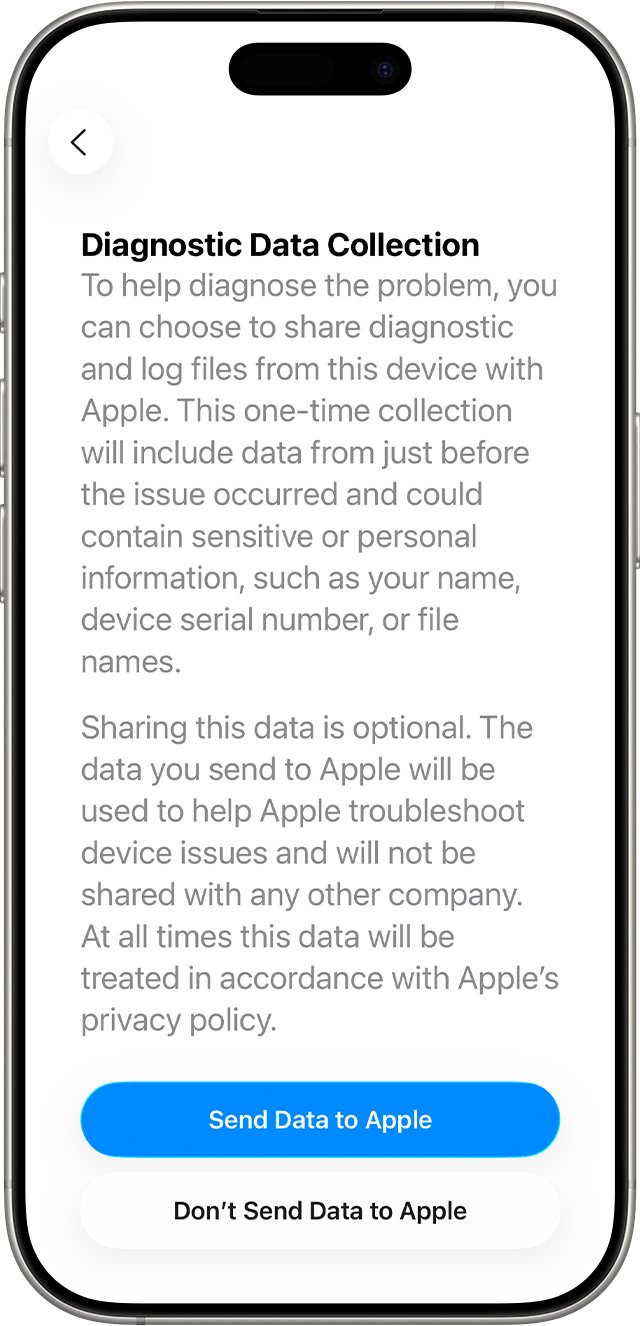
- Review the diagnostic data notice and choose whether to send data to Apple.
- Tap Diagnostics Mode to run hardware tests, or let the recovery process finish if the device will not start normally.
The recovery process downloads a software package and can take several minutes. Restart the device when it completes.
iPhone diagnostics mode tests explained
Each test checks one part of the device. Some ask you to mark problems yourself, so run them in a quiet, well-lit place.
| Test | What it checks | What you do |
|---|---|---|
| Mobile Resource Inspector | Software version, presence of certain parts and their basic function | Nothing; it is the first triage pass |
| Audio | Speakers play tones; each microphone records a short clip | Confirm the tones are clear and not distorted. The clip is deleted after the test |
| Display pixel anomalies | Pixel faults and other display-panel issues | Tap or draw on spots you see, swipe left with two fingers for the next pattern, then press Done |
| Multi-Touch | Touch response across the whole screen | Remove any case or screen protector, then slide a finger over the display; blue rectangles show working areas |
| Face ID | The Face ID sensors | Hold the device about an arm's length away, facing you, for about a minute. No photo is taken and scans are not saved |
| Camera image quality | Front and rear camera image quality | Photograph white paper, a white wall or a test chart, then mark any flaws. Photos are not saved |
To leave the display pixel test early, press the side button or either volume button. The audio test plays loud tones through the speakers, so check your surroundings before you start it.
How to run Apple Diagnostics on a Mac with Apple silicon
Apple Diagnostics checks the internal hardware of a Mac, including the logic board, memory and wireless parts. It runs even when macOS will not start normally.
- Install the latest macOS updates if the Mac still starts.
- Shut down the Mac. If it will not shut down, hold the power button (or Touch ID) for up to 10 seconds.
- Disconnect every external device except the keyboard, mouse, display, Ethernet and power.
- Place the Mac on a hard, flat surface with good ventilation.
- Press and hold the power button until Options appears, then release it.
- Press and hold Command (⌘)-D until the Mac restarts.
- Follow the onscreen instructions. If asked about terms and conditions, click Run Offline unless Apple Support or a technician started an online session.
In macOS Tahoe 26 and later, you choose a specific diagnostic to run, such as the built-in display, keyboard or trackpad. Earlier versions run the tests automatically.
How to run Apple Diagnostics on an Intel Mac
Intel Macs start Apple Diagnostics from a startup key instead of the startup options screen. Prepare the Mac the same way first.
- Shut down the Mac and disconnect all external devices except the keyboard, mouse, display, Ethernet and power.
- Turn on the Mac and immediately press and hold the D key.
- If D does nothing, restart and hold Option (⌥)-D instead.
- Release the key when a progress bar appears or you are asked to choose a language.
- Choose a Wi-Fi network or connect an Ethernet cable if asked.
- Wait for the test to finish and note any reference code it shows.
If a battery result needs confirming on an Intel Mac, Apple runs the internet version of the test with Option-D at startup.
Apple Diagnostics reference codes explained
Mac results list one or more reference codes. Codes that start with the same letters belong to the same part, so the prefix tells you where the fault is.
| Code | Meaning | What to do |
|---|---|---|
| ADP000 | No issues found | Nothing; look at software causes instead |
| CNW007, CNW008 | No Wi-Fi networks detected | Run the test again within range of a Wi-Fi network |
| NDD001 | Possible USB hardware issue | Disconnect everything except keyboard, mouse and Ethernet adapter, then run the test again |
| NDR007 | An external input device was detected | Disconnect external input devices and run the test again |
| NDT001 to NDT006 | Possible Thunderbolt hardware issue | Disconnect external Thunderbolt devices and run the test again |
| PPP001 to PPP008, PPP020 | Power adapter issue or no adapter detected | Use the correct adapter, unplug it from the Mac and the outlet, reconnect, and test again |
| PPT021 | Battery charge too low to finish the test | Charge the battery to 6% or higher and run the test again |
| PPT002, PPT003, PPT007 | Battery holds less charge than when new | Keep using it; contact Apple about a battery replacement |
| PPT004, PPT006 | Battery requires service | Contact Apple or an Apple Authorized Service Provider |
| PPT005 | Battery not installed properly | Shut down, stop using the Mac and get service |
| PPM, VDH, VFD, PPR prefixes | Memory, storage, display or graphics, and processor issues | Contact Apple, an Apple Store or an Apple Authorized Service Provider |
Take the reference code with you to an Apple Store, an Apple Authorized Service Provider or an Independent Repair Provider. It saves the technician a repeat test.
How to check device health on iPhone
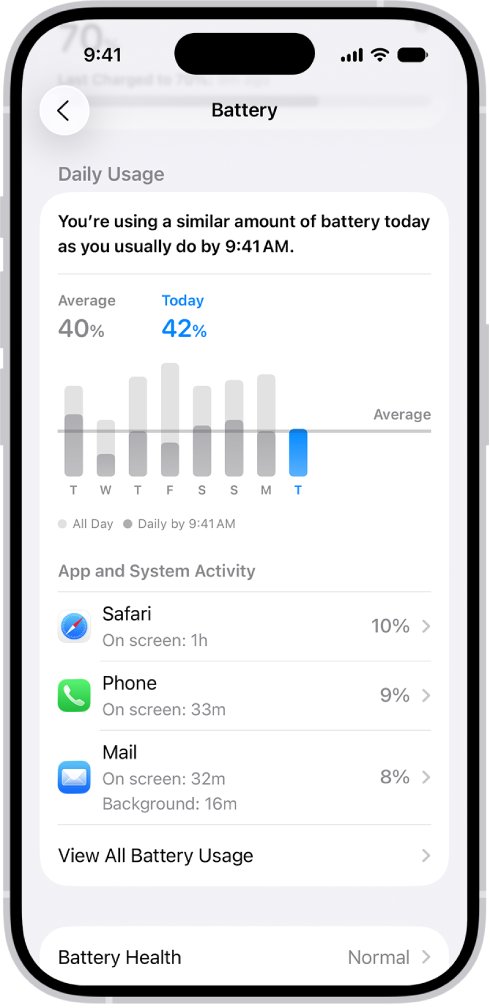
Two Settings screens show the state of an iPhone without restarting it: battery health and parts and service history.
- Open the Settings app.
- Tap Battery.
- On iPhone 14 or earlier, tap Battery Health & Charging. On iPhone 15 or later, tap Battery Health to also see cycle count, manufacture date and first use date.
- Go back to Settings, tap General, then tap About.
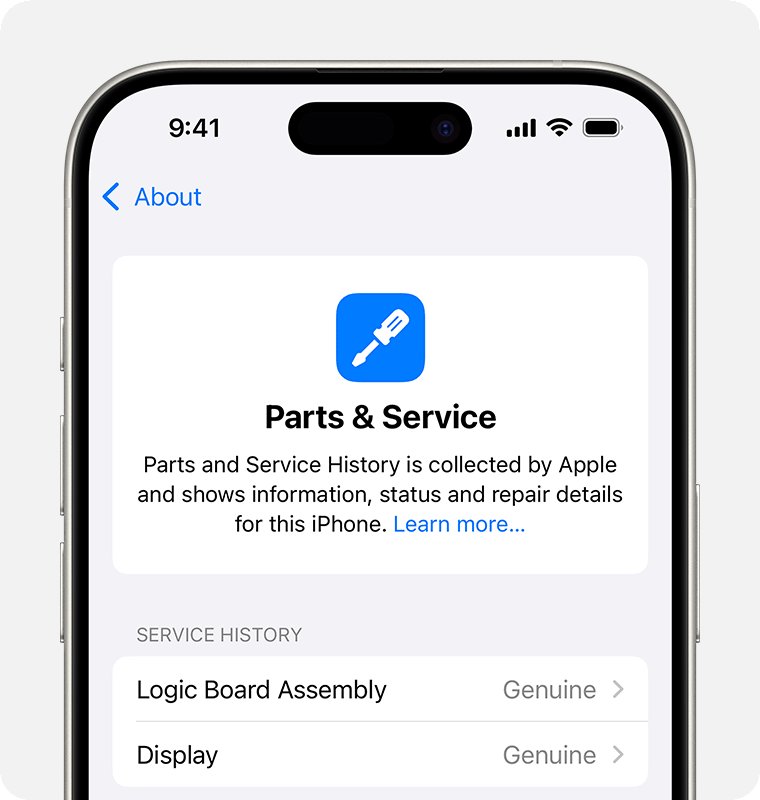
- Scroll to Parts and Service History. It appears only if the iPhone has been repaired, and needs iOS 15.2 or later.
- Read the label next to each part: Genuine, Unknown, Unverified or Used.
Unknown means a part is nongenuine, not working as expected, or not verified after a repair. Finish Repair means the repair still needs to be completed with Repair Assistant before Face ID or Touch ID work.
How to check parts and service history on iPad and Mac
iPad and Mac keep the same repair record as iPhone. The section only appears when the device detects that it has been repaired.
- On an iPad, open Settings, tap General, then tap About.
- Look for the parts and service section and the label next to each part.
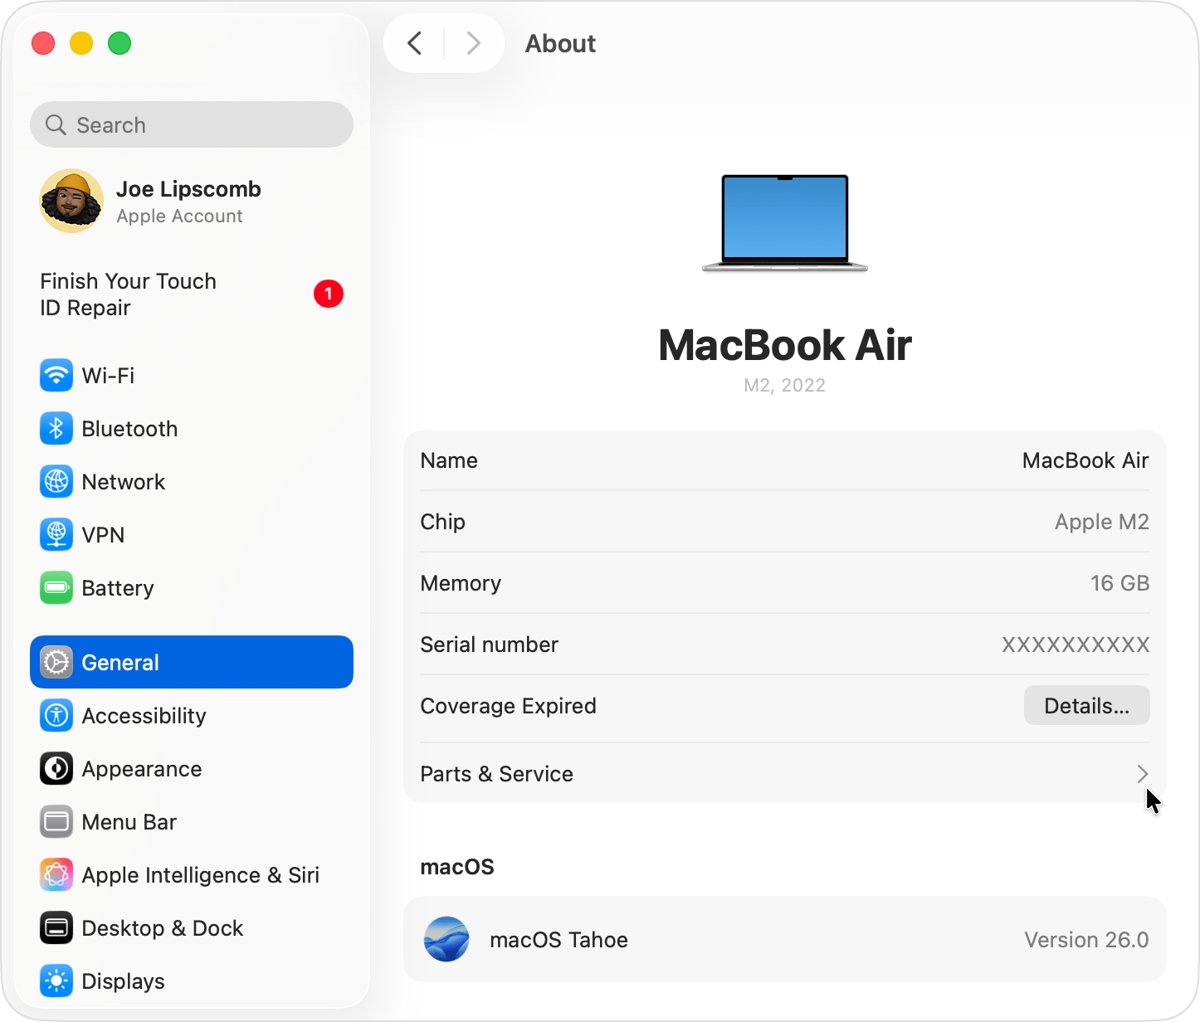
- On a Mac with Apple silicon running macOS Tahoe 26 or later, choose Apple menu > System Settings.
- Click General in the sidebar, then click About.
- Click Parts & Service to see each repaired part and its label.
On iPad, the feature covers iPad Pro (M4 and M5), iPad Air (M2, M3 and M4), iPad mini (A17 Pro and A20 Pro) and iPad (A16).
How to diagnose iPhone hardware problems on any model
Diagnostics mode is the deepest self-test, but it is not on every device. Match your device to a row.
| Your device | Use this | Why |
|---|---|---|
| iPhone 14 or later, recent iPad | Diagnostics mode in Recovery Assistant | Tests display, touch, audio, Face ID and cameras |
| iPhone 13 or earlier | Battery Health plus Parts and Service History in Settings | Diagnostics mode is not offered on these models |
| iPhone that will not start | Recovery Assistant recovery process | It downloads a software package to fix startup issues |
| Mac with any hardware symptom | Apple Diagnostics | Tests logic board, memory and wireless parts and gives a reference code |
| Mac that tests clean but still misbehaves | Reinstall macOS | Apple Diagnostics does not detect software or app conflicts |
Apple Diagnostics does not test external hardware, such as USB devices, non-Apple devices or third-party PCI cards.
What diagnostic data Recovery Assistant sends to Apple
Before tests or recovery start, Recovery Assistant asks whether to share diagnostic and log files with Apple. Sharing is optional.
| Data collected | What it includes |
|---|---|
| Device metadata | Model, software version, disk size and free space |
| System stability logs | Logs about the stability of the system |
| Recent activity logs | Data from before the issue occurred |
| Personal details in logs | Can include your name, device serial number or file names |
Apple uses the shared data to troubleshoot the device and does not share it with other companies. Choose not to send if the device holds files whose names you want kept private.
On-device diagnostics not working on iPhone or Mac
Diagnostics Mode does not appear on iPhone or iPad
The model is not supported, or Recovery Assistant did not open.
- Check the model against the supported list: iPhone 14 or later and the listed iPad models.
- Start Recovery Assistant manually: connect to power, turn off, hold the side button until the connect-to-computer screen appears, then double press the side button.
- On an older model, use Battery Health and Parts and Service History in Settings instead.
Diagnostics mode will not connect to Wi-Fi
Recovery Assistant does not support networks with a login page or 802.1X authentication.
- Switch to a home network that uses only a password.
- Use a personal hotspot from another phone if no such network is nearby.
- Start diagnostics mode again.
The iPhone still has a startup problem after Recovery Assistant
The recovery process did not fix the software fault.
- Restart the device.
- Update to the latest version of iOS or iPadOS.
- If it is already up to date, use recovery mode to restore the iPhone or iPad.
- If the problem continues, get service from Apple.
Apple Diagnostics will not start on an Intel Mac
The D key was pressed too late or the internet version is needed.
- Shut down the Mac fully.
- Turn it on and press and hold D immediately.
- If that fails, hold Option (⌥)-D at startup instead.
Mac test fails with a battery charge code
PPT021 means the charge is too low to complete the test.
- Connect the correct power adapter.
- Charge the battery to 6% or higher.
- Run Apple Diagnostics again.
On-device diagnostics FAQ
How do I diagnose iPhone problems?
On iPhone 14 or later, turn the phone off, hold the side button as it starts up to open Recovery Assistant, and tap Diagnostics Mode. It tests the display, touch, audio, Face ID and cameras. On older iPhones, check Battery Health and Parts and Service History in Settings.
How do I diagnose iPhone hardware?
Run diagnostics mode on a supported iPhone. Mobile Resource Inspector checks that certain parts are present and pass basic tests, then separate tests cover the speakers and microphones, display pixels, Multi-Touch, Face ID and both cameras. A failed test usually means the iPhone needs service.
How do I check device health on my iPhone?
Open Settings and tap Battery, then Battery Health on iPhone 15 or later, or Battery Health & Charging on iPhone 14 and earlier. For repair history, go to Settings > General > About and look for Parts and Service History, which appears after a repair.
Are there problems with my device if diagnostics finds nothing?
A clean result points to software rather than hardware. On a Mac, Apple says reinstalling macOS can fix problems that Apple Diagnostics does not detect. On an iPhone, update iOS first, then use recovery mode to restore it if the fault continues.
How do I diagnose laptop problems on a MacBook?
Shut the MacBook down, disconnect external devices except power, and start Apple Diagnostics. On Apple silicon, hold the power button until Options appears, then hold Command-D. On Intel, hold D at startup. Note any reference code the test shows.
How do I diagnose PC issues on Windows?
On-device diagnostics is an Apple feature, so a Windows PC uses its own tools. You can run system diagnostics on Windows with built-in utilities, and run Windows Memory Diagnostic when you suspect a RAM fault.
How do I check device info on iPhone?
Open Settings, tap General, then tap About. That screen holds the iPhone details and, after a repair, the Parts and Service History section with a label for each replaced part. Battery details sit separately under Settings > Battery.
How do I troubleshoot a device that keeps malfunctioning?
Run the built-in self-test first: diagnostics mode on a supported iPhone or iPad, or Apple Diagnostics on a Mac. Repeat a failed test after removing cases and accessories. If the same result returns, take the reference code or test result to Apple or an authorized service provider.