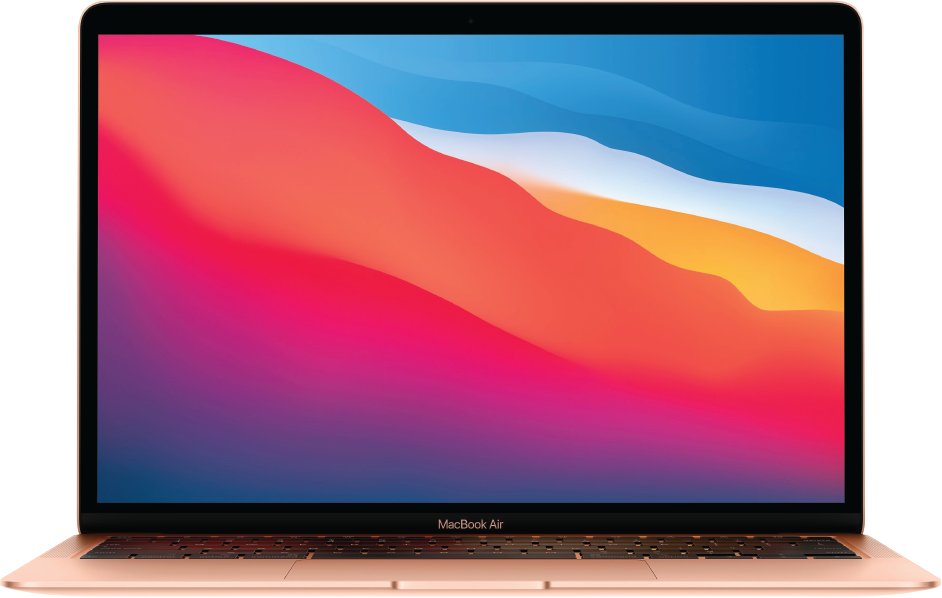
Open Apple menu > System Settings > Displays, select the LED Cinema Display, and drag its Brightness slider to control it from a MacBook Air.
This guide covers the brightness keys, the USB-C cables an M1 MacBook Air needs for the display's Mini DisplayPort and USB plugs, the Cinema Display models, and what to do when no slider appears.
Change LED Cinema Display brightness on MacBook Air in System Settings
Apple's displays show a brightness control in Displays settings once the Mac recognizes them.
- Connect the LED Cinema Display to power and to your MacBook Air.
- Choose Apple menu > System Settings.
- Click Displays in the sidebar. You may need to scroll down.
- Select the LED Cinema Display in the Displays pane.
- Drag the Brightness slider to make the display brighter or dimmer.
On macOS Monterey and earlier, the same control sits in System Preferences > Displays.
Brightness controller for Apple Cinema Display on Mac
The controls you get depend on which Cinema Display you own, because the older DVI models also have buttons on the display.
| Your situation | Use this | Why |
|---|---|---|
| You want a precise level | System Settings > Displays > Brightness slider | The slider sets the exact level for the selected display |
| You use an Apple keyboard or the MacBook Air keyboard | Brightness Up and Brightness Down keys | Apple says its keyboards can raise the brightness of an Apple external display |
| You want the settings pane fast | Option + a brightness key | Holding Option while pressing a brightness key opens Display settings |
| You own a 20-, 23- or 30-inch aluminum Apple Cinema Display (DVI) | The display's own brightness controls or the Displays slider | Apple lists hardware and software brightness controls for these models |
| No slider appears for the LED Cinema Display | The fixes in the troubleshooting section below | The Mac is not yet recognizing the display fully |
Use the MacBook Air brightness keys on an Apple Cinema Display
Apple's dark-display guidance says the Brightness Up key works when both the keyboard and the external display are made by Apple.
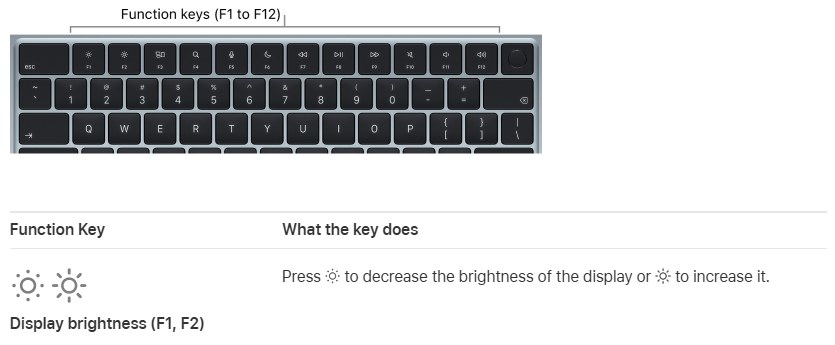
- Press the Brightness Up key on the top row to brighten the display one step.
- Press the Brightness Down key to dim it one step.
- If the keys change only the MacBook Air screen, hold Option and press a brightness key to open Display settings.
- Select the LED Cinema Display and use its Brightness slider.
- If your keyboard uses standard function keys, hold Fn while you press a brightness key.
Apple LED Cinema Display connections for MacBook Air M1
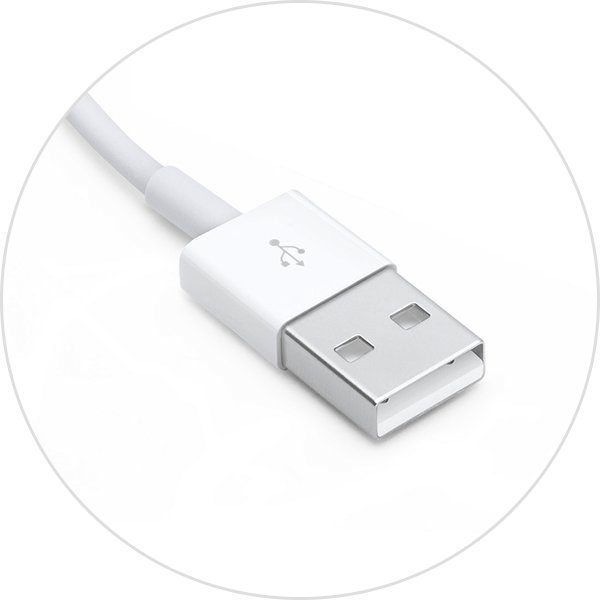
Both LED Cinema Displays have one cable with three connectors: Mini DisplayPort, MagSafe and USB 2.0. The M1 MacBook Air has only two Thunderbolt / USB 4 ports.
| Display plug | What it does | What the M1 MacBook Air needs |
|---|---|---|
| Mini DisplayPort | Video (and audio on the 27-inch model) | A USB-C to Mini DisplayPort cable or adapter that supports DisplayPort Alt Mode |
| USB 2.0 (USB-A) | Connects the display's USB side to the Mac | A USB-C to USB-A adapter such as the Apple USB-C to USB Adapter |
| MagSafe | Charges MacBook models with a MagSafe port | Nothing; the M1 MacBook Air has no MagSafe port and charges over USB-C |
| AC power cord | Powers the display | A wall outlet |
| Not compatible | Apple Thunderbolt 3 (USB-C) to Thunderbolt 2 Adapter | Apple says this adapter does not work with Mini DisplayPort displays such as the LED Cinema Display |
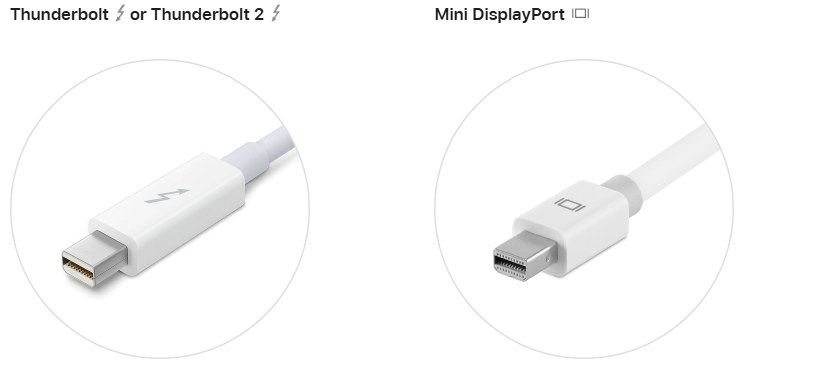
Thunderbolt 2 and Mini DisplayPort plugs have the same shape but different symbols, so check the symbol before you buy an adapter. The MacBook Air ports differ by model, so confirm what yours has.
How to connect Apple LED Cinema Display to MacBook Air
Apple tells you to check with the cable maker for compatibility with your Mac and display model, because USB-C to Mini DisplayPort cables come from third parties.
- Plug the display's AC power cord into a wall outlet.
- Connect the display's Mini DisplayPort plug to a USB-C to Mini DisplayPort cable or adapter.
- Plug that cable into one of the Thunderbolt / USB 4 ports on the MacBook Air.
- Connect the display's USB plug to the other port with a USB-C to USB-A adapter.
- Allow the display to connect if your Mac asks about a new accessory; if you do not, the display stays dark.
- Open System Settings > Displays and choose whether to extend or mirror your desktop.
The M1 MacBook Air supports one external display up to 6K at 60Hz, so a single LED Cinema Display is within its limit. A second external display stays dark on this model.
Apple Cinema Display models
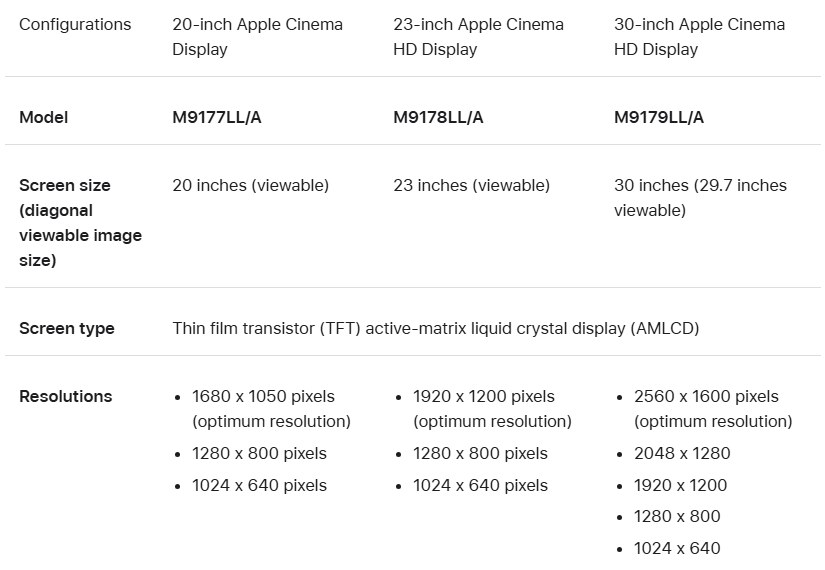
There is no 20-inch LED Cinema Display. The LED models are 24-inch and 27-inch; the 20-inch Apple Cinema Display is an older DVI model.
| Model | Resolution | Video connector | Other connections |
|---|---|---|---|
| LED Cinema Display 24-inch (Late 2008) | 1920 x 1200 | Mini DisplayPort | MagSafe, USB 2.0, three USB 2.0 ports, iSight camera with microphone, 2.1 speakers |
| LED Cinema Display 27-inch | 2560 x 1440 | Mini DisplayPort with audio | MagSafe up to 85W, USB 2.0, three USB 2.0 ports, iSight with microphone, 2.1 speakers; needs Mac OS X 10.6.4 or later |
| Apple Cinema Display 20-inch (M9177LL/A) | 1680 x 1050 | DVI | FireWire 400, USB 2.0, external DC power |
| Apple Cinema HD Display 23-inch (M9178LL/A) | 1920 x 1200 | DVI | FireWire 400, USB 2.0, external DC power |
| Apple Cinema HD Display 30-inch (M9179LL/A) | 2560 x 1600 | Dual-link DVI | FireWire 400, USB 2.0, external DC power |
For a 20-, 23- or 30-inch DVI model, use a USB-C to DVI adapter or cable, which Apple lists for the M1 MacBook Air's DVI output.
Apple LED Cinema Display 27 specs
These figures come from Apple's archived technical specifications for both LED models.
| Spec | LED Cinema Display 24-inch | LED Cinema Display 27-inch |
|---|---|---|
| Brightness (typical) | 330 cd/m2 | 375 cd/m2 |
| Contrast ratio (typical) | 1000:1 | 1000:1 |
| Response time (typical) | 14 ms | 12 ms |
| Lower supported resolutions | 1280 x 800, 1024 x 640 | 1920 x 1080, 1280 x 720 |
| Maximum power | 212W while charging a MacBook Pro | 250W while charging a MacBook Pro |
| Power supply | Built in; AC power cord | Built in; AC power cord |
| Weight | 21 pounds (9.5 kg) | 23.5 pounds (10.7 kg) |
Neither LED model has an HDMI input. Its only video plug is Mini DisplayPort, and its power comes from the AC cord, not a separate power adapter.
LED Cinema Display brightness slider missing on MacBook Air
No Brightness slider for the LED Cinema Display
The Mac shows the picture but does not recognize the display fully, often through a hub or outdated software.
- Connect both the Mini DisplayPort and USB plugs directly to the MacBook Air, not through a hub or dock.
- Install the latest macOS update, because macOS updates also deliver firmware for displays made by Apple.
- Restart the Mac with the display connected.
- Open System Settings > Displays again and select the LED Cinema Display.
Brightness keys change only the MacBook Air screen
The keys act on the built-in display when the Mac does not treat the Cinema Display as adjustable.
- Hold Option and press a brightness key to open Display settings.
- Select the LED Cinema Display and drag its Brightness slider.
- If no slider appears, follow the fixes in the first group.
LED Cinema Display stays dark
Power, the cable or adapter, or display detection is failing.
- Check that the AC power cord and video cable are secure at both ends.
- Use a USB-C adapter or cable that is compliant with DisplayPort Alt Mode, Thunderbolt 3 or Thunderbolt 4.
- Press the Brightness Up key in case the brightness was turned all the way down.
- Disconnect the display from the Mac and its power, then reconnect it.
- Close the lid for a few seconds, then open it to wake the Mac.
MacBook Air does not detect the Cinema Display
macOS missed the connection or the accessory was not allowed to connect.
- Open System Settings > Displays.
- Press and hold Option to show Detect Displays, then click it.
- Unplug the display cable and plug it back in, and allow the accessory to connect if asked.
- Restart the Mac. If it will not restart, hold the power button for about 10 seconds, then press it again.
Cinema Display picture is blurry or low resolution
A scaled resolution is set, or the adapter does not support the display's native resolution.
- Open System Settings > Displays and select the Cinema Display.
- Choose its native resolution: 1920 x 1200 on the 24-inch or 2560 x 1440 on the 27-inch.
- If that resolution is missing, replace the adapter with one that supports it.
If the slider is missing for every display, the fixes for brightness adjustment not available on Mac also apply. When the Mac sees no screen at all, work through the fixes for a Mac not detecting an external display.
Apple LED Cinema Display and MacBook Air FAQ
Can I use an Apple LED Cinema Display with an M1 MacBook Air?
Yes. Connect its Mini DisplayPort plug with a USB-C to Mini DisplayPort cable and its USB plug with a USB-C to USB-A adapter. The M1 MacBook Air supports one external display up to 6K at 60Hz, which covers the LED Cinema Display.
What adapter do I need for an Apple LED Cinema Display?
Use a USB-C to Mini DisplayPort cable or adapter that supports DisplayPort Alt Mode. Apple says its Thunderbolt 3 (USB-C) to Thunderbolt 2 Adapter does not work with the LED Cinema Display, because Mini DisplayPort is not the same as Thunderbolt.
Does the Apple Cinema Display have HDMI?
No. The LED Cinema Display's only video connector is Mini DisplayPort, and the older 20-, 23- and 30-inch Apple Cinema Displays use DVI. Neither type has an HDMI input, so an HDMI cable cannot plug into either display directly.
Does the LED Cinema Display need a power adapter?
No. Both LED Cinema Displays have a built-in power supply and ship with an AC power cord. The older aluminum 20-, 23- and 30-inch Apple Cinema Displays use external DC power at 24.5 volts instead.
Can the LED Cinema Display charge a MacBook Air?
Not an M1 MacBook Air. The display's MagSafe plug charges MacBook models that have a MagSafe port, and the M1 MacBook Air charges only over USB-C. Keep the Air on its own USB-C charger while you use the display.
Is there a 20-inch Apple LED Cinema Display?
No. Apple made the LED Cinema Display in 24-inch and 27-inch sizes. The 20-inch model is the aluminum Apple Cinema Display with a DVI connector and a 1680 x 1050 resolution, which connects with a USB-C to DVI adapter.
Can you use an Apple Cinema Display with a PC?
Apple lists the LED Cinema Display as compatible with Mac computers that have Mini DisplayPort, and it documents no Windows setup. Apple also documents no way to change its brightness from Windows, so the Displays slider on a Mac is the supported control.
Why does my LED Cinema Display brightness slider not appear?
The Mac is not recognizing the display fully. Connect the Mini DisplayPort and USB plugs directly to the MacBook Air instead of through a hub, install the latest macOS update, which carries firmware for Apple displays, and restart the Mac.