Pipe any PowerShell command to Export-Csv -Path <file> to save its output as a CSV file, for example Get-Service | Export-Csv -Path .\services.csv.
This guide covers the Export-Csv syntax, the differences between Windows PowerShell 5.1 and PowerShell 7, delimiters, quotes, encoding and appending, real admin exports such as Active Directory users, account lockouts and firewall rules, and the errors that break a CSV file.
How to export PowerShell output to a CSV file
Export-Csv writes one row per object and one column per property. The cmdlet returns no output, so a prompt that comes back silently means the file was written.
- Open Windows PowerShell or PowerShell 7 from the Start menu.
- Run the command that returns your data on its own first, for example
Get-Service, and check that the output is what you want. - Pick the columns with
Select-Object:Get-Service | Select-Object -Property Name, DisplayName, Status. - Add
Export-Csvat the end of the pipeline:Get-Service | Select-Object -Property Name, DisplayName, Status | Export-Csv -Path .\services.csv -NoTypeInformation. - Read the file back with
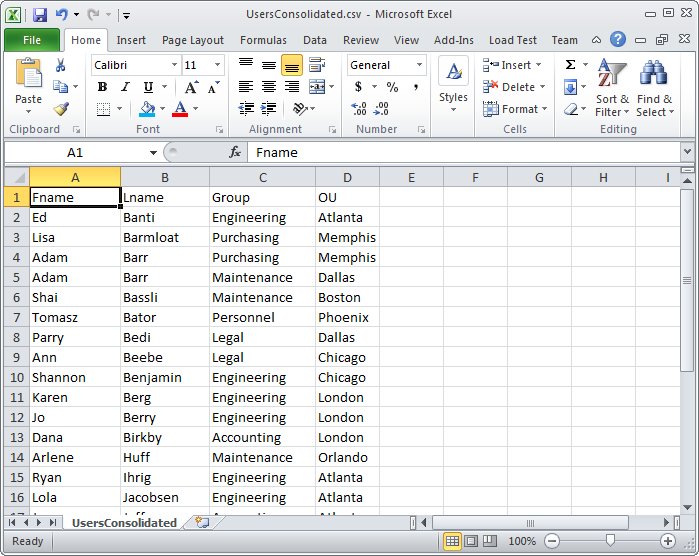
Import-Csv -Path .\services.csv, or double-click it to open it in Excel.
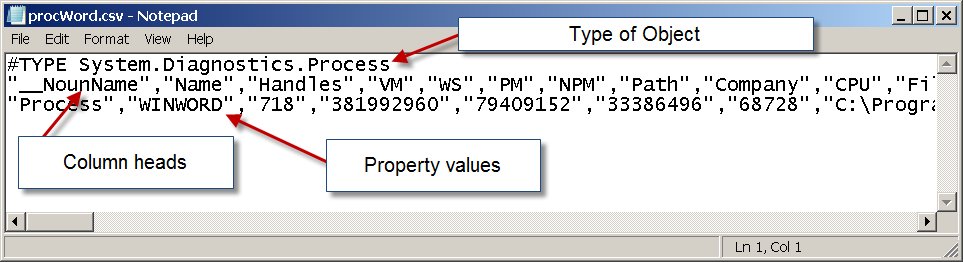
-NoTypeInformation matters only in Windows PowerShell 5.1. PowerShell 6.0 and later leave out the #TYPE line by default, so the switch is harmless there.
Without -Append, Export-Csv replaces the contents of an existing file without warning.
Export-Csv syntax and parameters
The core syntax is Export-Csv [[-Path] <String>] [[-Delimiter] <Char>] -InputObject <PSObject> followed by optional switches. In practice you almost always pipe objects in rather than pass -InputObject.
| Parameter | What it does | Version note |
|---|---|---|
-Path |
File to write. Relative paths save to the current folder | All versions |
-LiteralPath |
Same as -Path, but no character is read as a wildcard |
All versions |
-Delimiter |
Separator between values. The default is a comma | All versions |
-UseCulture |
Uses the list separator of the current culture as the delimiter | All versions |
-NoTypeInformation |
Removes the #TYPE header line |
Needed in 5.1; the default from 6.0 |
-IncludeTypeInformation |
Adds the #TYPE line, such as #TYPE System.Diagnostics.Process |
PowerShell 6.0 and later |
-Append |
Adds rows to the end of an existing file | Windows PowerShell 3.0 and later |
-Force |
Overwrites read-only files; with -Append, writes objects whose properties do not match |
All versions |
-NoClobber |
Refuses to overwrite a file that already exists | All versions |
-Encoding |
Text encoding of the file | Default ASCII in 5.1, utf8NoBOM in 7 |
-UseQuotes |
Always, AsNeeded or Never |
PowerShell 7.0 and later |
-QuoteFields |
Quotes only the named columns | PowerShell 7.0 and later |
-NoHeader |
Skips the header row of column names | PowerShell 7.4 and later |
The built-in alias for Export-Csv is epcsv on every platform.
Export-Csv in Windows PowerShell 5.1 vs PowerShell 7
Windows 11 and Windows 10 ship with Windows PowerShell 5.1, and the same command can produce a different file there. You can install PowerShell 7 alongside it to get the newer switches.
| Behaviour | Windows PowerShell 5.1 | PowerShell 7 |
|---|---|---|
#TYPE line on the first row |
Written unless you add -NoTypeInformation |
Left out unless you add -IncludeTypeInformation |
| Default encoding | ASCII (7-bit) | UTF-8 without a byte order mark (utf8NoBOM) |
| Control over quotes | Every value is quoted | -UseQuotes and -QuoteFields |
| File without a header row | Not available | -NoHeader from 7.4 |
| Hashtables as input | Cast each one to [pscustomobject] first |
From 7.2, the keys of the first hashtable become the column headers |
Code page numbers in -Encoding |
Not available | From 6.2, for example -Encoding 1251 |
Export selected properties with Select-Object and Export-Csv
Export-Csv takes its column list from the properties of the objects it receives. Select-Object is the tool that decides which properties survive and what they are called.
- List the properties an object has:
Get-Process | Get-Member -MemberType Property. - Choose the ones you need:
Get-Process | Select-Object -Property Name, Id, WorkingSet. - Rename or reshape a column with a calculated property:
Get-Process | Select-Object Name, Id, @{Name='MemoryMB'; Expression={[math]::Round($_.WorkingSet/1MB, 1)}}. - Sort before exporting if order matters: add
| Sort-Object -Property MemoryMB -Descending. - Finish the pipeline with
| Export-Csv -Path .\processes.csv -NoTypeInformation.
Never put Format-Table or Format-List before Export-Csv. Format cmdlets send formatting objects down the pipeline, and the CSV fills with columns such as ClassId2e4f51ef21dd47e99d3c952918aff9cd instead of your data.
Append to a CSV file with Export-Csv -Append
- Write the first batch normally:
Get-Service -DisplayName *Application* | Select-Object DisplayName, Status | Export-Csv -Path .\services.csv -NoTypeInformation. - Add the next batch with the same
Select-Objectlist and-Append:Get-Service -DisplayName *Windows* | Select-Object DisplayName, Status | Export-Csv -Path .\services.csv -NoTypeInformation -Append. - Run
Get-Content -Path .\services.csvto see both batches under one header row. - If PowerShell refuses because the new objects have different properties, either select the same columns or add
-Force, which writes the matching columns and discards the rest.
Appending is the usual way to build a log from a scheduled script: each run adds its rows to the same file instead of replacing it.
Change the Export-Csv delimiter to a semicolon or tab
- For a semicolon, wrap it in single quotes:
Get-Process | Export-Csv -Path .\processes.csv -Delimiter ';' -NoTypeInformation. - For a tab, pass the tab character code:
-Delimiter ([char]9). - To match the list separator of your Windows region, check it with
(Get-Culture).TextInfo.ListSeparator. - Then export with that separator:
Get-Process | Export-Csv -Path .\processes.csv -UseCulture -NoTypeInformation. - Read the file with the same separator later:
Import-Csv -Path .\processes.csv -Delimiter ';'.
-Delimiter and -UseCulture belong to different parameter sets, so use one or the other in a single command.
Export-Csv without quotes in PowerShell 7
By default Export-Csv wraps every value in double quotes. PowerShell 7.0 added two parameters that change this; Windows PowerShell 5.1 has neither.
- Remove all quotes:
Get-Service | Select-Object Name, Status | Export-Csv -Path .\services.csv -UseQuotes Never. - Quote only values that contain the delimiter, a double quote or a line break:
-UseQuotes AsNeeded. - Quote only chosen columns:
Get-Date | Export-Csv -Path .\date.csv -QuoteFields "DateTime", "Date". - Open the file with
Get-Contentand check that no value with a comma in it lost its quotes.
AsNeeded is the safer choice. Never can split a value such as Thursday, August 22 into two columns when the file is read back.
Set Export-Csv encoding to UTF-8
Windows PowerShell 5.1 writes ASCII by default, which cannot hold accented letters or non-Latin scripts. PowerShell 7 writes UTF-8 without a byte order mark.
- In Windows PowerShell 5.1, add
-Encoding UTF8:Get-ChildItem -Path . -File | Select-Object Name, Length | Export-Csv -Path .\files.csv -Encoding UTF8 -NoTypeInformation. - In PowerShell 7, add
-Encoding utf8BOMwhen the program that opens the file needs a byte order mark. - Use
-Encoding unicodefor UTF-16 little-endian if another tool asks for it. - In PowerShell 7.4 and later, use
-Encoding Ansito write in the ANSI code page of the current culture. - Open the file and check a row that holds accented or non-English text.
How to install RSAT (Remote Server Administration Tools) on Windows 11
Get-ADUser, Search-ADAccount and the other Active Directory cmdlets come from the Active Directory module, which ships with the RSAT Active Directory tools. RSAT installs only on Windows 11 or Windows 10 Pro and Enterprise, and you need administrator rights.
- Select Start, type
Optional Featuresand select Add an optional feature. - Check the list for RSAT: Active Directory Domain Services and Lightweight Directory Services Tools. If it is not installed, select View features at the top of the page.
- Search for
RSAT, select the Active Directory tools, select Next and then Install. - Or open PowerShell as administrator and list the RSAT capabilities:
Get-WindowsCapability -Online | Where-Object Name -like 'RSAT*'. - Install the Active Directory tools:
Add-WindowsCapability -Online -Name Rsat.ActiveDirectory.DS-LDS.Tools~~~~0.0.1.0. - Check that the output shows
Online : True, then open a new PowerShell window so the module loads.
On Windows 10, the same tools sit under Settings > System > Optional features > Add a feature.

Export Active Directory users to CSV with Get-ADUser
Get-ADUser returns a default set of properties, so ask for extra ones such as mail with -Properties, or narrow the export with other Get-ADUser filters and properties.
Get-ADUser -Filter * -Properties mail | Select-Object Name, SamAccountName, UserPrincipalName, Enabled, mail | Export-Csv -Path .\ad-users.csv -NoTypeInformation-Filter * returns every user in the domain, -Properties mail adds the email attribute, and Select-Object keeps five columns. Add -SearchBase "OU=Finance,DC=contoso,DC=com" to limit the export to one organizational unit.
You should see: The prompt returns with no output and ad-users.csv opens with one row per user account.
How to find the source of account lockouts with PowerShell
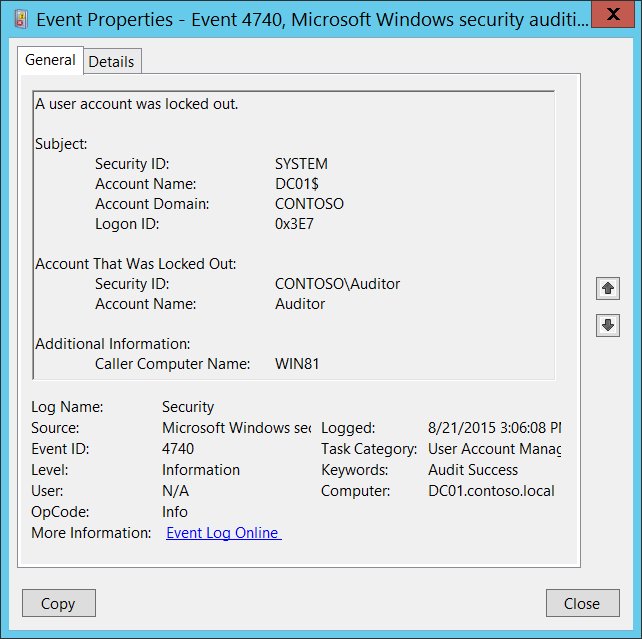
Windows logs event 4740 every time a user account is locked out, and its Caller Computer Name field names the computer the failed sign-in came from. In the event data, that value sits in the TargetDomainName field.
Run the command in an elevated PowerShell window on a domain controller. The event appears only when the Audit User Account Management subcategory is enabled. To list the accounts that are locked right now, run Search-ADAccount -LockedOut -UsersOnly | Select-Object Name, SamAccountName | Export-Csv -Path .\locked.csv -NoTypeInformation.
Get-WinEvent -FilterHashtable @{LogName='Security'; Id=4740} | ForEach-Object { $d = ([xml]$_.ToXml()).Event.EventData.Data; [pscustomobject]@{ Time = $_.TimeCreated; User = ($d | Where-Object Name -eq 'TargetUserName').'#text'; CallerComputer = ($d | Where-Object Name -eq 'TargetDomainName').'#text' } } | Export-Csv -Path .\lockouts.csv -NoTypeInformationGet-WinEvent reads only event 4740 from the Security log. Each event is turned into an object with three columns: when it happened, which account was locked, and which computer caused it.
You should see: lockouts.csv lists every lockout still in the log. The same computer repeating in the CallerComputer column is where the stale password lives.
Managing Windows Firewall rules with PowerShell and Export-Csv
Get-NetFirewallRule reads the firewall rules on the computer. Exporting them gives you a list to audit, compare between machines, or keep before you change anything. Run it in PowerShell opened as administrator.
Get-NetFirewallRule -Enabled True -Direction Inbound | Select-Object DisplayName, Direction, Action, Profile, Enabled | Export-Csv -Path .\firewall-inbound.csv -NoTypeInformation-Enabled True keeps only rules that are switched on, and -Direction Inbound limits the list to incoming traffic. Change it to -Direction Outbound for the other direction, or drop both filters to export every rule.
You should see: firewall-inbound.csv shows one row per enabled inbound rule with its name, action and profile.
PowerShell Export-Csv examples for common admin reports
| Report | Command |
|---|---|
| Services and their state | Get-Service | Select-Object Name, DisplayName, Status, StartType | Export-Csv -Path .\services.csv -NoTypeInformation |
| Installed Windows updates | Get-HotFix | Select-Object HotFixID, Description, InstalledOn | Export-Csv -Path .\updates.csv -NoTypeInformation |
| Local user accounts | Get-LocalUser | Select-Object Name, Enabled, Description | Export-Csv -Path .\local-users.csv -NoTypeInformation |
| User profiles on a PC, to review old ones before you delete them | Get-CimInstance -ClassName Win32_UserProfile | Select-Object LocalPath, LastUseTime, Loaded, Special | Export-Csv -Path .\profiles.csv -NoTypeInformation |
| Files in a folder and their sizes | Get-ChildItem -Path C:\Data -File -Recurse | Select-Object FullName, Length, LastWriteTime | Export-Csv -Path .\files.csv -NoTypeInformation |
| Errors from the System log in the last day | Get-WinEvent -FilterHashtable @{LogName='System'; Level=2; StartTime=(Get-Date).AddDays(-1)} | Select-Object TimeCreated, Id, ProviderName, Message | Export-Csv -Path .\system-errors.csv -NoTypeInformation |
In the user profile export, Loaded is True for a profile in use and Special is True for system accounts. Old user profiles that are neither loaded nor special and have an old LastUseTime are the ones worth a closer look before you delete them in Windows.
Open a CSV file in PowerShell with Import-Csv
- Show the raw text, including the header line and quotes:
Get-Content -Path .\services.csv -TotalCount 5. - Turn the rows back into objects:
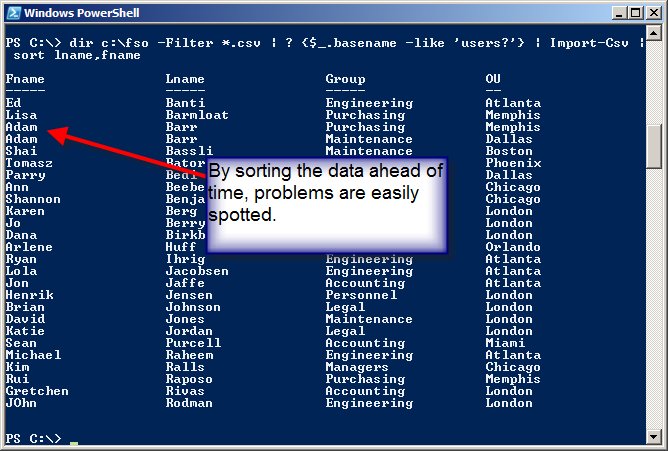
Import-Csv -Path .\services.csv. - Count the rows:
(Import-Csv -Path .\services.csv).Count, and compare it with the count from the original command. - Filter the imported data like any other output:
Import-Csv -Path .\services.csv | Where-Object Status -eq 'Stopped'. - If you used a different delimiter, pass the same one to
Import-Csv -Delimiter.
Imported rows hold every value as text. Numbers and dates need converting, for example [int]$_.Length, before you sort or compare them numerically.
Export-Csv vs ConvertTo-Csv vs Out-File
| You want to | Use | Why |
|---|---|---|
| Save objects as a CSV file | Export-Csv |
Converts each object to a CSV row and writes the file in one step |
| Get CSV text in the console or a variable | ConvertTo-Csv |
Same conversion as Export-Csv, but it returns strings instead of saving a file |
| Read CSV text that is already in memory | ConvertFrom-Csv |
Turns CSV strings back into objects without a file |
| Load a CSV file as objects | Import-Csv |
Recreates objects from the file, with every value as a string |
| Save exactly what the console shows | Out-File |
Writes formatted display text, not separated values |
Export-Csv not working in PowerShell
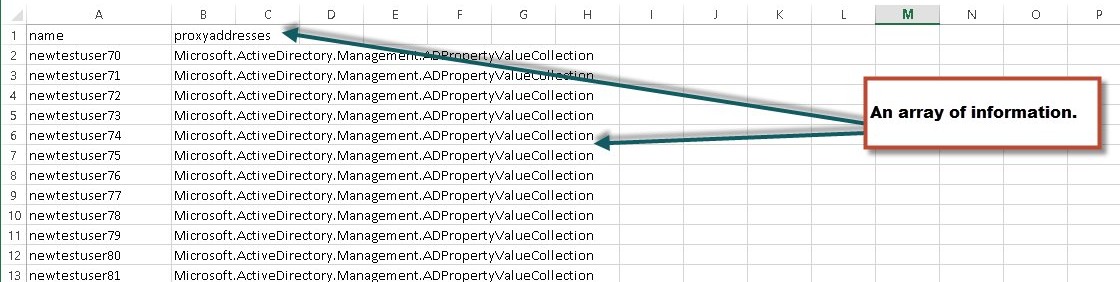
Cells show System.Object[] or System.String[]
Export-Csv converts each property with ToString(), and an array turns into its type name.
- Find the property that holds a list, such as
MemberOforProxyAddresses. - Join it into one string with a calculated property:
Select-Object Name, @{Name='MemberOf'; Expression={$_.MemberOf -join ';'}}. - Export again and check the column.
The CSV is full of ClassId2e4f51ef21dd47e99d3c952918aff9cd columns
A Format-Table or Format-List cmdlet sits before Export-Csv.
- Remove
Format-TableorFormat-Listfrom the pipeline. - Use
Select-Object -Propertyto pick the columns instead.
Export-Csv : Access to the path is denied
The target file is read-only, or the folder does not allow you to write to it.
- Add
-Forceif the file has the read-only attribute. - Save to a folder you own, such as
$HOME\Documents\report.csv. - Close the file in Excel if it is open there, then run the command again.
Cannot append CSV content to the following file
The appended objects do not have a property for every existing column.
- Use the same
Select-Objectlist for every write to the file. - Or add
-Force, which writes the matching columns and discards the mismatched properties.
Columns are missing or blank in the CSV file
Export-Csv builds the header from the first object only; later objects with extra properties lose them.
- Name every column you need in
Select-Object, so all objects share the same properties. - Export again and check the header row with
Get-Content -TotalCount 1.
The first line reads #TYPE System.Management.Automation.PSCustomObject
Windows PowerShell 5.1 writes type information by default.
- Add
-NoTypeInformationto the command. - Or run the same command in PowerShell 7, which omits the line by default.
Accented or non-English characters turn into question marks
Windows PowerShell 5.1 writes ASCII unless told otherwise.
- Add
-Encoding UTF8in 5.1. - In PowerShell 7, try
-Encoding utf8BOMif the program that opens the file still shows the wrong characters.
Every value lands in one column when the file opens
The program expects the list separator set for your region, not a comma.
- Check the separator with
(Get-Culture).TextInfo.ListSeparator. - Export with
-UseCulture, or set it directly with-Delimiter ';'.
If a script stops with a script execution error before Export-Csv runs at all, allow PowerShell scripts to run first.
Export-Csv PowerShell FAQ
How do I export to CSV without type information in PowerShell?
Add -NoTypeInformation to Export-Csv in Windows PowerShell 5.1. PowerShell 6.0 and later leave the #TYPE line out by default, and you only see it there when you add -IncludeTypeInformation on purpose.
Does Export-Csv overwrite an existing file?
Yes. Export-Csv replaces the contents of an existing file without warning. Add -Append to add rows to the end instead, or -NoClobber to make the command fail rather than overwrite a file that is already there.
How do I export only certain columns to CSV?
Pipe the output through Select-Object -Property with the column names you want before Export-Csv, for example Get-Service | Select-Object Name, Status | Export-Csv -Path .\services.csv. Only the selected properties become columns in the file.
What is the default delimiter for Export-Csv?
The default delimiter is a comma. Change it with -Delimiter, putting a semicolon in single quotes or a tab as ([char]9), or use -UseCulture to take the list separator from your Windows region settings.
Can Export-Csv write a file without a header row?
Yes, in PowerShell 7.4 and later. Add the -NoHeader switch and the cmdlet skips the line of column names. Windows PowerShell 5.1 does not have this switch, so the header row is always written there.
What is the alias for Export-Csv?
The built-in alias is epcsv, and it works on every platform PowerShell runs on. Aliases save typing at the prompt, but the full cmdlet name is easier to read in scripts that other people maintain.
Why does Export-Csv not show any output?
Export-Csv returns no output by design. It writes the file and hands the prompt back. Run Import-Csv or Get-Content on the file to see what was saved, or use ConvertTo-Csv to see the CSV text in the console.
How do I save a CSV file to a path with brackets or special characters?
Use -LiteralPath instead of -Path. LiteralPath uses the text exactly as typed and reads no character as a wildcard. Wrap the path in single quotes so PowerShell does not treat any character as an escape sequence.