Run winget install --id Microsoft.PowerShell --source winget in Terminal to install PowerShell 7 on Windows 11 or Windows 10, then type pwsh in a new window to start it.
The sections below also cover the MSI installer, the Microsoft Store and ZIP packages, Windows Server, making PowerShell 7 the Terminal default, updates and removal.
Method 1: Install PowerShell using WinGet
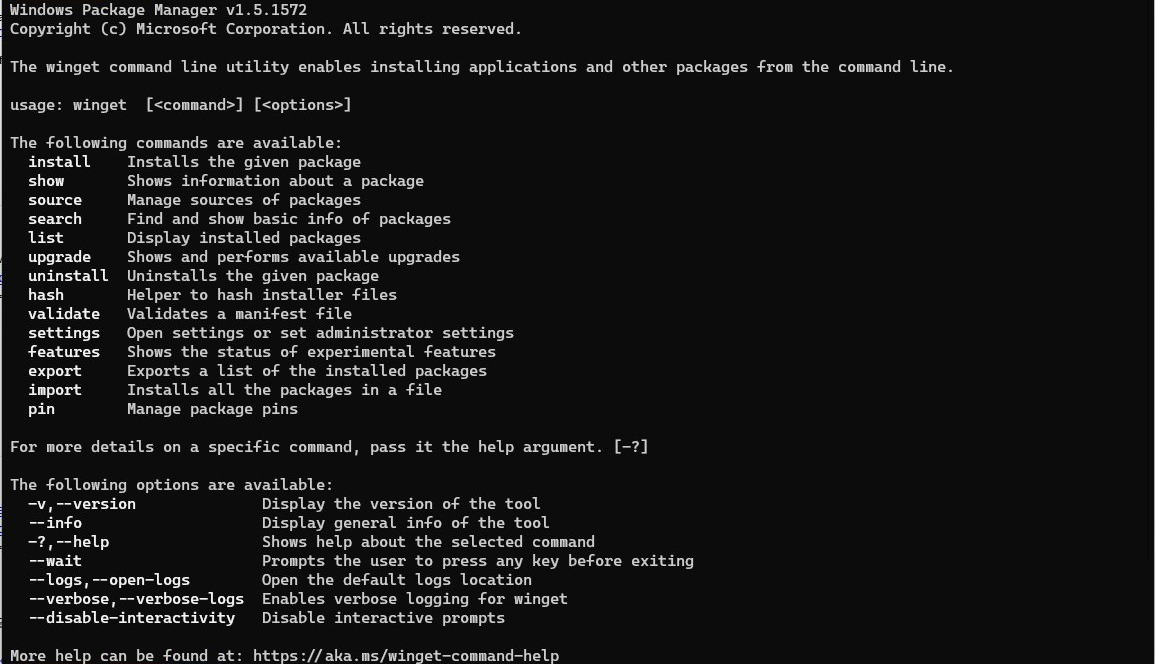
WinGet is Microsoft's recommended way to install PowerShell 7 on Windows client PCs. The Windows Package Manager is built into Windows 11 and modern Windows 10 as part of App Installer.
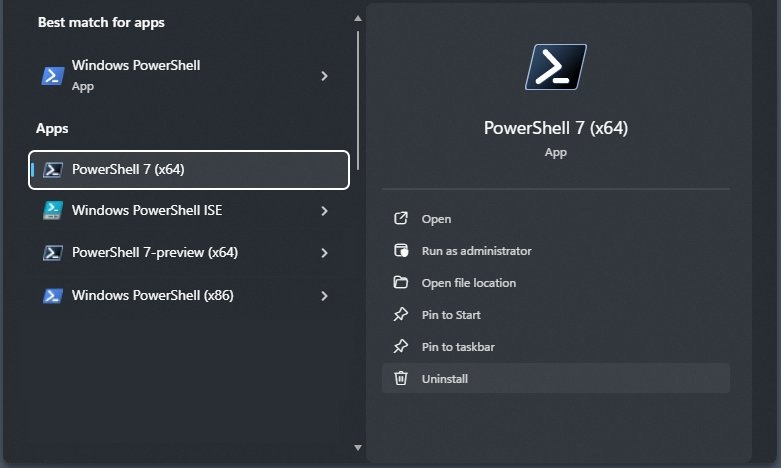
- Right-click Start and select Terminal on Windows 11, or open Windows PowerShell from Start on Windows 10.
- Type
winget search --id Microsoft.PowerShell --exactand press Enter to see the current release, PowerShell 7.6. - Type
winget install --id Microsoft.PowerShell --source wingetand press Enter. - Select Yes if Windows asks for permission, then wait for the Successfully installed message.
- Close the window, open a new one, type
pwshand press Enter to start PowerShell 7.
From PowerShell 7.6.0, the winget package installs the MSIX build by default. Add --installer-type wix to the install command to get the MSI build instead, which installs for all users and supports remoting.
Beginning with PowerShell 7.7.0 there is no MSI package, so winget installs only the MSIX build. For previews, use the ID Microsoft.PowerShell.Preview.
PowerShell 7 system requirements for Windows 11 and 10
Check these points before you start, because they decide which install method works on your PC. PowerShell 7 is free and released under the MIT license.
| Requirement | What applies |
|---|---|
| Supported Windows versions | Windows 10, Windows 11, Windows Server 2016, 2019 and 2022; support ends when either the Windows version or the PowerShell release reaches end of support |
| WinGet | Windows 10 version 1809 (build 17763) or later, Windows 11, and Windows Server 2025 with Desktop Experience; not on Windows Server 2022 or earlier |
| Administrator rights | Needed for the MSI package; the ZIP package can be deployed by any user, and the MSIX package installs for the current user only |
| Processor | x64 and Arm64 packages are available; use the Arm64 MSI, MSIX or ZIP on Arm PCs such as the Surface Pro X |
| Microsoft Update for PowerShell | Windows 10 version 1809 or Windows Server 2019 or newer, on an x64 system |
| Windows PowerShell 5.1 | Stays installed; PowerShell 7 runs side by side with it in its own folder |
Run winver to see your Windows version and build. Install PowerShell 7.6, the current Long Term Servicing (LTS) release, which is supported until 14 November 2028; PowerShell 7.4 and 7.5 both reach end of support on 10 November 2026.
PowerShell 7 MSI vs MSIX vs ZIP package
| Your situation | Install this | Why |
|---|---|---|
| Everyday use on a Windows 11 or Windows 10 PC | WinGet (MSIX by default) | One command, and updates come through winget or the Store |
| You need remoting into the PC, all-users profiles or Set-ExecutionPolicy -Scope LocalMachine | MSI package | MSIX runs in a sandbox that blocks changes to the PowerShell folder |
| Windows Server or enterprise deployment | MSI package | Installs for all users, supports silent install and Microsoft Update |
| No admin rights, several PowerShell 7 versions side by side, Server Core, IoT or Arm | ZIP package | No installer and no prerequisite check; extract and run pwsh.exe |
| You prefer the Microsoft Store and automatic updates | Microsoft Store (MSIX) | Updates are built into Windows; single user only |
| .NET developer with the .NET SDK installed | .NET global tool | Installs and updates like your other dotnet tools |
Method 2: Install PowerShell using the EXE installer (MSI package)
There is no .exe setup file for PowerShell 7 on Windows. The downloadable installer is an .msi package, and Microsoft recommends it for servers and managed PCs.
- Open
https://github.com/PowerShell/PowerShell/releases/latestin your browser. - Under Assets, download
PowerShell-7.6.6-win-x64.msi, orPowerShell-7.6.6-win-arm64.msion an Arm PC. - Double-click the downloaded .msi file and select Next on the welcome page.
- Keep the default folder,
C:\Program Files\PowerShell\; the installer adds the7subfolder itself. - Tick the optional actions you want: add PowerShell to PATH, register the event logging manifest, enable remoting, disable telemetry, and the Explorer context menu items.
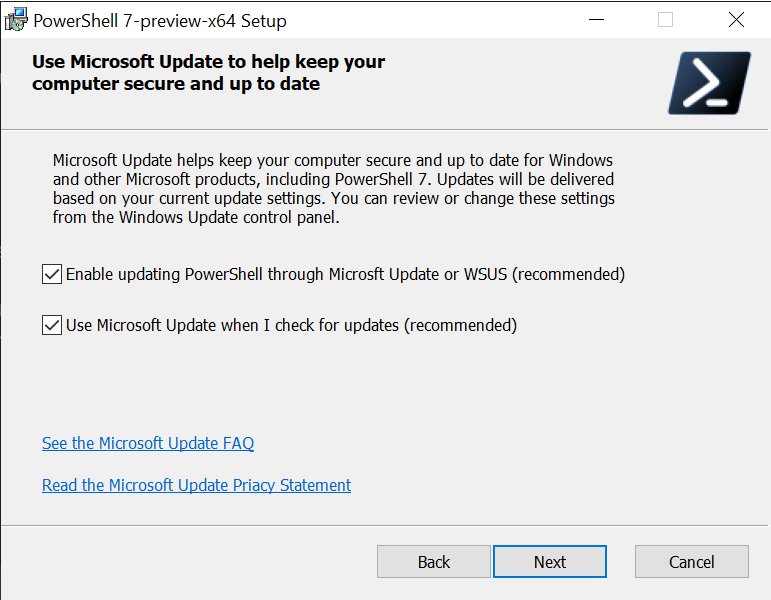
- Leave both Microsoft Update check boxes ticked to receive PowerShell 7 updates through Windows Update.
- Select Install, choose Yes at the User Account Control prompt, then select Finish.
The MSI needs administrator rights. Installing a newer 7.x MSI later replaces the older PowerShell 7 release in place.
Method 3: Install PowerShell 7 from the Microsoft Store
The Store version is the MSIX package. It suits casual use and updates itself, but it installs for one user only.
- Open Microsoft Store from Start.
- Search for PowerShell and open the PowerShell app from Microsoft, product ID 9MZ1SNWT0N5D.
- Select Get or Install and wait for the download to finish.
- Open a new terminal window and type
pwsh, or start PowerShell 7 from the Start menu.
To install a downloaded .msixbundle file instead, double-click it or run Add-AppxPackage -Path ".\PowerShell-7.6.6.msixbundle".
The Store sandbox blocks remote sessions into that copy and the commands Register-PSSessionConfiguration, Update-Help -Scope AllUsers, Enable-ExperimentalFeature -Scope AllUsers and Set-ExecutionPolicy -Scope LocalMachine. All-users profile scripts are also unavailable; current-user profiles still work.
Method 4: Install the PowerShell 7 ZIP package
The ZIP archive is a portable copy with no installer. Use it to run several PowerShell 7 versions side by side, or on Server Core, IoT and Arm devices.
- Open
https://github.com/PowerShell/PowerShell/releases/latestand, under Assets, downloadPowerShell-7.6.6-win-x64.ziporPowerShell-7.6.6-win-arm64.zip. - If Windows marked the download as blocked, run
Unblock-File -Path .\PowerShell-7.6.6-win-x64.zipfrom the download folder. - Extract the archive to
C:\Program Files\PowerShell\7, or to a folder in your user profile if you lack admin rights. - Use a different folder for each extra PowerShell 7 version you keep side by side.
- Open the folder and run
pwsh.exe. - Add the folder to PATH and create a Start menu shortcut yourself, because the ZIP does neither.
Add the folder through the PATH environment variable so pwsh works from any window. The ZIP skips the prerequisite check, so meet the WSMan remoting requirements yourself if you need remoting.
Install PowerShell 7 from Windows PowerShell
Use these two lines on a PC without winget, such as Windows Server 2022 or Server Core. Run them in Windows PowerShell opened as administrator.
Invoke-WebRequest -Uri https://github.com/PowerShell/PowerShell/releases/download/v7.6.6/PowerShell-7.6.6-win-x64.msi -OutFile PowerShell-7.6.6-win-x64.msi
msiexec.exe /package PowerShell-7.6.6-win-x64.msi /quiet ADD_PATH=1 ENABLE_PSREMOTING=1 REGISTER_MANIFEST=1 USE_MU=1 ENABLE_MU=1
Invoke-WebRequest saves the official x64 MSI to the current folder. msiexec.exe /package installs it, /quiet hides the wizard, and each property switches on one install option. Replace x64 with arm64 on Arm hardware.
You should see: No window appears. When the install finishes, open a new window and type pwsh; PowerShell 7 starts, and $PSVersionTable shows PSVersion 7.6.6.
On a desktop PC with winget, winget install --id Microsoft.PowerShell --source winget from Windows PowerShell does the same job in one line.
PowerShell 7 MSI command-line options
These MSI properties control a silent or scripted install. Set each one to 1 to switch the option on.
| Property | What it controls |
|---|---|
USE_MU |
1 (default) opts PowerShell into updates through Microsoft Update, WSUS or Configuration Manager; 0 opts out |
ENABLE_MU |
1 (default) turns on Microsoft Update for automatic updates; 0 skips it but does not remove an existing setting |
ADD_PATH |
Adds PowerShell 7 to the Windows PATH variable |
ENABLE_PSREMOTING |
Turns on PowerShell remoting during installation |
REGISTER_MANIFEST |
Registers the Windows Event Logging manifest |
ADD_EXPLORER_CONTEXT_MENU_OPENPOWERSHELL |
Adds an Open PowerShell item to the File Explorer context menu |
ADD_FILE_CONTEXT_MENU_RUNPOWERSHELL |
Adds a Run with PowerShell item to the context menu for script files |
DISABLE_TELEMETRY |
Turns off telemetry by setting the POWERSHELL_TELEMETRY_OPTOUT environment variable |
INSTALLFOLDER |
Changes the base folder, $Env:ProgramFiles\PowerShell\ by default; the 7 or 7-preview subfolder name can't change |
Group Policy can override the update options. The full list of msiexec switches is in Microsoft's Windows Installer command-line documentation.
How to install PowerShell 7 on Windows Server
The MSI package is Microsoft's first choice for Windows Server. Match your server version to a row and use that route.
| Your server | Use this | Why |
|---|---|---|
| Windows Server 2025 with Desktop Experience | winget install --id Microsoft.PowerShell --source winget --installer-type wix |
WinGet is included, and the MSI build supports remoting and all users |
| Windows Server 2022, 2019 or 2016, or any Server Core install | The Invoke-WebRequest and msiexec commands above | WinGet isn't available on these servers |
| Windows Server 2016 | MSI, then update it yourself with each new MSI | Microsoft Update for PowerShell needs version 1809 (Windows Server 2019) or newer |
| Server Core needing more than one PowerShell 7 version | ZIP package in separate folders | Each copy runs from its own folder without an installer |
Deploying the MSI needs administrator permission, and the same package works with Microsoft Configuration Manager for fleets of servers.
Install PowerShell 7 as a .NET global tool
dotnet tool install --global PowerShellWorks only when the .NET SDK is already installed. The installer adds $HOME\.dotnet\tools to your PATH, but the window you ran it in doesn't see the change.
You should see: Open a new shell and type pwsh; PowerShell 7 starts. Remove it later with dotnet tool uninstall --global PowerShell.
How to open PowerShell v7 or higher
PowerShell 7 opens through its own pwsh command and Start menu entry. Typing powershell still opens Windows PowerShell 5.1.
- Select Start, type PowerShell 7 and open the item labeled PowerShell 7.
- Or press Win + R, type
pwshand press Enter. - Or type
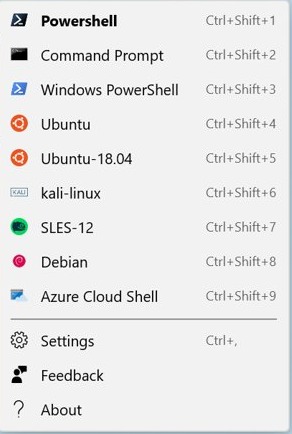
pwshinside Command Prompt or Windows PowerShell to switch shells in the same window. - In Windows Terminal, select the down arrow next to the tabs and choose the PowerShell profile.
- For a preview build, open the item labeled PowerShell 7-preview instead.
The entries named Windows PowerShell and Windows PowerShell ISE are version 5.1, and the ISE works only with 5.1. To get elevated rights, run PowerShell as administrator from the same Start menu entry.
How to check PowerShell 7 version in Windows 11
$PSVersionTableRun it inside the pwsh window. The table lists the running version, the edition and the operating system.
You should see: PSVersion shows 7.6.6 or later and PSEdition shows Core. Windows PowerShell 5.1 shows 5.1 and Desktop instead.
Type $PSHOME to see how PowerShell 7 was installed: C:\Program Files\PowerShell\7 points to the MSI, a path starting with C:\Program Files\WindowsApps\ means MSIX or Store, $HOME\.dotnet\tools means the .NET tool, and any other folder means a ZIP copy. More ways to check the PowerShell version work in both editions.
Set PowerShell 7 as default in Windows Terminal
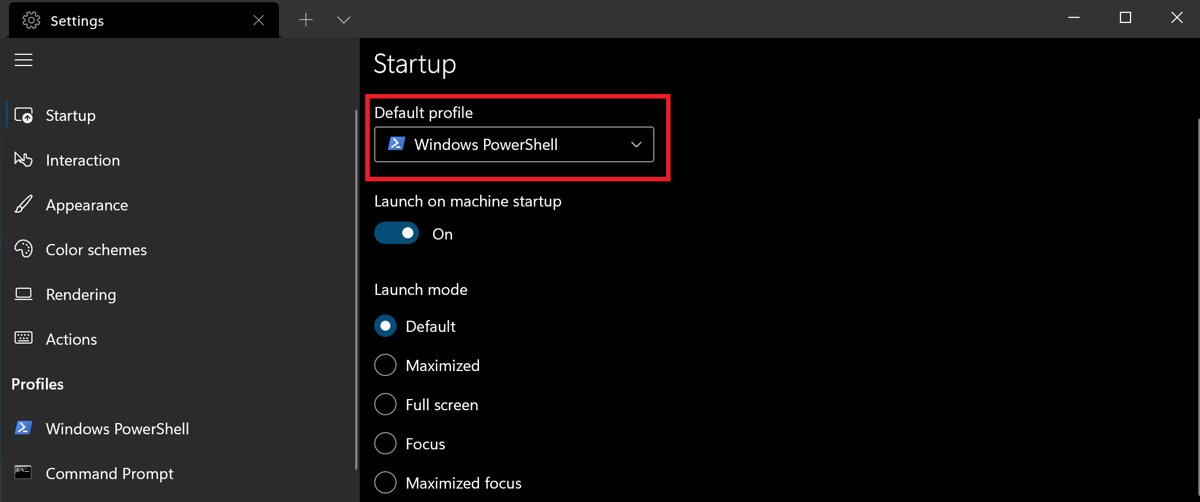
Windows Terminal creates a PowerShell 7 profile automatically once pwsh is installed, but new tabs still open the default profile.
- Open Windows Terminal.
- Select the down arrow next to the tabs and choose Settings.
- Select Startup in the left pane.
- Open the Default profile list and choose PowerShell, not Windows PowerShell.
- Select Save.
New tabs from the + button, Ctrl + Shift + T and wt new-tab now open PowerShell 7, and you can still switch between Terminal profiles from the down arrow when you need Windows PowerShell or Command Prompt.
PowerShell 7 vs Windows PowerShell 5.1
PowerShell 7 does not replace Windows PowerShell 5.1. Both stay installed, and each keeps its own executable, folders and profiles.
| Point | Windows PowerShell 5.1 | PowerShell 7 |
|---|---|---|
| Executable | powershell.exe |
pwsh.exe |
| Install folder | $Env:windir\System32\WindowsPowerShell\v1.0 |
$Env:ProgramFiles\PowerShell\7 |
| How you get it | Built into Windows 10, Windows 11 and Windows Server 2016 and later | Separate install with winget, MSI, MSIX, ZIP or dotnet |
| Built on | .NET Framework 4.x | .NET 10.0 for 7.6, .NET 9.0 for 7.5, .NET 8.0 for 7.4 |
| Profile folder | $HOME\Documents\WindowsPowerShell |
$HOME\Documents\PowerShell |
| Module paths | Windows PowerShell module folders only | Its own folders plus the Windows PowerShell module folders |
| PSEdition | Desktop | Core |
| ISE | Windows PowerShell ISE works | Not supported; ISE works only with 5.1 |
Some Windows PowerShell modules load in PowerShell 7 through its Windows Compatibility feature, while others still need 5.1. Keep both editions and use whichever a module requires.
How to update PowerShell 7 to the latest version
Update with the same method you used to install. A newer PowerShell 7 release replaces the older one; previews install side by side with stable builds.
winget list --id Microsoft.PowerShell --upgrade-available
winget upgrade --id Microsoft.PowerShell
The first line reports whether a newer version exists. The second installs it, keeping the same MSI or MSIX format you installed before.
You should see: Run $PSVersionTable in a new pwsh window; PSVersion shows the new number.
MSI installs with the Microsoft Update boxes ticked get updates through Windows Update as optional updates, up to two weeks after each release. Microsoft Update stays in the same channel, so 7.6 LTS receives 7.6 patches only. Store installs update through the Store, and ZIP copies need a fresh download.

How to uninstall PowerShell 7
- If you installed with winget, run
winget uninstall --id Microsoft.PowerShell. - If you used the MSI, press Win + R, type
appwiz.cpl, select PowerShell 7 in Programs and Features and choose Uninstall. - If you used the Store, open Start, search for PowerShell 7, and select Uninstall from its options.
- If you used the ZIP, delete the folder you extracted, then remove it from PATH.
- If you used the .NET tool, run
dotnet tool uninstall --global PowerShell.
Windows PowerShell 5.1 stays on the PC after PowerShell 7 is removed.
PowerShell 7 install not working in Windows 11 or 10
winget is not recognized or not available
WinGet registers only after the first sign-in, needs Windows 10 version 1809 or later, and isn't included on Windows Server 2022 or earlier.
- Run
winverand check that the version is 1809 or later. - In Windows PowerShell, run
Add-AppxPackage -RegisterByFamilyName -MainPackage Microsoft.DesktopAppInstaller_8wekyb3d8bbweto register WinGet. - Close and reopen the terminal, then run the winget install command again.
- On Windows Server 2022 or earlier, use the MSI commands instead.
pwsh is not recognized after a ZIP install
The ZIP package does not add PowerShell 7 to PATH or the Start menu.
- Add the extracted folder to the PATH environment variable.
- Open a new terminal window so it reads the updated PATH.
- Type
pwshagain, or runpwsh.exefrom the folder directly.
PowerShell 7 is not updating through Windows Update
Updates arrive as optional updates up to two weeks after release, Group Policy can block them, or the Microsoft Update boxes were left clear.
- Check the optional updates list in Windows Update.
- From the MSI folder, run
msiexec.exe /fmu .\PowerShell-7.6.6-win-x64.msi USE_MU=1 ENABLE_MU=1to turn the update option on. - Or update now with
winget upgrade --id Microsoft.PowerShell.
Set-ExecutionPolicy -Scope LocalMachine or remoting fails in PowerShell 7
The MSIX or Store build runs in a sandbox that blocks writes to its own folder.
- Run
$PSHOME; a path underC:\Program Files\WindowsApps\confirms the MSIX build. - Uninstall it with
winget uninstall --id Microsoft.PowerShellor from Start. - Install the MSI build with
winget install --id Microsoft.PowerShell --source winget --installer-type wix.
PowerShell 7 installation FAQ
How do I install PowerShell 7 on Windows 11?
Open Terminal and run winget install –id Microsoft.PowerShell –source winget. WinGet is built into Windows 11, so no download page is needed. When the install finishes, open a new window and type pwsh to start PowerShell 7.
How do I install PowerShell 7 on Windows 10?
On Windows 10 version 1809 or later, run winget install –id Microsoft.PowerShell –source winget in Windows PowerShell. On older builds, or without winget, download the PowerShell 7 MSI from the official GitHub releases page and run it.
How do I install PowerShell 7 on Windows Server 2019?
Download PowerShell-7.6.6-win-x64.msi with Invoke-WebRequest in an administrator Windows PowerShell window, then install it with msiexec.exe /package and /quiet. WinGet isn't available on Windows Server 2019, so the MSI is the route Microsoft recommends.
How do I install PowerShell 7 on Windows Server 2016?
Use the same MSI and msiexec commands as on Server 2019. PowerShell 7 supports Windows Server 2016, but Microsoft Update for PowerShell needs version 1809 or newer, so install each newer MSI yourself to update it.
Can I install PowerShell 7 from PowerShell?
Yes. Run winget install –id Microsoft.PowerShell –source winget from Windows PowerShell, or download the MSI with Invoke-WebRequest and install it with msiexec. Both work from the built-in Windows PowerShell 5.1 window.
Is PowerShell 7 included in Windows 11?
No. Windows 11 and Windows 10 include Windows PowerShell 5.1 only. PowerShell 7 is a separate, free download that you install with winget, the MSI, the Microsoft Store, a ZIP archive or the .NET global tool.
Does PowerShell 7 replace Windows PowerShell 5.1?
No. PowerShell 7 installs to its own folder and runs side by side with Windows PowerShell 5.1. Its command is pwsh, while powershell still opens version 5.1, and each edition keeps separate profiles.
Where is PowerShell 7 installed?
The MSI installs PowerShell 7 to C:\Program Files\PowerShell\7, and previews go to C:\Program Files\PowerShell\7-preview. MSIX and Store copies live under C:\Program Files\WindowsApps. Type $PSHOME in pwsh to see the folder in use.
Which version of PowerShell 7 should I install?
Install PowerShell 7.6, the current Long Term Servicing release, supported until 14 November 2028. PowerShell 7.4 and 7.5 reach end of support on 10 November 2026, and 7.7 is still a preview.