To prevent Windows 10 or Windows 11 from automatically locking, turn off Dynamic lock, clear On resume, display logon screen in the screen saver settings, and change when Windows asks you to sign in again.
Windows has several separate triggers for locking, so this guide covers each one in Settings first, then Group Policy and the registry for PCs where those settings do not stick.
How to turn off auto lock on Windows 11 and Windows 10
These three settings stop most automatic locks on a home PC and work the same way on both versions, apart from one label.
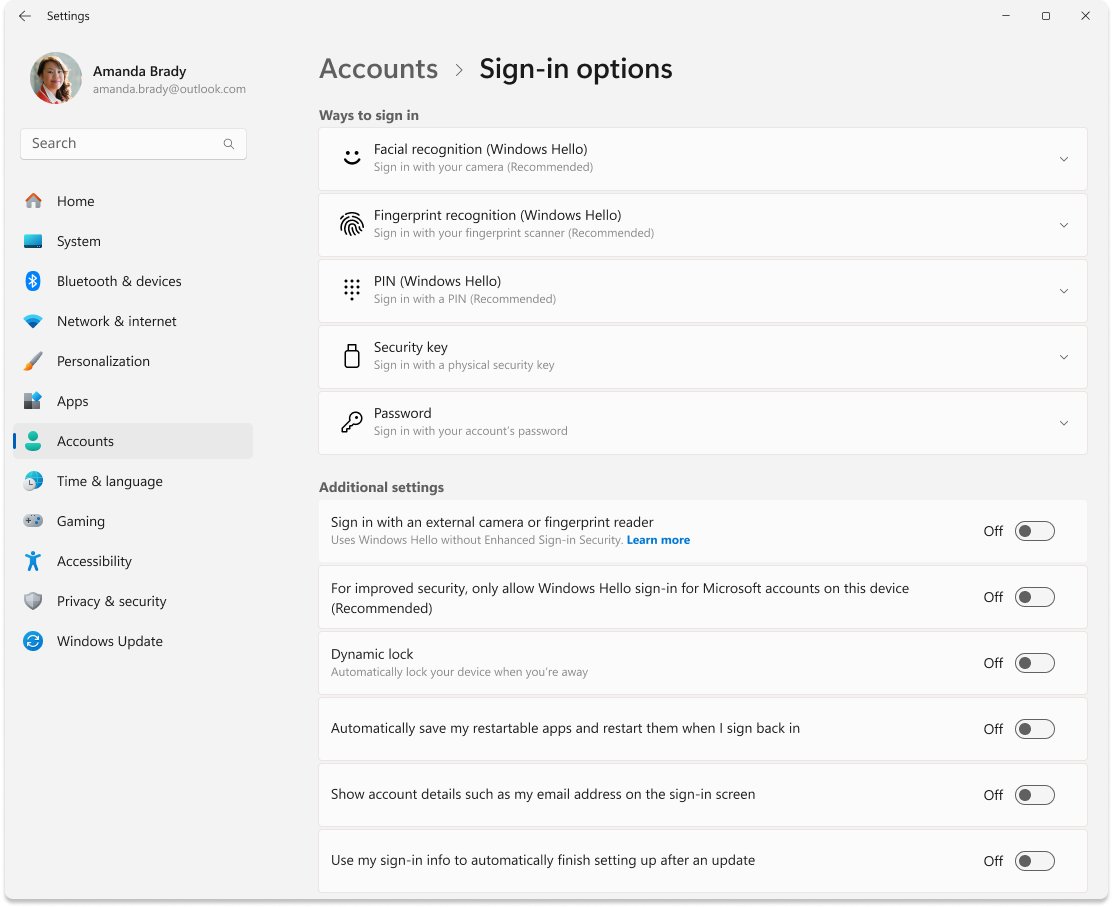
- Select Start > Settings > Accounts > Sign-in options.
- Turn Dynamic lock off.
- Under Additional settings, open If you've been away, when should Windows require you to sign in again? (Require sign-in on Windows 10) and choose Never if your PC lists it.
- Press Windows logo key + R, type
control desk.cpl,,1and select OK. - Clear On resume, display logon screen and select OK.
Leave the PC idle for longer than its old lock delay to test the change. If it still locks, the rest of this guide covers the remaining triggers.
Understanding the lock mechanism
Windows does not have one auto lock switch. Each trigger below locks the session on its own, so turning off only one often changes nothing.
| Lock trigger | When it locks | Where to change it |
|---|---|---|
| Dynamic lock | About a minute after your paired phone leaves Bluetooth range, and only if the PC is idle | Sign-in options (Step 1) |
| Screen saver lock | When the screen saver starts and On resume, display logon screen is ticked | Screen Saver Settings (Step 1 and the next section) |
| Sign-in on wake | When the PC wakes from sleep or the screen comes back on | Sign-in options (Step 2) |
| Screen and sleep timeouts | Timeouts decide when the PC sleeps, and the sign-in rule applies when it wakes | Power & battery or Power & sleep (Step 3) |
| Presence sensing | When a supported sensor sees you leave, on Windows 11 only | Screen and sleep (Windows 11 presence sensing section) |
| Machine inactivity limit | After a set number of idle seconds, and also when the screen saver starts or the display turns off | Group Policy (Step 4) or the registry (Step 5) |
Why does my Windows keep locking?
Match what you see to a row. Each cause points to the setting that controls it.
| What happens | Likely cause | Go to |
|---|---|---|
| PC locks soon after you walk away with your phone | Dynamic lock | Step 1 |
| PC locks after a fixed idle time and shows a screen saver first | Screen saver lock | Disable screensaver lock |
| PC asks for your PIN every time it wakes | Sign-in on wake | Step 2 |
| Screen goes dark quickly, then you must sign in | Short sleep or screen timeout | Step 3 |
| Laptop locks the moment you leave your seat | Presence sensing | Windows 11 presence sensing section |
| PC locks at the same interval whatever you change | Machine inactivity limit or a work policy | Step 4 and Step 5 |
Step 1: Turn off Dynamic Lock and screensavers
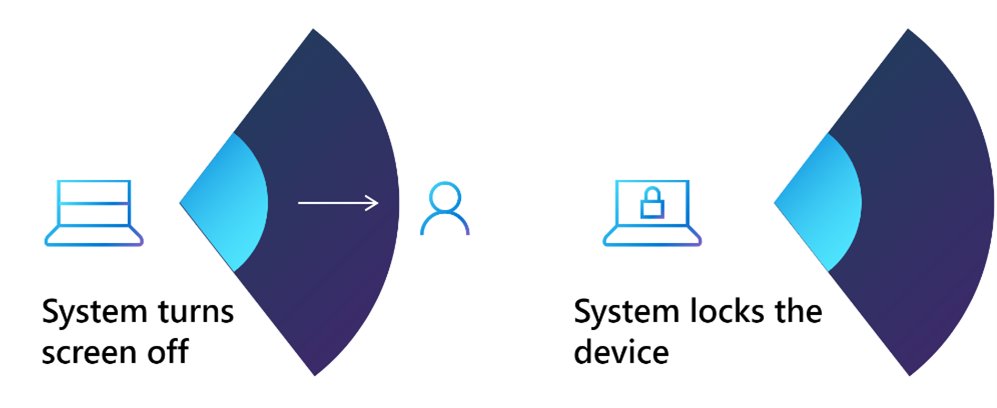
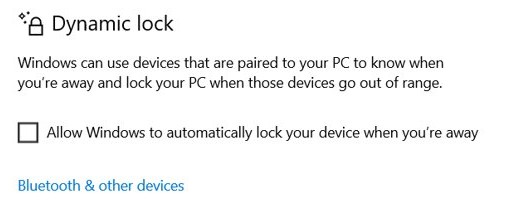
Dynamic lock watches the Bluetooth signal from your paired phone. A screen saver can also lock the PC when it starts, so remove it here if you do not want one at all.
- Select Start > Settings > Accounts > Sign-in options.
- Find Dynamic lock: on Windows 11 it sits under Additional settings, and on Windows 10 it is further down the same page.
- Turn Dynamic lock off.
- Select Settings > Personalization > Lock screen, then select Screen saver under Related settings. The path is the same on Windows 11 and Windows 10.
- Choose (None) in the Screen saver list and select OK.
You can change the screen saver later if you want one back, then clear its sign-in box with the next section.
Disable screensaver lock
Use this if you want to keep a screen saver running but no sign-in when it ends. The same dialog controls both Windows 10 and Windows 11.
- Press Windows logo key + R.
- Type
control desk.cpl,,1and select OK to open Screen Saver Settings. - Clear the On resume, display logon screen checkbox.
- Raise the Wait time if the screen saver starts too soon.
- Select Apply, then OK.
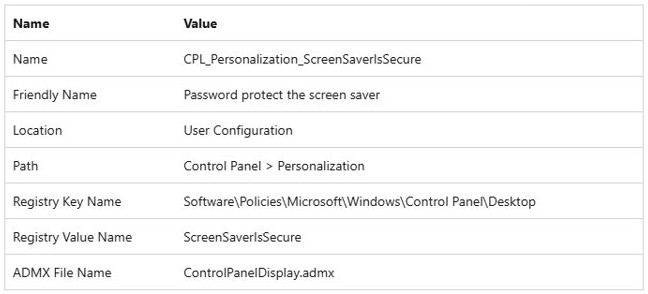
A greyed-out checkbox means a policy controls it. The Password protect the screen saver policy disables that option, and Step 4 shows where to find it.
Step 2: Modify sign-in options
This setting decides whether Windows asks for your password, PIN or Windows Hello when you return to the PC.
On Windows 11
- Select Start > Settings > Accounts > Sign-in options.
- Scroll to Additional settings.
- Open the list next to If you've been away, when should Windows require you to sign in again?
- Choose Never if it is listed, or otherwise the longest time offered.
On Windows 10
- Select Start > Settings > Accounts > Sign-in options.
- Find Require sign-in.
- Open the list under it.
- Choose Never if it is listed, or otherwise the longest time offered.
A work or school PC may hide this list or limit the choices, because a domain policy decides whether users can change this delay.
Step 3: Tweak power settings
A short timeout sends the PC to sleep, and the sign-in rule then applies when it wakes. Longer timeouts keep the session open, and Never stops the timeout entirely. A laptop on battery will drain faster with Never, so consider using it only when plugged in.
On Windows 11
- Select Start > Settings > System > Power & battery.
- Expand Screen, sleep & hibernate timeouts (Screen and sleep on earlier builds).
- Set Turn my screen off after to a longer time or Never.
- Set Make my device sleep after to a longer time or Never, for battery and plugged-in use.
On Windows 10
- Select Start > Settings > System > Power & sleep.
- Set the screen list, such as On battery power, turn off after, to a longer time or Never.
- Set the sleep list, such as On battery power, PC goes to sleep after, to a longer time or Never.
- Repeat for the plugged-in lists on a laptop.
Screen timeouts are separate from the lockscreen timeout, which only controls how long the display stays on once the PC is already locked.
How to turn off lock on leave in Windows 11
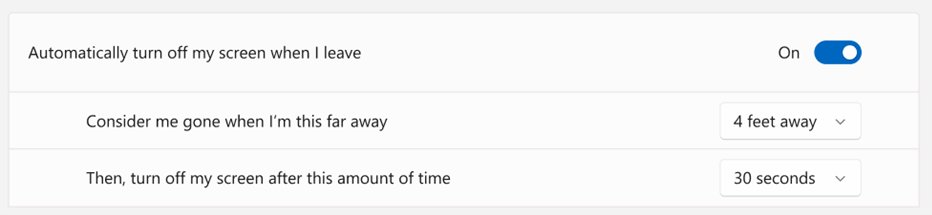
Some Windows 11 laptops have a presence sensor that turns the screen off when you leave, which locks the device shortly afterwards. If the sensor is missing, these settings do not appear.
- Select Start > Settings > System > Power & battery > Screen and sleep.
- Turn Automatically turn off my screen when I leave off.
- Select More options next to it if you want to keep the feature but change it.
- Turn Lock my device when I leave while an external display is connected off if you dock the laptop.
When presence sensing is on, the shorter timeout wins. A screen timeout of Never with lock on leave set to 2 minutes still turns the screen off after 2 minutes.
Step 4: Use local Group Policy Editor
Use policies when a setting keeps changing back or is greyed out. These policies are listed for the Pro, Enterprise and Education editions, so Windows Home users should stay with the Settings steps above.
- Press Windows logo key + R, type
gpedit.mscand select OK. - Go to Computer Configuration > Windows Settings > Security Settings > Local Policies > Security Options.
- Open Interactive logon: Machine inactivity limit, set Machine will be locked after to
0and select OK. - Go to User Configuration > Administrative Templates > Control Panel > Personalization.
- Set Password protect the screen saver to Disabled.
- Go to Computer Configuration > Administrative Templates > System > Power Management > Sleep Settings.
- Set Require a password when a computer wakes (plugged in) and Require a password when a computer wakes (on battery) to Disabled.
- Restart the PC, because the inactivity limit only takes effect after a restart.
A value of 0 or blank disables the inactivity limit, so the session is never locked after any idle period.
Do not display the lock screen policy in Windows 10 and 11
This policy is often suggested for auto lock problems, but it does not stop locking. It only skips the picture screen that appears before you sign in. Enabled, your PC still locks and shows your user tile instead.
| Policy | Path | What it changes |
|---|---|---|
| Do not display the lock screen | Computer Configuration > Administrative Templates > Control Panel > Personalization | Skips the lock screen picture; the PC still locks |
| Enable screen saver | User Configuration > Administrative Templates > Control Panel > Personalization | Disabled, screen savers do not run and users cannot change them |
| Password protect the screen saver | User Configuration > Administrative Templates > Control Panel > Personalization | Disabled, no screen saver can have password protection |
| Configure dynamic lock factors | Computer Configuration > Administrative Templates > Windows Components > Windows Hello for Business | Enabled by an administrator, it pushes Dynamic lock to the PC |
Step 5: Registry tweaks
The registry holds the values behind the screen saver and inactivity settings, which helps when Group Policy Editor is not available. A wrong edit can cause problems, so change only the values below and save each key first with File > Export.
- Press Windows logo key + R, type
regeditand select OK. - Go to
HKEY_LOCAL_MACHINE\SOFTWARE\Microsoft\Windows\CurrentVersion\Policies\System. - Set the DWORD value
InactivityTimeoutSecsto0, or leave it absent if it is not there. - Go to
HKEY_CURRENT_USER\Control Panel\Desktop. - Set the string value
ScreenSaverIsSecureto0to remove the password on resume. - Set the string value
ScreenSaveActiveto0if you want no screen saver at all. - Restart the PC.
Check HKEY_CURRENT_USER\Software\Policies\Microsoft\Windows\Control Panel\Desktop as well. Values there come from policy and take precedence over the ones you just changed, so on a managed PC ask your administrator.
How to test if auto lock is off on Windows
Run this test when you can leave the PC alone for a while, with your work saved.
- Save your work and carry your phone out of Bluetooth range if Dynamic lock used to catch you.
- Leave the keyboard and mouse untouched for longer than the delay that used to lock the PC.
- Move the mouse when you return.
- Check that the desktop appears with no sign-in prompt.
- Press Windows logo key + L to confirm you can still lock the PC yourself, then sign back in.
How to turn auto lock back on in Windows 11 and Windows 10
Restore a lock when the PC moves somewhere public. You can also lock your Windows 11 PC automatically with more options than these basics.
- Press Windows logo key + R, type
control desk.cpl,,1and select OK. - Pick a screen saver, set a Wait time in minutes and tick On resume, display logon screen.
- Select Settings > Accounts > Sign-in options and turn Dynamic lock on.
- Choose a shorter time under If you've been away, when should Windows require you to sign in again? or Require sign-in.
- Set any policy you changed in Step 4 back to Not Configured, then restart.
Windows computer keeps locking after you change the settings
If the lock comes back, one of these causes is usually still in place.
Windows computer keeps locking at the same interval
The machine inactivity limit or a screen saver policy still applies, and policies override your own settings.
- Check Interactive logon: Machine inactivity limit in
gpedit.msc. - Look for
InactivityTimeoutSecsin the registry path from Step 5. - Look for values under
HKEY_CURRENT_USER\Software\Policies\Microsoft\Windows\Control Panel\Desktop. - Set the limit to
0and restart the PC, because the change needs a restart.
Why does my screen lock so quickly?
A short screen saver Wait time, or a short sleep timeout, starts the lock sooner than you expect.
- Open Screen Saver Settings with
control desk.cpl,,1and check the Wait time. - Open the power settings from Step 3 and raise both timeouts.
- Turn off Automatically turn off my screen when I leave on a laptop with a presence sensor.
- Test again with the steps above.
Why are my lock screen settings locked?
Your organisation or a local policy manages them, which greys out controls and can hide lists.
- Select Settings > Accounts > Access work or school to see whether the PC is managed.
- Ask your administrator before changing anything on a work PC.
- On your own PC, open
gpedit.mscand set the policies in Step 4 to Not Configured. - Restart the PC and check the settings again.
Laptop gets locked automatically when you step away
Dynamic lock or presence sensing is still on. Dynamic lock needs the Bluetooth signal to fall and the PC to be idle.
- Confirm Dynamic lock is off under Sign-in options.
- Confirm Automatically turn off my screen when I leave is off under Screen and sleep.
- Check Lock my device when I leave while an external display is connected under More options if you use a dock.
Is it safe to turn off auto lock on Windows?
Turn off auto lock only on a PC that stays in a private place. An unlocked session is open to anyone who sits down at it. Microsoft advises a short auto lock for devices in public areas and accepts that locking can hinder productivity where only trusted people have access. On a shared or portable PC, keep a long delay rather than none.
Windows auto lock FAQ
How do I stop my PC from locking automatically?
Turn off Dynamic lock under Settings > Accounts > Sign-in options, clear On resume, display logon screen in Screen Saver Settings, and raise your screen and sleep timeouts. If it still locks, check the Interactive logon: Machine inactivity limit policy in Group Policy.
Why does my computer go to lock screen?
Your computer goes to the lock screen because a trigger fired: Dynamic lock, a password-protected screen saver, a sign-in rule on waking, presence sensing, or an inactivity policy. Each one works independently, so you need to find and turn off the specific one affecting you.
How do I prevent the lock screen from appearing?
Enable the Do not display the lock screen policy under Computer Configuration > Administrative Templates > Control Panel > Personalization. This skips only the picture screen, and your PC still locks and shows your user tile, so use the other settings in this guide to stop locking itself.
How do I turn off auto lock on a Dell or HP laptop?
Dell and HP laptops use the same Windows settings as any other PC, so start with Sign-in options and Screen Saver Settings. Laptops with a presence sensor also need Automatically turn off my screen when I leave turned off under Screen and sleep.
Does locking Windows stop processes?
No. Locking leaves your session active and only sends you to the sign-in screen, so programs keep running. Sleep is different, because the PC stops working until it wakes. Set sleep to Never if a long download or render needs to finish.
Why should I lock my computer?
Locking stops other people from using your open session when you step away. Microsoft describes the auto lock policy as a way to prevent unauthorized access when someone leaves without locking the desktop, which matters most in shared or public spaces.
Will Windows key + L still lock my computer after turning off auto lock?
Yes. Pressing Windows logo key + L locks the PC manually whatever your automatic settings are. You can also lock your computer screen with other methods, such as the Ctrl + Alt + Delete security screen.