To enable Intel Optane memory in Windows 11, set the BIOS to Intel RST mode with UEFI boot, install the Intel RST driver for your platform, then turn on acceleration from the Intel Optane Memory tab of the Intel Optane Memory and Storage Management app.
Intel has discontinued every Optane memory module and ended interactive support, so this guide also covers which PCs can still use it, how to check it is active, how to turn it off, and fixes for the common errors.
The fastest way to enable Intel Optane memory on a supported PC
This works only on an 8th, 9th, 10th or 11th Gen Intel platform whose BIOS supports Optane. Back up the drive you plan to accelerate first.
- Update the motherboard or laptop BIOS to the latest version from your system vendor.
- In the BIOS, set SATA mode to Intel RST (it may read Intel RST Premium with Intel Optane), boot mode to UEFI, and CSM to disabled.
- Install the Intel RST driver for your platform: 17.11.0.1000 for 8th and 9th Gen, or 18.6.1.1016 for 10th and 11th Gen.
- Install the Intel Optane Memory and Storage Management app from the Microsoft Store.
- Open the app and select the Intel Optane Memory tab on the left.
- Enable acceleration for your slower drive from that tab, then restart the PC when the app asks you to.
If the BIOS was in AHCI or Legacy mode when Windows was installed, read the preparation section first. Changing those settings under an installed copy of Windows means a reinstall.
Understanding Intel Optane Memory
Intel Optane memory is a small, fast module that sits between the processor and a slower drive, such as a SATA hard drive, SSHD or SATA SSD. It keeps frequently used data and programs closer to the processor so the PC responds faster.
| Question | What Intel says |
|---|---|
| What it speeds up | Booting, searching and finding files, saving large files, and launching apps, compared with the same PC on a hard drive alone |
| Does it replace the main drive? | No. It accelerates an existing slower drive, which can be the boot drive or a secondary drive |
| Does it replace RAM (DRAM)? | No. It is a storage accelerator, not system memory |
| M Series (Optane Memory, M10) | A standalone M.2 module paired with a separate SATA drive |
| H Series (H10, H20) | Optane media and Intel QLC 3D NAND on one M.2 device, sold only inside complete systems |
| Pinning | An option in the Intel app's Optane pages that needs a 32GB module; on smaller modules it is grayed out |
| Is it still sold? | No. End of life: Optane Memory Series on August 5, 2019, M10 on January 13, 2021, H10 and H20 on September 8, 2022 |
| Is it still supported? | Interactive support ended on May 29, 2024 (Optane Memory Series) and March 15, 2024 (M10). The 5-year warranty from date of sale is unchanged |
Source: Intel's Optane Memory M Series information page and End of Interactive Support notice.
System Requirements
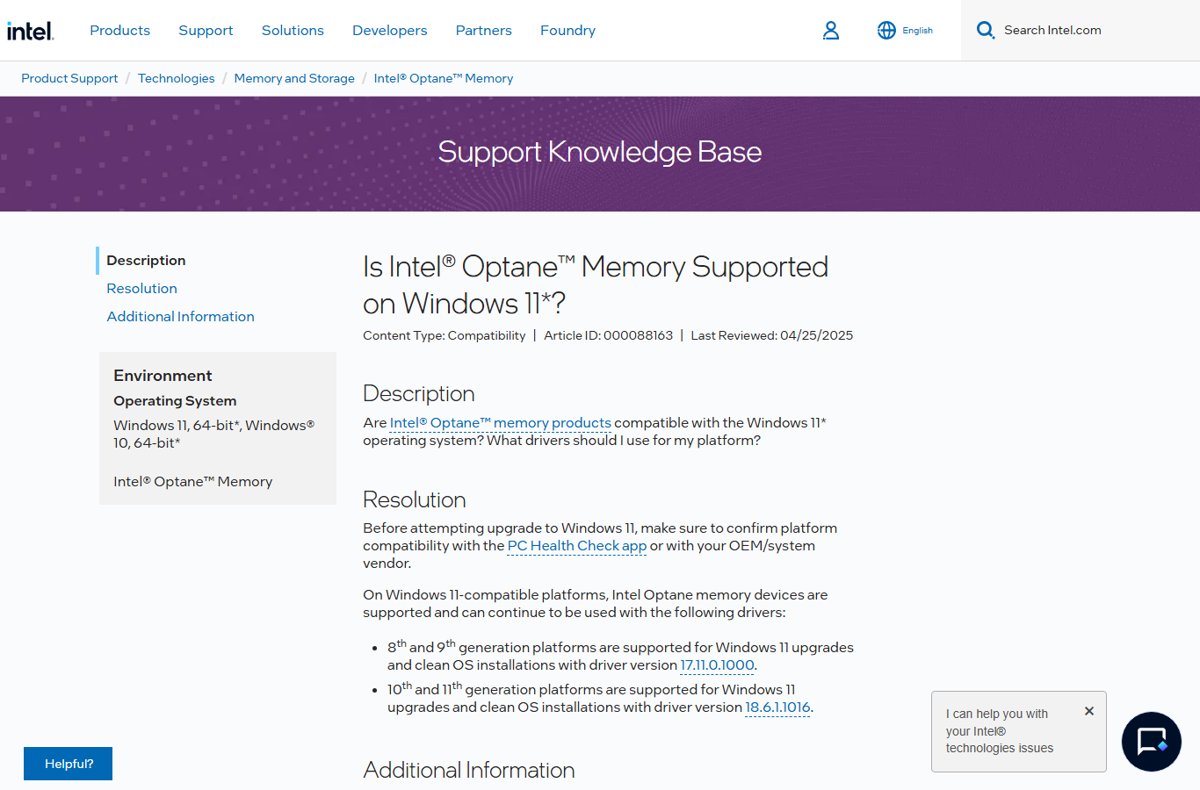
Windows 11 support depends on your processor generation. Confirm the PC meets Windows 11 requirements with PC Health Check or your system vendor before you upgrade.
| Your platform | Optane on Windows 11? | What to use |
|---|---|---|
| 7th Gen Intel Core | No. 7th Gen is not supported on Windows 11 | Stay on Windows 10 with RST 16.8.3.1003 and the legacy apps |
| 8th or 9th Gen Intel Core (Z390, Z370, H370, B360, B365, Q370) | Yes, upgrade or clean install | Intel RST driver 17.11.0.1000; BIOS update may be needed |
| 10th or 11th Gen Intel Core | Yes, upgrade or clean install | Intel RST driver 18.6.1.1016; 11th Gen mobile (PCH LP) needs Intel VMD |
| 12th Gen with Optane Memory or M10 | No | RST 19.0 and later dropped these modules |
| 12th Gen with H10 or H20 | Yes | Intel RST driver 19.0; check with the system vendor |
| 13th Gen and later | No | No Optane memory product is compatible |
| Core X-series (X299) or Xeon E3 v6 | Boot drive only | Secondary data drive acceleration is not supported |
Other hard requirements: Windows 11 or Windows 10 64-bit, a motherboard BIOS with Optane support, the drive to accelerate set up as a Basic disk with a GPT partition style, and the module in the M.2 slot the board designates for Optane. See Intel's Windows 11 support article and platform support list.
Preparing to Enable Intel Optane Memory
Almost every enabling error traces back to one of these settings. Do them in order, and back up your data before you start.
- Back up the drive you plan to accelerate. Enabling and disabling changes how the drive is presented to Windows.
- Update the BIOS. Older releases may lack the Intel RST pre-OS UEFI driver version 15.x or later that Optane needs.
- Check the board manual for shared lanes. Some M.2 and SATA ports share data lines, and some boards support Optane in only one M.2 slot.
- Open the BIOS and set SATA mode to Intel RST or Intel RST Premium with Intel Optane, not AHCI.
- Set boot mode to UEFI and disable CSM. Legacy mode does not support Optane.
- For an M Series module, enable Remapping for the M.2 port holding it. H Series devices need remapping disabled.
- In Windows, press Windows + R, type
msinfo32, and confirm a 64-bit edition of Windows 11 or 10. - Press Windows + X, open Disk Management, and confirm the target drive is Basic and GPT, with at least 5 MB of unallocated space at the very end of the boot drive.
- Confirm the Optane module itself shows no partitions or volumes. Its whole capacity must be unallocated.
SATA mode and boot mode cannot be switched under an installed copy of Windows without a reinstall. To move an existing MBR installation to GPT, follow Intel's Legacy to UEFI conversion article.
Enabling Intel Optane Memory in Windows 11
On 8th Gen and later platforms, Intel's RST installer (17.9.1.1009 and later) configures the BIOS where applicable, installs the driver, removes the legacy apps, and starts the Microsoft Store download of the new app.
- Get the Intel RST driver for your platform from your system vendor or Intel: 17.11.0.1000 for 8th and 9th Gen, 18.6.1.1016 for 10th and 11th Gen.
- Run the installer and restart when it finishes.
- Install Intel Optane Memory and Storage Management from the Microsoft Store if the installer did not add it.
- Open the app from the Start menu.
- Select Intel Optane Memory in the left pane.
- Enable acceleration and pair the module with the slower drive you want to speed up.
- Restart the PC when prompted so acceleration takes effect.
The older Intel Optane Memory and Intel Rapid Storage Technology apps reached end of life with the RST 17.8 package. Use them only on a 7th Gen PC, which cannot run Windows 11 anyway. The full screen-by-screen flow is in Intel's Optane Memory user guides.
How to check Intel Optane memory is working
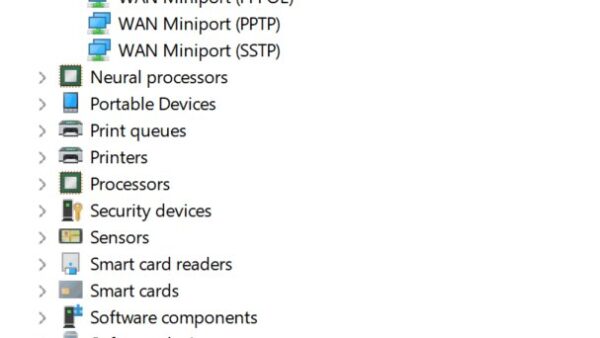
- Press Windows + X, then press M to open Device Manager.
- Expand Disk drives.
- Look for one combined Intel Optane volume instead of the module and the hard drive listed separately. That means acceleration is active.
- Open the Intel Optane Memory and Storage Management app and select Manage to see the Optane volume in the storage overview.
Once the module is paired, Device Manager no longer lists it as a separate disk. If you still see two separate drives, acceleration is not on.
How to disable or turn off Intel Optane memory
Disable acceleration before you remove the module, reinstall Windows, or move the drive to another PC. Back up first.
- Open Intel Optane Memory and Storage Management.
- Select the Intel Optane Memory tab on the left.
- Click Disable.
- Click Disable again to confirm. The process starts.
- Click Restart when it completes.
With the legacy Intel Optane Memory app, use the Setup tab and Disable. With the legacy Intel RST app, click the Disable link on the Status tab and confirm with Yes. If no app is installed, disable it in the BIOS: open the Intel Rapid Storage Technology section, select the Optane volume, and choose Reset to non-Optane or Deconcatenate. On an HP or other laptop with a factory-installed H Series module, Intel advises working with the system vendor first, because the BIOS may carry custom settings.
Troubleshooting Common Issues
Intel Optane Memory Module Not Detected
The module holds old metadata from a previous volume, sits in the wrong M.2 slot, or the BIOS does not see it.
- Enter the BIOS and check Peripherals or Intel Rapid Storage Technology. The module may be listed as INTEL MEMPEK.
- If it is missing in the BIOS, reseat it in the M.2 slot the board manual names for Optane. If it still does not appear, the module may be faulty.
- If the BIOS sees it but Windows does not, open the app, click Manage, select the module, and click Clear Metadata.
- If the app option is not available, use the BIOS option in the Intel RST menu, such as Reset to Non-Optane, Reset Metadata, or Convert to Non-RAID.
- Restart and check Device Manager again.
"No Compatible Disk", "no valid disk pairs" or "Your System Is Not Intel Optane Memory Ready"
The software cannot pair the module with a drive because of a BIOS, slot or driver issue.
- Confirm with the system vendor that the PC is Optane-ready and the module is actually installed. Some PCs ship the app without the hardware.
- Check that Remapping is enabled for the M.2 socket holding an M Series module.
- Install the latest Intel RST driver your system vendor supplies.
- Clear the module's metadata as described above if it was used in another volume.
"Error Enabling Intel Optane Memory" or error 0xA008002A, 0xA008002B or 0xA008002D
The BIOS is in Legacy mode, CSM is on, the drive is MBR, or the BIOS lacks Optane support.
- Install the latest BIOS from the platform vendor.
- Confirm SATA mode is still Intel RST Premium and remapping is enabled.
- Set boot mode to UEFI and disable CSM.
- Convert an MBR drive to GPT with Intel's Legacy to UEFI conversion steps, then try enabling again.
Unable to enable acceleration in the software
The target drive is Dynamic or MBR, lacks free space at the end, or the module still holds partitions.
- Open Disk Management and confirm the target drive is Basic and GPT.
- Shrink the last partition to leave at least 5 MB unallocated at the very end of the boot drive.
- Delete any partitions on the Optane module so its capacity is fully unallocated.
- Try enabling again from the Intel Optane Memory tab.
Device Manager sees the module but the Intel app does not
The M.2 port is not remapped to the Intel RST driver, or SATA mode is AHCI.
- Enable Remapping for the PCIe M.2 port that holds the module.
- Set SATA mode to a mode that supports Optane, not AHCI.
- Set UEFI boot with CSM disabled.
- Reinstall Windows, since changing SATA or boot mode under an existing installation requires it.
The app says there are no supported devices on a 12th or 13th Gen PC
Intel dropped Optane Memory and M10 support in RST 19.0, and no Optane memory works on 13th Gen or later.
- Press Windows + R, type
msinfo32, and read the Processor line to find your CPU generation. - If the module is an Optane Memory or M10 on 12th Gen or later, stop here. It cannot be enabled on that platform.
- Uninstall the app from Settings > Apps if you do not need it for RAID.
Performance not improving after enabling
Acceleration is not actually active, or the paired drive is not the slow SATA drive Optane is designed to speed up.
- Confirm in Device Manager that one combined Optane volume is listed under Disk drives.
- Confirm the accelerated drive is a SATA hard drive, SSHD or SATA SSD, the drive types Intel lists for Optane acceleration.
- Open the app and check Manage to confirm which drive the module is paired with.
- On a 32GB module, pin the apps you care about from the Intel Optane Memory area of the app.
For other codes, check Intel's error code list. Intel no longer answers tickets, chat or phone calls for Optane Memory and M10 modules.
Frequently Asked Questions
How do I enable Intel Optane memory?
Set the BIOS to Intel RST mode with UEFI boot and CSM off, install the Intel RST driver for your platform, then enable acceleration from the Intel Optane Memory tab of the Intel Optane Memory and Storage Management app and restart.
Can I enable Intel Optane memory in Windows 11?
Yes, on 8th to 11th Gen Intel platforms. Use RST driver 17.11.0.1000 for 8th and 9th Gen or 18.6.1.1016 for 10th and 11th Gen. 7th Gen PCs cannot run Windows 11, and 13th Gen PCs cannot use any Optane memory module.
How do I disable Intel Optane memory?
Open the Intel Optane Memory and Storage Management app, select the Intel Optane Memory tab, click Disable, confirm with Disable, then click Restart. Without the app, use Reset to non-Optane or Deconcatenate in the BIOS Intel RST section.
How do I disable Intel Optane memory on an HP computer?
Use the same Disable button in the Intel Optane Memory and Storage Management app. HP laptops often ship with an H Series module and custom BIOS settings, so Intel recommends contacting the system vendor before disabling acceleration or reinstalling Windows.
How do I turn off Intel Optane memory before removing it?
Disable acceleration in the Intel app and restart before you pull the module. If a paired module was already removed without being disabled, Intel suggests resetting it with the Reset-to-non-Optane option under the BIOS Intel Rapid Storage Technology menu.
How do I check if Intel Optane memory is working?
Press Windows + X, press M to open Device Manager, and expand Disk drives. An active setup shows one combined Intel Optane volume instead of the module and the slower drive as two separate disks.
Does my computer have Intel Optane memory?
Check Device Manager under Disk drives for an Intel Optane volume, or look for a module named INTEL MEMPEK in the BIOS storage list. If neither appears, the Intel Optane Memory and Storage Management app can be safely uninstalled.
How do I set up Intel Optane memory on a new PC?
Before installing Windows, set SATA mode to Intel RST, boot mode to UEFI and CSM to disabled. Install Windows in UEFI mode so the drive is GPT, leave 5 MB unallocated at the end, then install the RST driver and the Intel app.
What does Intel Optane memory do?
It caches frequently used data and programs from a slower SATA hard drive, SSHD or SSD so the PC boots, launches apps and finds files faster. It does not add system RAM and does not replace the main drive.
Is Intel Optane memory discontinued?
Yes. Intel ended production of the Optane Memory Series in 2019, M10 in 2021, and H10 and H20 in 2022. Interactive support for the Optane Memory Series and M10 ended in 2024, but the 5-year warranty from date of sale still applies.
Conclusion
Enable Optane on Windows 11 only if you already own a module and an 8th to 11th Gen board that supports it, and your Windows install is already in UEFI with Intel RST mode. The modules are discontinued, Intel no longer offers interactive support, and fixing a wrong SATA or boot mode means reinstalling Windows. On 12th Gen and later PCs, Optane Memory and M10 modules cannot be enabled at all.