To install a custom cursor in osu!, open the skin's .osk file with osu! (or drag it into the game window), then pick that skin under Options > Skin > Current skin.
This guide also covers swapping only the cursor inside the skin you already use, the cursor settings in osu!, building your own cursor.png, sharing it as an .osk, and fixing an old cursor that refuses to go away.
How do you install a complete custom cursor skin?
In the osu! rhythm game, a custom cursor arrives as part of a skin. The quickest route is an .osk file, which is simply an archive that holds one skin folder.
- Save the skin's .osk file somewhere you can find it, such as your Downloads folder.
- Double-click the .osk file so it opens with osu!, or drag it onto the open osu! window.
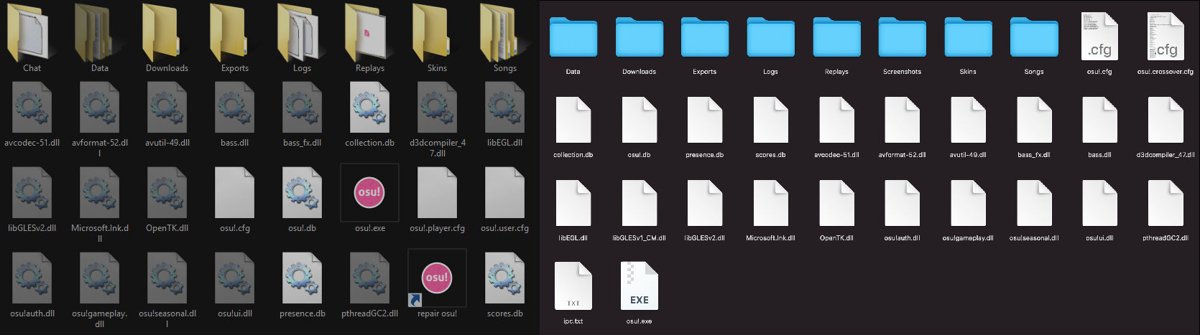
- If the skin came as a .zip or .rar instead, extract it and move the extracted folder (the one that contains skin.ini) into the Skins folder of your osu! install.
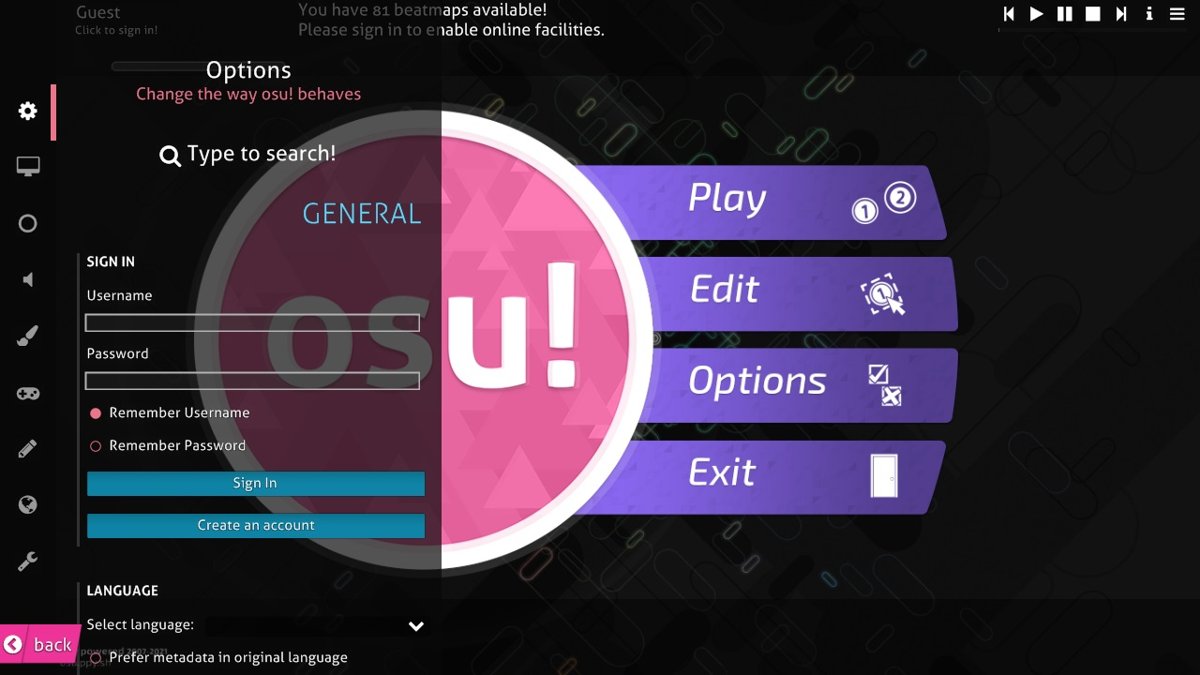
- In osu!, press Ctrl + O to open the options sidebar.
- Scroll to the Skin section and choose the new skin from the Current skin dropdown.
- Move the mouse over the menu to see the new cursor right away.
The Current skin list shows folder names from the Skins folder, not the name written inside skin.ini. On Windows, the default osu! folder is C:\Users\<Username>\AppData\Local\osu!, and the Skins folder sits inside it.
What is an osu! custom cursor?
An osu! custom cursor is a set of PNG images inside a skin folder that replace the default cursor osu! draws in its menus and during play. The game reads them by exact file name, so the names below matter more than the artwork.
| File name | What it draws | Default behaviour |
|---|---|---|
| cursor.png | The main cursor image | Rotates constantly and expands when you click; drawn from its centre |
| cursormiddle.png | A centre dot drawn on top of cursor.png | Never rotates or expands; its presence also switches osu! to a longer trail |
| cursortrail.png | The trail left behind as the cursor moves | Drawn underneath cursor.png; rotation is controlled by CursorTrailRotate |
| cursor-smoke.png | The smoke drawn while you hold the smoke key | The smoke key is C by default |
| cursor-ripple.png | The ripple shown on clicks | Only appears when Cursor ripples is enabled in the Input options |
| [email protected] (and other @2x files) | High-definition copies at double the pixel dimensions | Preferred at window heights of 800 pixels and above, with the normal file as fallback |
Only cursor.png is needed for a visible change. Any cursor file you leave out falls back to the default osu! image, and all images must be PNG files.
The official element list gives no fixed pixel size for cursor images. Design at the size you want to see in game, make the @2x copy exactly double, and fine-tune with the Cursor size slider.
Full cursor skin or cursor-only swap: which osu! route fits you
| Your situation | Do this | Why |
|---|---|---|
| You like a whole skin, cursor included | Install the full .osk skin | One import, and the cursor matches the rest of the skin's look |
| You like your current skin but want another cursor | Copy only the cursor files into your current skin folder | Every other element of your skin stays exactly as it was |
| You want a cursor nobody else has | Draw your own cursor.png and drop it into a skin folder | osu! accepts any PNG named correctly |
| You want to give your cursor to a friend | Export a cursor-only skin as .osk | The friend imports it with a double-click |
| Beatmaps keep swapping in their own cursor | Turn on Always use skin cursor | Your skin's cursor then wins over beatmap skins |
How do you change only the osu! cursor without changing the rest of a skin?
To keep your favourite skin and only change its cursor, copy the cursor images from another skin into your current skin's folder. Back up the originals first so the old cursor is one paste away.
- Press Ctrl + O, scroll to Skin, and make sure your usual skin is selected under Current skin.
- Click Open current skin folder to open that skin's folder in File Explorer.
- Create a new folder named
cursor-backupand move the existing cursor files (cursor.png, cursormiddle.png, cursortrail.png and their @2x copies) into it. - Open the folder of the skin that has the cursor you want, or the folder where your own cursor art is saved.
- Copy its cursor files, including any @2x versions, into your current skin folder.
- Back in osu!, press Ctrl + Alt + Shift + S to reload the skin without restarting the game.
osu! ignores subfolders inside a skin folder, so the backup folder does not interfere. If the new cursor has no cursormiddle.png but your old skin did, leave the old one out, or the old centre dot stays on screen.
Which osu! settings control a custom cursor?
Open the options sidebar with Ctrl + O (or O on the main menu), then type a setting name to jump straight to it. These are the settings that change how your custom cursor looks and behaves.
| Setting | Where it is | What it does | Default |
|---|---|---|---|
| Current skin | Options > Skin | Picks the skin, and therefore the cursor, osu! loads | Default |
| Always use skin cursor | Options > Skin | Keeps your skin's cursor even on beatmaps that ship their own | Off |
| Ignore all beatmap skins | Options > Skin | Uses your skin over every beatmap skin, cursor included | Off |
| Cursor size | Options > Skin | Scales the cursor up or down | 1x |
| Automatic cursor size | Options > Skin | Resizes the cursor to match each beatmap's circle size | Off |
| Cursor ripples | Options > Input > Mouse | Shows a small ripple effect on clicks | Off |
Optional cursor behavior in skin.ini
Four skin.ini commands change how the cursor moves. Put them under the [General] heading of the skin.ini file in your skin folder, and type them with exact capitals, because osu! treats skin.ini commands as case sensitive.
| Command | Value 1 | Value 0 | Default |
|---|---|---|---|
| CursorRotate | cursor.png spins constantly | cursor.png stays still | 1 |
| CursorExpand | cursor.png grows when you click | No size change on click | 1 |
| CursorCentre | The image's centre sits on the pointer position | The image's top-left corner sits on the pointer position | 1 |
| CursorTrailRotate | cursortrail.png spins | The trail stays still | Not stated consistently in the official docs; set it explicitly |
A cursor drawn as an arrow needs CursorCentre: 0 and CursorRotate: 0, or the arrow spins around its middle and clicks land off the tip. Reload with Ctrl + Alt + Shift + S after each edit.
How do you create an osu! cursor from scratch?
Any image editor that saves transparent PNG files can make an osu! cursor. Keep the canvas tight around the artwork, because osu! renders every pixel of an image, including empty ones.
- Create a square canvas with a transparent background in your image editor.
- Draw the cursor centred on the canvas, since osu! places cursor.png by its centre unless CursorCentre is 0.
- Export it as
cursor.png, then export a second copy at exactly double the width and height as[email protected]. - Optionally draw
cursortrail.pngthe same way, and addcursormiddle.pngif you want a centre dot and a longer trail. - Open the osu! Skins folder and create a new folder, for example
My Cursor, then save the PNG files into it. - Create a text file named
skin.iniin that folder with the lines[General],Name: My Cursor,Author: <your name>andVersion: 2.7. - In osu!, select the folder under Options > Skin > Current skin and press Ctrl + Alt + Shift + S after each change to the art.
Every element you do not draw falls back to the default osu! image, so a folder holding only cursor files is a working cursor-only skin. Avoid Version: latest in a skin you plan to share, because a future skin version can change how it displays.
How do you package and share a cursor-only skin?
osu! builds the .osk file for you. Clear out work files first, because osu! does not need .psd or .xcf files and they inflate the download.
- Remove everything from the skin folder except the cursor PNG files and skin.ini.
- Press Ctrl + O and select the cursor skin under Current skin.
- Click Export as .osk in the Skin section.
- Wait for osu! to open the folder that holds the exported file; it lands in the Exports folder of your osu! install.
- Share the file named after the skin's
Namevalue, such asMy Cursor.osk.
The person receiving it installs it by opening the .osk with osu!, exactly like a full skin. A cursor-only skin shows default osu! art everywhere else, so mention that in your post.
Quick installation checklist
Run through these checks once the skin is selected. Each one proves a different part of the install worked.
- Confirm the skin's folder name appears in Options > Skin > Current skin and is the one selected.
- Open the skin folder with Open current skin folder and confirm
cursor.pngsits directly in it, not in a subfolder. - Click Preview gameplay to watch the skin on a random beatmap played with the Auto mod.
- Move and click the mouse on the main menu: the cursor should show your new image, with spin and click growth matching your skin.ini settings.
- Play a beatmap known to carry its own skin; if its cursor replaces yours, turn on Always use skin cursor.
Why is osu! still showing the old cursor?
The old cursor stays after you copy in new files
osu! loaded the skin before the files changed and has not reloaded it.
- Make sure the edited skin is the one selected under Current skin.
- Press Ctrl + Alt + Shift + S to reload the skin.
- If nothing changes, close and reopen osu!.
The old cursor shows at full-screen or high resolutions only
An old [email protected] is still in the folder, and osu! prefers @2x files at window heights of 800 pixels and above.
- Open the skin folder with Open current skin folder.
- Delete or replace the old
[email protected],[email protected]and[email protected]. - Reload the skin with Ctrl + Alt + Shift + S.
The old centre dot or trail remains on top of the new cursor
Leftover cursormiddle.png or cursortrail.png files from the previous cursor are still being drawn.
- Remove the leftover file from the skin folder, or replace it with a fully transparent PNG of the same name.
- Reload the skin with Ctrl + Alt + Shift + S.
The cursor changes back on certain beatmaps
Those beatmaps include their own skin, and beatmap cursors win by default.
- Press Ctrl + O and open the Skin section.
- Turn on Always use skin cursor.
- Turn on Ignore all beatmap skins as well if you want your whole skin on every map.
The new skin is missing from the Current skin list
The skin folder is nested one level too deep or sits outside the Skins folder.
- Open the Skins folder inside your osu! install.
- Move the folder that directly contains
skin.iniand the PNG files into Skins, not a parent folder that wraps it. - Reopen Options > Skin and choose it from Current skin.
How to restore the default osu! cursor
- Press Ctrl + O and scroll to Skin.
- To go back to stock osu!, choose Default under Current skin.
- To keep your skin but drop the custom cursor, click Open current skin folder and move the cursor files out, or put back the ones saved in
cursor-backup. - Press Ctrl + Alt + Shift + S to reload the skin.
Deleting cursor files from a skin brings back the default osu! cursor for those elements, because missing images always fall back to the defaults.
Does an osu! custom cursor change the Windows pointer?
No. An osu! cursor skin only replaces images that osu! draws inside its own window, so the Windows pointer on your desktop and in other apps stays the same. Skin files live in the osu! Skins folder and are read only by the game. To restyle the system pointer, change the cursor size and color in Windows Settings instead.
The reverse is also true: you can customize mouse buttons and the pointer on Windows 11 without affecting the cursor osu! shows in game.
Frequently asked questions about osu! custom cursors
How do you get a custom cursor in osu!?
Install a skin that contains the cursor by opening its .osk file with osu! or dragging it into the game. Then press Ctrl + O and choose the skin under Skin > Current skin. The new cursor appears immediately.
What is a custom cursor in osu!?
It is a set of PNG images, mainly cursor.png, cursortrail.png and cursormiddle.png, stored in a skin folder. osu! draws them in place of its default cursor in menus and gameplay, and leaves the Windows pointer untouched.
How does a custom cursor work in osu!?
osu! looks for cursor files by exact name in the selected skin folder. Files it finds replace the default images, and missing ones fall back to the defaults. skin.ini commands such as CursorRotate and CursorExpand control spin and click growth.
How do you use a custom cursor without changing your whole skin?
Copy only the cursor PNG files, including any @2x copies, into your current skin's folder through Options > Skin > Open current skin folder. Back up the old cursor files first, then press Ctrl + Alt + Shift + S to reload.
How do you remove the cursor trail in osu!?
Replace cursortrail.png in your skin folder with a fully transparent PNG of the same name, and do the same for [email protected] if it exists. Deleting the file is not enough, because osu! then falls back to the default trail.
How do you get a custom osu! cursor on a Mac?
The steps match Windows, but the default osu! folder on macOS is /Applications/osu!.app/Contents/Resources/drive_c/osu!. Put the skin folder in its Skins folder, then select it under Options > Skin > Current skin.
Can an osu! cursor be used as a cursor for Windows?
Not directly. osu! cursor skins are game assets read only by osu!, and Windows uses its own pointer settings. Change the Windows pointer through the Windows mouse settings instead.
How big should an osu! cursor be?
The official osu! element list sets no fixed size for cursor images. Design cursor.png at the size you want in game, make [email protected] exactly double, and adjust the Cursor size slider in Options > Skin.
The bottom line on osu! custom cursors
Import a full .osk skin when you like its whole look, and copy just the cursor files into your current skin when you only want a new pointer. Both routes keep the rest of osu! intact and are easy to undo, and turning on Always use skin cursor stops beatmaps from overriding whichever cursor you choose.

![Outlook: not all emails are showing in inbox [resolved]](https://techdows.com/wp-content/uploads/2026/10/Outlook-on-the-web-inbox-with-Focused-and-Other-tabs-and-the-Filter-menu.jpg)