A 1366×768 panel cannot show more pixels than it physically has, so the way to get a true 1920×1080 picture in Windows 11 is to connect a 1080p monitor, while NVIDIA graphics can render 1920×1080 and shrink it to fit the panel.
The sections below cover each route, what Intel graphics cannot do on a laptop screen, and fixes for missing resolutions, black borders and Remote Desktop scaling.
Get 1920×1080 resolution on 1366×768 screen in Windows 11/10
Check the list in Settings first, because a generic driver can hide modes the screen does support. If the list really stops at 1366 x 768, the panel is the limit and an external 1080p screen is the fix.
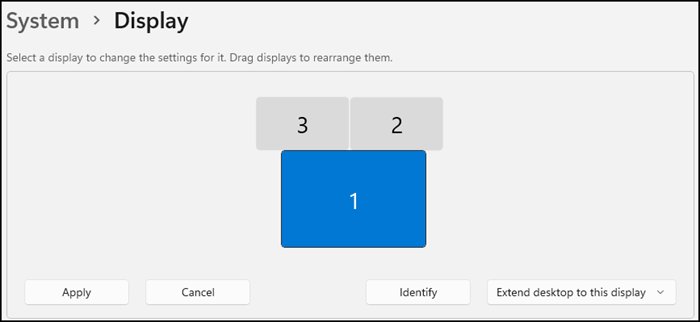
- Select Start > Settings > System > Display.
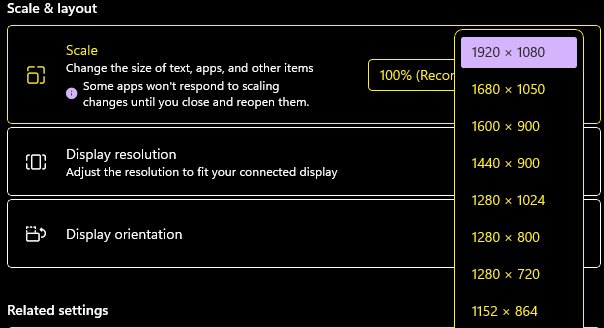
- Open the Display resolution list. If 1920 x 1080 appears, select it and keep the change.
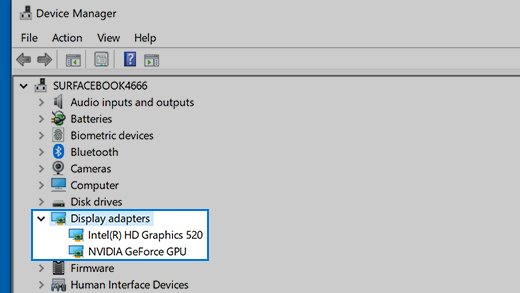
- If it does not appear, right-click Start, select Device Manager and expand Display adapters.
- If you see Microsoft Basic Display Adapter, install the manufacturer's driver through Windows Update, then check the list again.
- If the list still stops at 1366 x 768, connect a 1080p monitor or TV.
- Press Windows logo key + P and select Second screen only.
- Set the external display to 1920 x 1080 under Display resolution.
How to get 1920×1080 resolution on a laptop by graphics card
| Your setup | Route | What you get |
|---|---|---|
| Any PC with a video output and a 1080p monitor or TV | External display set to 1920 x 1080 | A true 1920×1080 picture with full sharpness |
| NVIDIA graphics, playing games | NVIDIA DSR in Manage 3D Settings | The game renders above the panel's resolution, then shrinks to fit |
| NVIDIA graphics, Windows desktop | Custom resolution in NVIDIA Control Panel | Works only if the screen accepts the mode during Test |
| Intel graphics, laptop screen | None in the Intel software | Intel says custom resolutions are not supported on internal displays |
| AMD graphics, laptop screen | AMD's own graphics software | Available options depend on your driver; the external display route always applies |
| Remote PC session on a small screen | mstsc /v:computer1 /w:1920 /h:1080 |
A 1920×1080 remote desktop that you can scale to fit the window |
Only the first row adds real detail. The others fit more onto the same 1,049,088 pixels, so small text is softer than on a true 1080p panel.
Why 1920 x 1080 resolution is not showing on a 1366×768 screen
Resolution measures how many pixels are on the screen. The two modes have almost the same shape, but 1920×1080 needs about twice as many pixels as the panel contains.
| Measure | 1366×768 | 1920×1080 |
|---|---|---|
| Horizontal pixels | 1,366 | 1,920 |
| Vertical lines | 768 | 1,080 |
| Total pixels | 1,049,088 | 2,073,600 |
| Width divided by height | About 1.78 | About 1.78 |
The Windows display settings list the modes the screen and graphics driver report. Microsoft advises keeping the mode marked (Recommended), and on a 1366×768 panel that is normally the highest entry.
Set display resolution to 1920 x 1080 on an external monitor
This is the only route that gives you 2,073,600 real pixels. A laptop can keep working with its own screen off, or use both screens side by side.
- Connect the monitor or TV with a suitable cable and turn it on.
- Press Windows logo key + P and select Second screen only or Extend.
- If nothing appears, open Settings > System > Display, expand Multiple displays and select Detect.
- Select the external display at the top of the Display page.
- Open the Display resolution list and select 1920 x 1080.
On Windows 10, you can change the resolution to 1920×1080 from the same Display settings. If the screen stays blank, secure or replace the cable and test the monitor on another PC.
Get 1920×1080 resolution for Windows 11 with NVIDIA DSR
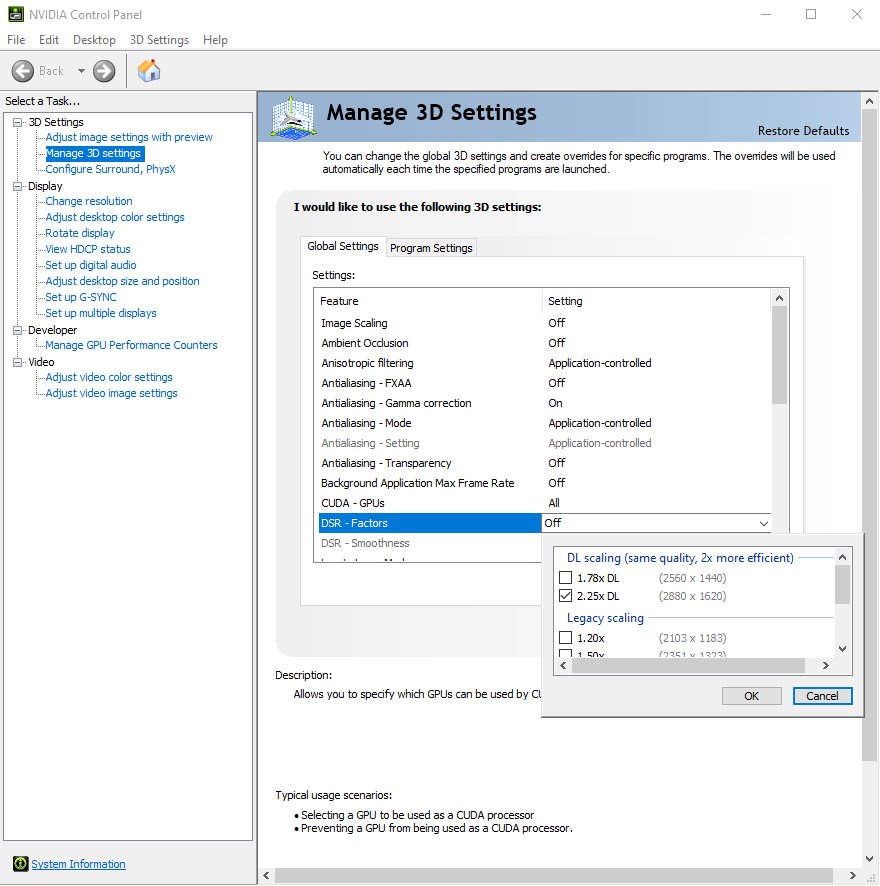
Dynamic Super Resolution renders a game at a higher resolution than the monitor supports, then scales the image back down to fit. It improves game detail and edge smoothness, not the panel's pixel count.
- Open NVIDIA Control Panel.
- Go to Manage 3D Settings and open DSR Factors.
- Select the scaling factors you want and apply the change.
- Use the slider below the scaling factors if the shrunken picture looks too soft or too sharp.
- Open the game's graphics settings and select the resolution closest to 1920 x 1080.
1920×1080 holds about 1.98 times as many pixels as 1366×768, so look for a factor near 2x. If DSR Factors is not in the list, this route is not available on that screen.
GeForce RTX cards can also select DLDSR in the same list, which NVIDIA says needs fewer input pixels for comparable quality.
Create a 1920 x 1080 custom resolution in NVIDIA Control Panel
This asks the screen to accept a mode it never advertised, so the test can fail. NVIDIA creates a custom resolution only if the change succeeds on the display.
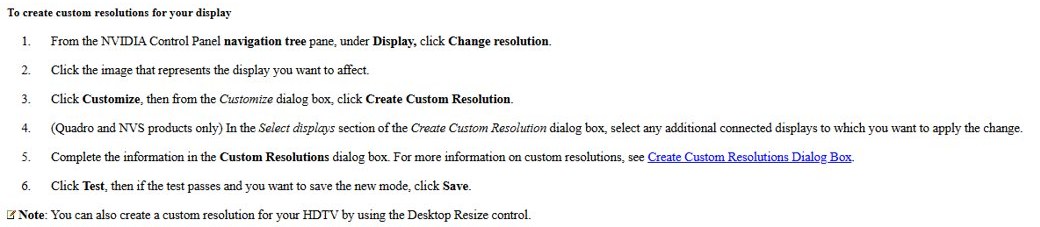
- Open NVIDIA Control Panel and, under Display, select Change resolution.
- Select Customize, then Create Custom Resolution.
- Enter 1920 in Horizontal pixels and 1080 in Vertical lines.
- Select Test.
- If the picture is correct, select Save and pick the mode in the Resolution list.
- If the screen goes blank, press nothing and wait for the previous mode to return.
A failed test means the panel did not accept that mode. You can also create and set a custom resolution with different timing options before you rule this route out.
Intel custom resolution not supported on internal displays
Intel integrated graphics cannot set 1920×1080 on a 1366×768 laptop screen through a custom resolution. Intel states that custom resolutions are not supported on internal displays because of hardware limits, and calls this expected behavior. It removed the option from Intel Graphics Command Center for those displays because earlier versions accepted the setting without applying it.
In Intel Graphics Command Center, select Display and use the Resolution list on the General tab to pick a listed mode. For 1920×1080 itself, connect a 1080p monitor.
Fit more on a 1366×768 screen in Windows 11
Many people want 1080p for the extra working space. These changes win back room on the existing panel without any driver tricks.
- Open Settings > System > Display.
- Under Scale & layout, open Scale and select 100%.
- In Microsoft Edge, press Ctrl + Minus sign (-) to zoom out on the current page.
- To change every site, open Settings and more > Settings > Accessibility and lower Page zoom.
Microsoft recommends the scale marked (Recommended), so raise it again if text becomes hard to read.
How to check screen resolution in Windows 11
- Select Start > Settings > System > Display.
- Select Advanced display.
- If you have several screens, choose the one you want at the top of the page.
- Read the current resolution and refresh rate under Display information.
On Windows 10, the same page is named Advanced display settings. A game running through DSR reports its chosen resolution in the game's own settings.
Change resolution back to 1366×768 in Windows 11
- Open Settings > System > Display.
- Select the mode marked (Recommended) in the Display resolution list.
- If the screen is blank, press Windows logo key + Ctrl + Shift + B to reset the graphics driver.
- If the blank screen stays, restart the PC.
- To remove the NVIDIA mode, open Change resolution, select Customize, select the custom mode and delete it.
Fix screen resolution problems in Windows 11
Windows 1920 x 1080 resolution not available on a 1080p monitor
Windows is using the generic display driver, or the cable or adapter is at fault.
- Open Device Manager and expand Display adapters.
- If Microsoft Basic Display Adapter is listed, check Windows Update for the manufacturer's driver.
- If Windows Update has none, install the driver from the manufacturer's website.
- Replace the cable and check the list again.
Screen resolution changes on its own
Microsoft points to a graphics driver that may need updating.
- Open Settings > Windows Update and select Check for updates.
- Install any display driver offered, then restart.
- Set the resolution again under Settings > System > Display.
How to fix 1920 x 1080 resolution after a driver update
The new driver changed the mode list or broke output.
- Press Windows logo key + Ctrl + Shift + B to reset the graphics driver.
- In Device Manager, right-click the display adapter and select Properties.
- On the Driver tab, select Roll Back Driver.
- If that option is unavailable, reinstall the display driver.
Monitor not displaying full screen in Windows 11
Microsoft notes that a mode below the panel's native resolution can look small, centered with black edges, or stretched. Setting the right mode fixes most cases.
Desktop is small and centered with black edges
The screen is running a lower mode with no scaling applied.
- Select the (Recommended) mode under Display resolution.
- If you need the lower mode on NVIDIA graphics, open NVIDIA Control Panel and select Adjust desktop size and position.
- Choose Aspect ratio to enlarge the picture while keeping its proportions.
- Apply the change.
Picture looks stretched
Full-screen scaling fills the screen and can distort the image.
- Open Adjust desktop size and position in NVIDIA Control Panel.
- Switch from Full-screen to Aspect ratio.
- Apply the change and check the result.
External monitor shows only part of the desktop
The monitor is not receiving a mode it can show in full.
- Set the external display to its (Recommended) mode.
- Press Windows logo key + Ctrl + Shift + B to reset the graphics driver.
- Secure the cable or try another one.
High DPI issues with Remote Desktop on Windows 11
The size and scale of a Remote Desktop session are controlled in the connection's .rdp file or on the mstsc command line. A small screen can also use this to work inside a full 1920×1080 remote desktop.
Remote desktop needs to be 1920×1080 on a smaller screen
By default, the session matches the local device's size.
- Open Run and enter
mstsc /v:computer1 /w:1920 /h:1080, using your PC's name in place of computer1. - For a saved connection, open its .rdp file in Notepad and set
desktopwidth:i:1920anddesktopheight:i:1080. - Add
smart sizing:i:1to scale the session to fit the window. - Save the file and connect by opening it.
Text and icons are too small in the session
The session scale does not suit the local display.
- Open the .rdp file in Notepad.
- Add
desktopscalefactor:i:150, or use another listed value, such as 125 or 200. - Save the file and reconnect.
- If the line stops working, change the scale in the remote PC's own Display settings, because Microsoft is deprecating this property.
Session does not resize with the window
Dynamic resolution is turned off for the connection.
- Open the .rdp file in Notepad.
- Set
dynamic resolution:i:1so the session follows the window size. - Save the file and reconnect.
1920 x 1080 resolution on a 1366×768 screen FAQ
What does 1920 x 1080 resolution mean?
It means the screen is 1,920 pixels wide and 1,080 pixels high. Microsoft lists this as Full HD. More pixels make a display sharper at the same physical size, which is why it looks crisper than 1366×768.
What resolution is 1920 x 1080?
It is Full HD, also called 1080p resolution. It has the same wide shape as 1366×768, at a width-to-height ratio of about 1.78, so moving between the two does not change the picture's proportions.
How much is 1920 x 1080 resolution?
It adds up to 2,073,600 pixels in total. A 1366×768 screen has 1,049,088 pixels, so 1920×1080 holds about 1.98 times as many. That difference is why a 1366×768 panel cannot show it pixel for pixel.
Is 1920 x 1080 resolution good?
Yes, for everyday work on a laptop or desktop monitor it is a clear step up from 1366×768. A 15.6-inch panel works out at about 141 pixels per inch at 1920×1080 and about 100 at 1366×768, so text looks noticeably sharper.
What is display resolution 1920 x 1080 in inches?
Resolution is a pixel count, so it has no fixed size in inches. The same 1920×1080 can fill a laptop panel or a large TV. The screen's diagonal size decides the physical size and how many pixels fit into each inch.
How to change resolution to 1920 x 1080?
Select Start, Settings, System, Display, then choose 1920 x 1080 in the Display resolution list. The mode appears only when the screen and driver report it. If it is missing, install the manufacturer's graphics driver through Windows Update.
How to get 1920×1080 resolution in VirtualBox?
Install Guest Additions inside the virtual machine, then resize the VM window or use the View menu to set the virtual screen's size. Oracle says Windows, Linux and Solaris guests with Guest Additions adjust their resolution automatically when you resize.
Why is 1920 x 1080 resolution not available in Windows?
The screen may not support it, or Windows may be using Microsoft Basic Display Adapter. A 1366×768 panel normally stops at its own size. On a 1080p monitor, install the maker's driver and try a different cable.