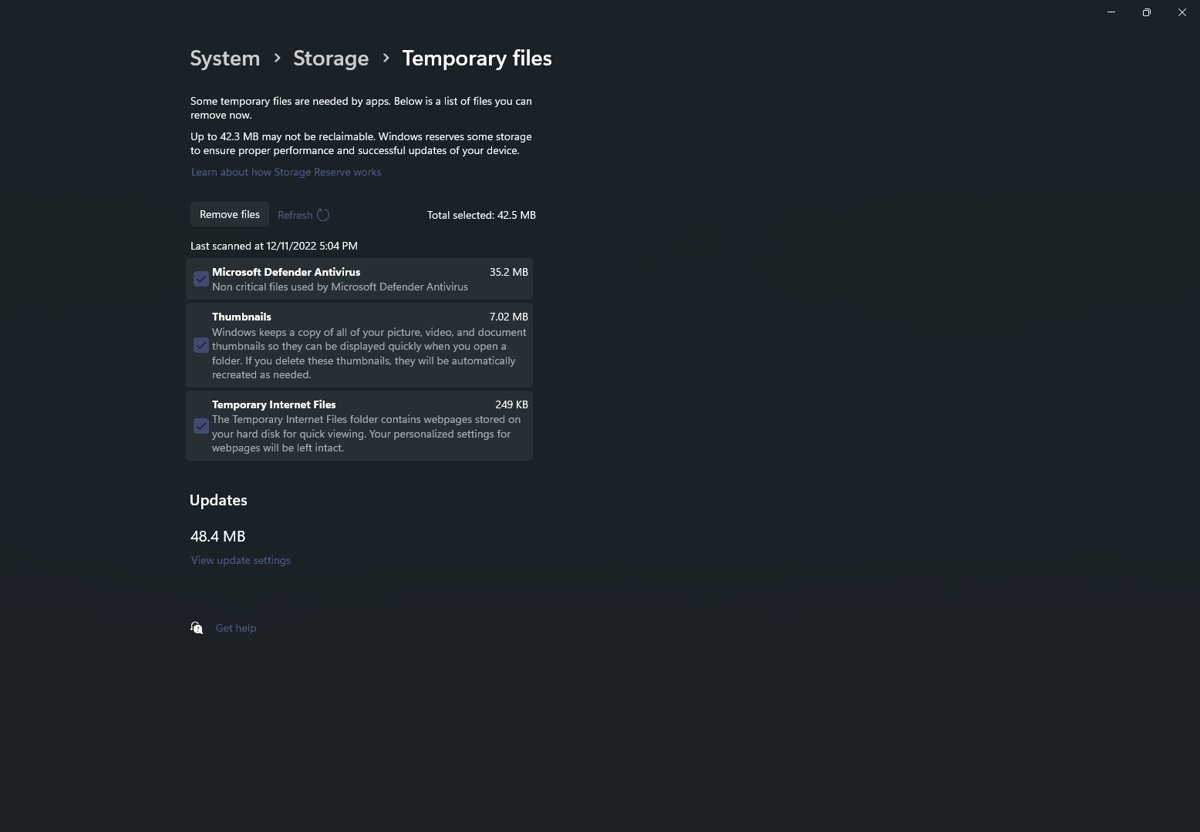
To delete temporary files in Windows 10, open Start > Settings > System > Storage, select Temporary files, tick the categories you want gone and select Remove files.
This guide covers that route plus Storage Sense, Disk Cleanup with system files, the %temp% folder, browser caches, the Windows Update download cache, command-line cleanup and fixes for files that refuse to delete.
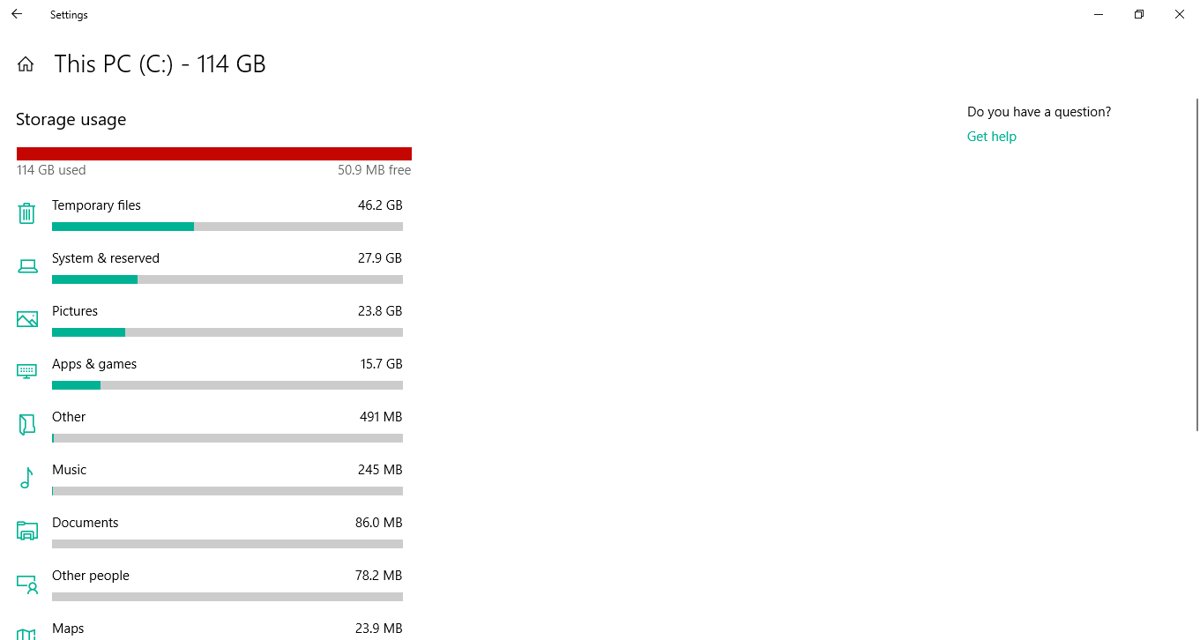
Method 1: Delete Temporary Files Using Windows 10 Settings
The Settings app is the quickest safe route because Windows only lists files it knows it can remove. The same path works on Windows 11.
- Select Start, then Settings (the gear icon).
- Select System, then Storage in the left pane.
- Select Temporary files under your system drive, usually C:.
- Wait for Windows to finish calculating the size of each category.
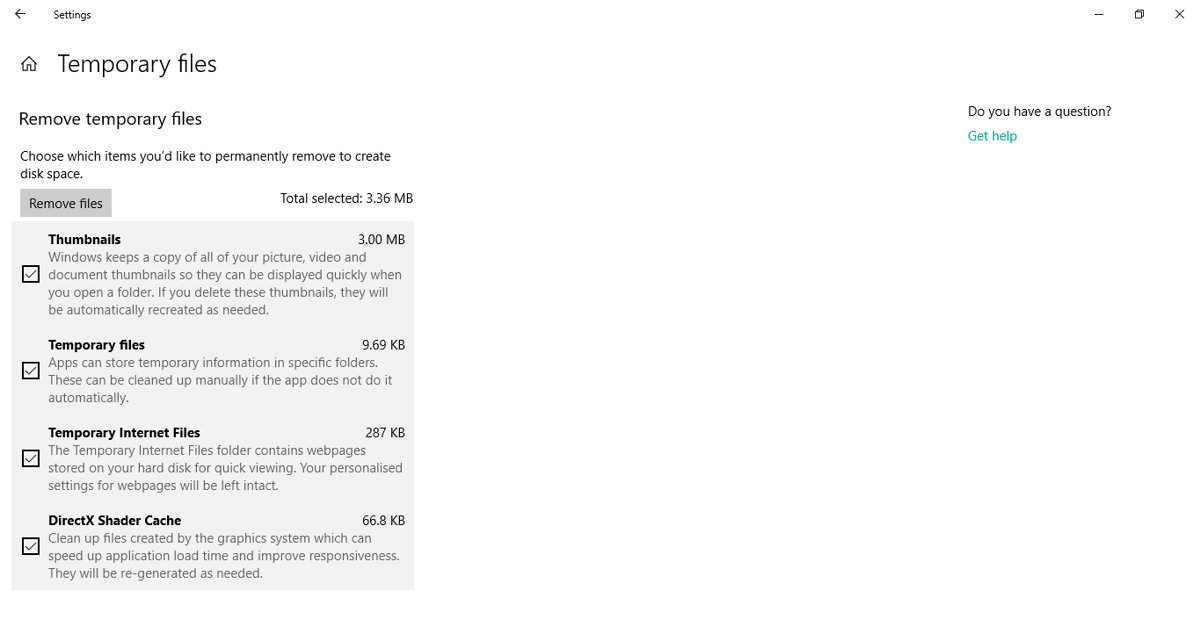
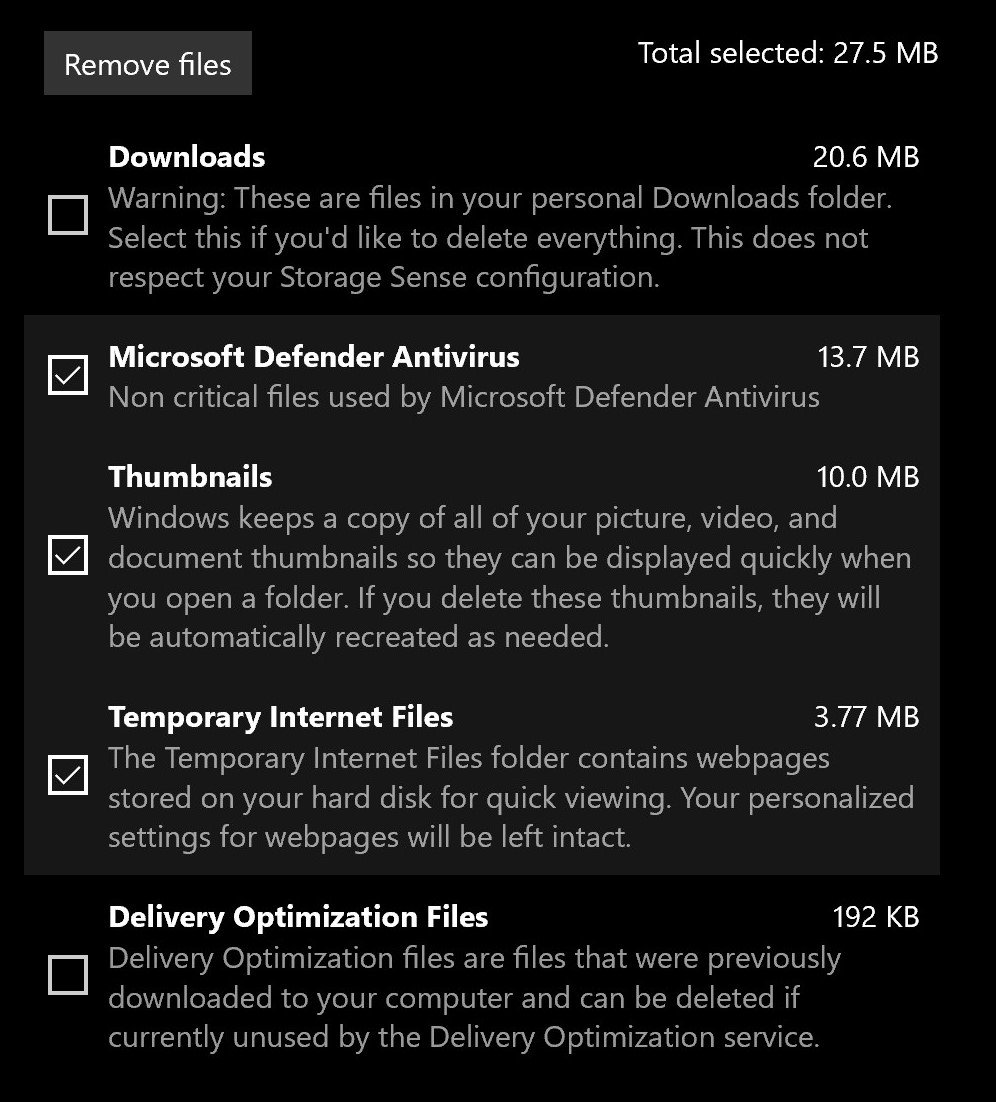
- Tick the categories you want to delete. Leave Downloads unticked unless you have checked that folder first.
- Select Remove files and wait for Windows to finish.
Anything a running program still holds open is skipped, so a few megabytes often remain. That is normal and not an error.
Which method should you use?
| Your situation | Use this | Why |
|---|---|---|
| You want a one-off cleanup in a minute | Method 1: Settings > Storage > Temporary files | Windows lists only files it can safely remove and shows sizes first |
| You never want to think about it again | Method 2: Storage Sense | Runs on a schedule or when the drive is low on space |
| You need more space than Settings freed | Method 3: Disk Cleanup > Clean up system files | Adds system categories such as leftover setup files and old Windows versions |
| An app installer or crash left junk in your profile | Method 4: %temp% from the Run dialog | Opens your personal Temp folder directly |
| Websites load stale pages or the browser cache is huge | Method 5: the browser's own clear-data dialog | Browser caches live outside the Windows Temp folders |
| Deleted files are still eating space | Method 6: empty the Recycle Bin | Deleted files keep their space until the bin is emptied |
| Windows Update is stuck or its downloads are corrupt | Method 7: rename the SoftwareDistribution\Download folder | Microsoft's own reset step for the update cache |
| You manage several PCs or like scripts | Method 8: del or Remove-Item | Repeatable, and easy to put in a scheduled task |
What Are Temporary Files in Windows 10?
Temporary files are working copies that programs and Windows create while they run. Microsoft's Disk Cleanup documentation says a program usually deletes its temp data before it quits, but crashes and installers often leave files behind.
| Type | What it holds | Safe to delete? |
|---|---|---|
| Temporary files (user Temp folder) | Working data from apps, installers and crash logs | Yes; Microsoft says files not modified in the last week can be deleted safely |
| Temporary Setup Files | Files created by a setup program that is no longer running | Yes |
| Temporary Internet Files and browser caches | Copies of web pages and images kept for faster loading | Yes; pages simply reload from the web |
| Downloaded Program Files | ActiveX controls and Java programs downloaded by older web pages | Yes |
| Thumbnails | Cached previews of pictures and videos | Yes; Windows rebuilds them when you open a folder |
| Recycle Bin | Files you deleted but have not purged | Yes, once you are sure you do not need them back |
| Previous Windows installation | The Windows.old folder after an upgrade | Only if you will never roll back; deletion cannot be undone |
Windows keeps two main Temp folders: one inside your user profile and one inside the Windows folder. Finding the exact Temp folder paths covers every way to open them; the locations are the same on Windows 10.
Before You Start: What to Know
| Check | Why it matters |
|---|---|
| Close open apps and save your work | Files that a running program still uses cannot be deleted and trigger errors |
| Use an administrator account for system cleanup | Clean up system files, the Windows Temp folder and the update cache all need admin rights |
| Look inside Downloads before ticking it | Storage cleanup can include Downloads, which holds your own files, not temp data |
| Decide about the previous Windows version | Removing it deletes Windows.old, and you can no longer go back to the earlier version |
| Know your Windows 10 support status | Windows 10 support ended on October 14, 2025, so free security updates no longer arrive |
Never delete folders inside C:\Windows, C:\Program Files or AppData by hand to free space. Clean only the Temp folders and let the built-in tools handle the rest.
Method 2: Turn On Storage Sense for Automatic Cleanup
Storage Sense deletes unneeded temporary files and old Recycle Bin items for you. Microsoft notes it works only on the system drive and is off by default unless Windows turns it on during a low-space event.
- Select Start > Settings > System > Storage.
- Set the Storage Sense switch to On.
- Select Configure Storage Sense or run it now.
- Under Run Storage Sense, choose how often it runs, or leave it on low free disk space.
- Choose how long files may stay in the Recycle Bin and in Downloads before deletion. Leave the Downloads option unmanaged if you keep files there.
- Select Clean now to run it immediately.
Storage Sense settings apply only to your own account; other people on the PC manage theirs. For background, Storage Sense arrived in the Windows 10 Creators Update to delete temporary files automatically.
Method 3: Use Disk Cleanup, the Classic Windows Tool
Disk Cleanup still ships in Windows 10 and 11 and reaches system categories that the Settings page groups differently. The Clean up system files button reloads the list with admin-only items.
- In the search box on the taskbar, type disk cleanup, then select Disk Cleanup from the results.
- Select your system drive, usually (C:), then select OK.
- Tick the file types to delete. Downloaded Program Files, Temporary Internet Files and Thumbnails are ticked by default.
- Select Clean up system files to add system categories.
- Select the drive again and select OK.
- Tick the extra categories you want, such as Temporary files and Temporary Setup Files.
- Select OK and confirm the deletion.
On a drive that does not hold Windows, Disk Cleanup offers only the Recycle Bin and content index catalog files. Run cleanmgr /sageset:1 once to save your choices, then cleanmgr /sagerun:1 to repeat them.
Method 4: Delete Temp Files Manually with the Run Dialog
The Run dialog jumps straight to your user Temp folder through the %temp% variable. This is the folder that fills up after failed installs and app crashes.
- Close every open app you can.
- Press Windows logo key + R to open Run.
- Type
%temp%and select OK. - Press Ctrl + A to select everything in the folder.
- Press Delete, or press Shift + Delete to skip the Recycle Bin.
- Skip any item Windows says is in use; a program still needs it.
- Close File Explorer when the deletion finishes.
Delete only the contents of the Temp folder, never the Temp folder itself. The system Temp folder under the Windows folder needs admin rights; leave it to Disk Cleanup unless an app vendor tells you otherwise.
Method 5: Clear Browser Cache and Temporary Internet Files
Each browser keeps its own cache, so Windows cleanup tools do not empty it fully. Clear only Cached images and files if you want to stay signed in to websites.
- Microsoft Edge: select Settings and more (…) > Settings > Privacy, search, and services.
- Edge: under Clear browsing data, select Choose what to clear, pick a Time range, tick Cached images and files and select Clear now.
- Google Chrome: select More (the three dots) > Delete browsing data.
- Chrome: choose a time range such as All time, tick Cached images and files, untick anything you want to keep, then select Delete data.
- Mozilla Firefox: follow Mozilla's official steps to clear the Firefox cache, or delete the Firefox cache2 files in the cache folder itself.
If Edge sync is on, clearing browsing data also clears it on your other synced devices. Turn off sync first under Settings > Profiles > Sync if you want to clear this PC only.
Method 6: Empty the Recycle Bin
Files you delete keep using disk space until the Recycle Bin is emptied. Microsoft's own advice is to empty it after deleting large files.
- Open Disk Cleanup and select your drive, as in Method 3.
- Tick Recycle Bin. Select View Files first if you want to check what is inside.
- Select OK and confirm the deletion.
- To empty it from PowerShell instead, run
Clear-RecycleBinand confirm the prompt, orClear-RecycleBin -Forceto skip the prompt. - To automate it, set the Recycle Bin age option in Storage Sense (Method 2).
Each drive has its own Recycle Bin. Clear-RecycleBin -DriveLetter C empties only the one on C:.
Method 7: Clear Windows Update Download Cache
Windows Update stores downloaded update files in the SoftwareDistribution\Download folder. Clear it only when updates fail or the folder is clearly bloated; it is part of Microsoft's documented Windows Update reset, not routine cleanup.
- Open Command Prompt as administrator (an elevated command prompt).
- Run
net stop bits, thennet stop wuauservto stop the transfer and update services. - Run
ren %systemroot%\SoftwareDistribution\Download Download.bakto set the cache aside. - Run
net start bits, thennet start wuauserv. - Check for updates in Windows Update; Windows downloads a fresh cache.
- Once updates install normally, delete the Download.bak folder to reclaim the space.
Renaming instead of deleting gives you a way back if anything goes wrong. Do not touch other folders in C:\Windows while you are there.
Method 8: Use Command Prompt or PowerShell for Quick Cleanup
Both commands clear only your own Temp folder, so they need no admin rights. Files in use are skipped with an access error, which is expected.
del /q /f /s %temp%\*del deletes files; /q skips confirmation prompts, /f removes read-only files and /s works through every subfolder of your user Temp folder. Empty subfolders stay behind, which is harmless.
You should see: Command Prompt prints the name of each deleted file and returns to the prompt. Any file still in use is reported and left in place.
In PowerShell, run Remove-Item -Path "$env:TEMP\*" -Recurse -Force -ErrorAction SilentlyContinue. -Recurse includes subfolders, -Force covers hidden and read-only files, and -ErrorAction SilentlyContinue hides the errors for locked files.
Microsoft advises running a matching dir command before any wildcard del, so you see exactly what will go. Always check that the path ends in %temp% or $env:TEMP before pressing Enter.
How to check the cleanup worked
- Open File Explorer and select This PC. Note the free space under Devices and drives.
- Compare it with the figure you saw before cleaning. The gap is the space you recovered.
- Reopen Settings > System > Storage > Temporary files. The categories you removed should show a much smaller size.
- Press Windows logo key + R, type
%temp%and select OK. Only a handful of files in use should remain. - Restart the PC and check again; files that were locked are often released and can be removed on a second pass.
How Often Should You Delete Temporary Files?
| How you use the PC | Suggested schedule | How |
|---|---|---|
| Light use, plenty of free space | Let Storage Sense handle it when space runs low | Method 2 with the default setting |
| Daily use, small SSD | Weekly or monthly | Storage Sense on a fixed schedule |
| Frequent app installs or testing | After each big install or uninstall | Method 1 or Method 4 |
| Before a Windows feature update | Once, a day or two before | Method 3 with Clean up system files |
| Windows Update errors | Only when troubleshooting | Method 7 |
Deleting temp files more often does not make Windows faster. It frees space, and apps rebuild some caches the next time they run.
What Not to Delete When Clearing Space
| Leave this alone | Why |
|---|---|
| The Temp folders themselves | Programs expect %temp% to exist; delete only what is inside |
| C:\Windows, System32, WinSxS and Program Files | Manual deletion there can break Windows or apps; use Disk Cleanup instead |
| Previous Windows installation (Windows.old) | Deleting it removes the option to go back, and Microsoft says this cannot be undone |
| Downloads | Settings and Storage Sense can include it, but it holds your own files |
| Files that are in use | Forcing them out can crash the app that owns them; skip them and retry after a restart |
| Anything a third-party "PC cleaner" flags as registry junk | Windows' own tools cover temp files; registry cleaners are not needed |
Troubleshooting: If Temporary Files Will Not Delete
Why can't I delete temporary files in Windows 10?
A running app or Windows service still has the files open.
- Save your work and close every app, including ones in the notification area.
- Restart the PC, not just sign out.
- Run Method 1 or Method 4 again straight after signing in.
- Skip any file that still reports it is in use; it is being used right now and is not junk.
Temporary files won't delete from Settings or Disk Cleanup
The files belong to the system or another user and need admin rights.
- Sign in with an administrator account.
- Open Disk Cleanup, select Clean up system files and choose the drive.
- Tick the categories again, select OK and confirm the deletion.
Low Disk Space error keeps returning because the Temp folder refills
Microsoft says the Temp folder can fill with Microsoft Store app (.appx) files.
- Press Windows logo key + R, type
wsreset.exeand select OK to clear the Store cache. The Store opens after about ten seconds. - Run the Windows Store Apps troubleshooter. On Windows 11 it sits under Settings > System > Troubleshoot > Other troubleshooters.
- Run the Windows Update troubleshooter from the same list.
- Restart and check free space again.
A few stubborn files survive every restart
A startup app or driver loads them as soon as Windows starts.
- Start Windows in Safe Mode: in Windows Recovery Environment select Troubleshoot > Advanced options > Startup Settings > Restart.
- On the Startup Settings screen, choose Enable Safe Mode with its number key.
- Open
%temp%and delete the remaining files. - Restart normally to leave Safe Mode.
Cleanup fails repeatedly or reports disk errors
File system errors can stop files from being removed.
- Open an elevated Command Prompt.
- Run
chkdsk C: /f. - Type Y when chkdsk asks to check the drive the next time the system restarts.
- Restart the PC, let the check finish, then run the cleanup again.
How Much Space Can You Expect to Recover?
There is no fixed figure; it depends on how long the PC has gone without cleanup. Windows shows the size of each category before you delete, so read the numbers rather than guessing.
| Source | What decides its size | Where to see the size first |
|---|---|---|
| User Temp folder | Failed installs, crash dumps and app logs since the last cleanup | Settings > Storage > Temporary files |
| Browser caches | Browsing volume and each browser's cache limit | The browser's clear-data dialog |
| Recycle Bin | Whatever you deleted and never emptied | Disk Cleanup > Recycle Bin |
| Windows Update cache | Size of recent cumulative and feature updates | Properties of the SoftwareDistribution\Download folder |
| Previous Windows installation | A whole earlier copy of Windows, usually the largest item | Disk Cleanup > Clean up system files |
Best Safe Cleanup Routine for Most Windows 10 PCs
Turn on Storage Sense with a monthly schedule and the Downloads option left unmanaged, then run Disk Cleanup with Clean up system files once before each major update. Storage Sense clears user temp files and old Recycle Bin items without any effort, while Disk Cleanup reaches the system categories it skips. Neither touches your documents, and both use only Microsoft's own tools.
Frequently Asked Questions
How do I delete temporary files in Windows 10?
Open Start > Settings > System > Storage, select Temporary files, tick the categories you want to remove and select Remove files. For more space, run Disk Cleanup and select Clean up system files.
How do I delete temporary files in Windows 11?
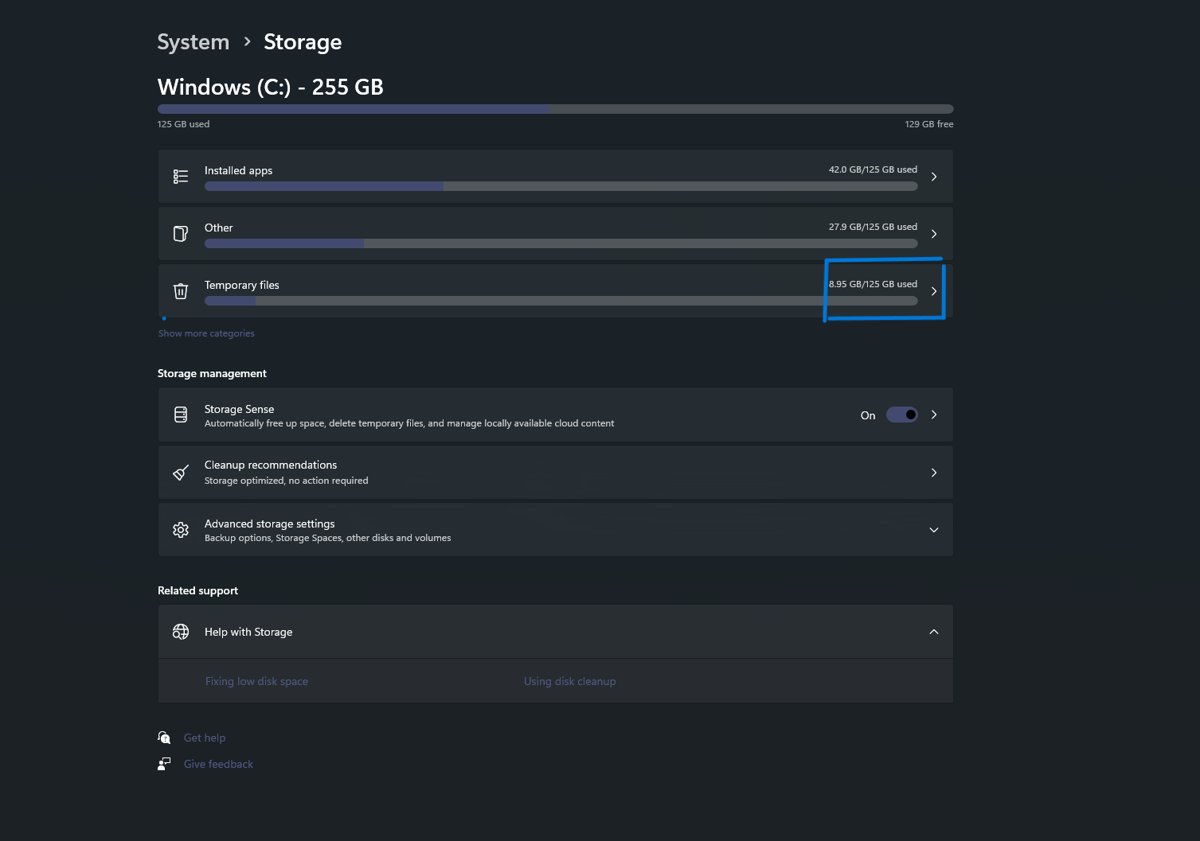
Select Start > Settings > System > Storage > Temporary files, tick the files to remove and select Remove files. Windows 11 also offers Cleanup recommendations on the same Storage page, which shows how much space each category will free.
How do I delete temporary files in Windows 10 with CMD?
Open Command Prompt and run del /q /f /s %temp%\*. It removes files from your user Temp folder without prompting and skips files that are in use. It does not need administrator rights because it only touches your own profile.
How do I delete temporary files in Windows 11 with CMD?
The command is the same as on Windows 10: del /q /f /s %temp%\*. In PowerShell, use Remove-Item -Path "$env:TEMP\*" -Recurse -Force -ErrorAction SilentlyContinue to include subfolders.
How do I delete temporary files in Windows 7?
Press Windows logo key + R, type %temp%, select OK and delete the folder contents, or run Disk Cleanup from the Start menu search. Windows 7 is no longer supported, so moving to a supported version matters more than cleanup.
Should I delete temporary files?
Yes, when you need the space. Microsoft states that temp files not modified in the last week can be deleted safely. Skip files in use, and leave Downloads and the previous Windows installation unticked unless you mean to remove them.
What does deleting temporary files do?
It frees disk space by removing leftover installer files, crash logs, caches and thumbnails. Apps recreate the caches they need, so some pages or thumbnails may load a little slower the first time afterwards.
Can I delete temporary files in Windows 11?
Yes. Windows 11 uses the same Temp folders and the same tools: Settings > System > Storage > Temporary files, Storage Sense and Disk Cleanup. Files currently in use are skipped automatically.
Why won't temporary files delete in Windows 10?
Usually a running app or service has them open. Close your apps, restart the PC and try again. System temp files need an administrator account, and files that survive restarts can be removed in Safe Mode.
How do I delete temporary files in Windows 11 Pro?
The steps are identical on Home and Pro editions: Settings > System > Storage > Temporary files, then Remove files. Storage Sense and Disk Cleanup also work the same way on both editions.
How do I delete temporary internet files only?
Clear the cache in your browser. In Edge, open Settings > Privacy, search, and services > Choose what to clear and tick Cached images and files. In Chrome, open More > Delete browsing data. Disk Cleanup's Temporary Internet Files option covers the older Internet Explorer cache.