Snipping Tool records sound only when you update it to a version with audio support and turn on the audio options on the capture bar before you select Start.
This guide covers the audio settings, microphone access, the Windows sound checks, app repair and how to raise a quiet recording in Clipchamp.

How to record sound with Snipping Tool in Windows 11
Microsoft added PC audio and microphone voice-over recording to Snipping Tool with version 11.2307.44.0. Older versions record video only, so a silent clip is expected on them.
- Update Snipping Tool from Microsoft Store so the audio options appear.
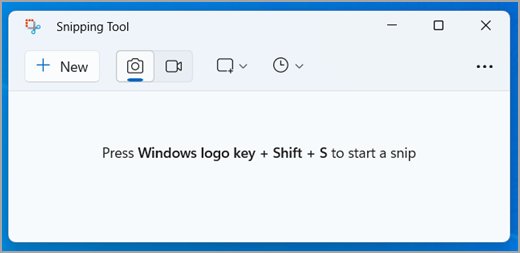
- Press Windows logo key + Shift + R to open the capture bar for recording.
- Turn on the audio options on the capture bar: PC audio for sound from the computer, the microphone for your voice.
- Pick your preferred microphone on the capture bar if more than one recording device is connected.
- Drag to select the area of the screen you want to record.
- Select Start, record a few seconds of sound, then select Stop.
- Play the clip in the Snipping Tool window and listen before you save it.
If the clip still plays silently, work through the fixes below in order. Each one rules out a single cause.
Understanding the problem: why is there no sound?
A silent Snipping Tool recording almost always has one of six causes. Match what you hear to a row, then jump to that fix.
| What you notice | Likely cause | Fix |
|---|---|---|
| No audio options on the capture bar | Snipping Tool is older than the audio update | Update Snipping Tool in Microsoft Store |
| Whole clip is silent, audio options exist | PC audio and microphone were left off before recording | Turn the audio options on, or set them as defaults |
| Your voice is missing | Microphone access is off, or the wrong input device is chosen | Allow microphone access and pick the right microphone |
| Voice records but sounds faint | Input volume is low | Raise the input volume, or boost the clip in Clipchamp |
| No sound plays from the computer at all | Wrong output device, muted volume or a stuck audio service | Check the output device and restart Windows Audio |
| Sound broke after an update | The audio driver changed | Roll back, update or reinstall the audio driver |
Update Snipping Tool in Microsoft Store to get audio recording
Snipping Tool gets its updates from Microsoft Store. An out-of-date copy has no audio options at all.
- Select Start, then search for and select Microsoft Store.
- Open Downloads (your library) in Microsoft Store.
- Check for updates and install any update listed for Snipping Tool.
- Close and reopen Snipping Tool after the update finishes.
- To keep it current, select Profile > Store Settings and make sure App updates is turned On.
If Microsoft Store refuses the update, fix Snipping Tool installation problems first, then return here.
Set default audio for new Snipping Tool screen recordings
Snipping Tool has app settings for the default audio of new screen recordings. Set them once and every recording starts with sound on.
- Open Snipping Tool from the Start menu.
- Select See more, then Settings.
- Find the screen recording audio settings.
- Turn on PC audio and the microphone as your defaults for new recordings.
- Close Settings and press Windows logo key + Shift + R to start a new recording.
You can still switch either audio option off on the capture bar for a single recording.
Snipping Tool microphone permission in Windows 11
Windows blocks every app from the microphone when Microphone access is off. Snipping Tool then records PC sound but never your voice.
- Select Start > Settings > Privacy & security.
- Under App permissions, select Microphone.
- Turn on Microphone access.
- Turn on Let apps access your microphone.
- Under Choose which apps can access your microphone, turn on Snipping Tool if it is listed.
- Turn on Let desktop apps access your microphone as well.
- Close and reopen Snipping Tool, then record a short test clip.
Choose the microphone for Snipping Tool recordings in Windows 11
A laptop with a headset, a webcam and a USB microphone has several inputs. Windows may be listening to one you are not speaking into, so set up and test your microphone before you record.
- Select Start > Settings > System > Sound.
- Under Input, open Choose a device for speaking or recording and select the microphone you use.
- Select the arrow to the right of that device.
- Under Input settings, select Start test and speak at a normal volume.
- Select Stop test, then select Play under the recorded sample.
- Drag the Input volume slider up if the sample sounds faint.
- Pick the same microphone on the Snipping Tool capture bar before your next recording.
If your headset has a Mute button, make sure it is not switched on. A muted headset records silence even when every setting is right.
How to test sound in a Snipping Tool screen recording
A five-second test clip saves you from re-recording a long session with no audio.
- Play a video or a system sound so the PC produces audio.
- Press Windows logo key + Shift + R and make sure both audio options are on.
- Select a small area, select Start and say a few words.
- Select Stop after about five seconds.
- Play the clip in the Snipping Tool window and listen for both the PC sound and your voice.
If one of the two sources is missing, go straight to that symptom in the fixes below.
Step-by-step fixes for the no sound problem
The capture bar shows no audio options
The installed Snipping Tool predates the audio update.
- Open Microsoft Store and go to Downloads.
- Install the pending Snipping Tool update.
- Reopen Snipping Tool and press Windows logo key + Shift + R again.
The whole recording is silent
Both audio options were off when you selected Start.
- Press Windows logo key + Shift + R to open the capture bar.
- Turn on PC audio and the microphone before you select the area.
- Select Start and record a short test.
- Set both options as defaults in See more > Settings so they stay on.
PC sound records but your voice is missing
Microphone access is blocked or a different input device is selected.
- Go to Settings > Privacy & security > Microphone and turn on Microphone access.
- Go to Settings > System > Sound and pick your microphone under Input.
- Choose the same microphone on the capture bar.
- Record a new test clip.
Your voice records but PC sound is missing
The PC audio option was off, or the sound was playing through a device you did not expect.
- Turn on the PC audio option on the capture bar.
- Select the Speakers icon on the taskbar, then the arrow next to the volume slider.
- Choose the speakers or headphones you are listening on.
- Record again while the PC is playing sound.
No sound plays from the PC at all
A muted output device, a stuck audio service or a driver fault affects every app, not only Snipping Tool.
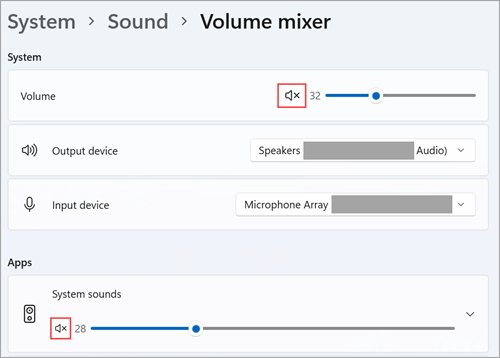
- Select the settings icon next to the volume slider, tooltip More mixer settings, and unmute any device marked with an x.
- Go to Settings > System > Sound, scroll to Advanced and run Output devices under Troubleshoot common sound problems.
- Restart the Windows audio services, then the audio driver fixes in the next sections.
Sound stopped recording after a Windows update
A new audio driver arrived with the update.
- Right-click Start and select Device Manager.
- Expand Sound, video and game controllers.
- Right-click your audio device, select Properties and open the Driver tab.
- Select Roll Back Driver if it is available, then restart the PC.
Restart Windows Audio service to fix Snipping Tool sound
When the Windows Audio service hangs, apps open normally but no sound reaches them. A restart takes a few seconds.
- Type services in the taskbar search box and open Services.
- Right-click Windows Audio and select Restart.
- Select Yes if Windows asks to restart dependent services.
- Right-click Windows Audio Endpoint Builder and select Restart.
- Open Snipping Tool and record a short test clip.
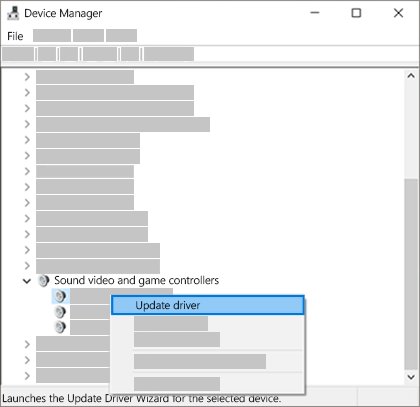
Update or reinstall the audio driver in Windows 11
A damaged or outdated audio driver breaks sound for every app, including Snipping Tool. Update it first, and reinstall only if the update does not help.
- Type device manager in the taskbar search box and open it.
- Expand Sound, video and game controllers.
- Right-click your audio device and select Update driver, then Search automatically for drivers.
- If that fails, right-click the device and select Uninstall device.
- Check Attempt to remove the driver for this device and select Uninstall.
- Restart the PC so Windows reinstalls the driver.
- If the device does not return, right-click Sound, video and game controllers and select Scan for hardware changes.
Also select Start > Settings > Windows Update > Check for updates, because audio fixes often ship there. For problems beyond recording, fix Windows 11 sound problems system-wide.
Repair or reset Snipping Tool in Windows 11
If only Snipping Tool loses audio while other apps record fine, repair the app. Use Reset only when Repair is missing or does not help.
- Select Start > Settings > Apps > Installed apps.
- Find Snipping Tool and select the More icon next to it.
- Select Advanced options.
- Select Repair if it is available, and wait for it to finish.
- Record a test clip. If it is still silent, return and select Reset.
- Open See more > Settings in Snipping Tool and check your audio defaults after a reset.
Increase Snipping Tool recording volume in Clipchamp
A recording with faint sound is not broken. Clipchamp, which opens from Snipping Tool, can raise the volume to 200%.
- Select Stop to end the recording.
- Select Edit in Clipchamp in the Snipping Tool window.
- Open the Audio tab in the sidebar.
- Drag the volume slider up, anywhere from 0 to 200%.
- Select Detach audio if you want the sound as a separate file.
- Press Windows logo key + R and type downloads to find the detached audio file.
Clipchamp can also add captions from the Captions tab with Transcribe media, which helps viewers when the voice is quiet.
Snipping Tool screen recording audio FAQ
Does Snipping Tool record audio?
Yes. Snipping Tool records PC audio and microphone voice-overs from version 11.2307.44.0 onward. Turn on the audio options on the capture bar before you select Start, or set them as defaults in Settings.
Why is my Snipping Tool recording silent?
The most common cause is that the audio options were off when the recording started. An old Snipping Tool version, blocked microphone access or the wrong input device can also leave the clip without sound.
Can Snipping Tool record system audio?
Yes. The PC audio option on the capture bar records sound the computer plays, such as a video or a call. Turn it on before you select Start, because it cannot be added after the recording ends.
How do I record my voice with Snipping Tool?
Turn on microphone access in Settings > Privacy & security > Microphone, then turn on the microphone option on the capture bar. Pick your preferred microphone there if more than one device is connected.
What is the shortcut for Snipping Tool screen recording?
Press Windows logo key + Shift + R. It opens the Snipping Tool capture bar for recording, where you turn on audio, select the area and select Start.
Can Snipping Tool record audio on Windows 10?
Microsoft documents Snipping Tool video recording for Windows 11 only. On Windows 10 the Snipping Tool help page covers screenshots, so use another recorder there.
How do I make a Snipping Tool recording louder?
Select Edit in Clipchamp after you stop recording, open the Audio tab and drag the volume slider up to as much as 200%. Raising the Input volume in Sound settings helps future recordings.
Where does Snipping Tool save screen recordings?
Snipping Tool shows the recording in its window when you select Stop, and you save it from there or open it in Clipchamp. To change automatic saving, select See more, then Settings.