Connect your iPhone to the computer with a USB cable, unlock it, tap Trust, then import your photos with the Photos app on Windows or Mac.
This guide covers the cable route for each system, wireless options such as iCloud, AirDrop, OneDrive and Google Photos, and fixes for an iPhone the computer cannot see.
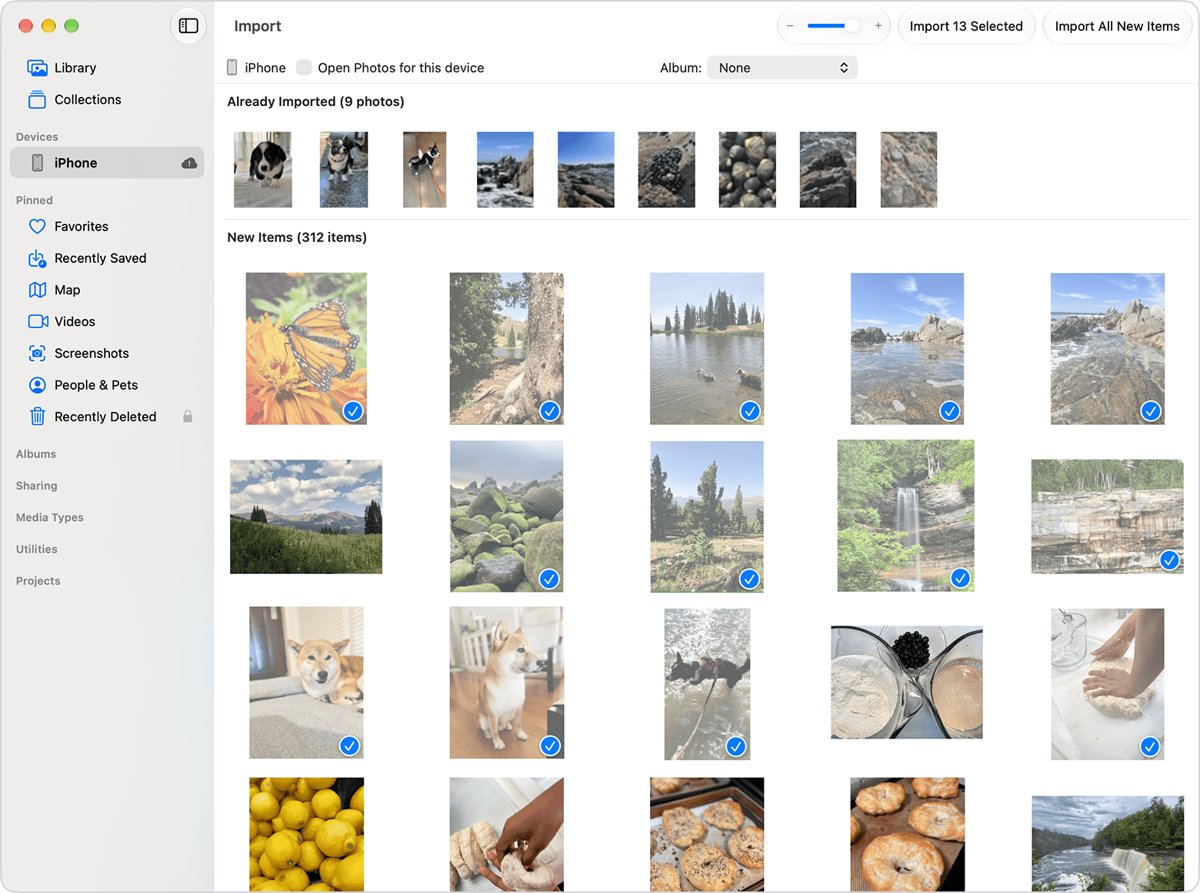
Step-by-step: Transfer photos from iPhone to computer
A USB cable and the built-in Photos app are the most direct route, and neither needs an internet connection or cloud storage.
- On a Windows PC, install the Apple Devices app from the Microsoft Store. A Mac needs nothing extra.
- Connect the iPhone with a USB cable that supports data and charging.
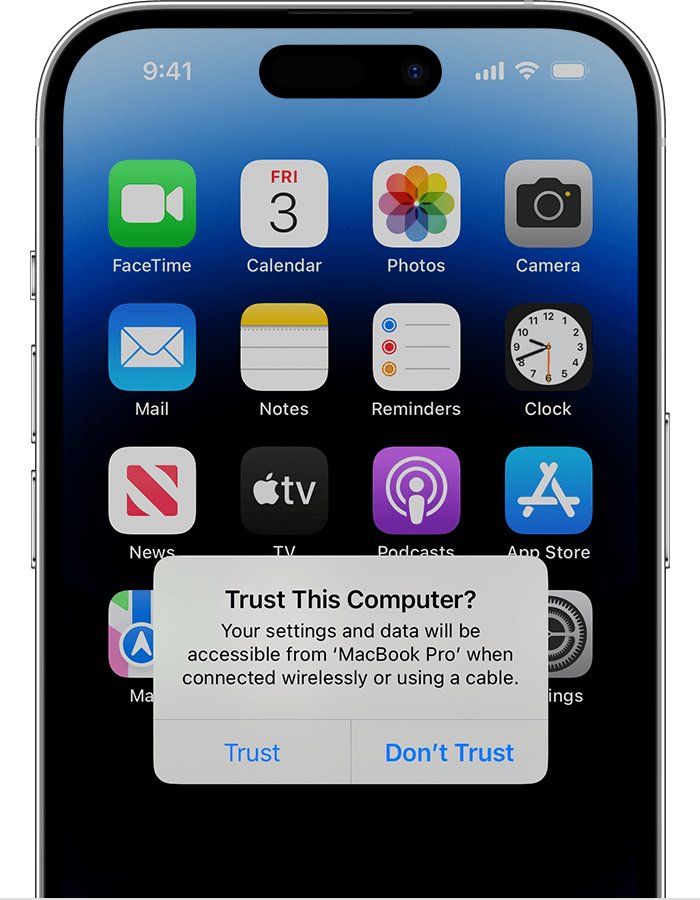
- Unlock the iPhone and tap Trust or Allow when it asks about this computer.
- Open Photos on the computer and start the import: select Import on Windows, or select the iPhone under Devices on a Mac.
- Choose the photos you want and where to save them, then complete the import.
- Wait for the transfer to finish before you disconnect the cable.
Why is transferring iPhone photos to a computer tricky?
Most failed transfers come down to one of five things, and each has a simple answer.
| Cause | What happens | What to do |
|---|---|---|
| The iPhone is locked | The PC cannot find the device | Unlock it and leave it unlocked while connecting |
| The computer is not trusted | The iPhone blocks access to its photos | Tap Trust on the alert |
| The cable only charges | The phone charges, but no device appears | Use a cable that supports both data and charging |
| Originals are stored in iCloud | Photos that exist only in iCloud may not import over USB | Download originals to the iPhone first, or use iCloud for Windows |
| Photos use the HEIF format | A Windows PC may need an extra codec to open them | Install HEIF Image Extension or change the camera format |
Alternative ways to transfer iPhone photos
If a cable is not an option, match your situation to one of these routes.
| Your situation | Use this | Works with |
|---|---|---|
| You have a few photos and a Mac nearby | AirDrop | Mac only |
| You want every new photo on your computer automatically | iCloud Photos | Windows and Mac |
| You need photos on a computer that is not yours | iCloud.com | Any computer with a browser |
| You already pay for or use another cloud service | OneDrive, Google Photos or Dropbox | Windows and Mac |
| You have no internet and no cable to the computer | A USB flash drive | Windows and Mac |
| You need to send one or two pictures quickly | Email or a messaging app | Windows and Mac |
Step by step tutorial: How to transfer iPhone photos to PC
Windows needs a little preparation that a Mac does not. Complete these steps once, and later imports only need the cable.
- Open the Microsoft Store on the PC, search for Apple Devices, select the app and choose Get.
- Open Apple Devices and connect the iPhone with a USB cable.
- Tap Trust on the iPhone and enter your passcode if asked. The iPhone then appears in the app's sidebar.
- If iCloud Photos is on, go to Settings > your name > iCloud > Photos on the iPhone and turn off Optimize Storage, so full-resolution originals download to the phone.
- For the widest compatibility with Windows, go to Settings > Camera > Formats and tap Most Compatible. This only affects new photos.
Transfer photos using a USB cable and the Windows Photos app
This is Microsoft's own import route for Windows 11 and Windows 10.
- Connect the iPhone to the PC with a USB cable that can transfer files.
- Unlock the iPhone, because the PC cannot find a locked device.
- Select Start, then select Photos.
- Select Import, then select your iPhone.
- Pick the items to import and choose the folder where they should be saved.
- Follow the on-screen prompts and wait until the import finishes.
Detection and transfer can take a few moments, so wait before you assume the iPhone was not found.
Copy photos manually with File Explorer
File Explorer suits anyone who wants to drag files into their own folders and skip the Photos app.
- Connect the iPhone with a USB cable, unlock it and tap Trust.
- Press Windows + E to open File Explorer.
- Select your iPhone in the navigation pane, under This PC.
- Open the folders inside the iPhone until you reach your photos and videos.
- Select the files you want and copy them.
- Paste them into a folder on the PC, such as Pictures, and wait for the copy to finish.
Photos that exist only in iCloud do not appear here. Download them to the iPhone first if your folder looks incomplete.
Import photos through iCloud for Windows
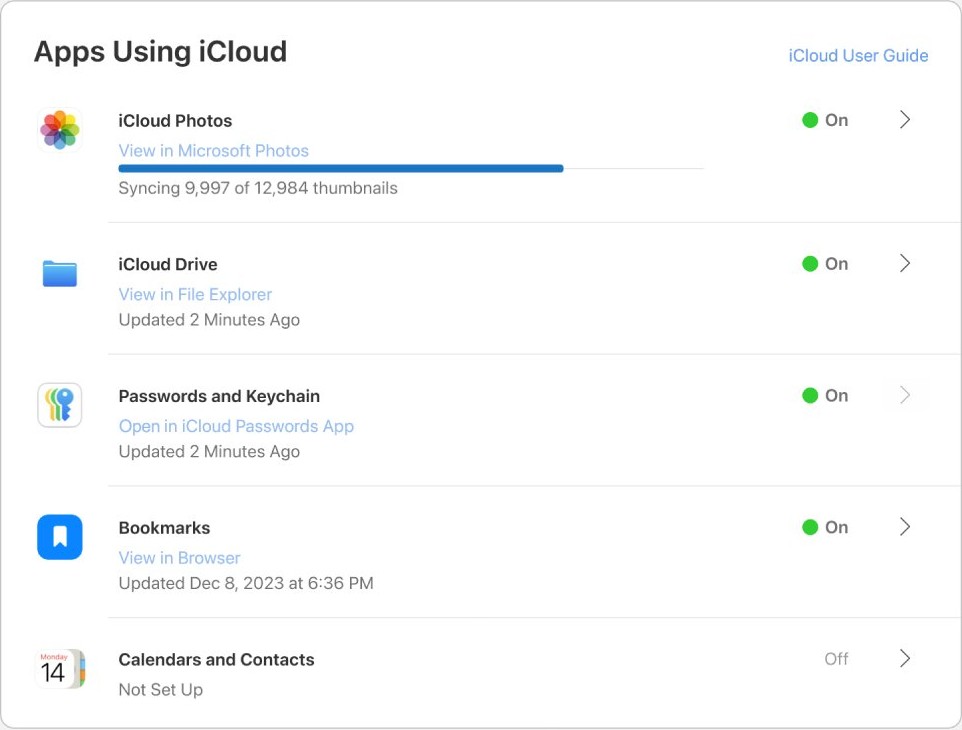
iCloud for Windows puts your iCloud Photos library in File Explorer, with no cable needed. Set up iCloud on the iPhone before you start.
- Install iCloud for Windows from the Microsoft Store.
- Open it and sign in with the same Apple Account as your iPhone.
- Select the options button to the right of iCloud Photos.
- Turn on iCloud Photos, then click Done.
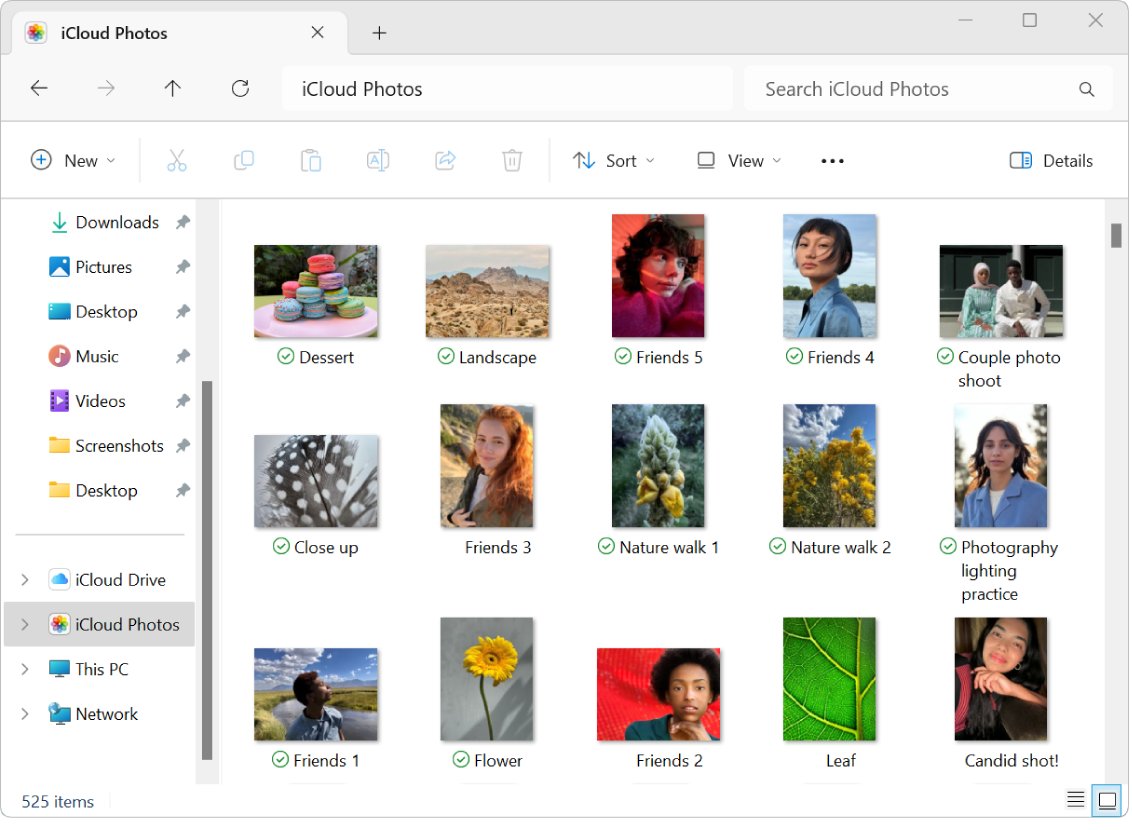
- Open File Explorer and click iCloud Photos in the navigation pane. If it is missing, open Pictures and double-click iCloud Photos.
- Double-click a thumbnail to download and view the photo.
Photos are stored in C:\Users\[user name]\Pictures\iCloud Photos\Photos. In iCloud for Windows 14.2 or later, you can also select Download High-Efficiency format photos and videos in the same options window.
Download photos from iCloud.com
The website needs no app, so it works on a borrowed or shared computer. iCloud Photos must already be on for your iPhone.
- Go to
icloud.com/photosin a browser on the computer. - Sign in to your Apple Account if asked.
- Select the photos or videos you want.
- Click the download button in the toolbar.
- To pick a file format first, open the menu next to it and click More Download Options.
Downloads arrive in the most compatible format for the computer you are using, unless you choose another one.
Transfer photos wirelessly with OneDrive, Google Photos, or Dropbox
Each service uploads your camera roll from its iPhone app, and you collect the photos on the computer afterwards. Storage limits depend on your plan.
| Service | Turn it on in the iPhone app | Get the photos on the computer |
|---|---|---|
| OneDrive | Tap your account image, then Settings > Camera Upload. Turn on Camera Upload, and Include Videos if needed. | Open OneDrive on the computer or the OneDrive website |
| Google Photos | Tap your profile picture, then the settings icon > Backup. Switch Backup on. | Go to photos.google.com, click a photo, click More and select Download |
| Dropbox | Tap the account icon, then Camera uploads. Give Dropbox photo access and tap Turn on camera uploads. | Open the Camera Uploads folder in your Dropbox account |
Keep the OneDrive app running in the background, because closing it can stop automatic uploads. To save a whole library rather than single items, you can download all your Google Photos in one go.
How to transfer photos from iPhone to Mac
The Photos app on a Mac imports directly from a connected iPhone and needs no extra software.
- Connect the iPhone to the Mac with a USB cable. Click Allow if the Mac asks to allow the accessory.
- Unlock the iPhone and tap Trust if asked.
- Open Photos on the Mac and click the iPhone under Devices in the sidebar.
- Open the album menu to import into an existing album, choose New Album, or choose None.
- Click Import at the top right for everything new, or select photos and click Import Selected.
- If asked, click Keep Items to leave the photos on the iPhone, then disconnect when the import is done.
Method 1: Using AirDrop
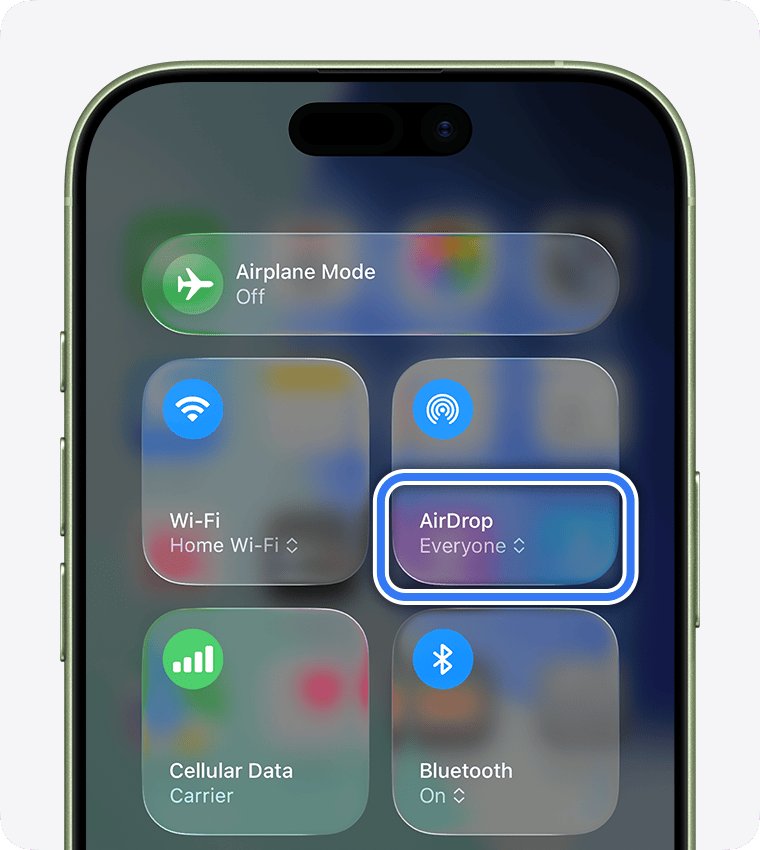
AirDrop sends photos wirelessly to a nearby Mac. It only works between Apple devices, so it is not an option for a Windows PC, and Apple says it is best for a small selection of files.
- Turn on Wi-Fi and Bluetooth on both devices, and keep them within 30 feet (10 meters) of each other.
- Turn off Personal Hotspot on the iPhone.
- On the Mac, turn on AirDrop.
- Open Photos on the iPhone, tap Select and choose your photos.
- Tap the Share button, tap AirDrop, then tap your Mac.
- Click Accept on the Mac. If both devices use the same Apple Account, the transfer is accepted automatically.
On the Mac, some items save automatically to the Downloads folder, and you may be offered a choice between Downloads and Photos.
Method 2: Using iCloud Photos
iCloud Photos uploads your original, full-resolution photos and keeps your library up to date on each device signed in to the same Apple Account.
- On the iPhone, go to Settings > your name > iCloud > Photos.
- Turn on Sync this device and wait for the upload to finish.
- On a Mac, open System Settings, click your name, click iCloud, then click Photos.
- Turn on Sync this Mac.
- To store full-size files on the Mac, open Photos > Settings > iCloud and select Download Originals to this Mac.
- On a Windows PC, use iCloud for Windows or iCloud.com, as described earlier.
If a new phone is missing pictures after this kind of sync, you can fix iCloud photos that did not transfer.
Method 3: Using iTunes or Finder
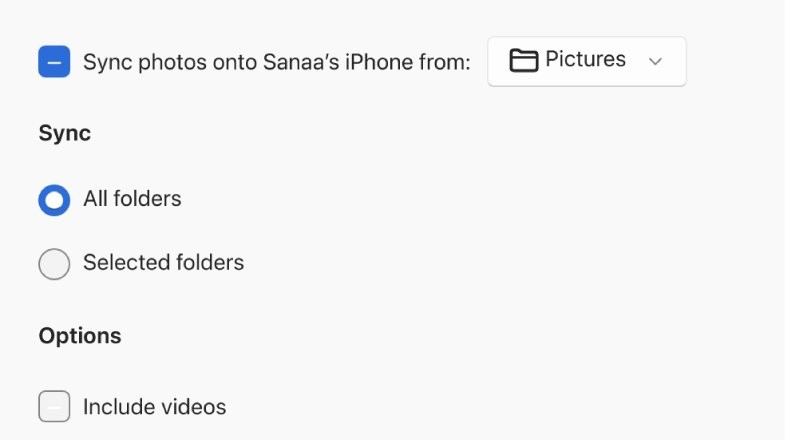
Finder on a Mac and the Apple Devices app on Windows handle the connection to your iPhone, but they are not the import tool. On Windows, Apple's photo sync runs one way, from the PC to the iPhone.
- Connect the iPhone and open Finder on a Mac, or Apple Devices or iTunes on Windows.
- Tap Trust on the iPhone and click Trust or Continue on the computer if prompted.
- Check that the iPhone appears in the sidebar, which proves the connection works.
- Close that window and open the Photos app to import the pictures.
- On a Mac, choose View > Show Sidebar in Finder if you cannot see the sidebar.
Use syncing when you want to move pictures from a PC to your iPhone. It will not copy your camera roll to the computer.
Method 4: Using third-party apps
Desktop device managers give you more control than the Photos app. iMazing is one example: it runs on Windows and Mac, works over USB or Wi-Fi, and needs neither iTunes nor iCloud to export photos.
- Download iMazing from its own website,
imazing.com, and install it. - Open the app and connect the iPhone by USB cable.
- Unlock the iPhone and tap Trust.
- Open the photos section for your iPhone in the app.
- Drag the photos you want onto a folder on your computer.
iMazing converts HEIC images to JPEG when needed. It is a paid product, so check its current licence terms before you buy.
Method 5: Using photo transfer app
Every Mac includes Image Capture, a small photo transfer app that copies files straight into any folder without adding them to your Photos library. Windows users can get the same result with the Photos app or File Explorer routes above.
- Connect the iPhone to the Mac with a cable, then unlock it and trust the Mac if asked.
- Open Image Capture and select the iPhone under Devices in the sidebar.
- Select the items you want, or skip this step to copy everything.
- Click the Import To menu at the bottom of the window and choose a folder, or choose Other.
- Click Download for your selection, or Download All for everything.
A Live Photo downloads as two files, a still image and a video. With macOS 15.4 or later, photos in a locked Hidden album are skipped.
Method 6: Using message apps
A chat app you also use on your computer works for one or two pictures. Treat it as a quick handoff, not as a way to archive your originals.
- Open the photo in the Photos app on the iPhone.
- Tap the Share button and choose Messages or another chat app.
- Send the photo to yourself, or to a conversation you can open on the computer.
- Open the same conversation on the computer.
- Save the received photo to a folder.
Method 7: Using email
Email works on any computer and needs no setup, though your provider sets a limit on attachment size.
- Open the Mail app on the iPhone and start a new message to your own address.
- Tap in the message body, then tap the attachment button above the keyboard.
- Tap Photo Library and choose your photos.
- Send the message.
- Open the email on your computer and download the attachments.
If the file is over your provider's limit, the iPhone offers Mail Drop for large attachments. Apple stores those attachments for up to 30 days, so download them soon.
Method 8: Using USB flash drives
An iPhone can copy photos directly to a USB drive through the Files app, so no computer or internet connection is needed during the copy. Depending on your iPhone's port and the drive's plug, you may need a cable adapter.
- Connect the USB flash drive to the iPhone.
- Open Photos, tap Select and choose your photos.
- Tap the Share button, then tap Save to Files.
- Under Locations, choose the USB drive and tap Save.
- Disconnect the drive and plug it into the computer.
- Copy the photos from the drive to a folder on the computer.
iPhone models with a USB-C port can reformat a drive as ExFAT from the Files app, under Browse. Formatting erases everything on it, so copy existing files off first.
Transfer iPhone photos to external hard drive
The simplest approach is to use the computer as the bridge and point the import at the drive.
- Plug the external hard drive into the computer and check that it appears in File Explorer or Finder.
- Connect the iPhone with a USB cable, unlock it and tap Trust.
- On Windows, open Photos, select Import, and choose a folder on the external drive as the save location.
- On a Mac, open Image Capture, click Import To, choose Other and select a folder on the drive.
- Start the import and wait for it to finish.
- Eject the external drive safely before you unplug it.
Tips: Making the most of transferring iPhone photos to PC
| Setting or habit | Where to find it | What it does |
|---|---|---|
| Keep Originals | Settings > Apps > Photos > Keep Originals | Stops HEIF and HEVC files from being converted to JPEG or H.264 when you import over USB |
| Most Compatible | Settings > Camera > Formats | Captures new photos as JPEG and videos as H.264, which work on more devices |
| High Efficiency | Settings > Camera > Formats | Captures new photos as HEIF and videos as HEVC, which saves space |
| HEIF Image Extension | Microsoft Store on Windows | Lets Windows open HEIF photos that you keep in their original format |
| Location data | Settings > Privacy & Security > Location Services | Controls whether photos carry location tags, which matters if you share the copies later |
Pro tips for faster photo transfers
| Tip | Why it helps |
|---|---|
| Use a good data cable | USB cables have different transfer speeds, and not all of them can transfer files |
| Keep the iPhone unlocked at the start | The computer cannot detect a locked iPhone, so you avoid a failed first attempt |
| Import in smaller batches | A selected group is quicker to check, and a problem does not cost you the whole run |
| Choose a cable over the cloud for large libraries | A cloud route has to upload every file and then download it again |
| Download originals before a USB import | You avoid a second pass for photos that exist only in iCloud |
Fix common iPhone-to-Windows photo transfer problems
Why can't I transfer photos from iPhone to PC?
Windows cannot see the iPhone, usually because of the connection, the cable or a missing trust approval.
- Open the Apple Devices app and connect the iPhone with a USB cable.
- Unlock the iPhone and tap Trust. It should then appear in the app's sidebar.
- Try another USB cable that supports both data and charging.
- Try another USB port or another computer.
- Update Windows and iOS to the latest versions.
The Trust This Computer alert does not appear on iPhone
You tapped Don't Trust earlier, so the iPhone remembers that answer.
- Go to Settings > General > Transfer or Reset iPhone on the iPhone.
- Tap Reset, then tap Reset Location & Privacy.
- Reconnect the cable and tap Trust when the alert appears.
Some iPhone photos are missing from the Windows import
With iCloud on, photos that exist in iCloud but not on the iPhone may not be available over USB.
- Go to Settings > your name > iCloud > Photos on the iPhone.
- Turn off Optimize Storage, so the originals download to the phone.
- Run the import again after the download completes.
- Use iCloud for Windows instead if the phone does not have room for the originals.
HEIC photos from iPhone will not open on Windows
Windows may need a codec to open HEIF files.
- Install HEIF Image Extension from the Microsoft Store.
- Open the photo again.
- To avoid this for future photos, go to Settings > Camera > Formats and tap Most Compatible.
Still not working? Try these fixes
Why won't my iPhone transfer photos to my Mac?
The Mac has not recognized the iPhone, or the accessory alert is waiting for an answer.
- Click Allow if the Mac shows the Allow accessory to connect? alert.
- Open Finder and look for the iPhone in the sidebar. Choose View > Show Sidebar if the sidebar is hidden.
- Unplug the cable and check the iPhone's charging port for debris if the phone does not chime or vibrate on connection.
- Update macOS and iOS to the latest versions.
iPhone charges but will not transfer photos
The cable may only carry power. Apple says the cable must support both data and charging.
- Connect a different USB cable that supports data.
- Plug it into a different USB port on the computer.
- Unlock the iPhone and watch for the Trust alert.
- Contact Apple Support for service if another computer cannot see the iPhone either.
iCloud Photos shows only thumbnails on Windows
This is normal. Photos stay as thumbnails until you download them.
- Open iCloud Photos in File Explorer.
- Double-click a thumbnail to download it.
- Wait for the photo to open, then copy it wherever you need it.
AirDrop does not show your Mac on iPhone
One of the AirDrop requirements is not met, or the Mac is out of range.
- Check that Wi-Fi and Bluetooth are on for both devices.
- Turn off Personal Hotspot on the iPhone.
- Move the devices within 30 feet (10 meters) of each other.
- Set the Mac to receive from Contacts Only or Everyone.
- Restart both devices and try again.
Best way to transfer photos from iPhone to computer
Use a USB cable and the Photos app for a one-time transfer, and iCloud Photos for ongoing copies. The cable needs no account or internet and handles large libraries directly. iCloud Photos suits anyone who wants new pictures on the computer without connecting anything, as long as the iCloud plan has room for the library.
iPhone photo transfer FAQ
How to transfer photos from iPhone to laptop?
A laptop uses the same steps as a desktop. Connect the iPhone by USB cable, unlock it and tap Trust, then import with the Photos app on Windows or Mac. Without a cable, use iCloud Photos, OneDrive or Google Photos over Wi-Fi.
How do I transfer photos from iPhone to laptop without iTunes?
You do not need iTunes for this. On Windows, install the Apple Devices app, connect the iPhone and import with Microsoft Photos. On a Mac, use the Photos or Image Capture app. iCloud for Windows and iCloud.com also work without iTunes and without a cable.
Where do imported iPhone photos go on Windows?
They go to the folder you choose during the import in Microsoft Photos, so check that screen before you start. Photos synced through iCloud for Windows are stored in C:\Users\[user name]\Pictures\iCloud Photos\Photos and also appear in File Explorer.
Can I transfer photos from iPhone to PC wirelessly?
Yes. Turn on iCloud Photos and use iCloud for Windows or iCloud.com, or upload with the OneDrive, Google Photos or Dropbox app. AirDrop is not an option, because it only works between iPhone, iPad and Mac. Allow time for large libraries to upload.
Why won't my iPhone show up in the Photos app?
The iPhone is usually locked, not trusted, or connected with a cable that only charges. Unlock it, tap Trust, and try a cable that supports data. Check that it appears in the Apple Devices app, then update Windows and iOS if it still does not.
Why are my iPhone photos saving as HEIC instead of JPEG?
Your camera is set to High Efficiency, which saves space by using HEIF and HEVC. To capture JPEG photos instead, go to Settings > Camera > Formats and tap Most Compatible. The change only applies to new photos, not to ones already taken.
Will transferring delete photos from my iPhone?
No, not unless you ask it to. Importing copies the files and leaves the originals on the iPhone. On a Mac, avoid the Delete items checkbox and choose Keep Items if asked. In Image Capture, avoid Delete after import.
How to transfer photos from iPhone to Mac or MacBook?
Connect the iPhone with a cable, open Photos on the Mac and click the iPhone under Devices. Click Import or Import Selected. For a few photos, AirDrop is quicker, and iCloud Photos keeps a MacBook up to date without a cable.
How to transfer photos from iPhone to USB?
Connect the USB drive to the iPhone, using an adapter if the plug does not fit. In Photos, select your pictures, tap Share, tap Save to Files, and choose the drive under Locations. You can also import to a computer first and then copy them across.
How to transfer photos from iPhone to iPhone?
Use AirDrop for a few pictures, or turn on iCloud Photos with the same Apple Account on both phones to keep the whole library in step. When you are setting up a new phone, you can move everything to a new iPhone in one pass.
How can I transfer photos from iPhone to iPad?
AirDrop sends a selection of photos directly when both devices are nearby with Wi-Fi and Bluetooth on. For the full library, turn on iCloud Photos on both devices with the same Apple Account, and new pictures then appear on the iPad automatically.
How to transfer photos from iPhone to Android?
Back up the iPhone's photos with the Google Photos app by switching Backup on in its settings. Then sign in to Google Photos on the Android phone with the same Google Account. AirDrop and iCloud Photos sync will not reach an Android device directly.