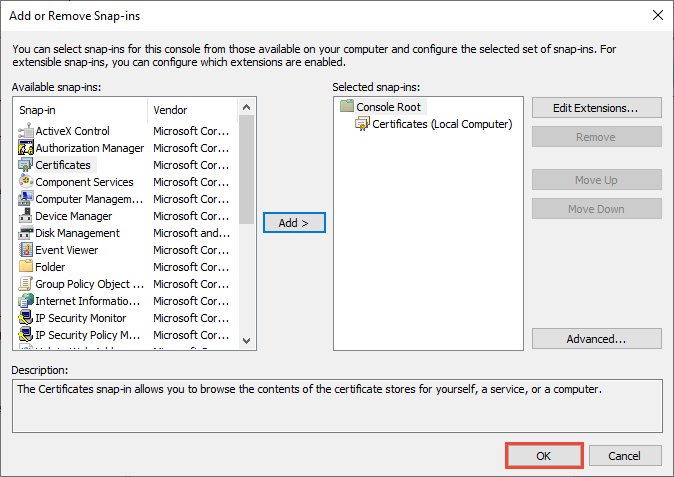
Open certlm.msc, expand Trusted Root Certification Authorities and select Certificates to view, import, export or delete the root certificates Windows 11 and Windows 10 trust.
This guide covers the Certificate Manager, PowerShell, certutil and Group Policy methods, how Windows keeps its root list current, and the errors that stop an import or a sync.
How to open trusted root certificates in Windows 11
The local computer console shows the root store every account on the PC uses. The same steps work on Windows 10.
- Press Windows key + R to open the Run box.
- Type
certlm.mscand press Enter. Select Yes if User Account Control asks for permission. - In the left pane under Certificates – Local Computer, expand Trusted Root Certification Authorities.
- Select Certificates to list every root certificate the computer trusts, with Issued To, Issued By and expiry columns.
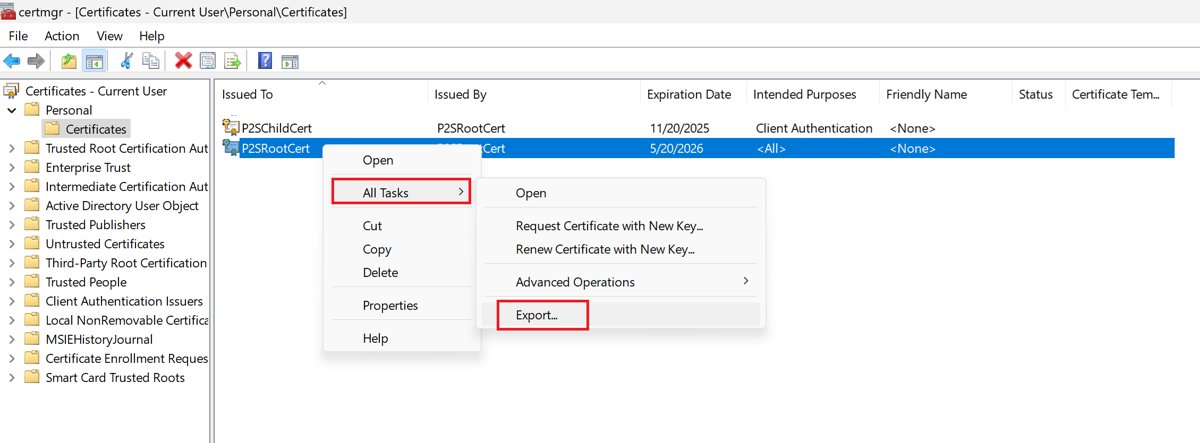
- Right-click a certificate to Open, Delete or, under All Tasks, Export it.
- Right-click the Certificates folder and select All Tasks > Import to add a new root certificate.
To work only on your own account, type certmgr.msc instead. It opens Certificates – Current User, which needs no administrator rights. The Certificate Manager console has more on what each folder holds.
What are trusted root certificates in Windows?
A trusted root certificate is the top of a certificate chain. Windows and apps check it before they accept a website, a signed driver or a signed app.
By default the store holds public certificate authorities that meet the requirements of the Microsoft Root Certificate Program.
| Term | What it means in Windows 11 and 10 |
|---|---|
| Trusted Root Certification Authorities | The store that holds the root certificates of every CA Windows trusts. Its internal name is Root. |
| Local machine store | Global to all users on the PC. It lives under the HKEY_LOCAL_MACHINE registry root and opens with certlm.msc. |
| Current user store | Local to one user account, under HKEY_CURRENT_USER. It opens with certmgr.msc. |
| Inheritance | Every current user store except Personal inherits the local machine store, so a root added to the computer appears for all users. |
| Certificate trust list (CTL) | The signed list Windows downloads from Windows Update to learn which roots are trusted (the Trusted CTL) and which are known fraudulent (the Untrusted CTL). |
| Disallowed certificates | Certificates that are publicly known to be fraudulent. Windows refuses to trust anything that chains to them. |
Methods to manage trusted root certificates
All four tools change the same store. Pick the one that matches how many PCs you manage and whether you need a script.
| Your situation | Use this | Why |
|---|---|---|
| One PC, a few certificates, you prefer menus | Certificate Manager (certlm.msc or certmgr.msc) |
Import, export and delete from a right-click menu with a wizard |
| Repeatable changes or a script | PowerShell Cert: drive |
Import-Certificate, Export-Certificate and Remove-Item match one certificate by thumbprint |
| Batch files or older scripts | certutil in Command Prompt | Ships with Windows and works without PowerShell |
| Many domain-joined PCs | Group Policy | One GPO pushes the same root certificate to every computer in a domain or OU |
Method 1: Using the Certificate Manager (certmgr.msc)
Use certlm.msc to add a root for the whole computer, or certmgr.msc to add it to your account only. The wizard is the same in both.
- Press Windows key + R, type
certlm.msc(orcertmgr.msc) and press Enter. - Expand Trusted Root Certification Authorities, then right-click Certificates and select All Tasks > Import.
- On Welcome to the Certificate Import Wizard, select Next.
- Under File to Import, select Browse, pick the .cer, .crt, .p7b or .sst file and select Next.
- Keep Place all certificates in the following store set to Trusted Root Certification Authorities and select Next.
- Select Finish, then OK when the wizard reports that the import was successful.
- If a security warning asks you to confirm the root install, check the certificate name and select Yes only for a CA you expect.
Only import a root certificate you got from its owner, such as your company's CA or a vendor's support page. A root in this store can vouch for any website.
How to install a root certificate from a .cer file in Windows 11
You can skip the console and install a certificate file straight from File Explorer.
- Right-click the .cer or .crt file and select Install Certificate.
- Under Store Location, select Local Machine (all users) or Current User, then select Next.
- Select Place all certificates in the following store, then select Browse.
- Choose Trusted Root Certification Authorities, select OK, then Next.
- Select Finish. The prompt The import was successful confirms the install.
Pick Local Machine when a service, a driver or several users need the root. Current User affects your account only.
How to delete a trusted root certificate in Windows 10 and 11
Export the certificate first so you can put it back. Deleting a root that Windows or an app relies on breaks the sites and software it vouches for.
- Press Windows key + R, type
certlm.mscand press Enter. - Expand Trusted Root Certification Authorities and select Certificates.
- Find the certificate in the Issued To column and double-click it to check the name and expiry date.
- Close the dialog, right-click the certificate and select Delete.
- Select Yes to confirm the deletion.
A root added through certmgr.msc lives in your user store, so delete it from Certificates – Current User instead.
How to export trusted root certificates in Windows
Exporting saves the public certificate, which is all another PC needs to trust the same root.
- Open
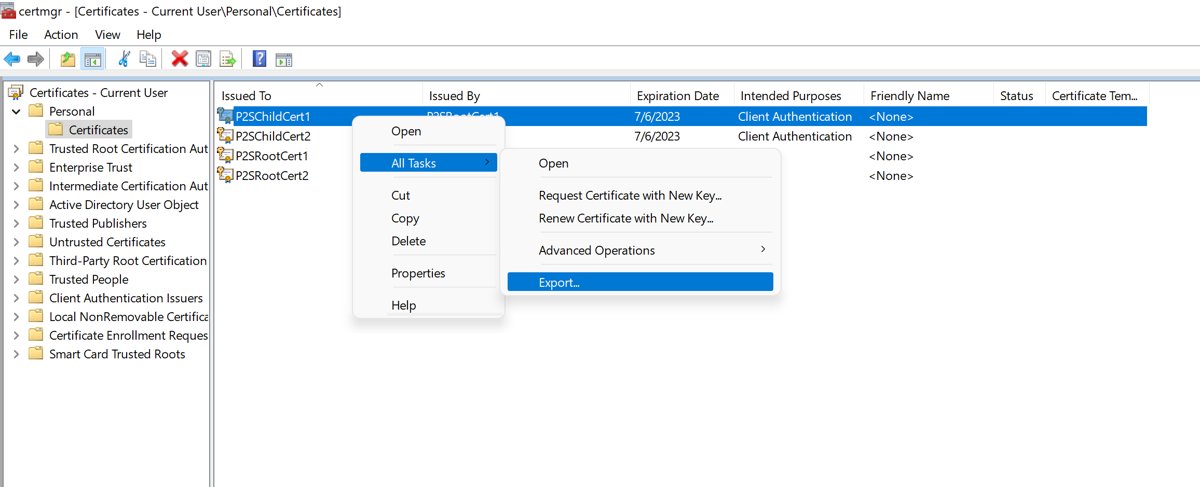
certlm.msc, expand Trusted Root Certification Authorities and select Certificates. - Select one certificate, or hold Ctrl and select several.
- Right-click one of the selected certificates and select All Tasks > Export.
- In the Certificate Export Wizard, select Next.
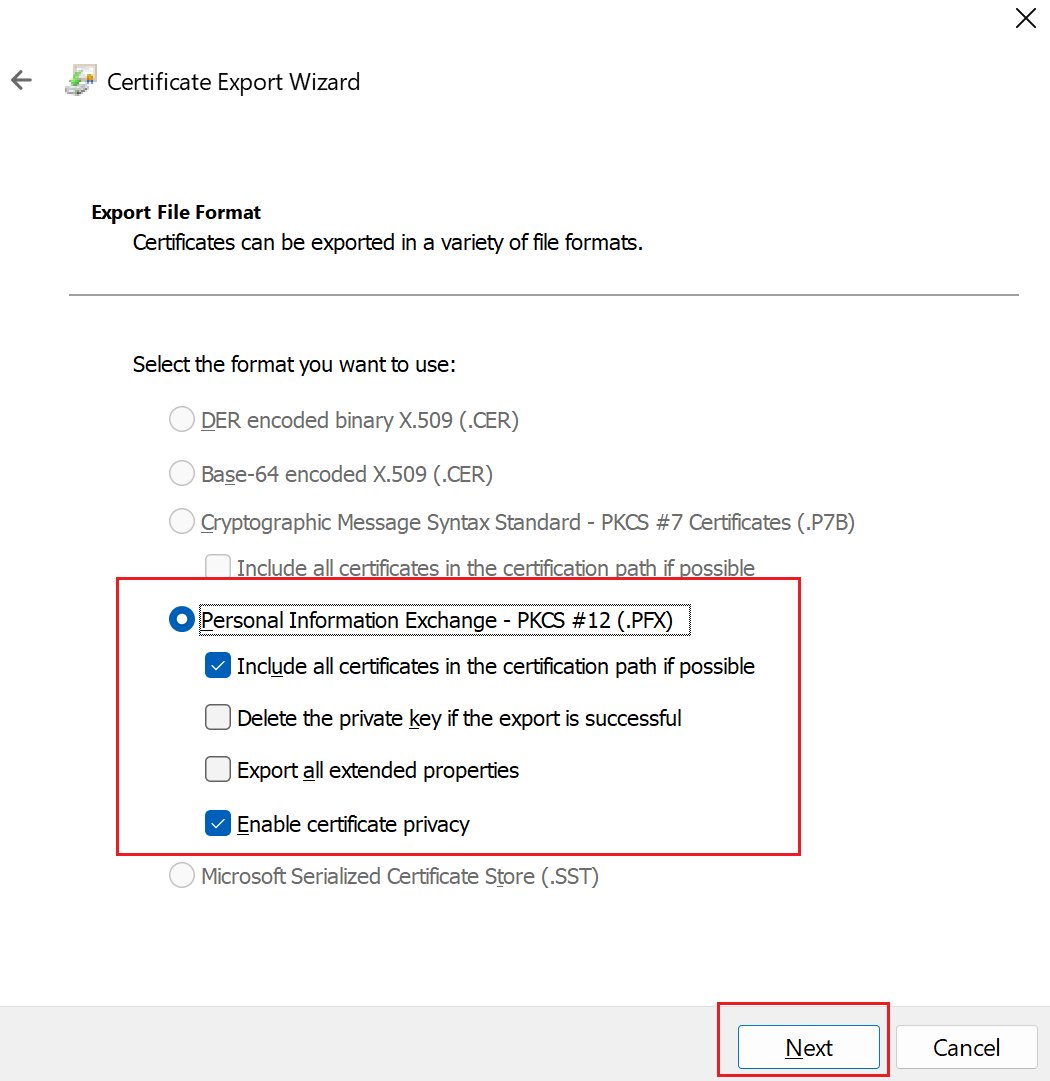
- On Export File Format, pick a format. Choose Microsoft Serialized Certificate Store (.SST) to keep several certificates in one file.
- On File to Export, enter a path such as
C:\Certs\RootBackup.sst, select Next, then Finish and OK.
The .sst option needs at least two selected certificates. With one certificate selected, the wizard offers .cer formats instead.
Method 2: Using PowerShell to manage root certificates
PowerShell exposes the stores as the Cert: drive. Search PowerShell and open it as administrator, then run the commands below. Replace LocalMachine with CurrentUser to work on your own account.
- List the computer's trusted roots with their thumbprints:
Get-ChildItem Cert:\LocalMachine\Root. - Find one root by name:
Get-ChildItem Cert:\LocalMachine\Root | Where-Object Subject -like '*Contoso*'. - Import a root certificate:
Import-Certificate -FilePath 'C:\Certs\RootCA.cer' -CertStoreLocation Cert:\LocalMachine\Root. - Export one root without its private key:
$cert = Get-ChildItem -Path Cert:\LocalMachine\Root\<thumbprint>, thenExport-Certificate -Cert $cert -FilePath C:\Certs\root.cer. - Preview a deletion:
Remove-Item Cert:\LocalMachine\Root\<thumbprint> -WhatIf. - Delete it once the preview names the right certificate:
Remove-Item Cert:\LocalMachine\Root\<thumbprint>.
Import-Certificate accepts .sst, .p7b and .cert files. It imports every certificate in a file only when the file is .sst; other formats import just the first one.
Method 3: Using certutil (Command Prompt)
The certutil command-line tool ships with Windows. Open Command Prompt with Run as administrator for the computer store, or add -user to target your account.
- Dump the computer's root store:
certutil -store Root. - Add a root certificate:
certutil -addstore Root "C:\Certs\RootCA.cer". Add-fto overwrite an existing copy. - Add a root to your account only:
certutil -user -addstore Root "C:\Certs\RootCA.cer". - Save one root to a file by its serial number or SHA-1 hash:
certutil -store Root <CertId> C:\Certs\root.cer. - Delete a root by its serial number or SHA-1 hash:
certutil -delstore Root <CertId>.
Microsoft notes that certutil -store slows down when a store holds more than 10 certificates, because it matches the ID against every field. PowerShell matches the thumbprint only.
Method 4: Using Group Policy (domain environments)
Group Policy pushes one root certificate to every computer a GPO applies to. You need a domain controller or a PC with RSAT, and a Domain Admins or Enterprise Admins account.
- Open Group Policy Management (
gpmc.msc) on a domain controller or a PC with RSAT. - Find or create a GPO linked to the domain, site or OU that holds the target computers. Right-click it and select Edit.
- Go to Computer Configuration > Policies > Windows Settings > Security Settings > Public Key Policies.
- Right-click Trusted Root Certification Authorities and select Import.
- In the Certificate Import Wizard, select Next, browse to the .cer or .sst file and select Next.
- Confirm the Trusted Root Certification Authorities store, select Next, then Finish and OK.
- On a client, run
gpupdate /forcefrom an elevated prompt, or restart it, to apply the policy.
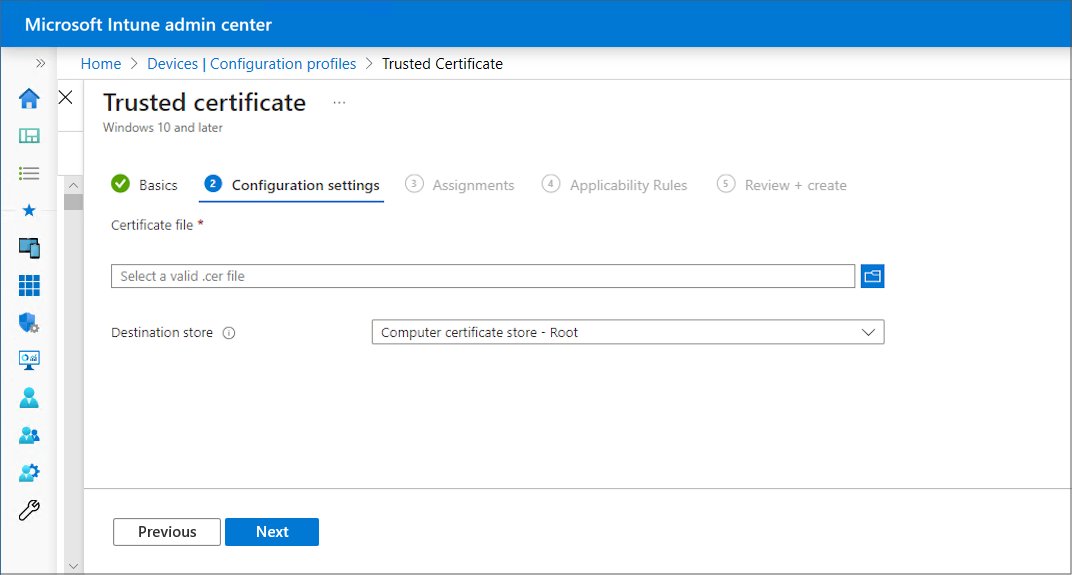
Intune-managed PCs get the same result from a trusted certificate profile with the Computer certificate store – Root destination.
How to update trusted root certificates in Windows 10 and 11
Windows updates its root list on its own. The CTL updater downloads the trusted and untrusted lists from ctldl.windowsupdate.com daily when the PC can reach Windows Update.
For an offline PC, build the current list on a connected machine with the command below. Then import the file with Import-Certificate or distribute it through the Group Policy steps above.
certutil -generateSSTFromWU WURoots.sstRun it from an elevated Command Prompt or PowerShell on a PC with internet access. It writes the third-party roots that Windows Update currently trusts into one .sst file. To keep a whole file share in sync for a disconnected network, use certutil -syncWithWU \\Server1\CTL instead.
You should see: WURoots.sst appears in the current folder. Run start explorer.exe wuroots.sst to open it and list the certificates it holds.
To deploy only part of that list, open WURoots.sst, select the roots you want, and export them to a new .sst file before you import it into Group Policy.
How to check if a root certificate is installed in Windows
- Open
certlm.msc, expand Trusted Root Certification Authorities and select Certificates. - Look for the CA name in the Issued To column. If it is missing, the root is not installed for the computer.
- Check
certmgr.msctoo if the root was added for one user only. - In PowerShell, run
Get-ChildItem Cert:\LocalMachine\Root | Where-Object Subject -like '*Contoso*'and compare the Thumbprint with the one your CA publishes. - To see when Windows last refreshed its trusted list, run
certutil -verifyctl AuthRoot | findstr /i "lastsynctime". - Run
certutil -verifyctl Disallowed | findstr /i "lastsynctime"for the untrusted list.
Double-click any root to check its certificate details, including the chain and intended purposes.
Where is the Turn off Automatic Root Certificates Update policy?
Microsoft does not recommend turning automatic root updates off. It also stops updates to the disallowed list and the pin rules, and the PC may fail to connect to some websites. Leave these at their defaults unless your network has no internet access by design.
| Setting | Where it lives | Default |
|---|---|---|
| Turn off Automatic Root Certificates Update | Computer Configuration > Administrative Templates > System > Internet Communication Management > Internet Communication Settings | Not configured (updates on) |
| Automatically update certificates in the Microsoft Root Certificate Program (recommended) | Computer Configuration > Windows Settings > Security Settings > Public Key Policies > Certificate Path Validation Settings > Network Retrieval tab | Checked |
| DisableRootAutoUpdate (REG_DWORD) | HKLM\SOFTWARE\Policies\Microsoft\SystemCertificates\AuthRoot |
No value present, so updates are on (1 turns them off) |
| EnableDisallowedCertAutoUpdate (REG_DWORD) | HKLM\SOFTWARE\Policies\Microsoft\SystemCertificates\AuthRoot |
No value present, so untrusted-list updates are on |
| RootDirUrl (REG_SZ) | HKLM\SOFTWARE\Microsoft\SystemCertificates\AuthRoot\AutoUpdate |
No value present, so Windows Update is the source |
Is it safe to delete trusted root certificates?
Delete a root certificate only when you added it yourself or your IT team tells you it is unwanted. Microsoft warns that improper changes to this store can compromise the PC's security, and a missing public root stops the sites and signed software that chain to it from validating. Export a copy before you delete anything, and leave Microsoft's own root certificates alone.
Group Policy changes behave differently. The root update settings a GPO writes stay on client PCs after the GPO is unlinked, so reverse them in the GPO itself or in the registry.
Trusted root certificate errors in Windows 10 and 11
certutil -syncWithWU fails with 0x80072efd
The PC cannot open TCP port 80 to the Microsoft automatic update servers.
- Allow HTTP on TCP port 80 from that PC to
ctldl.windowsupdate.com. - Run the
certutil -syncWithWUcommand again from an elevated prompt.
Error 0x80072ee7: the server name or address couldn't be resolved
DNS on the PC cannot resolve ctldl.windowsupdate.com.
- Allow DNS on TCP and UDP port 53 for that PC.
- Run
nslookup ctldl.windowsupdate.comto confirm the name resolves, then retry.
certutil -syncWithWU fails with 0x800700b7 (file already exists)
CTL files from an earlier sync are already in the target folder.
- Add the
-fswitch to overwrite them:certutil -f -syncWithWU \\Server1\CTL. - Schedule the command so the share stays current, because the trusted and untrusted lists can change daily.
Error 0x80070002 or 0x80070043 when you sync to a folder
0x80070002 means the local folder does not exist; 0x80070043 means the network share name cannot be found.
- Create the folder, or check the share name and its permissions.
- Run the sync again with the corrected path.
Only one certificate imported from a file that holds several
Import-Certificate imports every certificate only from an .sst file; from other formats it takes the first one.
- Export the certificates to a Microsoft Serialized Certificate Store (.SST) file.
- Run
Import-Certificate -FilePath C:\Certs\roots.sst -CertStoreLocation Cert:\LocalMachine\Rootagain.
You can only manage certificates for your own account
Your account is not an administrator on the PC, so the computer store is read-only to you.
- Sign in with an administrator account, or ask your IT team to add the root.
- Use
certmgr.mscto add the root to your own user store if the app only needs it for your account.
Trusted root certificates FAQ
Where are trusted root certificates stored in Windows 11?
They are stored in the Trusted Root Certification Authorities store. The computer copy lives under HKEY_LOCAL_MACHINE and opens with certlm.msc; each user's copy lives under HKEY_CURRENT_USER and opens with certmgr.msc. Windows 10 uses the same locations.
What is the difference between certmgr.msc and certlm.msc?
certlm.msc opens the local computer certificate stores, which apply to every user and need administrator rights to change. certmgr.msc opens the current user stores, which apply only to your account. User stores inherit roots added to the computer store.
How do I add a trusted root certificate in Windows 10?
Right-click the .cer file, select Install Certificate, choose Local Machine, then place it in the Trusted Root Certification Authorities store and select Finish. You can also run Import-Certificate in PowerShell or certutil -addstore Root with the file path.
How does Windows update trusted root certificates?
The CTL updater downloads the trusted and untrusted certificate trust lists from Windows Update every day when the PC can reach ctldl.windowsupdate.com. Offline networks can host the files on an internal server with certutil -syncWithWU and point clients there through Group Policy.
How do I export all trusted root certificates?
Select the certificates in certlm.msc, right-click and choose All Tasks > Export, then pick the Microsoft Serialized Certificate Store (.SST) format. In PowerShell, Export-Certificate writes an SST file by default when you pass it more than one certificate.
What are disallowed certificates in Windows?
Disallowed certificates are certificates that are publicly known to be fraudulent. Microsoft publishes them in the Untrusted CTL, and Windows downloads that list automatically so it refuses any certificate that chains to one of them.
Do I need administrator rights to manage root certificates?
Yes for the computer store. Adding or removing roots in certlm.msc, or in Cert:\LocalMachine\Root, needs an administrator account. Without one you can only manage certificates in your own user store through certmgr.msc.
Can I remove a root certificate with PowerShell?
Yes. Run Remove-Item Cert:\LocalMachine\Root\ followed by the certificate's thumbprint from an elevated PowerShell window. Add -WhatIf first to preview which certificate the command will delete before you run it for real.