Press Windows logo key + Shift + R, drag a box over the part of the screen you want, and select Start to record your screen with Snipping Tool in Windows 11.
This guide covers the recording steps, adding microphone and PC audio, where the video is saved, GIF export, the Xbox Game Bar alternative, and fixes for a missing Record button, silent clips, black video and failed saves.
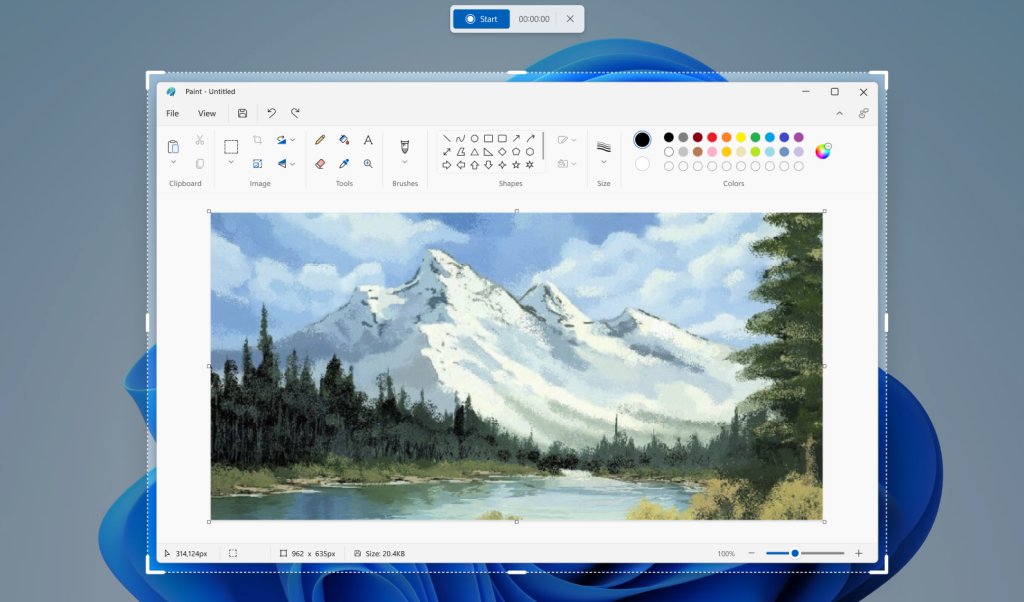
Record your screen with Snipping Tool in Windows 11
Screen recording is built into the Snipping Tool app on Windows 11, so there is nothing extra to install once the app is up to date.
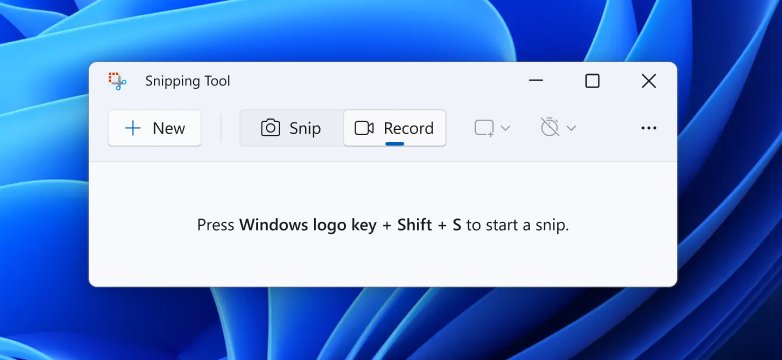
- Press Windows logo key + Shift + R to open the Snipping Tool overlay in video mode. You can also open Snipping Tool from Start, select the Record (video camera) button, and then select New.
- Drag a rectangle over the area of the screen you want to record. Adjust the edges until the box frames only what you need.
- Turn on the microphone or PC audio options on the recording bar if you want sound in the video.
- Select Start. Some PCs show a short delay before capture begins.
- Use the pause button on the recording bar if you need a break without ending the clip.
- Select Stop when you are finished. The recording opens in a preview window.
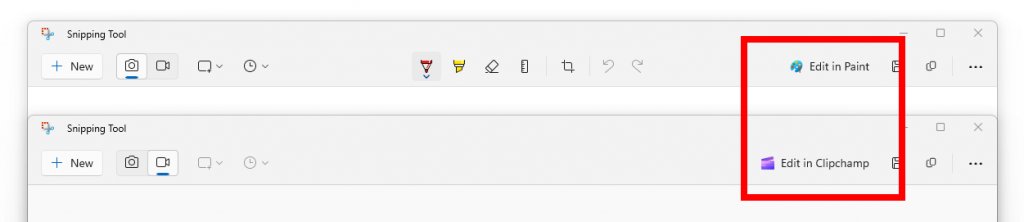
- Play the preview, then save it, share it, or select Edit in Clipchamp to trim and caption it.
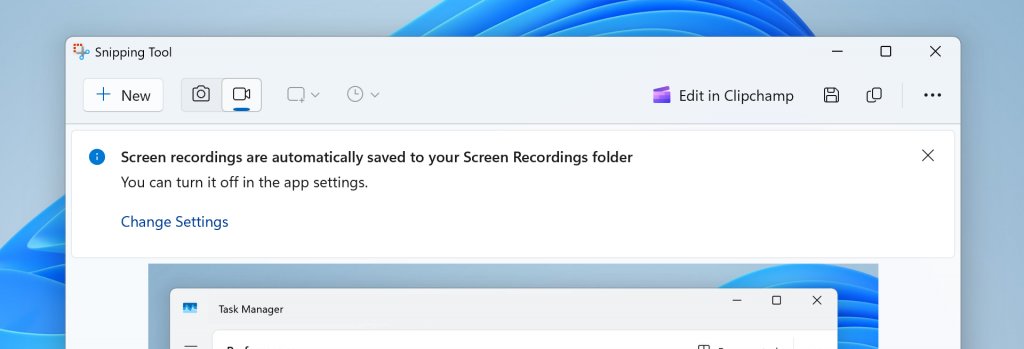
On current versions of the app, the finished video is also saved automatically to the Screen Recordings folder inside your Videos folder.
Prerequisites and compatibility
Recording arrived in Snipping Tool through Microsoft Store updates, so the features you see depend on the app version as much as on Windows.
| Requirement | Detail |
|---|---|
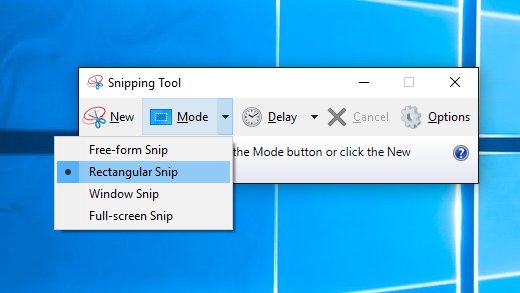
| Operating system | Windows 11. The Windows 10 version of Snipping Tool only offers Free-form, Rectangular, Window and Full-screen snips, with no video mode. |
| Basic screen recording | Snipping Tool version 11.2211.35.0 or later (first released to Windows Insiders in December 2022) |
| Pause while recording | Added in the January 2023 update, version 11.2212.24.0 |
| Microphone and PC audio | Snipping Tool version 11.2307.44.0 or later |
| Edit in Clipchamp button | Snipping Tool version 11.2306.43.0 or later |
| Automatic save to Screen Recordings | Snipping Tool version 11.2405.31.0 or later |
| Export GIF | Snipping Tool version 11.2505.21.0 or later; clips of 30 seconds or less |
| Microphone permission | Microphone access turned on in Settings > Privacy & security > Microphone |
On Windows 10, Microsoft points users to Clipchamp for screen recording on Windows 10 instead.
How to record screen with audio using Snipping Tool
Snipping Tool can capture PC audio, a microphone voice-over, or both. Pick the inputs before you press Start, because they cannot be added to the same take afterwards.
- Press Windows logo key + Shift + R to open the recording bar.
- Turn on the microphone option on the recording bar to capture your voice.
- Turn on the system audio option to capture sound playing on the PC, such as a video or app alerts.
- If you have more than one microphone, choose the recording device from the microphone option before you start.
- Drag a box over the area you want, then select Start.
- Select Stop, then play the preview and listen for both sound sources before you save.
To set the audio defaults for every new recording, open Snipping Tool, select See More (the three dots), choose Settings, and set the screen recording audio options there.

Where are Snipping Tool screen recordings saved in Windows 11
Where the video ends up depends on the app version and whether automatic save is on.
| Situation | Where the recording goes |
|---|---|
| Snipping Tool 11.2405.31.0 or later, automatic save on | Videos > Screen Recordings, saved as soon as you stop recording |
| Automatic save turned off in Snipping Tool settings | Only where you save it yourself from the preview window |
| Older Snipping Tool versions | Nothing is stored until you save the preview manually |
| Exported GIF | Wherever you save it, or the clipboard if you choose to copy it |
| Xbox Game Bar recordings | Videos > Captures, as MP4 files named after the app with the date and time |
To stop automatic saving, open Snipping Tool, select See More > Settings, and turn off automatic save for screen recordings. Turn it back on the same way.
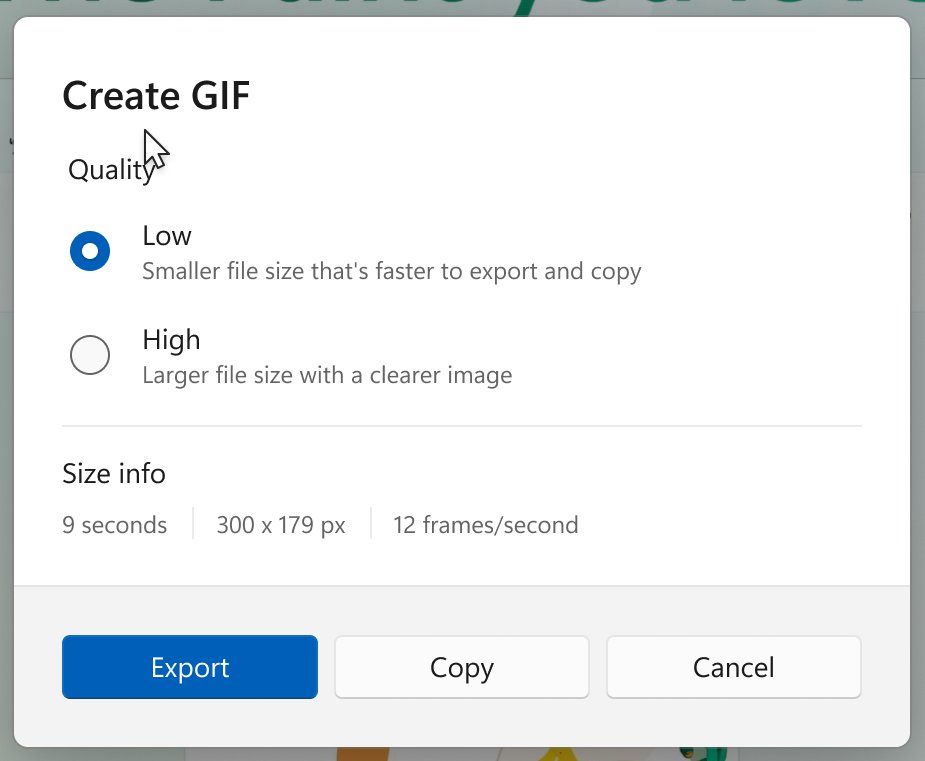
How to save a Snipping Tool recording as a GIF
GIF export suits short clips you want to paste into chat, email or a bug report. It only handles the first 30 seconds of a longer video.
- Record a clip with Windows logo key + Shift + R and select Stop.
- In the preview window, select Export GIF on the top toolbar.
- Choose a quality setting between low and high.
- Save the GIF to a folder, or copy it to the clipboard and paste it straight into another app.
- For a recording longer than 30 seconds, accept the offer to export the first 30 seconds, or record a shorter take.
How to edit a Snipping Tool video in Clipchamp
Snipping Tool has no trimming tools of its own. The preview window hands the video to Clipchamp, the Microsoft video editor, where captions and audio changes happen.
- Stop the recording so the preview window opens.
- Select Edit in Clipchamp. The video opens in a new Clipchamp project.
- Trim the start and end on the timeline to cut dead time.
- Open the Captions tab and select Transcribe media to add automatic captions, choosing the language first.
- Open the Audio tab to set the clip volume anywhere from 0 to 200%, or select Detach audio to save the sound as a separate file.
- Export the finished video from Clipchamp.
Detached audio downloads to your Downloads folder. Press Windows logo key + R, type downloads and press Enter to open it.
Verify that the recording succeeded
A recording that looked fine on screen can still come out silent or blank, so check the saved file rather than the preview alone.
- Open File Explorer and go to Videos > Screen Recordings (or the folder you saved to).
- Sort by Date modified and confirm the newest file has the time you recorded.
- Double-click the file and play it from start to finish.
- Listen for your voice and for PC sound if you turned those options on.
- Check that every window you meant to show appears, not a black or gray box.
- If anything is missing, use the matching fix below and record a new take.
Alternate method: record an app with Xbox Game Bar
Xbox Game Bar is a second built-in recorder. It records one app or game window rather than a region you draw, and it works without the Snipping Tool update.
- Press Windows logo key + I, search for xbox, and turn on Enable Xbox Game Bar.
- To record all PC sound, press Windows logo key + G, open Settings, select Capturing, and choose All.
- Switch to the app or game you want to record.
- Press Windows logo key + Alt + R to start recording.
- Press Windows logo key + Alt + M to turn the microphone on or off during the recording.
- Press Windows logo key + Alt + R again to stop. The MP4 file is saved to Videos > Captures.
Press Windows logo key + G at any time to show the Game Bar controls, including the stop button.
Troubleshooting and rollback/escalation
Work from the lightest fix to the heaviest. Each step leaves your other apps and files alone.
Recording problems that survive a restart
The app is out of date or its files are damaged.
- Open Microsoft Store, go to Downloads, and install any pending update for Snipping Tool.
- Select Start > Settings > Apps > Installed apps.
- Find Snipping Tool, select the three-dot More menu, and choose Advanced options.
- Select Repair and test a short recording.
- If Repair does not help, select Reset on the same page and test again.
You need a recording now and Snipping Tool still fails
A fix will take longer than the task allows.
- Record the app with Xbox Game Bar using Windows logo key + Alt + R.
- Report the Snipping Tool fault in Feedback Hub (Windows logo key + F) under Apps > Snipping Tool.
The Record button is missing in Snipping Tool
Only screenshot modes appear, with no Record or video camera button
The PC runs Windows 10, or Snipping Tool is older than version 11.2211.35.0.
- Confirm the PC runs Windows 11. The Windows 10 Snipping Tool has no video mode.
- Open Microsoft Store and select Downloads.
- Install the pending Snipping Tool update, then close and reopen the app.
- Press Windows logo key + Shift + R to test the recorder directly.
If the app itself is gone from Start, you can install Snipping Tool without the Store and then update it.
The recording is silent
The video plays but there is no voice or PC sound
Audio options were off, the wrong microphone was chosen, or Windows blocks microphone access.
- Update Snipping Tool from Microsoft Store. Audio capture needs version 11.2307.44.0 or later.
- Before the next take, turn on the microphone and system audio options on the recording bar.
- Select Start > Settings > Privacy & security > Microphone and turn on Microphone access.
- Turn on Let apps access your microphone and Let desktop apps access your microphone.
- Go to Settings > System > Sound, pick your microphone under Choose a device for speaking or recording, and run the microphone test.
- Raise Input volume if the test level is low, then record a new clip.
Snipping Tool opens, but Start does nothing or the app closes
Start does not begin the recording, or Snipping Tool closes
A short start delay, a stalled app process, or damaged app files.
- Wait a few seconds after selecting Start. Some PCs show a short delay before capture begins.
- Close Snipping Tool, reopen it, and try Windows logo key + Shift + R instead of the in-app button.
- Install any Snipping Tool update from Microsoft Store > Downloads.
- Go to Settings > Apps > Installed apps, open Advanced options for Snipping Tool, and select Repair.
- Select Reset on the same page if Repair does not fix it.
The video is black, gray, blank, or does not show protected content
One window shows as a black or empty box in the recording
The app protects its window from capture. Windows lets an app show content only on the monitor, so recordings show the window with no content or leave it out entirely.
- Play the file and note which window is blank. Everything else recording normally points to that app's protection.
- Check whether the content is a protected stream, such as paid video, or a secure app. Snipping Tool cannot record it, and no setting changes that.
- Record a different window or region to confirm the recorder itself works.
- If the whole video is black, update Snipping Tool, select Repair under Advanced options, and record again.
Snipping Tool will not save the recording
No file appears in Videos > Screen Recordings
Automatic save is off, or the app version predates it.
- Open Snipping Tool, select See More > Settings, and turn on automatic save for screen recordings.
- Update Snipping Tool. Automatic save needs version 11.2405.31.0 or later.
- Until then, save each clip yourself from the preview window before you close it.
Saving fails or the GIF export stops early
App files are damaged, or the clip is longer than GIF export allows.
- For GIFs, keep the clip to 30 seconds or less, or accept the first-30-seconds export.
- Select Repair for Snipping Tool under Settings > Apps > Installed apps > Advanced options if every save fails.
Snipping Tool screen recording FAQ
For still images rather than video, the Windows screenshot shortcuts use the same Snipping Tool overlay.
What is the shortcut to screen record with Snipping Tool?
Press Windows logo key + Shift + R. The shortcut opens the Snipping Tool overlay in video mode, so you can drag a box over the area you want and select Start. Select Stop when you finish.
Does Snipping Tool record audio?
Yes. Snipping Tool version 11.2307.44.0 and later can record PC audio, a microphone voice-over, or both. Turn on the audio options on the recording bar before you select Start, and set defaults under See More > Settings.
Where are Snipping Tool recordings saved?
Snipping Tool 11.2405.31.0 and later saves recordings automatically to the Screen Recordings folder inside your Videos folder. If automatic save is off or the app is older, the video is saved only where you choose from the preview window.
Can Snipping Tool record the screen on Windows 10?
No. The Windows 10 version of Snipping Tool only takes Free-form, Rectangular, Window and Full-screen screenshots. Microsoft points Windows 10 users to Clipchamp for screen recording, and Xbox Game Bar can record app windows there too.
Can you pause a Snipping Tool screen recording?
Yes. Pause was added to Snipping Tool in the January 2023 update, version 11.2212.24.0. Use the pause button on the recording bar, resume when you are ready, and select Stop to finish the clip.
Can Snipping Tool save a recording as a GIF?
Yes, in version 11.2505.21.0 and later. Select Export GIF in the preview toolbar, pick a quality from low to high, and save or copy the file. GIF export covers videos of 30 seconds or less.
How do you trim a Snipping Tool recording?
Snipping Tool has no trim control, so select Edit in Clipchamp in the preview window. Clipchamp opens the video on a timeline where you can trim it, add automatic captions, adjust volume and export the result.
Why is part of my Snipping Tool recording black?
The app in that area protects its window from capture. Windows can show such a window only on the monitor, so recordings show it empty or leave it out. Protected video and secure apps cannot be recorded with Snipping Tool.