To insert a check box in Word, turn on the Developer tab, click where you want the box, and select Check Box Content Control.
This guide covers clickable boxes on Windows and Mac, checklists in Word for the web, printable boxes, changing the X to a check mark, and protecting a form.
How to insert a clickable check box in Word for Windows
A check box content control is a box readers can click in the Word desktop app. The control has been available since Word 2010.
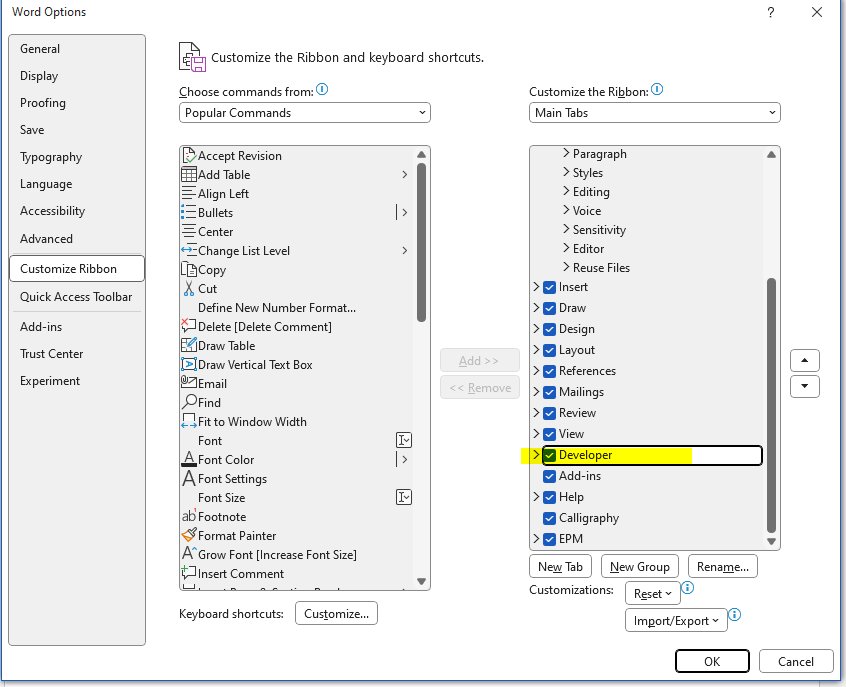
- Select File > Options > Customize Ribbon.
- Under Main Tabs, select the Developer check box, then select OK.
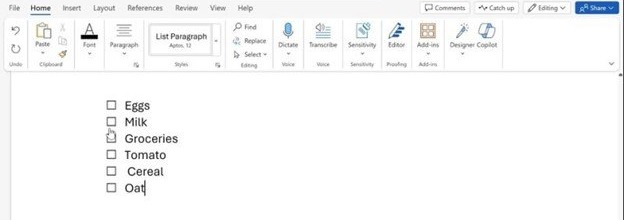
- Type your list, one item per line.
- Click at the start of the first line.
- Select Developer > Check Box Content Control.
- Click the box to test it. A click adds an X, and a second click clears it.
- Copy the box and paste it at the start of each remaining line.
Forms that need sign-off can also carry a signature in Word after the last item.
Interactive check box or printable box: choose the right type
Word has several features that produce a box. Pick by how the document will be used, because a printable bullet cannot be clicked.
| Your situation | Use this | Why |
|---|---|---|
| People tick boxes on screen in desktop Word | Check Box Content Control on Windows, Check Box on Mac | A click toggles the box |
| You and others edit in a browser | Checklist in Word for the web | Creating fillable forms is not available in the web app |
| The list will be printed and ticked by hand | A box symbol set as a custom bullet | No Developer tab needed, and the list formats like any bullets |
| You only need a tick or a box character once | Insert > Symbol | It inserts a plain character, not a control |
How to show the Developer tab in Word
The Developer tab is hidden by default. Once on, it stays visible until you clear the check box or reinstall Microsoft 365. If no tabs show at all, display the Word ribbon first.
| Word version | Path | Last step |
|---|---|---|
| Word for Windows | File > Options > Customize Ribbon | Select Developer under Main Tabs |
| Word for Mac | Word > Preferences > Ribbon and Toolbar > Customize the Ribbon > Main Tabs | Select Developer, then Save |
How to insert a check box in Word on a Mac
Word for Mac uses a form control called Check Box, with its own options and the Protect Form command.
- Show the Developer tab using the path in the table above.
- Type your list.
- Place the cursor at the start of the first line.
- On the Developer tab, select Check Box.
- Add a tab or spaces after the box if you want a gap before the text.
- Copy the box with its spacing and paste it at the start of each item.
- Select Developer > Protect Form, then fill in the form as a reader would to test it.
To change the form again, select Protect Form a second time. To set a default value or size, select a box and choose Options.
How to make a checklist in Word for the web
Word for the web has no check box control, but it has a built-in Checklist command that needs no Developer tab.
- Open your document in Word for the web.
- Click where the list should start.
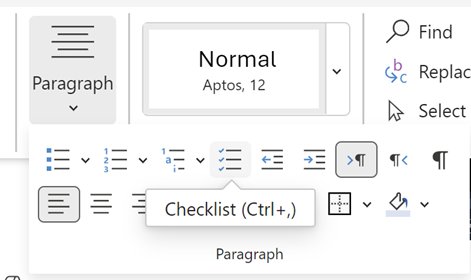
- Select Home, then Checklist in the Paragraph group, or press Ctrl + , (comma).
- Type each item.
- Select the empty box to the left of an item to tick it, and select it again to clear it.
How to create empty check boxes for printing
For a paper list or a printable worksheet in Word, turn a box symbol into a custom bullet. The steps below are the same idea on Windows and Mac.
- On the Home tab, select the down arrow next to Bullets.
- Select Define New Bullet.
- On Windows, select Symbol; on a Mac, select Bullet.
- Find a box character. If none shows, change Font to Wingdings or Segoe UI Symbol.
- Select OK twice.
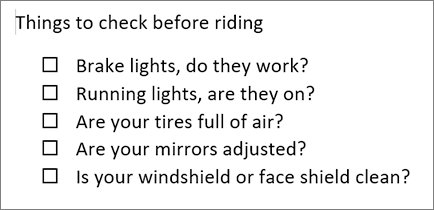
- Type your list. Each new line starts with an empty box.
How to put a check mark in a box in Word with Symbol
When you need a single tick or square rather than a working control, insert it as a character.
- Place the cursor where the mark belongs.
- Select Insert > Symbol.
- Select a check mark from the list, or choose More Symbols.
- Use the Font selector to look through other symbol sets.
- Double-click the symbol, then select Close.
- To resize it, select the mark and change its font size.
How to change the X to a check mark
A checked content control shows an X by default on Windows. You can change that symbol, but you have to do it for each box.
- Click the check box in your document.
- On the Developer tab, select Properties.
- In Content Control Properties, select Change next to Checked symbol.
- Choose a check mark character and select OK.
- If you do not see one, pick another font, such as Wingdings 2 or Segoe UI Symbol.
- Select OK to close the dialog, then repeat for each box.
Set up one box first, then copy it, so you need to change fewer controls.
How to keep a checklist aligned
A hanging indent keeps wrapped text clear of the box. Grouping then locks the list in place on Windows.
- Select the whole list, including the boxes.
- On the Home tab, open the Paragraph dialog box launcher. On a Mac, select Format > Paragraph.
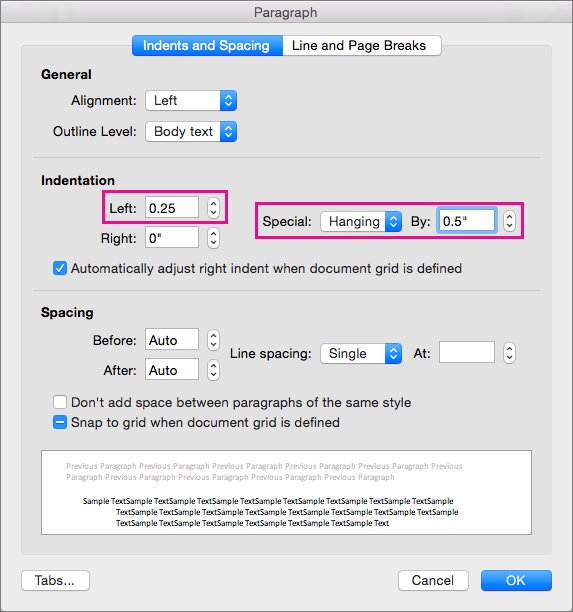
- Under Indentation, set Left to 0.25.
- Under Special, choose Hanging. Word sets By to 0.5 inches, which you can change.
- Select OK.
- On Windows, to lock the text and controls, select the list and boxes, then select Developer > Group > Group.
- To unlock the list later, select it and choose Group > Ungroup.
How to protect a form without disabling its check boxes
Restrict Editing blocks changes across the document, so you allow changes only in the areas that hold the boxes. On a Mac, use Developer > Protect Form instead. The same controls can make a Word document fillable with text and date fields too.
- Select a box, then select Developer > Properties.
- Select Content control cannot be deleted, leave Contents cannot be edited clear, and select OK.
- Select Review > Restrict Editing.
- Under Editing restrictions, select Allow only this type of editing in the document and choose No changes (Read only).
- Select the part of the form with the boxes, holding Ctrl to add more parts.
- Under Exceptions, select Everyone.
- Select Yes, Start Enforcing Protection, add a password if you want one, and test a box.
To edit the form later, select Review > Restrict Editing > Stop Protection and enter the password if asked.
How to tell if a Word check box is clickable
- Click the box once. A content control shows its checked symbol, an X by default.
- Click it again. The empty box should return.
- If you only see a character being selected, it was inserted as a symbol or bullet, not a control.
- Select the box and open Developer > Properties. If Content Control Properties opens, it is a content control.
How to remove a check box in Word
The route depends on which version created the box.
- If protection is on, turn it off first with Stop Protection or Protect Form.
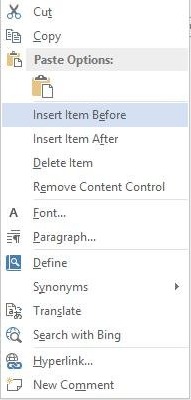
- On Windows, right-click the box and select Remove content control.
- If that option is unavailable, open Developer > Properties and clear Content control cannot be deleted.
- On a Mac, select the box and press Delete.
How to insert a check box in Google Docs and Google Sheets
People moving between editors often want the same result elsewhere. Both Google apps have a built-in option, and a text box in Google Docs helps when you build a form layout.
| App | Where to find it | To change or remove |
|---|---|---|
| Google Docs | Click where the list goes and choose the checklist option in the toolbar, under More if it is hidden | To convert a list, click a bullet, then Format > Bullets & numbering > Checklist |
| Google Sheets | Select the cells, then Insert > Checkbox | Select the checkboxes and press Delete |
Troubleshooting Word check boxes
The Developer tab is missing
Word hides the tab by default.
- Select File > Options > Customize Ribbon.
- Select Developer under Main Tabs.
- Select OK. On a Mac, use Word > Preferences and select Save.
The check box cannot be clicked
The contents are locked, protection blocks that area, or the box is really a symbol.
- Select the box, open Developer > Properties, and clear Contents cannot be edited.
- Select Review > Restrict Editing to see whether protection is on, then add the boxes as an exception.
- Replace any symbol or bullet with Check Box Content Control.
The box disappears or changes when shared
Word for the web can open a form but cannot create one, and the box symbol depends on a font.
- Ask the other person to open the file in the Word desktop app.
- Use Word for the web's Checklist if everyone edits in a browser.
- Send a PDF when the list only needs to be read or printed.
- In the PDF options, select Bitmap text when fonts may not be embedded so the symbols keep their look.
The check boxes move out of alignment
The list has no hanging indent, or spacing after each box differs.
- Select the list and set Left to 0.25 and Special to Hanging in the Paragraph dialog box.
- Use the same spacing after every box.
- Lock the list with Developer > Group > Group on Windows.
Word check box FAQ
Can I insert a checkbox in Word?
Yes. On Windows, select Developer, then Check Box Content Control. On a Mac, select Developer, then Check Box. In Word for the web, select Home, then Checklist in the Paragraph group. The Developer tab is hidden until you turn it on.
Can I insert a check box without the Developer tab?
Yes, but it will not be a control on the Windows or Mac desktop apps. Use a box symbol as a custom bullet for printing, or Insert, Symbol for a single character. Word for the web's Checklist command gives you clickable boxes without the tab.
Can I copy and paste a Word check box?
Yes. Microsoft's own checklist steps insert one box at the start of the first line, then copy and paste it to the start of each other line. On a Mac, copy the box along with any tab or spaces after it.
Will clickable check boxes appear when printed?
You can print a form built with content controls, but Microsoft notes that the boxes around the content controls do not print. Print one test page to see how your check box symbols look on paper before printing the full form.
Can someone use the boxes after I convert the document to PDF?
Do not count on it. Microsoft describes Word's PDF export for files meant to be read and printed, and its PDF options include nothing for keeping check boxes clickable. Open the PDF and click a box to check before you send it.
How do I remove a check box?
On Windows, right-click the box and select Remove content control. If it will not delete, clear Content control cannot be deleted in Developer, Properties. On a Mac, select the box and press Delete. Turn off any protection first.
How do I insert a check box in Word online?
Open the document in Word for the web, select Home, and select Checklist in the Paragraph group, or press Ctrl and comma. Select the box beside an item to tick or clear it. Fillable form controls cannot be created in the browser.