Run winget install 9MZ95KL8MR0L -s msstore in Terminal to install Snipping Tool on Windows 11 without opening the Microsoft Store, or run the Snipping Tool installer that Microsoft publishes on its own support page.
Below are 13 methods, from re-registering a broken copy and DISM provisioning for every account to Features on Demand, error codes and a dead Windows + Shift + S shortcut.
Method 1: Install Snipping Tool without the Store using winget
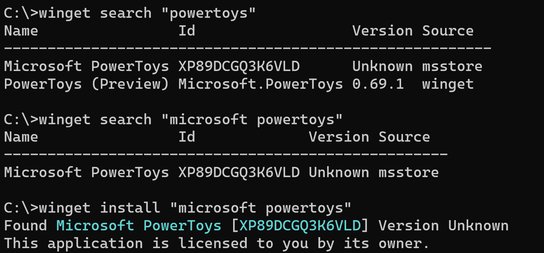
winget is the Windows Package Manager. It ships inside App Installer on Windows 11 and on Windows 10 version 1809 or later, and its msstore source installs Store apps without opening the Store app.
- Select Start, type Terminal (or PowerShell on Windows 10), and open it without administrator rights.
- Run
winget install 9MZ95KL8MR0L -s msstore. The ID is Snipping Tool's Microsoft Store product ID, published by Microsoft Corporation. - Accept the source agreement when winget asks, or add
--accept-source-agreements --accept-package-agreementsto skip both prompts. - Wait until winget reports that the installation finished.
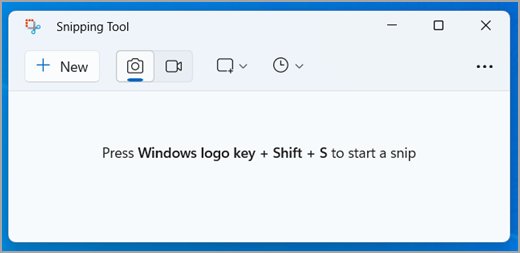
- Press Windows + Shift + S and check that the snipping overlay appears.
Store IDs such as 9MZ95KL8MR0L do not need the --exact switch. If Windows does not recognise the winget command, install and update WinGet before you continue.
What you need to know before installing Snipping Tool without the Store
Snipping Tool is a packaged Microsoft Store app, not a classic .exe program. Every route below installs or registers the same package.
| Item | Detail |
|---|---|
| Package name | Microsoft.ScreenSketch; package family Microsoft.ScreenSketch_8wekyb3d8bbwe |
| Microsoft Store product ID | 9MZ95KL8MR0L, published by Microsoft Corporation |
| Windows needed to uninstall and reinstall | Windows 11, or Windows 10 22H2 build 19045.3758 or later |
| Current package minimum | Windows 11 build 22000, according to Microsoft's Store catalog |
| Installer files from Microsoft | 64-bit (most common), 32-bit and ARM64 |
| winget | Windows 10 version 1809 (build 17763) or later, delivered with App Installer |
| Who gets the app | Packaged apps register separately for each user account on the PC |
| Feature on Demand | Microsoft.Windows.SnippingTool~~~~0.0.1.0, not available where the app is preinstalled |
Check Settings > System > About under Device specifications to see whether your PC needs the 64-bit, 32-bit or ARM64 file.
Why you might need to install Snipping Tool without the Store
| Your situation | Use this | Why |
|---|---|---|
| The Microsoft Store app will not open or is blocked | Method 1 (winget) or Method 2 (Microsoft's installer) | Neither route needs the Store app window |
| Snipping Tool was uninstalled from Installed apps | Method 2 or Method 1 | Both put the signed package back for your account |
| Snipping Tool is listed but will not open | Method 3 (re-register), then Method 5 (repair or reset) | The package is on the PC; its registration or data is broken |
| Another account on the PC still has it | Method 4 (PowerShell) | Registers the existing package by family name, with no download |
| Every account on the PC needs it | Method 8 (DISM provisioning) | Provisioned apps install for each user at the next sign-in |
| You build or service Windows images | Methods 9 to 11 (Feature on Demand) | Adds the capability with DISM, online or from the ISO |
| A work or school PC blocks app installs | Your IT administrator | Policies such as AppLocker override every local fix |
First check whether Snipping Tool is already installed
Reinstalling on top of a working copy wastes time, so find out what is on the PC first.
- Select Start, type snipping tool, and see whether Snipping Tool appears in the results.
- Open Settings > Apps > Installed apps and search for Snipping Tool.
- Open Windows PowerShell and run
Get-AppxPackage -Name Microsoft.ScreenSketch. Output with a Version and an InstallLocation means it is installed for your account. - If that returns nothing, open PowerShell as administrator and run
Get-AppxPackage -Name Microsoft.ScreenSketch -AllUsersto check the other accounts.
Listed for another user only: use Method 4. Listed for you but broken: use Method 3. Not listed anywhere: use Method 1 or Method 2.
Method 2: Reinstall Snipping Tool in Windows 11 with Microsoft's installer
Microsoft publishes Snipping Tool installer files on its Paint and Snipping Tool reinstall support page. The page requires Windows 10 22H2 build 19045.3758 or later, which includes Windows 11.
- Open Settings > System > About and note the System type under Device specifications.
- Open Microsoft's support page and go to Reinstall Paint/Snipping Tool.
- Select Snipping Tool Windows 64-bit (most common), Snipping Tool Windows 32-bit or Snipping Tool Windows ARM64 to match your PC.
- Open the downloaded file to run the installer.
- Follow the installer's instructions until setup is complete.
- Press Windows + Shift + S to check that the capture overlay opens.
Take the file only from that Microsoft page, never from a download portal that repackages it.
Method 3: Re-register Snipping Tool if it is already on the PC
Re-registering repairs missing entries for an installed package without downloading anything. Microsoft's own troubleshooting for inbox Store apps uses the same command.
- Open Windows PowerShell without administrator rights.
- Run
Get-AppxPackage -Name Microsoft.ScreenSketchand confirm it returns the package. - Run
Get-AppxPackage -Name Microsoft.ScreenSketch | Foreach {Add-AppxPackage -DisableDevelopmentMode -Register "$($_.InstallLocation)\AppXManifest.xml"}. - Wait for the prompt to return, then close PowerShell.
- Open Snipping Tool from Start, then test Windows + Shift + S.
Run it from a normal window. In an elevated prompt the package registers to the administrator account instead of yours. The pipe works only when the package is already registered for you; otherwise use Method 4.
Method 4: Install Snipping Tool using PowerShell
PowerShell can register a package that another account on the PC already has, which avoids a download. Microsoft documents this route for apps that return nothing for the current user.
- Open Windows PowerShell as administrator.
- Run
Get-AppxPackage -Name Microsoft.ScreenSketch -AllUsers. Details in the output mean the package exists on the PC. - Close that window and open Windows PowerShell again without administrator rights.
- Run
Add-AppxPackage -RegisterByFamilyName -MainPackage Microsoft.ScreenSketch_8wekyb3d8bbwe. - If the first command returned nothing, run
winget install 9MZ95KL8MR0L -s msstorein the same window instead.
The family name ends in _8wekyb3d8bbwe, the publisher ID Windows shows for Microsoft Corporation's Store packages.
Method 5: Repair or reset Snipping Tool without reinstalling
Microsoft's order is Repair first, then Reset if Repair is missing or does not help. Reset returns the app to its original settings, as if freshly installed.
- Select Start > Settings > Apps > Installed apps.
- Select the More icon (three dots) next to Snipping Tool.
- Select Advanced options.
- Select Repair, then open Snipping Tool to test it.
- If it still fails, return to the same page and select Reset.
On Windows 10 the path is Settings > Apps > Apps & features; select Snipping Tool, then Advanced options. From PowerShell, Reset-AppxPackage -Package (Get-AppxPackage -Name Microsoft.ScreenSketch).PackageFullName performs the same reset.
Method 6: Install Snipping Tool from an MSIX/Appx package file
App Installer, built into Windows 11 and Windows 10 version 1803 and later, installs a package when you double-click it. The package must be signed; Windows refuses an unsigned one with error 0x80073CF0.
- Put the Snipping Tool package and its dependency packages in one folder, for example
C:\Packages. - Right-click the package, select Properties, and open the Digital Signatures tab.
- Select the signature, then Details, and check who signed it before you continue.
- Double-click the package and follow the App Installer prompts.
- Or open Windows PowerShell and run
Add-AppxPackage -Path "C:\Packages\<package file>" -DependencyPath "C:\Packages\<dependency file>". - Run
Get-AppxPackage -Name Microsoft.ScreenSketchto confirm the package registered.
Add-AppxPackage takes .msix and .appx packages and bundles such as .msixbundle. Run it without elevation so the app lands in your own account.
Method 7: Download Snipping Tool AppxBundle from trusted sources
Microsoft is the only trusted source for a Snipping Tool package. Sideloaded apps must be signed with a certificate the device trusts, and Microsoft warns that installing apps from outside the Store can increase security risks.
| Source | Publisher | Use it? |
|---|---|---|
| winget msstore source, ID 9MZ95KL8MR0L | Microsoft | Yes. Installs the current package for your account (Method 1) |
| Installer files on Microsoft's reinstall support page | Microsoft | Yes. 64-bit, 32-bit and ARM64 (Method 2) |
winget download --id 9MZ95KL8MR0L -s msstore |
Microsoft | IT only. Needs a Microsoft Entra ID sign-in; the license file needs a Global, User or License Administrator role |
| Store link generators, file hosts, forum attachments | Not Microsoft | No. Delete the file; its signature and contents are unknown |
winget download saves the package, its dependencies and the license file to your Downloads folder by default. Adding --skip-license leaves out the license file and the authorization needed to generate it.
Make sure app sideloading is allowed
This setting matters only for package files you install yourself in Methods 6 and 8. Windows already accepts Microsoft-signed packages deployed from the Microsoft Store, which covers winget's msstore route.
| Windows version | Where the setting is | What to turn on |
|---|---|---|
| Windows 11, version 25H2 and later | Settings > System > Advanced > For developers | Developer Mode |
| Windows 11 before 25H2 | Settings > System > For developers | Developer Mode |
| Windows 10 | Settings > Update & Security > For developers | Sideload apps |
| Editions with Group Policy (not Home) | Computer Configuration > Administrative Templates > Windows Components > App Package Deployment | Allow all trusted apps to install |
Developer Mode needs administrator access, and an organization's policy can lock it off. Microsoft notes that ordinary day-to-day use does not need Developer Mode at all.
Method 8: Install Snipping Tool for all users with DISM provisioning
A provisioned package installs for every existing and new account the next time each user signs in. It needs the package, its dependencies and, normally, its license file.
- Open Windows PowerShell as administrator.
- Run
Get-AppxProvisionedPackage -Online | Format-Table DisplayName, PackageNameand look for Microsoft.ScreenSketch. - If it is missing, run
Dism /Online /Add-ProvisionedAppxPackage /PackagePath:C:\Packages\<package file> /DependencyPackagePath:C:\Packages\<dependency file> /LicensePath:C:\Packages\<license file>.xml. - Repeat
/DependencyPackagePath:once for each dependency package. - Sign out and back in; even the current account gets the app only at its next sign-in.
Microsoft advises /SkipLicense only for apps that need no license on a sideloading-enabled PC; using it in other cases can compromise an image.
Method 9: Reinstall Snipping Tool via Windows optional features
Snipping Tool also exists as a Windows Feature on Demand. Microsoft states it is not available on images where the Snipping Tool app is preinstalled, so this route shows up only on PCs built without the app.
- Open Settings > System > Optional features.
- Select Add a feature.
- Type Snipping Tool in the search box.
- If it appears, select it and install it.
- If nothing appears, the feature is not offered for your Windows image; use Method 1 or Method 2.
On Windows 10 releases older than 22H2, Optional features sits under Settings > Apps > Apps & features.
Method 10: Install Snipping Tool using DISM command
DISM adds the same Feature on Demand from the command line. On a running PC it fetches the files from Windows Update unless you add /LimitAccess.
- Open Command Prompt as administrator.
- Run
DISM /Online /Get-Capabilitiesand look forMicrosoft.Windows.SnippingTool~~~~0.0.1.0in the list. - Run
DISM /Online /Add-Capability /CapabilityName:Microsoft.Windows.SnippingTool~~~~0.0.1.0. - Let DISM download the files and finish the operation.
- Restart the PC if DISM asks you to, then search Start for Snipping Tool.
Microsoft lists the capability's install size as 6.79 MB. Because it has satellite packages, Microsoft says to add it only with DISM /Add-Capability.
Method 11: Restore Snipping Tool using Windows Features on Demand ISO
Offline PCs can take the capability from the Languages and Optional Features ISO on Windows 11, or the Features on Demand ISO on Windows 10 version 2004 and later. The ISO must match your Windows version.
- Mount the ISO in File Explorer; Windows gives it a drive letter such as E:.
- Open Command Prompt as administrator.
- Run
DISM /Online /Add-Capability /CapabilityName:Microsoft.Windows.SnippingTool~~~~0.0.1.0 /Source:E: /LimitAccess, replacing E: with your drive letter. - Wait for the operation to finish, then search Start for Snipping Tool.
/LimitAccess stops DISM from checking Windows Update. Use the mounted ISO itself as the source: Microsoft warns against hand-copying .cab files into a folder, because DISM needs the repository's metadata.
Method 12: Copy Snipping Tool executable from another PC
Copying files does not install a packaged app. Windows deploys Snipping Tool as a signed package and registers it for each user, so a copied folder has no registration on the new PC.
| What you copy | What happens | Do this instead |
|---|---|---|
The Microsoft.ScreenSketch_... folder from C:\Program Files\WindowsApps |
It registers only through Add-AppxPackage -Register, which Microsoft describes as a development-mode install for testing |
Install the signed package with Method 1, 2 or 6 |
| A single .exe from inside that folder | Nothing installs, because the app has no package registration on this PC | Use Method 1 or Method 2 |
| A signed package file the other PC downloaded from Microsoft | It installs normally when its dependencies come with it | Method 6 with Add-AppxPackage -Path |
How to confirm Snipping Tool installed correctly
- Press Windows + Shift + S; the snipping overlay should appear for a screenshot.
- Press Windows + Shift + R; on Windows 11 the overlay opens for a video clip.
- Open Snipping Tool from Start, select New, and take a snip; on Windows 11 it saves to your Screenshots folder automatically.
- Run
Get-AppxPackage -Name Microsoft.ScreenSketchand check that Status reads Ok and Publisher starts with CN=Microsoft Corporation.
Fix Windows + Shift + S after reinstalling Snipping Tool
Windows + Shift + S does nothing
The package is not registered for your account, or its registration broke during the reinstall.
- Run
Get-AppxPackage -Name Microsoft.ScreenSketchin Windows PowerShell. - If it returns the package, re-register it with the Method 3 command.
- Restart the PC and press Windows + Shift + S again.
- If it still fails, use Repair, then Reset, under Advanced options in Installed apps.
The overlay opens but the screenshot seems to vanish
Windows + Shift + S copies the selected region to the clipboard rather than straight to a file.
- Paste with Ctrl + V into a document, email or image editor.
- On Windows 11, open Pictures > Screenshots, where Snipping Tool saves captures automatically.
- To change autosave or the folder, open Snipping Tool and select See more > Settings.
Print Screen no longer opens screen snipping
The Print Screen setting is turned off.
- On Windows 11, open Settings > Accessibility > Keyboard.
- Turn on Use the Print Screen button to open screen snipping.
- On Windows 10, open Settings > Ease of Access > Keyboard and turn on Print Screen shortcut.
Common Snipping Tool installation errors and how to fix them
Package errors carry a code that names the cause. If the Store download itself stalls, fix the stuck Snipping Tool download on the Store side instead.
The winget command is not recognized
App Installer has not registered winget for this account yet, which can lag behind a first sign-in.
- Open Windows PowerShell.
- Run
Add-AppxPackage -RegisterByFamilyName -MainPackage Microsoft.DesktopAppInstaller_8wekyb3d8bbwe. - Close and reopen Terminal, then run the winget command again.
winget finds no Snipping Tool package
The query does not match a single package, or the msstore source agreement was declined.
- Use the ID
9MZ95KL8MR0Lrather than the app name. - Add
-s msstoreso winget searches only the Microsoft Store source. - Accept the source agreement when prompted, or add
--accept-source-agreements.
0x80073CFF: you need a developer license or a sideloading-enabled system
The package is not a Microsoft-signed Store deployment, and this PC does not allow trusted sideloaded apps.
- Install through Method 1 or Method 2 instead of a package file.
- If the file came from Microsoft, allow sideloading with the settings in the sideloading table.
- On a work PC, ask IT to enable Allow all trusted apps to install.
0x80073D02: resources it modifies are currently in use
Snipping Tool is running while Windows tries to replace it.
- Close Snipping Tool and any open snip windows.
- Run the install again, adding
-ForceApplicationShutdownif you useAdd-AppxPackage. - Restart the PC if the error repeats.
0x80073D06: a higher version of this package is already installed
The PC already has a newer Snipping Tool than the file you are installing.
- Stop installing the older file.
- Fix the installed copy with Method 3 or Method 5 instead.
0x80073CFB: the package is already installed and reinstallation is blocked
The file is not bitwise identical to the installed package, even when the version matches.
- In an administrator PowerShell window, run
Remove-AppxPackage -Package (Get-AppxPackage -Name Microsoft.ScreenSketch -AllUsers).PackageFullName -AllUsers. - Run the install again.
0x80073CF3 or 0x80073D10: dependency or architecture failure
A dependency package is missing, or the file targets a different processor architecture.
- Check System type in Settings > System > About.
- Use the package built for that architecture.
- Add every dependency with
-DependencyPathinAdd-AppxPackage.
0x800B0109 or 0x80073CF0: untrusted or unsigned package
The package is unsigned, or its certificate chain ends at a root Windows does not trust.
- Delete the file.
- Install from Microsoft with Method 1 or Method 2.
0x80073D01: deployment blocked by policy
An application control policy blocks the package, or you are signed in with a temporary profile.
- Sign out, sign back in, and try again.
- On a managed PC, ask your administrator to allow Snipping Tool.
How to update Snipping Tool without opening the Store
Microsoft updates Snipping Tool through the Microsoft Store, and winget reaches the same updates from the command line.
- Open Terminal or Windows PowerShell.
- Run
winget upgradeto list the apps that have an update available. - Run
winget upgrade --id 9MZ95KL8MR0L --source msstoreto update Snipping Tool. - Or run
winget install 9MZ95KL8MR0L -s msstoreagain; install upgrades an existing copy unless you add--no-upgrade.
Add --accept-package-agreements --accept-source-agreements to run the update unattended, for example from a scheduled script.
How to uninstall Snipping Tool in Windows 11
- Open Settings from the Start menu.
- Select Apps, then Installed apps.
- Find Snipping Tool, select the three dots on the right, and select Uninstall.
- Select Uninstall again to confirm.
From PowerShell, Remove-AppxPackage -Package (Get-AppxPackage -Name Microsoft.ScreenSketch).PackageFullName removes it for your account. Microsoft warns that removing an app package can be irreversible, and Methods 1 and 2 put Snipping Tool back.
Can you install the old classic Snipping Tool instead?
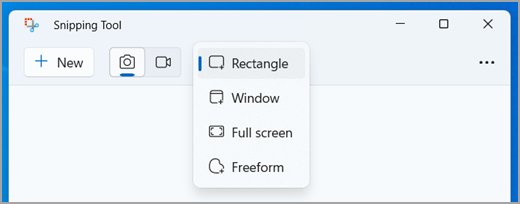
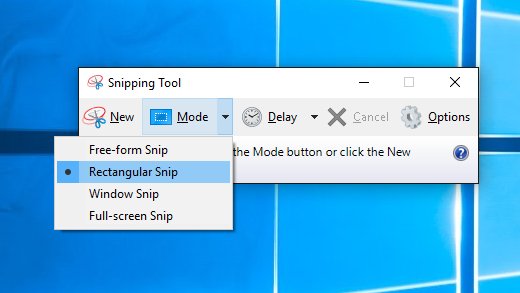
No supported route installs the classic Snipping Tool on a Windows 11 PC that already ships the app. Microsoft's only separate Snipping Tool component is the Feature on Demand Microsoft.Windows.SnippingTool~~~~0.0.1.0, and Microsoft states it is not available on images where the Snipping Tool app is preinstalled. The classic capture shapes remain: in Snipping Tool, select Snipping Mode and pick rectangle, window, full screen or freeform.
Alternatives if you cannot install Snipping Tool
Windows has other screenshot shortcuts built in, and these work without the Snipping Tool app.
| Shortcut | What it does |
|---|---|
| Print Screen (with the screen snipping setting off) | Copies the whole screen to the clipboard |
| Alt + Print Screen | Copies the active window to the clipboard |
| Windows + Print Screen | Saves the whole screen as a file in Pictures > Screenshots |
| Fn + Windows + Space | Takes a screenshot on keyboards without a Print Screen key |
| Windows + G | Opens Xbox Game Bar and its capture tools |
Method 13: Use third-party alternatives (if needed)
If Snipping Tool cannot be installed at all, a third-party capture tool fills the gap. Install it through winget or the publisher's own site, never from a repackaged download.
- Run
winget search screenshotto list capture tools in your configured sources. - Run
winget show --id <package ID>and read the details, including the publisher. - Install the one you choose with
winget install --id <package ID> -e.
Best practices after installing Snipping Tool
| Practice | Why it matters |
|---|---|
Keep it updated with winget upgrade |
Microsoft ships Snipping Tool updates through the Microsoft Store |
| Turn on the Print Screen snipping setting | Print Screen then opens the snipping overlay on Windows 11 |
| Check the autosave folder under See more > Settings | Windows 11 saves every snip to Screenshots unless you change it |
| Delete package files from unofficial sites | Unknown packages carry unknown code and signatures |
Run Add-AppxPackage from a normal window |
An elevated prompt registers the app to the administrator, not you |
| Leave Developer Mode off unless a package needs it | Microsoft says everyday use does not need Developer Mode |
Best method to use for installing Snipping Tool without the Store
Run winget install 9MZ95KL8MR0L -s msstore; if winget is unavailable, use Microsoft's installer file from its support page. Both install the current Microsoft-signed package for your account from Microsoft itself. Re-register first when Snipping Tool is still listed, and keep DISM provisioning and Features on Demand for IT deployments and Windows images.
Snipping Tool install and reinstall FAQ
How do I install Snipping Tool on Windows 11?
Snipping Tool comes with Windows 11, so press Windows + Shift + S first. If it is missing, run winget install 9MZ95KL8MR0L -s msstore in Terminal, or run the 64-bit installer from Microsoft's Uninstall and reinstall Paint and Snipping Tool page.
How do I install Snipping Tool on Windows 10?
Use Microsoft's installer files, which include a 32-bit version, on Windows 10 22H2 build 19045.3758 or later. winget also runs on Windows 10 version 1809 and later, so winget install 9MZ95KL8MR0L -s msstore works there too.
How do I reinstall Snipping Tool in Windows 11?
Uninstall it from Settings > Apps > Installed apps, then run Microsoft's installer or the winget msstore command. If Snipping Tool is still listed and only misbehaves, re-register it with Add-AppxPackage instead of reinstalling.
How do I uninstall Snipping Tool in Windows 11?
Open Settings > Apps > Installed apps, select the three dots next to Snipping Tool, select Uninstall and confirm. On Windows 10, Microsoft supports removing it on 22H2 build 19045.3758 or later.
How do I reinstall Snipping Tool on Windows 10?
Update to Windows 10 22H2 build 19045.3758 or later, then run the Snipping Tool installer that matches your system type from Microsoft's support page. Repair and Reset sit under Settings > Apps > Apps & features > Advanced options.
Can I install Snipping Tool with PowerShell in Windows 11?
Yes. Run winget install 9MZ95KL8MR0L -s msstore from PowerShell, or run Add-AppxPackage -RegisterByFamilyName -MainPackage Microsoft.ScreenSketch_8wekyb3d8bbwe when another account on the PC still has the package.
How do I install Snipping Tool on Windows without the Microsoft Store app?
Use winget's msstore source or the installer files Microsoft publishes on its support page. Neither route needs you to open the Microsoft Store app, and both install the Microsoft-signed package for your account.
Why is Snipping Tool missing from Windows 11?
It was uninstalled, it is not registered for your account, or a work policy such as AppLocker blocks packaged apps. Run Get-AppxPackage -Name Microsoft.ScreenSketch -AllUsers in an administrator PowerShell window to see whether the package is still on the PC.