To set up Google Authenticator, install the app on your Android phone or iPhone, turn on 2-Step Verification in the account you want to protect, then scan the QR code that account shows, or type its setup key, and enter the first code to confirm.
This guide covers installing the app, syncing codes to your Google Account, adding codes for Google and other sites, signing in with a code, backup codes, moving to a new phone and what to do when a phone is lost.
How To Set Up Google Authenticator For An Account
Every site that supports authenticator apps follows the same pattern. The site gives you a QR code, the app turns it into a changing code, and you prove the link by typing one code back.
- Install Google Authenticator from Google Play on Android or the App Store on iPhone and iPad.
- Open the app and either sign in to your Google Account to sync codes, or tap Use without an account.
- On the site you want to protect, open its security settings and turn on two-step or two-factor verification with an authenticator app.
- In Google Authenticator, choose to add a code and scan the QR code the site shows.
- If you cannot scan it, type the setup key shown next to the QR code instead, and choose time-based if the app asks.
- Type the code the app now shows into the site before it changes, and confirm.
- Save the backup or recovery codes the site offers somewhere safe, away from your phone.
From now on, the site asks for your password and then a current code from the app. The code works even when the phone has no internet or mobile service.
What Is Google Authenticator?
Google Authenticator is a free Google app that generates one-time verification codes for sites and apps that support authenticator-app 2-Step Verification. It is the second step after your password, not a replacement for it.
| Question | What Google says |
|---|---|
| What Google Authenticator does | Creates one-time verification codes for 2-Step Verification on supported sites and apps |
| Does it need internet? | No. Codes are generated on the phone even without a network or cellular connection |
| Which code types does it support? | Time-based and counter-based code generation |
| Can it hold many accounts? | Yes, codes for many sites, and codes synced from more than one Google Account |
| Can codes be backed up? | Yes. Signed in to a Google Account, codes sync across your devices and survive a lost phone |
| How are synced codes protected? | Google encrypts them in transit and at rest |
What You Need Before You Start
| Requirement | Details |
|---|---|
| A phone | Android 6.0 or later, or an iPhone or iPad on iOS or iPadOS 16.0 or later |
| The app version for sync | Authenticator 6.0 or later on Android, 4.0 or later on iOS, to sync codes across devices |
| A Google Account (optional) | Needed only if you want codes backed up and synced |
| The account you want to protect | You must be able to sign in to it and reach its security or 2-Step Verification settings |
| Correct phone time | Time-based codes only match when the phone's clock is right for your time zone |
| A safe place for backup codes | Paper in a drawer, or a password manager you can reach without this phone |
Authenticator runs on the phone even when you sign in on a laptop. You read the code from the phone and type it into the browser on the computer.
How To Install Google Authenticator
Install only the listing published by Google LLC.
| Your phone | Where to get it | Requirement |
|---|---|---|
| Android | Open Play Store, search for Google Authenticator and tap Install on the listing from Google LLC | Android 6.0 or later |
| iPhone | Open App Store, search for Google Authenticator and tap Get on the listing from Google LLC | iOS 16.0 or later |
| iPad | Same App Store listing as iPhone | iPadOS 16.0 or later |
Should You Sign In To Google Authenticator?
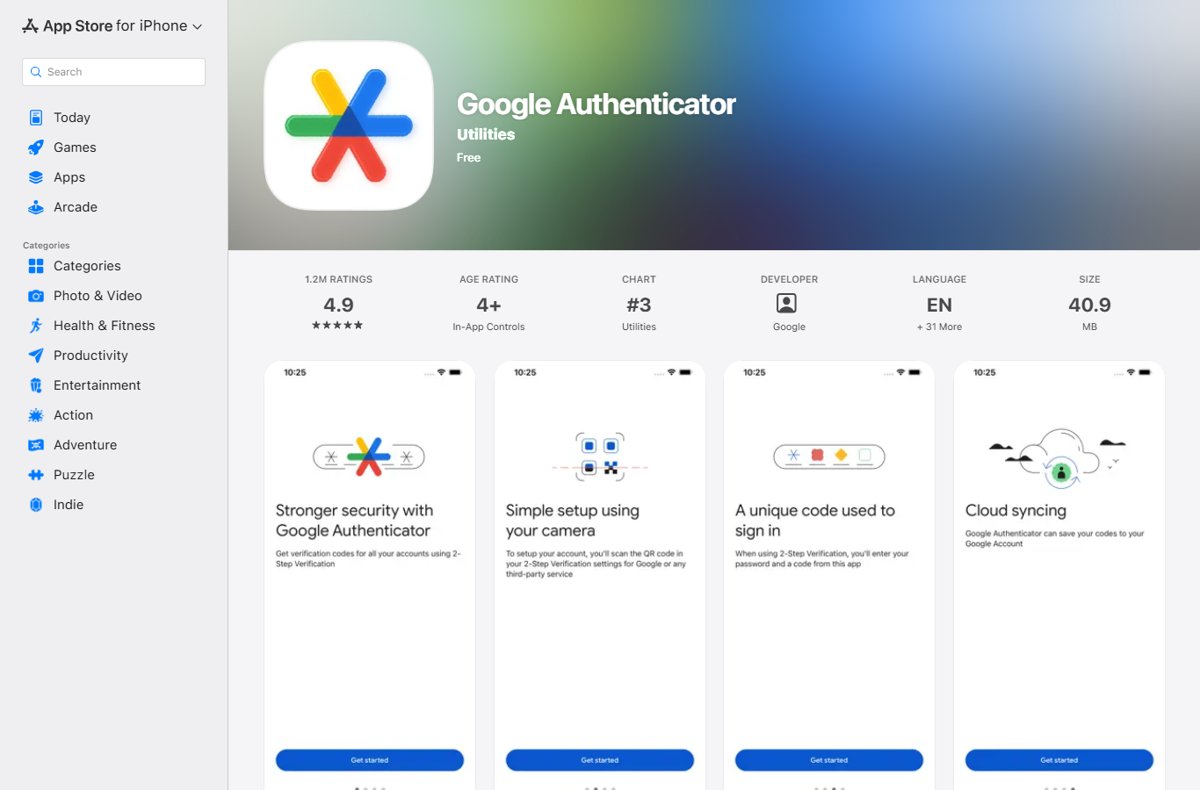
The first time you open the app, it offers to sign in to your Google Account or to continue with Use without an account. This one choice decides whether a lost phone costs you your codes.
| Your situation | Choose | Why |
|---|---|---|
| You want codes to survive a lost, broken or replaced phone | Sign in with your Google Account | Codes sync to the account and reappear when you sign in on another device |
| You use Authenticator on a phone and a tablet | Sign in with the same Google Account on both | Google says codes sync across all your devices |
| You want codes stored only on this phone | Use without an account | Nothing leaves the device, but losing the phone loses the codes |
| You already sync and want to stop | Tap your profile picture, then Use Authenticator without an account | Google removes the codes from your Google Accounts and keeps them on the device |
| You have two Google Accounts | Tap your profile picture, then Add another account | Authenticator can show codes synced to several accounts on one phone |
If you sync, protect the Google Account itself with a strong password and a second step, because anyone who gets into it can restore your codes.
How To Add Codes to Google Authenticator
Use this every time you add another account, such as a bank, an exchange like Bybit, or a work portal. The QR code and the setup key hold the same secret, so either one works.
- On the site, turn on two-step verification and pick the authenticator app option until it shows a QR code.
- Open Google Authenticator and choose to add a new code.
- Pick the QR code option and point the phone camera at the code on screen.
- If the QR code is on the same phone, or the camera will not read it, pick the setup key option instead.
- Enter an account name you will recognise, type the setup key exactly as the site shows it, and keep the key type time-based unless the site says counter-based.
- Save the entry, then type the code now showing in the app into the site and confirm.
Example: Set Up Google Authenticator for a Google Account
Gmail and every other Google service use your Google Account, so this is also how to set up Google Authenticator for Gmail. Google requires 2-Step Verification to be on first.
- Open
https://myaccount.google.com/signinoptions/two-step-verification, or open your Google Account and tap Security & sign-in. - If 2-Step Verification is off, under How you sign in to Google select Turn on 2-Step Verification and follow the on-screen steps.
- On your phone, go to your 2-Step Verification settings and tap Set up authenticator.
- Follow the on-screen steps to add the code to Google Authenticator and confirm it.
- Back in the 2-Step Verification settings, get your backup codes before you leave the page.
Google says it may take up to 7 days for Authenticator to appear as a sign-in option. Keep your other second step in place until it does.
Example: Set Up Google Authenticator for Facebook or Instagram
Facebook, Instagram and Amazon all accept codes from an authenticator app. Each site names the setting slightly differently, so look in its security settings for two-factor authentication and an authentication app option. Menu wording on these sites changes often, but the authenticator-app choice sits inside the two-factor section.
| Account | What to look for on the site | What to do in Authenticator |
|---|---|---|
| The two-factor authentication setting, then the authentication app choice | Scan the QR code shown, then type the current code into Facebook | |
| The two-factor authentication setting, then the authentication app choice | Scan the QR code, or type the key if the QR code is on this same phone | |
| Amazon | The two-step verification setting in your account's sign-in and security area, then the authenticator app choice | Scan the QR code, type the code into Amazon, then keep the backup method it asks for |
| Any other site | Security, sign-in or two-factor settings | Same QR code or setup key flow as above |
How To Use Google Authenticator When Signing In
This is the everyday part. Each code works for a short window and then changes, so read it fresh each time.
- Enter your username and password on the site as usual.
- When the site asks for a verification code, unlock your phone and open Google Authenticator.
- Find the right entry by name, or use the search bar at the top to find it by username.
- Type the code shown before it changes, then confirm on the site.
- If Google asks for a different second step, select Try another way and choose the Authenticator option.
How To Rename Or Organize Accounts
A list of ten entries all called by an email address is how people type the wrong code. Rename and order them once.
| Task | How to do it |
|---|---|
| Rename or edit an entry | Swipe left on the code to show the edit option, then change the username or account name |
| Reorder codes | Touch and hold a code, then drag it to a new position |
| Find a code fast | Use the search bar at the top to search by username |
| Remove a code | Swipe right on the code to show the delete option |
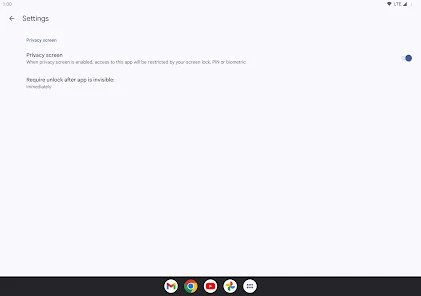
| Lock the app | Tap Menu > Settings > Privacy Screen, turn it on and complete the verification |
To remove a code from Google Authenticator safely, first turn off the authenticator method on that site, or switch it to another second step. Deleting the entry alone leaves the site still asking for codes you can no longer produce.
Save Backup Codes Immediately
Backup codes are how you sign in when the phone is gone. Google gives you a set of 10 codes, each 8 digits long, and each one works once.
- Open your Google Account and go to Security & sign-in > 2-Step Verification.
- In the Backup codes section, click Get backup codes.
- Print the codes, or download them and store the file somewhere other than your phone.
- Cross off each code after you use it, because a used code stops working.
- Click Refresh to create a new set when you run low or think someone saw them; the old set stops working.
If you downloaded codes before and cannot find them, search your computer for a file named Backup-codes-username.txt. Save the recovery codes other sites offer the same way.
How To Move Google Authenticator to a New Phone
Keep the old phone working until the new one shows every code. Google offers two routes, and re-adding each account is the fallback.
| Method | When to use it | Steps |
|---|---|---|
| Method 1: Restore with Google Account sync | Your codes already sync to your Google Account | Install Authenticator on the new phone, tap Get started and sign in to the same Google Account; the codes appear |
| Method 2: Use the built-in transfer feature | Codes are stored only on the old phone, or you want to move specific ones | On the old phone tap Menu > Transfer accounts > Export accounts, unlock the device, select the accounts and tap Next. On the new phone tap Menu > Transfer accounts > Import accounts and scan the QR code |
| Method 3: Set up each account again | The old phone is lost, or a site's code did not transfer | Sign in to each site with a backup code or another second step, turn the authenticator method off and on, and scan the new QR code |
If you export more than one account, the old phone may create more than one QR code. Scan every one before you wipe the old device.
How to check your codes are working and backed up
- Sign out of one protected site and sign back in using a code from the app, to prove that entry works.
- Tap your profile picture at the top right of Authenticator and confirm it shows the Google Account you expect, if you sync.
- Install Authenticator on a second device, sign in to the same Google Account and check that the codes appear.
- In your Google Account, open 2-Step Verification and confirm Authenticator is listed as a second step.
- Check that your backup codes are printed or saved away from the phone.
Troubleshooting Common Problems
Match what you see to a heading below. Most wrong-code errors come down to the phone's clock or the wrong entry.
Google Authenticator codes do not work
The code expired, belongs to a different site or account, or the phone's time is wrong.
- Wait for a fresh code and enter it before it changes.
- Check the entry name matches both the site and the account you are signing in to.
- Open your phone's date and time settings and turn on automatic date and time and time zone.
- Update Authenticator; since version 7.0 it uses the phone's system time and has no separate time correction setting.
My codes disappeared from the app
You were signed out of your Google Account, or the codes are saved under a different account.
- Tap the profile icon at the top right and confirm you are signed in.
- Switch to your other Google Account if you have more than one.
- Check Use without an account, in case the codes were stored only on the device.
I deleted Google Authenticator
Reinstalling brings codes back only if they were synced to a Google Account.
- Reinstall the app from the official store listing.
- Tap Get started and sign in to the Google Account you used before.
- If codes do not return, sign in to each site with a backup code and set the authenticator up again.
Authenticator is not offered when signing in to Google
Google can take up to 7 days to show Authenticator as an available sign-in option.
- Select Try another way on the sign-in screen.
- Use Google prompts, a backup code or another second step until Authenticator appears.
What If You Lose Your Phone?
Act fast, because the phone holds a second step. Sync decides how hard the rest is.
Your phone is lost or stolen and codes were synced
Codes are safe in your Google Account, but the lost phone can still show them.
- Use the remote erase option for Android or iPhone.
- Sign in on another device with a backup code or another second step.
- Sign the lost phone out of your Google Account, which also removes its synced codes, and change your password.
- Sign in to Authenticator on your new phone to restore the codes.
Your phone is lost and codes were not synced
The codes existed only on that phone.
- Sign in to each site with its backup or recovery codes.
- Remove the old authenticator from each site's security settings.
- Set the authenticator up again on the new phone with a fresh QR code.
You cannot get into your Google Account at all
No other second step, backup code or trusted device is available.
- Use a device you marked as trusted, if you have one.
- Go to account recovery and answer the questions as fully as you can.
- Expect Google to take 3-5 business days to confirm it is you.
Google Authenticator vs SMS Codes, Passkeys, and Security Keys
Google says any second step adds security, but they are not equal. Codes typed by hand can be phished; passkeys and security keys cannot be handed over.
| Method | Works offline | Main weakness | Google's position |
|---|---|---|---|
| Google Authenticator | Yes | A code can be typed into a fake site | Good when you lack internet or mobile service |
| SMS or voice call codes | No, needs mobile service | Vulnerable to SIM swap and other phone number hacks | Adds security, but the weakest option |
| Google prompts | No | Needs a signed-in phone online | Recommended second step if you do not use a passkey |
| Passkeys | Unlocks with your device | Needs a supported device and screen lock | Cannot be shared or copied, so more secure against phishing |
| Hardware security keys | Yes | A physical key to carry and not lose | Protects your account from phishing attacks |
| Backup codes | Yes | Anyone holding them can use them | The fallback when the phone is lost |
Passkeys need Windows 10, macOS Ventura, ChromeOS 109, Android 9 or iOS 16 or later. Keep Authenticator as a second step for sites that do not support passkeys.
Security Tips for Using Google Authenticator
Most lockouts and takeovers come from a short list of beginner mistakes. Each row pairs the mistake with the fix.
| Common mistake | What to do instead |
|---|---|
| No screen lock on the phone | Set a PIN, pattern or biometric lock, and turn on Privacy Screen in Authenticator |
| Sharing a QR code or setup key | Treat both like a password; anyone with them can make your codes |
| Typing a code into a link from an email or text | Beware of phishing; type the site address yourself before entering a code |
| Skipping backup codes | Save them the moment you set up each account |
| Syncing to a weakly protected Google Account | Protect that account with a strong password and a second step |
| Outdated recovery phone and email | Keep recovery options updated in your Google Account |
| Wiping the old phone before a transfer | Confirm every code works on the new phone first |
| Only one second step on important accounts | Enrol more than one 2-Step Verification method |
Best Practices Checklist
Install Google Authenticator from the official store, sign in to your Google Account so codes sync, add each account by QR code, and save every site's backup codes before you close the setup page. Sync and backup codes are the two things that turn a lost phone from a lockout into a short inconvenience. Google also recommends a Privacy Screen, several second steps and passkeys where a site supports them.
Frequently Asked Questions
How do I set up Google Authenticator on Android?
Install Google Authenticator from Google Play on Android 6.0 or later. Open it, sign in to your Google Account to sync codes or tap Use without an account, then scan the QR code each site shows and type the code back to confirm.
How do I set up Google Authenticator on iPhone?
Install Google Authenticator from the App Store on iOS 16.0 or later. Open it, sign in to sync codes or choose Use without an account, then scan each site's QR code. Version 4.0 or later is needed to sync codes across devices.
How do I set up Google Authenticator for Gmail?
Gmail uses your Google Account. Open myaccount.google.com, go to Security & sign-in, turn on 2-Step Verification, then tap Set up authenticator and follow the on-screen steps. It can take up to 7 days to appear as a sign-in option.
How do I set up Google Authenticator manually with a setup key?
When a site shows its QR code, it also shows a setup key. In Authenticator, choose to add a code, pick the setup key option, name the account, type the key exactly and keep it time-based unless the site says otherwise.
Where do I get the Google Authenticator setup key or QR code?
The site you are protecting provides it, not the app. Turn on two-step verification in that site's security settings and choose the authenticator app option. The site then shows a QR code and usually a text setup key beside it.
Can I set up Google Authenticator on a laptop?
Google publishes Authenticator for Android and iPhone and iPad. Set it up on your phone, then read the code from the phone when you sign in on a laptop. Avoid unofficial desktop apps that claim to be Google Authenticator.
How do I log in with Google Authenticator?
Enter your password as usual. When the site asks for a verification code, open Authenticator, find the right entry and type the current code before it changes. On Google, select Try another way if a different second step is offered.
How do I set up Google Authenticator for Facebook?
In Facebook's security settings, turn on two-factor authentication and choose the authentication app option. Scan the QR code Facebook shows with Google Authenticator, then type the current code into Facebook to finish.
How do I set up Google Authenticator on a new phone?
If codes sync, install the app on the new phone and sign in to the same Google Account. If not, on the old phone tap Menu > Transfer accounts > Export accounts, then on the new phone choose Import accounts and scan the QR code.
How do I set up Google Authenticator for Bybit, HRSA or AHPRA?
Every site uses the same flow. Sign in, open its security or two-factor settings, choose the authenticator app option, scan the QR code or type the setup key in Google Authenticator, then enter the current code. Save any recovery codes the site gives you.
Can I use Google Authenticator without a Google Account?
Yes. Tap Use without an account the first time you open the app. Codes then stay only on that phone, so losing the phone loses them unless you saved each site's backup codes.

![Turn Bluetooth on or off in Windows 11 [3 Simple Methods]](https://techdows.com/wp-content/uploads/2026/09/Windows-11-Quick-Settings-panel-with-the-Bluetooth-tile-highlighted-465x338.jpg)