Windows 10 and Windows 11 already use every CPU core by default, so enabling all cores means removing a boot limit someone set with numproc or onecpu, or a core disabled in firmware.
This guide covers removing those limits, counting cores and logical processors, setting a core limit at boot on purpose, CPU affinity for single apps, and fixes when Windows shows fewer cores than the CPU has.
How to enable all cores on Windows
A processor limit lives in the boot configuration data (BCD) store. Removing the numproc and onecpu values returns Windows to its default of using every processor. You need an administrator account.
- Select Start, type cmd, right-click Command Prompt and select Run as administrator. Select Yes at the User Account Control prompt.
- Run
bcdedit /enum {current}and look for anumprocoronecpuline in the output. - If
numprocis listed, runbcdedit /deletevalue {current} numproc. - If
onecpuis listed, runbcdedit /deletevalue {current} onecpu. - Restart the PC.
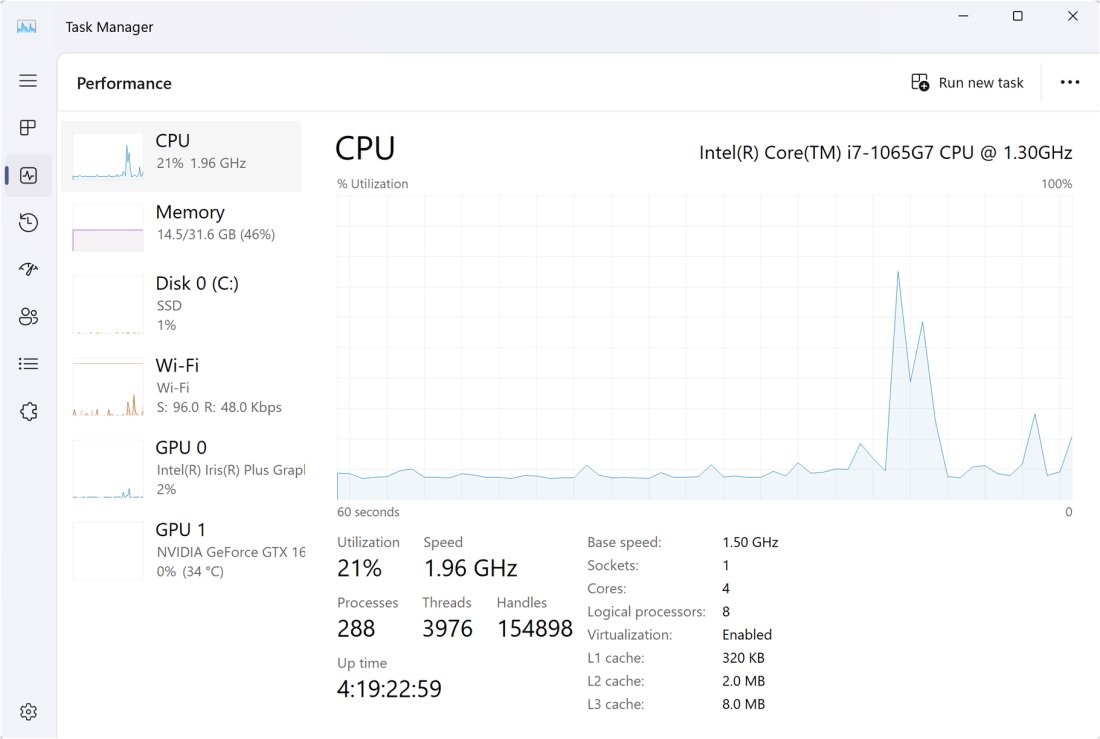
- Press Ctrl + Shift + Esc, select Performance > CPU, and check that Logical processors matches the processor's specification.
Run these in Command Prompt. In PowerShell, quote the identifier as '{current}', because PowerShell reads bare braces as a script block. If neither line was listed, Windows was already using all cores. A lower count than the CPU's specification then points to firmware settings or a processor group limit, covered in the troubleshooting section.
Find the number of available CPUs and cores on Windows
Task Manager shows both counts on Windows 11 and Windows 10. Cores are physical; logical processors include the extra threads from hyper-threading.
- Right-click Start and select Task Manager, or press Ctrl + Shift + Esc.
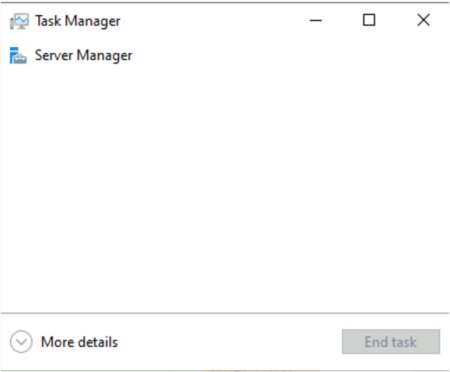
- Select More details if Task Manager opens in its compact view.
- Select Performance in the left pane, then select CPU.
- Read the values next to Cores: and Logical processors: below the graph.
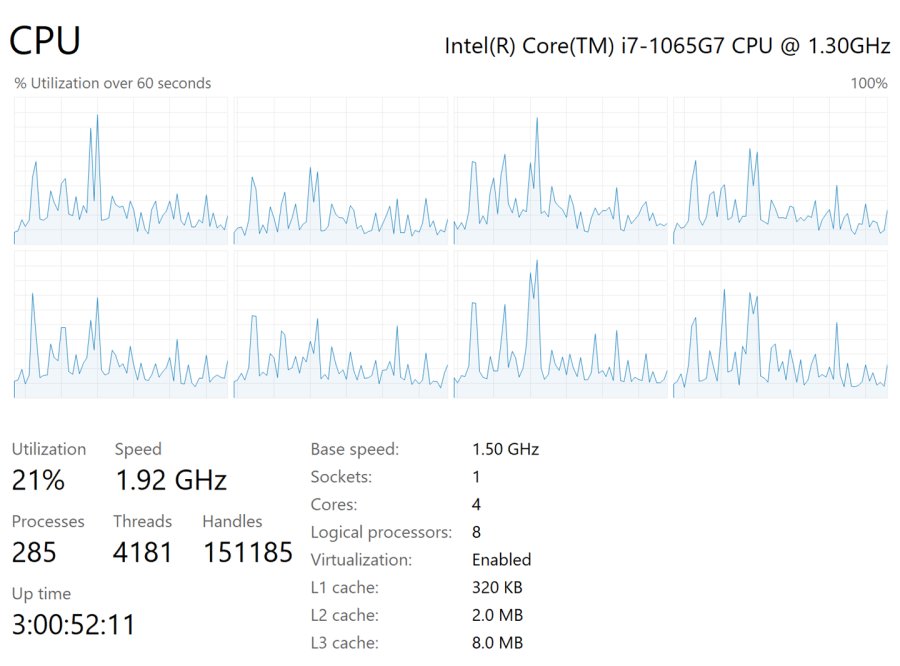
- To see the load on each logical processor, right-click the graph and select Change graph to > Logical processors.
With the per-processor graph on, each logical processor gets its own small graph. Uneven CPU utilization across them is normal; the scheduler moves threads between processors as work arrives. If every core sits near 100 percent under load, it is also worth a look at CPU temperature on Windows 11.
Check CPU cores and logical processors with PowerShell
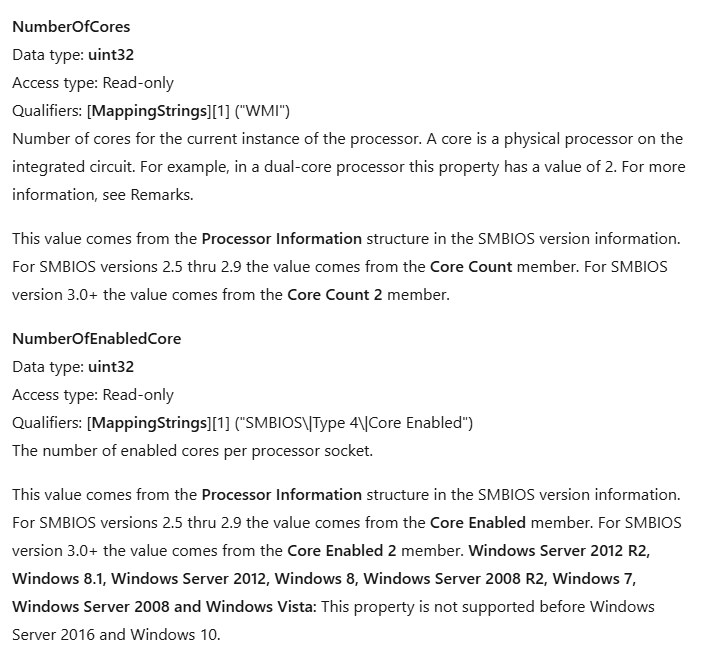
The Win32_Processor class reports physical cores, cores enabled in firmware, and logical processors for each CPU socket, which settles whether a core is switched off.
Get-CimInstance Win32_Processor | Select-Object Name, NumberOfCores, NumberOfEnabledCore, NumberOfLogicalProcessors, ThreadCountLists one row per physical processor. NumberOfCores is the core count the firmware reports, NumberOfEnabledCore is how many of those cores are enabled, and NumberOfLogicalProcessors is what Windows can schedule on that processor.
You should see: NumberOfEnabledCore equals NumberOfCores, and NumberOfLogicalProcessors is equal to or higher than NumberOfCores. A higher logical count means hyper-threading is on.
NumberOfEnabledCore is supported from Windows 10 and Windows Server 2016 onward. For the whole PC, Get-CimInstance Win32_ComputerSystem | Select-Object NumberOfProcessors, NumberOfLogicalProcessors returns the socket count and the total logical processors.
CPU cores vs logical processors in Windows
| Term | What it means | Where Windows shows it |
|---|---|---|
| Processor (socket) | A physical CPU package; most desktops and laptops have one | NumberOfProcessors in Win32_ComputerSystem |
| Core | A physical execution unit inside the CPU | Task Manager Cores, NumberOfCores |
| Logical processor | What Windows schedules work on; two per core when hyper-threading is on | Task Manager Logical processors, NumberOfLogicalProcessors |
| Enabled core | A core the firmware has left switched on | NumberOfEnabledCore |
| Processor group | A set of up to 64 logical processors the OS schedules as one unit | Only matters on PCs with more than 64 logical processors |
| Processor affinity | The set of logical processors a process is allowed to run on; by default, all of them | ProcessorAffinity on a process in PowerShell |
Change the number of cores used at Windows boot
Limiting Windows to fewer processors is a testing tool, for example to reproduce a fault on a smaller machine. It never makes a normal PC faster. Microsoft warns that changing some boot entry options with BCDEdit can make a computer inoperable, so note the command to undo it before you start.
- Open Command Prompt with Run as administrator.
- Run
bcdedit /set {current} numproc 4, replacing 4 with the number of logical processors Windows should use. - To force Windows onto only the boot CPU instead, run
bcdedit /set {current} onecpu on. - Restart the PC and check Logical processors in Task Manager.
- To go back to all cores, run
bcdedit /deletevalue {current} numprocandbcdedit /deletevalue {current} onecpu, then restart.
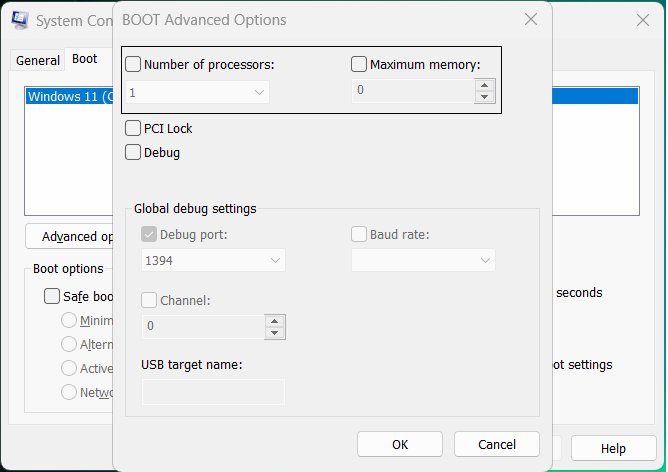
The Boot tab of System Configuration (press Windows key + R, type msconfig, press Enter) is Microsoft's graphical editor for the same boot settings. If a processor limit was set there, bcdedit /enum {current} shows it as numproc, and deleting it with the steps above clears it.
How to restrict app to specific cores on Windows (CPU affinity)
Affinity limits one program to chosen logical processors without changing the rest of Windows. The start command in Command Prompt applies an affinity mask, written in hexadecimal, when it launches the program.
- Press Windows key + R, type
cmdand press Enter. - Work out the mask from the table below: each bit is one logical processor, starting with bit 0 for the first.
- Run
start /affinity 3 notepad.exeto start Notepad on the first two logical processors only. - Replace
notepad.exewith the full path to your program in quotes if it is not on the PATH, and add an empty title first:start "" /affinity 3 "C:\Path\App.exe". - Close the program to end the affinity; the next normal launch uses all processors again.
CPU affinity mask values for start /affinity
| Mask (hex) | Binary | Logical processors allowed |
|---|---|---|
| 1 | 0001 | 1 |
| 3 | 0011 | 1 and 2 |
| 7 | 0111 | 1, 2 and 3 |
| 9 | 1001 | 1 and 4 |
| F | 1111 | 1 to 4 |
| 7F | 0111 1111 | 1 to 7 |
| FF | 1111 1111 | 1 to 8 |
The default affinity for a process is 2^n – 1, where n is the number of processors, which is every bit set. A value of 0 hands the choice back to the Windows scheduler.
Set CPU affinity for a running process with PowerShell
For a program that is already open, change the ProcessorAffinity property of its process. Run PowerShell as administrator for processes started by another account.
$p = Get-Process -Name notepad; $p.ProcessorAffinity = 3Get-Process returns the running Notepad process, and setting ProcessorAffinity to 3 (binary 0011) lets its threads run only on logical processors 1 and 2. Use the decimal value of your mask, or a hex literal such as 0xF.
You should see: Running (Get-Process -Name notepad).ProcessorAffinity returns 3. The setting lasts until the process closes.
If several processes share the name, Get-Process returns them all; pick one with Get-Process -Id <PID> instead. The process ID is in the PID column of Task Manager's Details tab.
Windows not showing all CPU cores
Task Manager shows fewer logical processors than the CPU specification
A numproc limit is set in the boot configuration.
- Run
bcdedit /enum {current}in Command Prompt opened with Run as administrator. - If
numprocappears, runbcdedit /deletevalue {current} numproc. - Restart and check Task Manager again.
Windows uses only one CPU core
The onecpu boot option forces Windows onto the boot CPU.
- Run
bcdedit /enum {current}and look foronecpu. - Run
bcdedit /deletevalue {current} onecpu. - Restart the PC.
NumberOfEnabledCore is lower than NumberOfCores
Cores are switched off in the PC's UEFI or BIOS firmware, not in Windows.
- Restart into the firmware setup using the key or method in your PC or motherboard maker's manual.
- Find the CPU or processor configuration settings the manufacturer documents and set the active core count to all cores.
- Save, restart, and run the
Win32_Processorcommand again.
Task Manager Cores is half of Logical processors
Hyper-threading is on, so each core shows as two logical processors. This is normal.
- Compare NumberOfCores with NumberOfLogicalProcessors in PowerShell.
- Leave it as it is; no core is disabled.
Only 64 processors used, or %NUMBER_OF_PROCESSORS% too low on a large workstation
PCs with more than 64 logical processors split them into processor groups, and before Windows 11 each process ran in one group by default.
- Update to Windows 11: processes and their threads span all processor groups by default.
- On Windows 11 version 22H2 and later,
%NUMBER_OF_PROCESSORS%reports the total across all groups. - On Windows 10, the application has to set thread affinity to other groups itself.
Enable all CPU cores FAQ
Does Windows use all CPU cores by default?
Yes. Windows 10 and Windows 11 schedule work on every logical processor unless a boot option such as numproc or onecpu limits them, or the firmware disables cores. A process's default affinity includes every processor.
Will enabling all cores make my PC faster?
Only if cores were disabled before. On a PC with no numproc, onecpu or firmware limit, Windows is already using every core, and there is nothing further to switch on. Removing an existing limit does restore the missing processors.
How do I check how many cores my CPU has in Windows 11?
Press Ctrl + Shift + Esc, select Performance, then CPU. The Cores and Logical processors values appear under the graph. In PowerShell, Get-CimInstance Win32_Processor returns NumberOfCores and NumberOfLogicalProcessors.
What is the difference between cores and logical processors?
Cores are physical execution units in the CPU. Logical processors are what Windows schedules on; with hyper-threading each core appears as two. Microsoft's example: two hyper-threaded processors give NumberOfCores 2 and NumberOfLogicalProcessors 4.
How do I undo a processor limit set with bcdedit?
Open Command Prompt as administrator, run bcdedit /deletevalue {current} numproc, and also bcdedit /deletevalue {current} onecpu if that option was set. Restart the PC so Windows starts with every processor again.
How do I make a program use only certain cores?
Start it with start /affinity and a hex mask in Command Prompt, such as start /affinity 3 app.exe for the first two logical processors. For a running program, set its ProcessorAffinity property from PowerShell. Both last until the program closes.
Why does Windows 10 only use 64 of my logical processors?
Windows groups logical processors in sets of up to 64, and before Windows 11 each process ran in a single group by default. Windows 11 lets processes span all groups, or applications on Windows 10 must assign threads to other groups.