After a Windows 11 reinstall, the Apple Devices app treats your PC as a new computer, so connect the iPhone with a cable, tap Trust, select General, tick Show this iPhone when on Wi-Fi and select Apply; if it still fails, reset Location & Privacy on the iPhone and set the Wi-Fi network to Private.
This guide covers the Wi-Fi sync setup, why the option fails after a clean install, the trust reset, the Windows network profile, repairing the app and fixes when the iPhone still does not appear over Wi-Fi.
How to turn on Wi-Fi sync in the Apple Devices app on Windows 11
Wi-Fi sync can only be switched on while the iPhone is connected by cable. Your iPhone needs iOS 5 or later, which every current iPhone has.
- Open the Apple Devices app on the PC.
- Connect the iPhone with a USB or USB-C cable that carries data, not only charge.
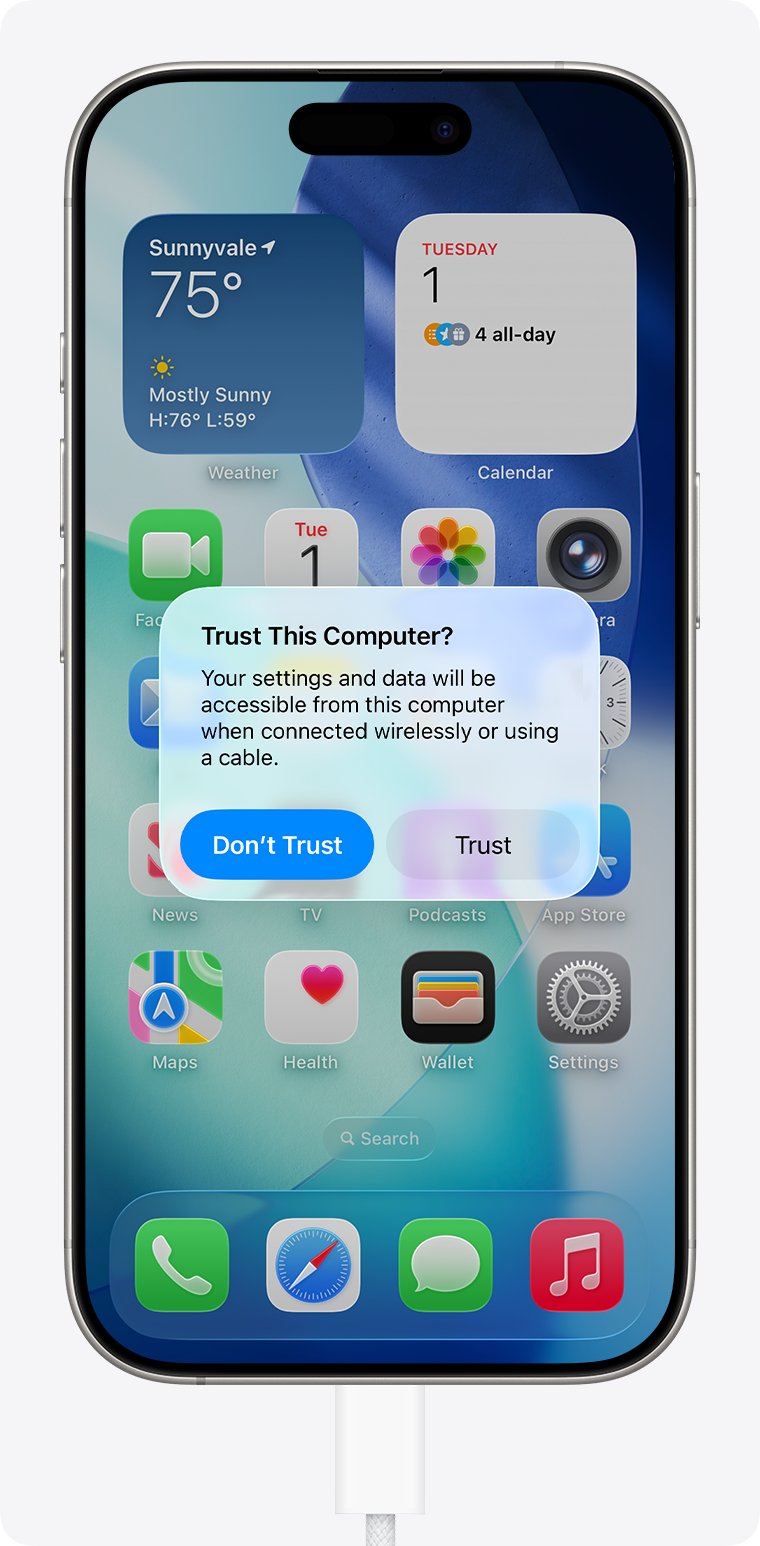
- Unlock the iPhone. When Trust This Computer? appears, tap Trust and enter your passcode.
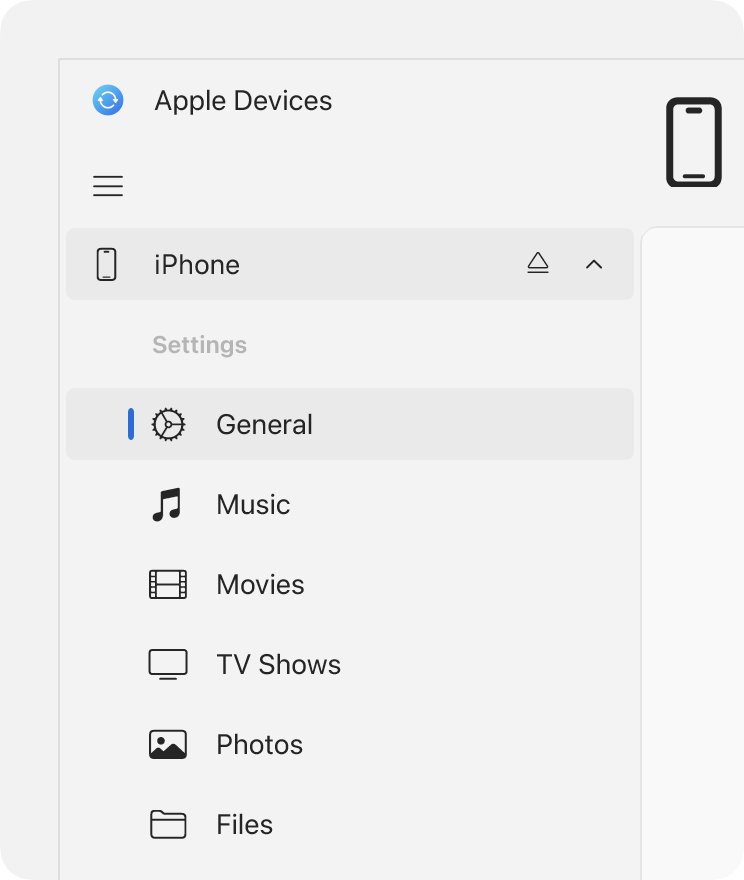
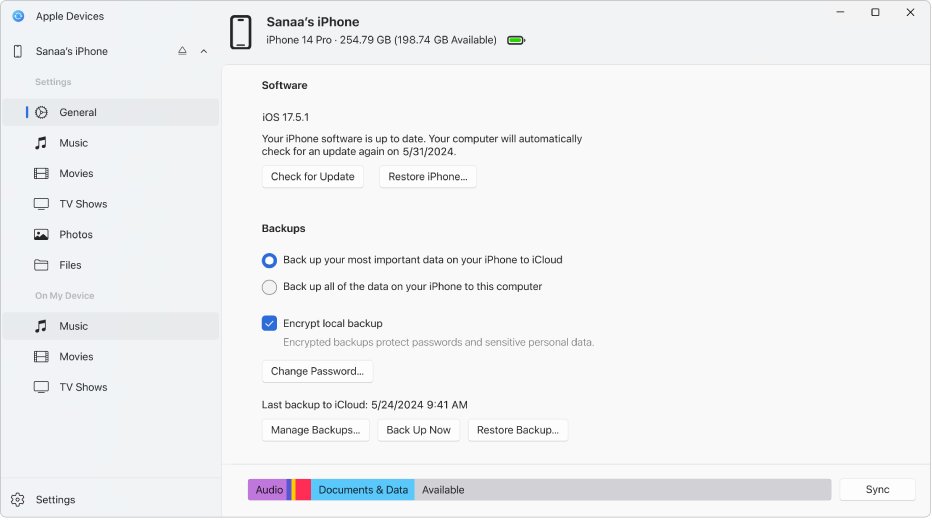
- Select your iPhone in the Apple Devices sidebar, then select General.
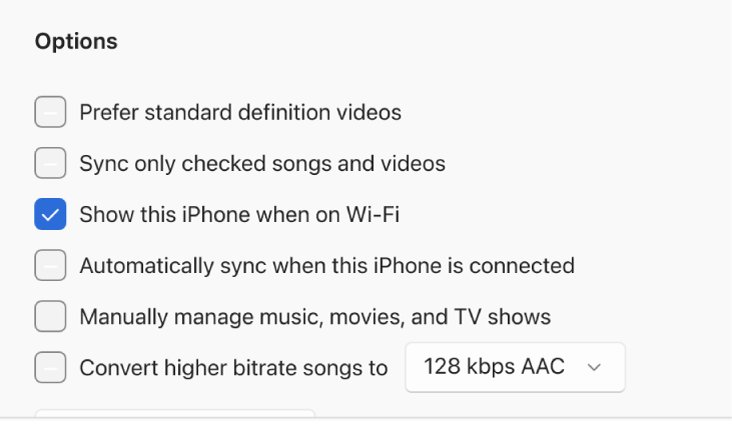
- Tick Show this iPhone when on Wi-Fi.
- Select Apply at the bottom of the window. The setting is not saved until you do.
- Select the Eject button next to the iPhone in the sidebar, then unplug the cable.
If the box unticks itself or the iPhone never shows up without the cable, work through the sections below in order.
Why 'Show this iPhone when on Wi-Fi' stops working after reinstalling Windows
A clean install of Windows 11 removes the Apple Devices app and its settings, so the iPhone has to be set up with the PC again. These are the usual reasons the option fails afterwards.
| Cause | What you notice | Fix |
|---|---|---|
| The iPhone still trusts the old Windows installation, or you tapped Don't Trust | No Trust prompt, or the iPhone shows in the sidebar but settings will not save | Reset Location & Privacy on the iPhone and trust the PC again |
| Windows set your Wi-Fi as a Public network | Works by cable, never appears over Wi-Fi | Change the Network profile type to Private network |
| Apply was not selected after ticking the box | The box is clear the next time you open General | Tick it again and select Apply before unplugging |
| PC and iPhone on different networks or bands with different names | iPhone missing from the sidebar when unplugged | Join both to the same Wi-Fi network name |
| An outdated or damaged Apple Devices app | The app freezes or will not save settings | Update, repair or reset the app |
How to reset trusted computers on iPhone for the Apple Devices app
The iPhone remembers every computer you have trusted. Resetting Location & Privacy clears that list, so the next connection shows the Trust prompt and pairs fresh with the reinstalled PC.
- On the iPhone, open Settings and tap General.
- Tap Transfer or Reset iPhone, then tap Reset.
- Tap Reset Location & Privacy and enter your passcode to confirm.
- Connect the iPhone to the PC with the cable and unlock it.
- Tap Trust on the iPhone, and select Trust in the Apple Devices app if it asks.
- Select the iPhone > General, tick Show this iPhone when on Wi-Fi and select Apply.
Apps on the iPhone may ask again for location or privacy permissions after this reset; allow them as they come up.
Change Wi-Fi from Public to Private in Windows 11 for Apple Devices sync
Windows 11 sets every newly joined network to Public, and a reinstall makes your home Wi-Fi new again. On a Public network the PC is hidden from other devices, which stops the iPhone finding it over Wi-Fi.
- Open Settings and select Network & internet.
- Select Wi-Fi, then select the network you are connected to.
- Under Network profile type, select Private network.
- Make sure the iPhone is joined to the same Wi-Fi network name.
- Restart the Apple Devices app and wait a minute with the iPhone unlocked nearby.
Only choose Private network for a home network you trust. The iPhone and PC find each other with Bonjour, which uses UDP port 5353; if you added firewall rules that block it on private networks, Wi-Fi sync cannot connect.
Update, repair or reset the Apple Devices app in Windows 11
A fresh Apple Devices install from Microsoft Store can still be out of date or half-configured. Update it first, then repair, then reset.
- Open Microsoft Store, select Library, then Get updates, and let Apple Devices update.
- Open Settings > Windows Update and select Check for updates, then install anything offered.
- Go to Settings > Apps > Installed apps.
- Select the More (three dots) icon next to Apple Devices and choose Advanced options.
- Select Repair and test Wi-Fi sync again.
- If that does not help, select Reset, open the app, connect the iPhone by cable and turn the Wi-Fi option on again.
If you have not saved a backup since the reinstall, back up the iPhone to the PC once the app recognises it.
Apple Devices app Wi-Fi sync requirements
| Requirement | Detail |
|---|---|
| Apple Devices app | Installed from Microsoft Store: search Apple Devices and select Get |
| Apple Music and Apple TV apps | Needed to sync music, movies and TV shows |
| iOS version | iOS 5 or later on the iPhone |
| First connection | By USB or USB-C cable, with the PC trusted on the iPhone |
| Network | PC and iPhone on the same Wi-Fi network |
| Setting | Show this iPhone when on Wi-Fi ticked and saved with Apply |
| iCloud Photos and iCloud Music Library | When on, Photos and Music show no sync options; they sync through iCloud instead |
Turn on automatic Wi-Fi syncing in the Apple Devices app
Once Wi-Fi sync works, you can have the app sync every time the iPhone appears instead of selecting Apply each time.
- Select the iPhone in the Apple Devices sidebar, by cable or over Wi-Fi.
- Select General.
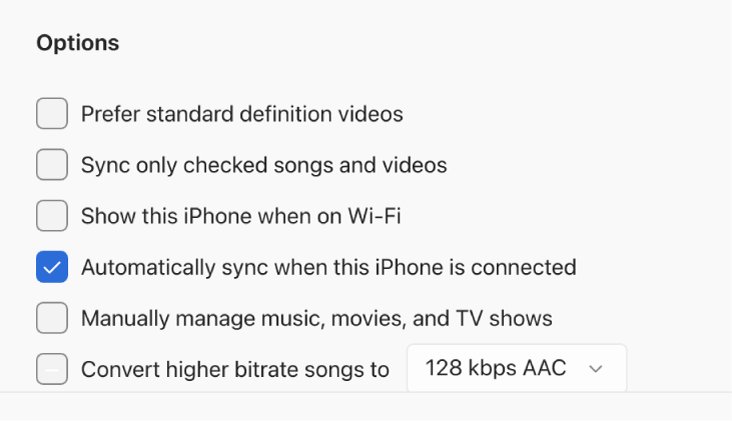
- In Options, tick Automatically sync when this iPhone is connected.
- Choose the content types to sync in the sidebar, such as Music or Movies.
- Select Apply.
If music syncing makes the app close, the same fixes for Apple Devices music-sync crashes work on Windows 11.
How to tell if Apple Devices Wi-Fi sync is working
- Eject and unplug the iPhone, and keep it unlocked on the same Wi-Fi network.
- Open the Apple Devices app on the PC.
- Look for the iPhone in the sidebar with no cable attached.
- Select it and check that General still shows Show this iPhone when on Wi-Fi ticked.
- Select Back Up Now and wait for the backup to finish without the cable.
If the iPhone appears with the cable but not without it, the problem is the network, not the app: go back to the Private network step.
Windows 11 Apple Devices app Wi-Fi not working
Apple Devices app won't find the iPhone even with a cable
The cable, port or trust prompt is the problem, so Wi-Fi sync cannot be set up yet.
- Check the iPhone shows it is charging; if not, clear the charging port and reseat the cable.
- Try another cable that supports data and charging, and another USB port.
- Unlock the iPhone and stay on the Home Screen.
- Tap Trust when asked, or reset Location & Privacy if you tapped Don't Trust.
- Make sure Windows 11 and iOS are both up to date.
The Show this iPhone when on Wi-Fi box unticks itself
The change was not saved, or the PC is not trusted after the reinstall.
- Tick the box and select Apply before you eject.
- Reset Location & Privacy on the iPhone and trust the PC again.
- Repair the Apple Devices app from Settings > Apps > Installed apps.
The iPhone appears by cable but never over Wi-Fi
The PC is hidden on a Public network, or the two are on different networks.
- Set the Wi-Fi network to Private network under Network profile type.
- Join the iPhone to the same Wi-Fi network name as the PC.
- In Windows Security > Firewall & network protection, make sure Blocks all incoming connections is not ticked for the private network.
- Restart the PC and the iPhone, then open the app with the iPhone unlocked.
The Trust prompt never appears on the iPhone
The iPhone or app is stuck on old pairing or network data.
- Disconnect and reconnect the iPhone.
- Restart the PC and the iPhone.
- Reset Location & Privacy on the iPhone.
- As a last resort, tap Settings > General > Transfer or Reset iPhone > Reset > Reset Network Settings; this also erases saved Wi-Fi passwords and VPN settings.
Apple Devices app Wi-Fi sync FAQ
How do I use the Apple Devices app on Windows 11?
Install Apple Devices from Microsoft Store, connect your iPhone with a cable, tap Trust, and select the iPhone in the sidebar. General handles updates, backups and restores, and the content types in the sidebar handle syncing music, movies, TV shows and photos.
Do I need a cable to set up Apple Devices Wi-Fi sync?
Yes. The first connection must use a USB or USB-C cable, because the Show this iPhone when on Wi-Fi option only appears for a connected iPhone. After you select Apply, later syncs can happen over Wi-Fi without the cable.
Why won't the Apple Devices app on Windows 11 find my phone?
Usually the cable only charges, the iPhone is locked, or the PC is not trusted. Use a data cable, unlock the iPhone, tap Trust, and reset Location & Privacy if you once tapped Don't Trust.
Can the iPhone and PC be on different Wi-Fi networks for sync?
No. Apple Devices Wi-Fi sync only works when the PC and the iPhone are connected to the same Wi-Fi network. A guest network or a second router with a different network name keeps them apart.
Can I back up my iPhone over Wi-Fi with the Apple Devices app?
Yes. Once Wi-Fi sync is on, select the iPhone in the sidebar over Wi-Fi, open General and select Back Up Now. Manage Backups shows the backups stored on the PC.
Is the Apple Devices app the same as iTunes?
No. Apple Devices handles the iPhone management iTunes did on Windows, such as syncing, backing up, updating and restoring, while music and video live in the Apple Music and Apple TV apps.
Can Apple apps run on Windows 11?
Yes. Apple Devices, Apple Music and Apple TV install from Microsoft Store on Windows 11, and iCloud for Windows syncs photos and files. Apple Devices needs the Music and TV apps installed to sync music and video.
Why do Music and Photos show no sync options in Apple Devices?
iCloud Music Library or iCloud Photos is on, so those items already sync through iCloud. Turn off iCloud Music Library or iCloud Photos if you want to sync them from the PC instead.