To use Claude Code in a terminal, install the claude command-line tool, open your project folder in the terminal, type claude and describe the coding task in plain English.
This guide covers installation on Windows, macOS and Linux, the first sign-in, your first session, code changes, Git, the commands worth knowing, CLAUDE.md project memory and fixes for common errors.
How to use Claude Code in terminal
Claude Code is Anthropic's agentic coding tool. It reads your codebase, edits files, runs commands and works with your development tools, all from a terminal prompt.
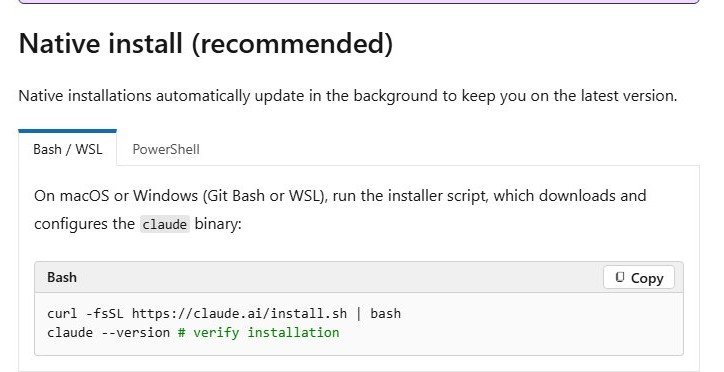
- Install Claude Code: on macOS, Linux, WSL or Git Bash run
curl -fsSL https://claude.ai/install.sh | bash; in Windows PowerShell runirm https://claude.ai/install.ps1 | iex. - Run
claude --versionto confirm theclaudecommand is on your PATH. - Change to your project folder, for example
cd your-project. - Type
claudeand press Enter to start an interactive session. - Sign in with your Claude account or API billing account when Claude Code asks for it.
- Type a request such as "Summarize this project's structure" and press Enter.
For a single answer without opening a session, pass the request in quotes: claude "explain the code in src/".
What you need before starting
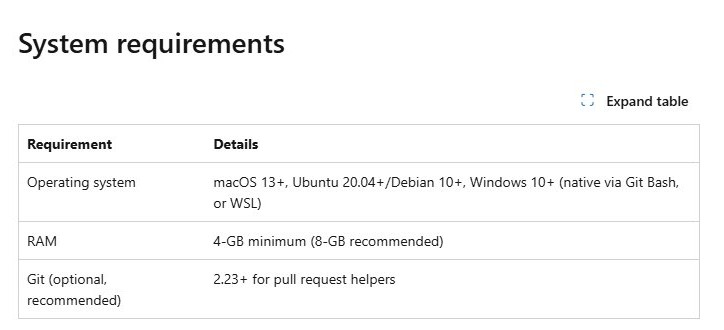
| Requirement | Details |
|---|---|
| Operating system | macOS 13 or later, Ubuntu 20.04+ or Debian 10+, Windows 10 or later (native PowerShell, Git Bash or WSL) |
| Memory | 4 GB RAM minimum, 8 GB recommended |
| Account | A Claude Pro, Max, Team or Enterprise subscription, or pay-as-you-go API billing |
| Git | Optional but recommended; version 2.23 or later for the pull request helpers |
| Windows shell | Git Bash (part of Git for Windows) or WSL2 for full Linux compatibility; PowerShell works for the native installer |
| Node.js | Not needed for the native installer; the old npm install method is deprecated |
Installing Claude Code on macOS
macOS has two supported routes: the native installer, which updates itself in the background, and the Homebrew cask, which you update by hand.
- Open Terminal from Applications > Utilities.
- Run the native installer:
curl -fsSL https://claude.ai/install.sh | bash. - Or, if you use Homebrew, run
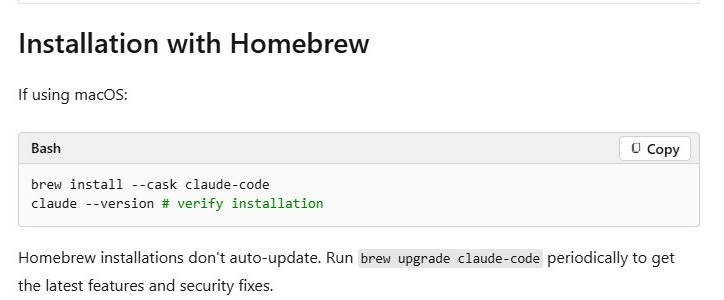
brew install --cask claude-codeinstead. - Run
claude --versionto confirm the install. - If the shell reports
command not found, add~/.local/binto your PATH in~/.zshrcand open a new Terminal window.
Homebrew installs do not auto-update, so run brew upgrade claude-code from time to time to get new features and security fixes.
Installing Claude Code on Linux
Ubuntu 20.04 and later and Debian 10 and later are supported. The same script runs inside WSL on Windows.
- Open a terminal window.
- Run
curl -fsSL https://claude.ai/install.sh | bashto download and set up theclaudebinary. - Run
claude --versionto confirm the install. - If
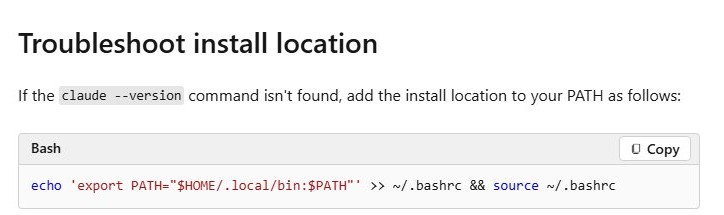
claudeis not found, runecho 'export PATH="$HOME/.local/bin:$PATH"' >> ~/.bashrc && source ~/.bashrc. - Run
claude --versionagain in the same terminal.
Homebrew on Linux also carries the claude-code cask for x86_64 and ARM64 machines, so brew install --cask claude-code is an option if you already manage tools with Homebrew.
Installing Claude Code on Windows
Claude Code runs on Windows 10 and later. Pick the shell that matches how you already work; WSL2 gives the closest match to Linux and macOS behavior.
| Your setup | Install command | Notes |
|---|---|---|
| Windows PowerShell (native) | irm https://claude.ai/install.ps1 |iex |
No WSL or Git Bash needed to install; native installs update themselves |
| Git Bash (Git for Windows) | curl -fsSL https://claude.ai/install.sh |bash |
Git Bash ships with Git for Windows and gives you Git in the same shell |
| WSL2 with Ubuntu or Debian | curl -fsSL https://claude.ai/install.sh |bash inside the Linux shell |
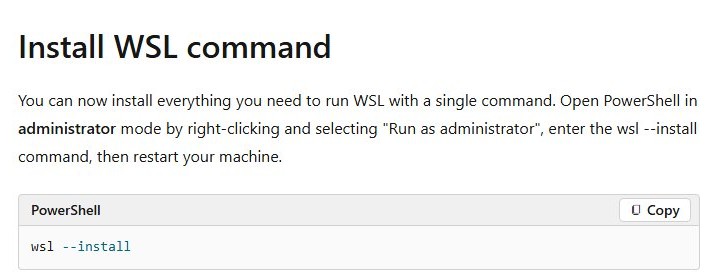
Recommended for full Linux compatibility; run wsl --install first if WSL is missing |
After any of the three, close and reopen the terminal and run claude --version. Windows Terminal holds PowerShell, Git Bash and WSL tabs side by side, which suits switching between them.
Logging in for the first time
By default Claude Code connects to the Anthropic API and asks you to sign in the first time you start it.
- Open a terminal in any folder and type
claude. - Choose how to sign in when prompted: your Claude subscription account or an API billing account.
- Follow the sign-in prompts until the session shows its input prompt.
- Type
/statusin the session to see the version, model and API provider in use. - Type
/logoutand then/loginlater if you need to switch accounts.
Companies that run Claude through Microsoft Foundry skip this sign-in: they set CLAUDE_CODE_USE_FOUNDRY=1 and ANTHROPIC_FOUNDRY_RESOURCE, sign in with az login, and /login and /logout are disabled.
Your first session — getting to know your codebase
Start Claude Code from the project's root folder. It works on the files under the folder where you launch it.
- Run
cd your-projectto move into the project root. - Type
claudeand press Enter. - Ask for an overview, for example "Summarize this project's structure."
- Ask follow-up questions about specific folders, such as "Explain what src/workflows does."
- Ask where a feature lives before asking for changes, such as "Which files handle user login?"
- Type
/renameto give the session a name you can recognize later.
Making code changes
Describe the result you want, not the keystrokes. Claude Code reads the relevant files, edits them and can run your build or test commands to confirm the change.
- Commit or stash your current work so the change is easy to review and undo.
- Describe one change in a sentence, for example "Add input validation to the signup form and show an error under each field."
- Name the files or folders involved if you already know them.
- Ask Claude Code to run the test command, for example "run pytest tests/ -v and fix any failures."
- Review the result with
git diffbefore you keep it. - Ask for a revision in plain language if anything is off, such as "keep the old error message text."
Using Git through Claude Code
Git is optional, but it is what makes changes reviewable and reversible. Git 2.23 or later unlocks the pull request helpers.
- Run
git initin the project if it is not a repository yet. - Ask Claude Code for status in plain English: "What files have changed since the last commit?"
- Ask it to create a branch for the work, for example "Create a branch called fix-login-validation."
- Ask it to commit with a descriptive message once the tests pass.
- Ask it to undo a change you do not want, such as "Revert the edits to config.yaml."
- Push the branch and open the pull request when you are happy with the commits.
Claude Code also runs in GitHub Actions through anthropics/claude-code-action@v1, so it can review pull requests or answer @claude mentions in PR comments.
Essential commands to know
| Command | Where you type it | What it does |
|---|---|---|
claude |
Shell | Starts an interactive session in the current folder |
claude "your request" |
Shell | Runs a one-off request, for example claude "explain src/workflows/" |
claude --version |
Shell | Prints the installed version and proves claude is on your PATH |
claude --model <name> |
Shell | Starts a session with a specific model |
claude install |
Shell | Migrates an old npm install to the native installer |
/status |
Inside a session | Shows version, session ID, working folder, API provider and model |
/login and /logout |
Inside a session | Signs in to or out of your Anthropic account |
/rename |
Inside a session | Gives the current session a name |
/plugin marketplace add <owner/repo> |
Inside a session | Adds a plugin marketplace, such as microsoftdocs/mcp |
/plugin install <plugin>@<marketplace> |
Inside a session | Installs a plugin from an added marketplace; restart Claude Code afterwards |
Setting up CLAUDE.md — project memory
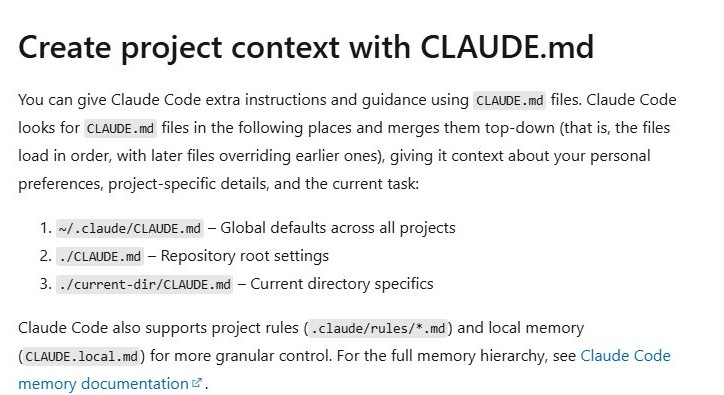
CLAUDE.md is a Markdown file of standing instructions that Claude Code loads at the start of every session. Put the project overview, tech stack, folder layout and the exact build and test commands in it.
Claude Code merges the files top-down, so a later, more specific file overrides an earlier one. Start a new session after editing a CLAUDE.md file so it loads.
| File | Scope |
|---|---|
~/.claude/CLAUDE.md |
Your global defaults across every project |
./CLAUDE.md |
The repository root; commit it so the whole team shares it |
./<subfolder>/CLAUDE.md |
Specifics for that folder |
.claude/rules/*.md |
Separate rule files for finer control |
CLAUDE.local.md |
Local memory for your machine only |
Practical tips for getting better results
| Tip | Why it helps |
|---|---|
Launch claude from the project root |
Claude Code works on the folder it starts in, so it sees the whole codebase |
| Keep build and test commands in CLAUDE.md | Every session starts knowing how to verify its own changes |
| Ask for one change per request | Smaller diffs are easier to review and revert |
| Name the files and the expected behavior | Less searching, fewer edits in the wrong place |
| Ask it to run the tests after each change | Failures surface while the context is still fresh |
| Commit before large changes | git diff and git restore give you a clean way back |
| Use plan mode for bigger tasks in the VS Code extension | You agree on the approach before any file changes |
Claude Code –version and /status check
- Run
claude --versionin a new terminal; a version number means the install and PATH are correct. - Run
claudeinside your project folder. - Type
/statusand confirm the cwd line shows your project folder. - Confirm the API provider and Model lines show the account and model you expect.
- Send a test prompt such as "Summarize this project's structure" and confirm you get an answer without an authentication error.
Update Claude Code on Windows, macOS and Linux
| How you installed it | How it updates |
|---|---|
Native installer (install.sh or install.ps1) |
Updates itself automatically in the background |
| Homebrew cask | Run brew upgrade claude-code |
| npm (deprecated) | Run claude install once to move to the native installer |
Troubleshooting common issues
`claude: command not found` after installing
The install folder, ~/.local/bin, is not on your shell's PATH yet.
- Close the terminal and open a new one, then run
claude --version. - If it still fails in Bash, run
echo 'export PATH="$HOME/.local/bin:$PATH"' >> ~/.bashrc && source ~/.bashrc. - On macOS with zsh, add the same
export PATHline to~/.zshrcinstead.
Why can't I use Claude Code?
Claude Code needs a paid Claude plan or API billing; a free account is not enough.
- Type
/statusto see which account and provider the session uses. - Type
/logout, then/login, and sign in with an account that has a Pro, Max, Team or Enterprise plan or API billing. - Run
claudeagain from your project folder.
Claude Code asks for an Anthropic login on a Foundry setup
CLAUDE_CODE_USE_FOUNDRY is not set, so Claude Code falls back to the default Anthropic API.
- Set
CLAUDE_CODE_USE_FOUNDRY=1andANTHROPIC_FOUNDRY_RESOURCEin the shell ($env:CLAUDE_CODE_USE_FOUNDRY = "1"in PowerShell). - Run
az login, or setANTHROPIC_FOUNDRY_API_KEY. - Add the variables to
~/.bashrcor~/.zshrcso they persist, then startclaudeagain.
The VS Code extension does not connect
Environment variables were set after VS Code started, or only on one side of a WSL setup.
- Set the variables, then launch VS Code from that same terminal.
- With WSL, set the variables on both Windows and inside WSL.
- Open a new WSL terminal and run
code ..
Claude Code in terminal FAQ
Can I use Claude Code for free?
No. Claude Code runs on a Claude Pro, Max, Team or Enterprise subscription, or on pay-as-you-go API billing. The CLI itself is free to install, but each session uses your plan's allowance or bills API usage.
How do I use Claude Code in Windows?
Install it in PowerShell with irm https://claude.ai/install.ps1 | iex, or in Git Bash or WSL with the install.sh script. Then open your project folder in that shell and type claude. WSL2 gives the most Linux-like behavior.
Can I use Claude Code in VS Code?
Yes. Install the Claude Code extension from the Visual Studio Marketplace (VS Code 1.98.0 or later) and open it from the Spark icon in the sidebar. You can also run claude in the integrated terminal of Visual Studio Code.
How do I use Claude Code in IntelliJ or PyCharm?
Install the Claude Code [Beta] plugin from the JetBrains Marketplace. It needs the Claude Code CLI installed separately, then shares IDE errors and warnings with Claude Code as you work in IntelliJ IDEA, PyCharm and other JetBrains IDEs.
Why do I need Git to use Claude Code?
You do not strictly need it; Git is optional. It is recommended because it lets you review every change with git diff and roll back edits, and Git 2.23 or later is required for the pull request helpers.
Why use Claude Code instead of a chat window?
Claude Code works inside your project. It reads the codebase, edits files directly and runs your commands and tests, so you do not copy code between a browser and your editor.
Does npm install -g still work for Claude Code?
The npm install method is deprecated. Use the native installer or Homebrew instead. If you installed through npm earlier, run claude install once to migrate to the native method, which updates itself.
How do I run Claude Code in the terminal without an interactive session?
Pass the request as an argument in quotes, for example claude "explain the code in src/workflows/". Claude Code answers that one request about the current folder.